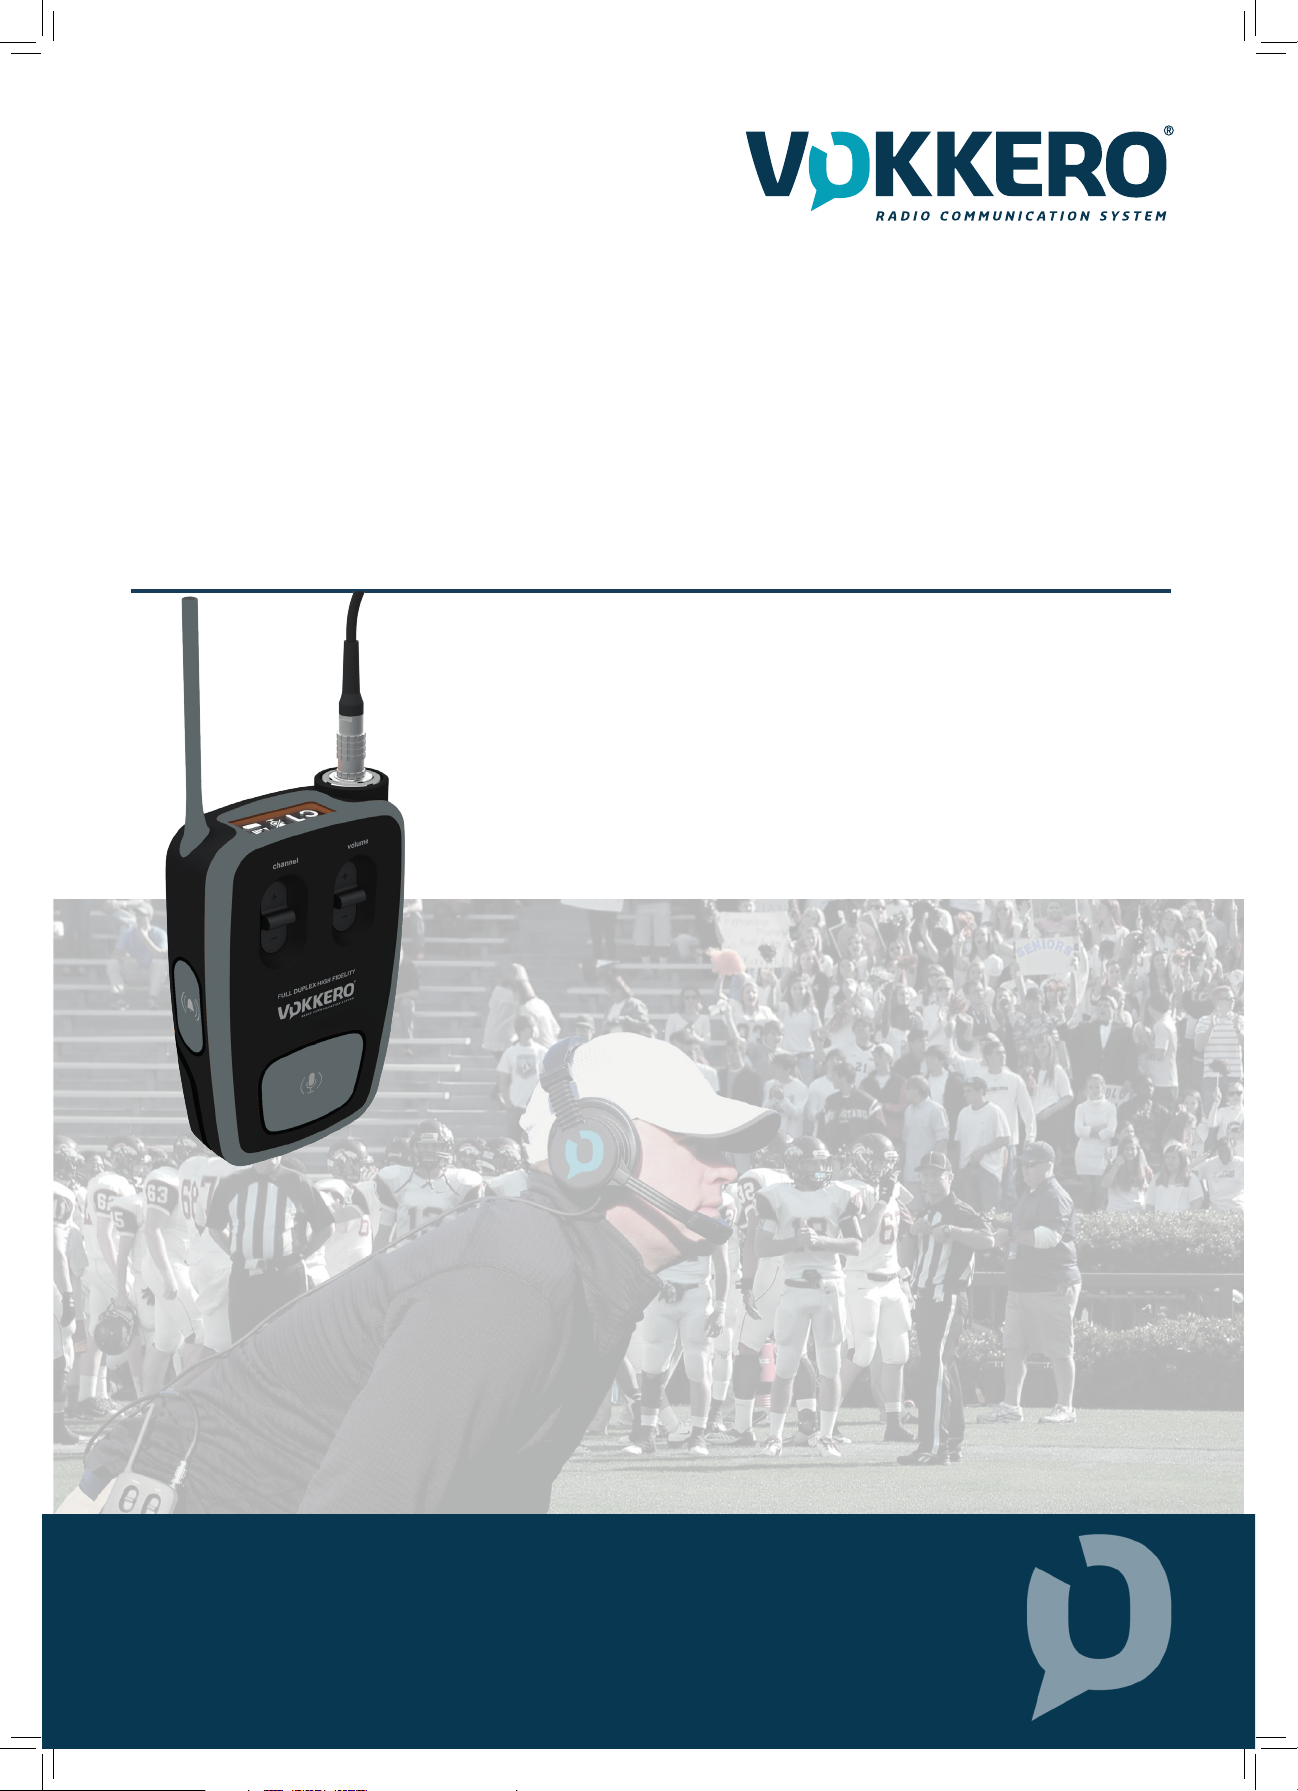
VOKKERO GUARDIAN C2C - User Guide V1.0.0
6
/ 32
COMPLIANCE TO FCC US/CAN
This device complies with part 15 of the FCC rules and Industry Canada licence-exempt RSS standard(s).
Operation is subject to the following two conditions:
• This device may not cause Harmful interference
• This device must accept any interference received, including interference that may cause undesired operation of the device
This equipment has been tested and found to comply with the limits for a Class B digital device, pursuant to part 15 of the FCC Rules. These
limits are designed to provide reasonable protection against harmful interference in a residential installation. This equipment generates, uses
and can radiate radio frequency energy and, if not installed and used in accordance with the instruction, may cause harmful interference to
radiocommunication. However, there is no guarantee that interference will not occur in a particular installation.
If this equipment does cause harmful interference to radio or television reception, which can be determined by turning the equipment off
and on, the user is encouraged to try to correct the interference by one or more of the following measures:
- Reorient or relocate the receiving antenna.
- Increase the separation between the equipment and receiver.
- Connect the equipment into an outlet on a circuit different from that to which the receiver is connected.
- Consult the dealer or an experienced radio/TV technician for help.
CHANGES OR MODIFICATIONS NOT EXPRESSLY APPROVED BY ADEUNIS COULD VOID THE USER’S AUTHORITY TO OPERATE THE
EQUIPMENT.
Under Industry Canada regulations, this radio transmitter may only operate using an antenna of a type and maximum (or lower) gain approved
for the transmitter by Industry Canada.To reduce potential radio interference to other users, the antenna type and its gain should be chosen so
that the equivalent isotropically radiated power (e.i.r.p.) is not superior than necessary for successful communication.
----------------------
Ce dispositif est conforme aux règles de la FCC part 15 and à la norme CNR-210 d’Industrie Canada applicable aux appareils radio exempts de
licence. Son fonctionnement est sujet aux deux conditions suivantes:
• Le dispositif ne doit pas produire de brouillage préjudiciable
• Ce dispositif doit accepter tout brouillage reçu, y compris un brouillage susceptible de provoquer un fonctionnement indésirable.
Cet équipement a été testé et déclaré conforme aux limites d’un appareil numérique de classe B, conformément à la partie 15 des règles de la
FCC. Ces limites sont conçues pour fournir une protection raisonnable contre les interférences nuisibles dans une installation résidentielle. Cet
équipement génère, utilise et peut émettre de l’énergie radiofréquence et, s’il n’est pas installé et utilisé conformément aux instructions, peut
causer des interférences nuisibles aux radiocommunications. Il est cependant toujours possible que des interférences se produisent dans le cadre
d’une installation particulière.
Si cet appareil produit des interférences nuisibles à la réception des programmes de radio et de télévision détectables lors de la mise hors
tension ou en tension de l’appareil-l’utilisateur est encouragé à mettre en œuvre une ou plusieurs des mesures suivantes pour remédier à ces
interférences :
- Réorienter ou déplacer l’antenne de réception.
- Augmenter la distance entre l’équipement et le récepteur.
- Branchez le matériel à une sortie sur un circuit différent de celui auquel le récepteur est branché.
- Prendre conseil auprès du commerçant ou d’un technicien de radio/TV expérimenté.
TOUT CHANGEMENT OU MODIFICATION NON EXPRESSÉMENT APPROUVÉ PAR LA PARTIE RESPONSABLE DES MESURES DE
CONFORMITÉ PEUT AMENER L’UTILISATEUR À SE VOIR INTERDIRE L’USAGE DE L’APPAREIL.
Cet appareil est limité à l’exploitation des fréquences autorisées Partie 15, et ne peut pas être configuré par des utilisateurs finaux ou des
installateurs professionnels à fonctionner en dehors des bandes autorisées.
Conformément à la réglementation d’Industrie Canada, le présent émetteur radio peut fonctionner avec une antenne d’un type et d’un gain
maximal (ou inférieur) approuvé pour l’émetteur par Industrie Canada. Dans le but de réduire les risques de brouillage radioélectrique à l’inten-
tion des autres utilisateurs, il faut choisir le type d’antenne et son gain de sorte que la puissance isotrope rayonnée équivalente (p.i.r.e.) ne
dépasse pas l’intensité nécessaire à l’établissement d’une communication satisfaisante.