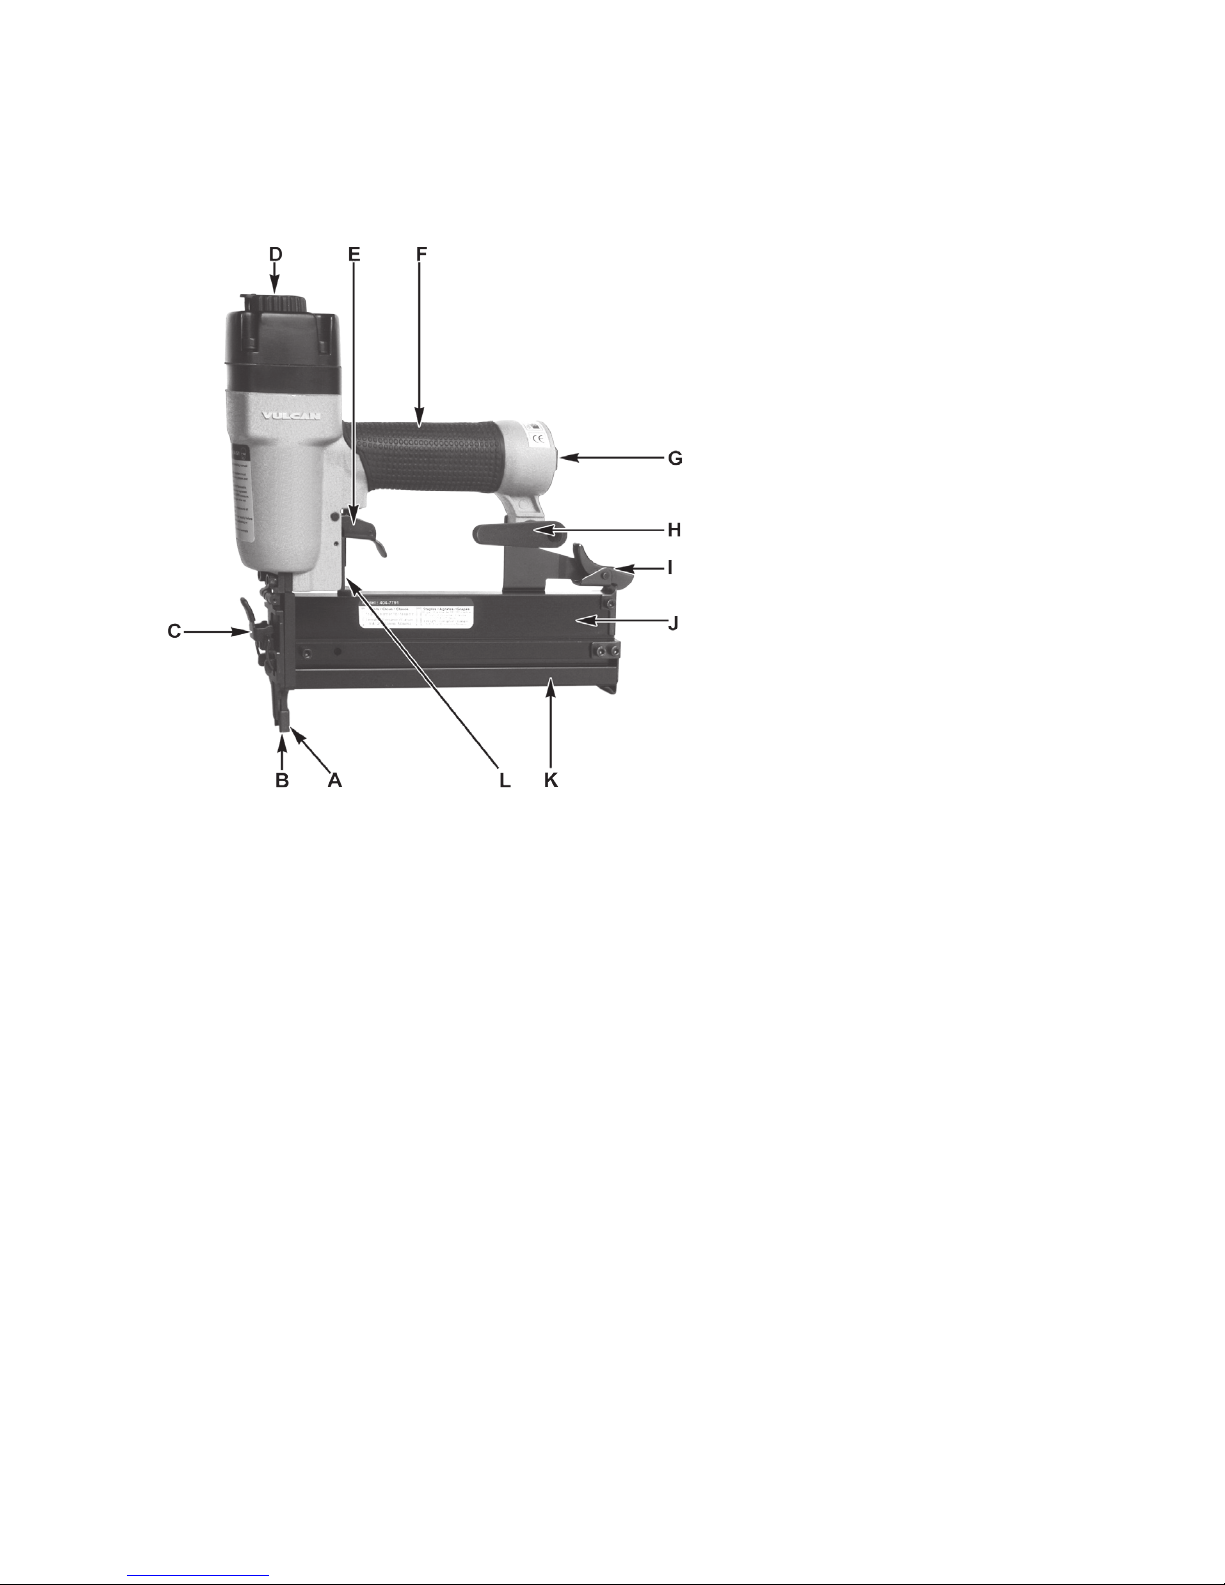
4
switch does not turn it on and off properly.
User service. Some user-serviceable components
are described in the Troubleshooting section. We
cannot guarantee repairs made or attempted by
anyone other than authorized agencies.
Tool service must be performed only by
qualied repair personnel. Service or
maintenance performed by unqualied personnel
could result in risk of injury. For example, internal
wires may be misplaced or pinched, safety guard
Guard against electric shock. Prevent body
contact with grounded surfaces: pipes, radiators,
ranges, and refrigerator enclosures. Before
driving fasteners into walls, oors, or wherever
“live” electrical wires may be encountered, try to
ascertain whether there is a danger of shock.
Hearing protection. Wear ear protection when
using the tool for extended periods. Prolonged
exposure to high intensity noise can cause
hearing loss.
Safety glasses To prevent eye injuries, the tool
operator and all persons in the work area must
wear approved safety glasses conforming to ANSI
Z87.1 specications with permanently attached,
rigid side shields.
Use clean, dry, regulated, compressed air at 60
to 100 psi.
Do not connect tool to pressure which
potentially exceeds 200 psi.
Air hose. Only use hose that is rated for a
minimum working pressure of 150 psi or 150%
of the maximum system pressure, whichever is
greater.
Never use oxygen, carbon dioxide, combustible
gases or any other bottled gas as a power
source for this tool. Explosion and serious
personal injury could result.
Couplings. Connect tool to the air supply hose
with 1/4” NPT couplings that remove all pressure
from the tool when the coupling is disconnnected.
Be aware of air hoses and their connections.
Don’t trip over hoses. Make sure all connections
are tight.
Disconnect tool from air supply hose before
return springs may be improperly mounted.
When servicing tool, use only identical
replacement parts. Follow instructions in
the Maintenance section of this manual. Use
of unauthorized parts or failure to follow
Maintenance instructions may create a risk of
injury. Certain cleaning agents such as gasoline,
carbon tetrachloride, ammonia, etc. may damage
plastic parts.
SAFETY RULES FOR AIR NAILERS
doing any disassembly, maintenance, loading
fasteners, clearing a jammed fastener, leaving
the work area, moving the tool to another
location, or handing the tool to another person.
Never use a tool that is leaking air, has missing
or damaged parts, or requires repair. Before
each use, make sure all screws and caps are
securely tightened.
Check for damaged parts. Never use a tool if
safety, trigger, or spring are inoperable, missing or
damaged. Do not alter or remove safety, trigger,
or springs. Make daily inspections for the free
movement of trigger and safety mechanism.
Replacement parts. When servicing, use
only identical replacement parts and fasteners
recommended by us.
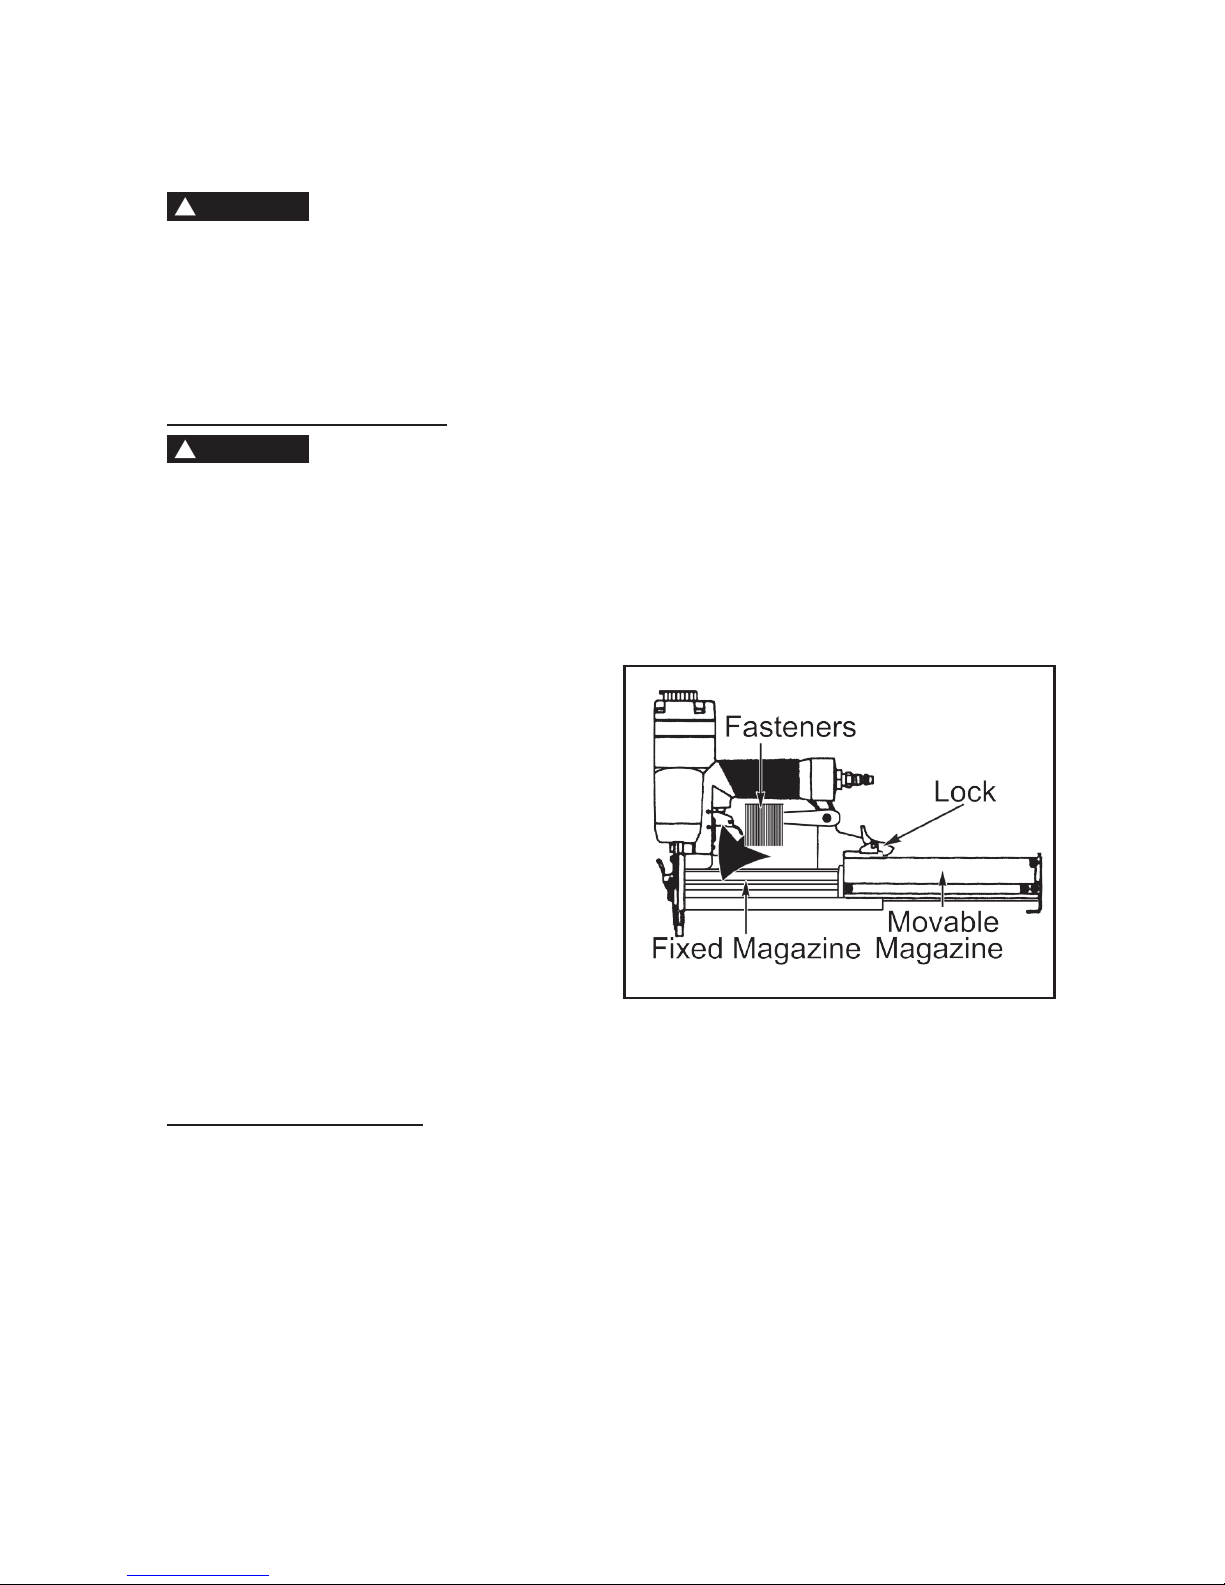
Be sure the tool is disconnected from the air
supply before loading the fasteners. Take
care on re-connection: fasteners may be red
accidentally during connection. The fastener
driving mechanism may cycle when the tool is
connected to the air supply.
Assume the tool contains fasteners at all times.
Always keep it pointed away from yourself and
others. No horseplay. Respect the tool as having
lethal potential.
Do not load fasteners with trigger or safety
depressed. The tool may unintentionally re a
fastener.
Do not depress the trigger unless the nosepiece
is directed at the worksurface or when not
driving fasteners. Never carry tool with nger on
or touching the trigger mechanism: tool may re
an unwanted fastener.
WARNING
The warnings, cautions, and instructions detailed in this manual cannot cover all
possible conditions and situations that occur. It must be understood by the operator
that COMMON SENSE AND CAUTION ARE FACTORS that cannot be built into
this product, but MUST BE SUPPLIED BY THE OPERATOR.
Fire fasteners into work surface only and never
into materials too hard to penetrate
Grip tool rmly to maintain control while
allowing the tool to recoil away from the work
surface as the fastener is driven. If the safety is
allowed to recontact the work surface before the
trigger is released, an unwanted fastener will be
red.
Do not drive fasteners on top of other
fasteners, or with the tool at too steep an angle:
the fasteners can ricochet causing personal injury.
Do not drive fasteners too close to the edge
of the workpiece. The workpiece is likely to
split, allowing the fasteners to y free or ricochet
causing personal injury.