IMPORTANT SAFEGUARDS
Please read all instructions before using this product and
keep these safety instructions for future reference.
1. Always unplug the product when not in use
2. Do not use the product if the unit, plug, cord or any part of the unit is
damaged
3. For indoor use on a flat floor only - do not use outdoors
4. Do not put the heater directly in front of curtains or furniture
5. Keep a distance of approximately 1 m clear above the heater
6. Never put the unit into water and do not use with wet hands
7. Unplug the unit via the plug - do not pull the cord
8. Do not place any objects into the vents or exhaust ports - this may cause
fire, or damage the product
9. Do not use near flammable liquids
10. Use this unit as described in this manual to avoid damage or injury
11. Children should be supervised when near the product
12. Do not cover
13. This product is not intended for use with an extension cable - plug directly
into a wall socket
14. Do not store in a dusty room when not in use for a long period of time
15. Please unplug the appliance when not in use and before cleaning
16. Please use with caution and under any necessary supervision
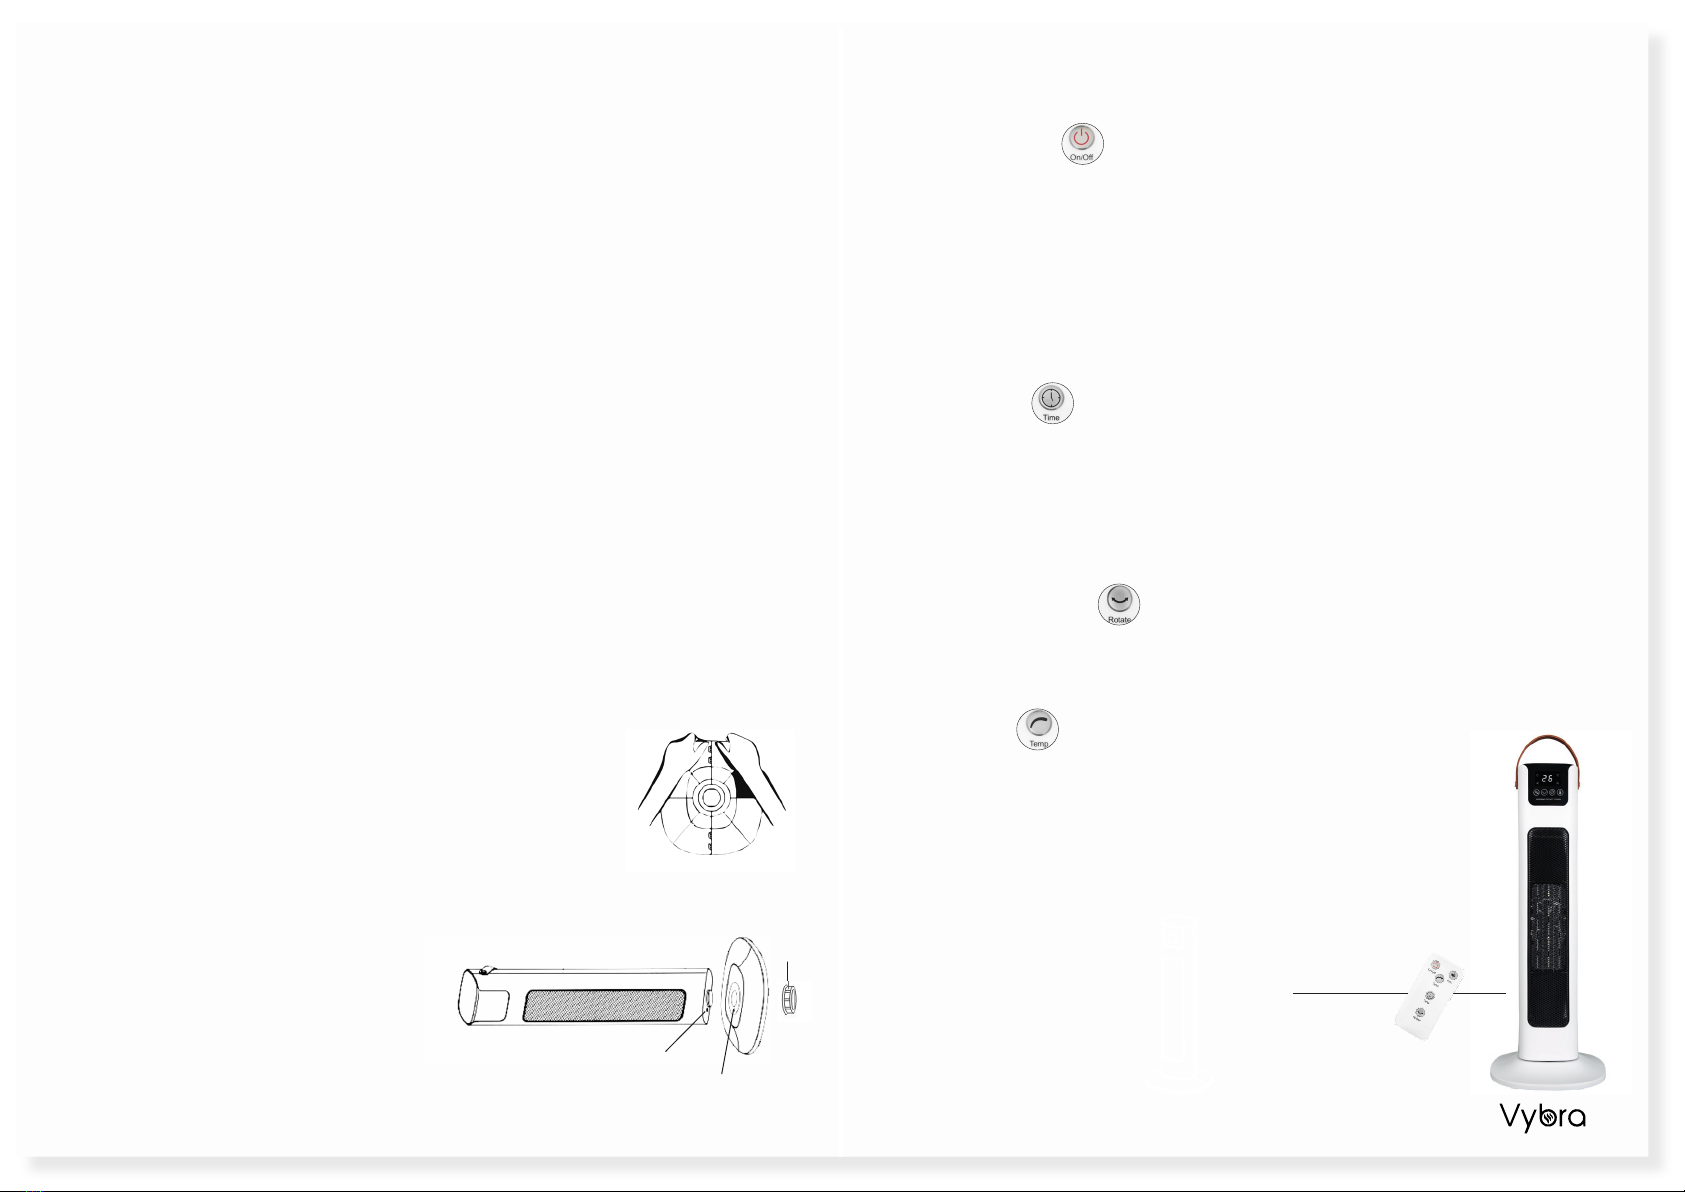
PRODUCT SET UP
1. Take the two white base plates out, align the location holes
and push together until they click into place (Fig 1)
2. Unscrew and remove the large black plastic nut from the
bottom of the unit
3. Align the white base plate onto the main unit’s base - en-
suring the small round location stud aligns with the base small
location hole
4. Twist until it clicks into place
5. Replace the black plastic nut and
and screw on, to secure the base to
the unit
6. Stand upright and connect to a wall
power socket vybrasolutions.co.uk | sales@vybrasolutions.co.uk
INSTRUCTIONS FOR USE
Manual Touch Panel or Remote Control Operation
POWER BUTTON)
1. Press the Power button and the machine will turn on with air flow
2. The display will show the ambient temperature (ie. the current room temper-
ature)
3. The digital display will show 1d (1000W) – which is the low start-up heat
4. Press the power button again and it will show 2d (2000W) – which is the high-
heat function
5. Press the power button for a third time and it will turn off the heat function
and a 30 second countdown will turn the unit off.
TIMER FUNCTION
1. Press the timer button to set the time from being on for 1 – 12 hours
2. Each press of the button will increase the amount of hour by one hour per
press
3. After 12 presses, the display will show ‘00’ – and the time will been cancelled
completely
4. In order to start the timer again, press and repeat
OSCILLATING FUNCTION
1. To use the oscillation, press the button and the machine will rotate 70° left
and right.
2. Press the button again to stop
TEMPERATURE
1. Press the temperature button to enter heat mode
2. The temp setting is 15° – 45° C with a 1° increase per
press
NOTE: If the ambient (indoor) temperature is higher than
the temperature set, the heater will not turn on
NOTE: The remote control has a 5 m with a 30° angle of
operation
5 m / 30° angle
Fig 1
location stud
location hole
nut


