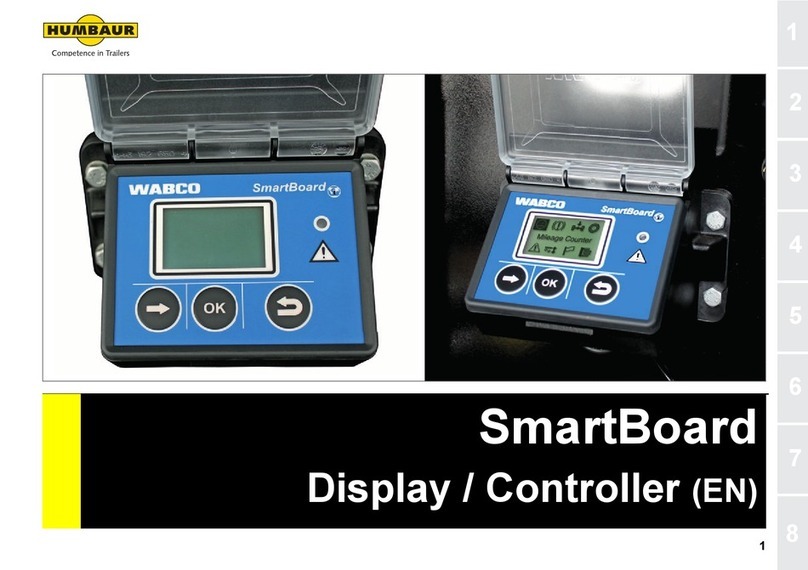
WABCO Smartboard II User manual

1 / 8
Wabco Smartboard control and
ECAS functions
Mini manual*:
Content
1. Introduction ........................................................................................................................ 1
2. The buttons and their functions ....................................................................................... 2
3. ECAS: height control air suspension ................................................................................. 2
ECAS: Raising and lowering air suspension....................................................................................2
ECAS: Setting memory level..............................................................................................................3
4. Lifting axles: lifting axle functions and their operation ................................................ 4
Lifting axle control: manual operation of the lifting axle(s)..........................................................4
Lifting axle function: OptiTurn .........................................................................................................5
Lifting axle function: Traction help .................................................................................................6
5. Reading the information.................................................................................................... 7
Axle load..............................................................................................................................................7
Brake lining wear ...............................................................................................................................7
Saved error messages.......................................................................................................................8
*The content of this document is of a purely informative nature and no liability of STAS Konstruktie- werkhuizen nv can be derived
from this document. The only legally valid document is the ocial STAS user manual supplied with your STAS trailer.
1. Introduction
In this document, we explain how to operate the Wabco Smartboard II of your STAS Trailer,
and exactly how to use the ECAS functions (Electronically Controlled Air Suspension) using
the Smartboard.

2 / 8
11
3 2
54
1: 2: 3:1: 2: 3:1: 2: 3:1: 2: 3:
1. Function buttons
2. Next page menu
3. Previous page menu (or back to start page when
you press and hold)
4. Diagnostic messages and active systems
5. Current menu page
2. The buttons and their function
Raising and lowering the chassis can also be done using the blue or black lever on the con-
trol console. The lever works even when the ignition is switched o.
The trailer always returns automatically to the ride height congured by STAS from a speed
of 15 km/h.
ECAS Lifting/Lowering
chassis
Lifting chassis
ECAS stop
Lowering chassis
Purpose of this function: To raise and lower the chassis by using the Smartboard.
3. ECAS: control air suspension height
From the homepage, press the following buttons to enter the the appropriate menu:
SMARTBOARD > ECAS > Lifting/lowering chassis
ECAS: Lowering and raising the air suspension

3 / 8
M
1: 2: (3:)
1
M2M1
M
The trailer always returns automatically to the ride height congured by STAS from a speed
of 15 km/h.
When setting a new memory level, use
the blue or black lever to move to the
preferred height.
From the homepage, press the following buttons to enter the the appropriate menu:
SMARTBOARD > ECAS > Memory level
ECAS: Setting memory level
Purpose of this function: To store a (frequently used) height in order to be able to go to that
specic height very easily at a later date, e.g. in case of frequently used unloading points.
The system can store up to 2 levels and both storing and selecting a memory level are done
in the same menu.
ECAS memory level
Select / save memory level 2
(press and hold button)
Select / save memory level 1
(press and hold button)
4:

4 / 8
1: 2: 3:
4. Lifting axles: lifting axle functions and their
operation
What do we mean by “lifting axles”?
Simple: lifting axles are axles that can lift themselves o the ground by means of lifting
bellows. However, an axle can have lifting axle functions without having lifting bellows.
Without these lifting axle bellows, only the pressure in the air suspension is reduced, which
means that the axle no longer carries a load, but still rests on the ground under its own
weight. We therefore distinguish between “lifting axles” and “lifting axle functions”.
9Lifting axles: axles equipped with lifting bellows, and thus capable
of detaching from the ground.
9Lifting axle functions: all (automatic) functions related to
manipulating the pressure in the air suspension bellows, even
without the axle being visibly detached from the ground.
Lifting axle control: manual operation of the lifting
axle(s)
Purpose of this function: to manually lift and lower any lifting axles on the trailer by using
the Smartboard.
This function only works on vehicles equipped with lifting bellows. When these are not
tted, this function does nothing.
The lift axles always return automatically to the conguration congured by STAS from a
speed of 15 km/h.
From the homepage, press the following buttons to enter the the appropriate menu:
SMARTBOARD > Lifting axle control > Controlling the lifting axle
Lifting axle control Operating lifting axle(s)
Lift axle down
(press twice for the
second lift axle)
Status of lift axle(s)
Lift axle up
(press twice for the
second lift axle)

5 / 8
1: 2: 3:
AUTO
Lift axle function: OptiTurn
Purpose of this function: To optimise the turning circle of the combination when cornering.
The theoretical wheelbase is shortened in corners by lifting or (partially) relieving the load on
the rear axle. Cornering is detected thanks to the ABS sensors.
This function also works smoothly on vehicles not equipped with lifting axle bellows. In this
case, the rear axle is not lifted, but rather relieved.
When all axles are 100% loaded, the rear axle will not detach from the ground even in the
case of lifting axle bellows. The rear air suspension bellows are vented until the front two
axles are loaded to a maximum of 130%. When fully loaded, the rear axle thus continues
to carry 40% of its maximum load when cornering.
From the homepage, press the following buttons to enter the the appropriate menu:
SMARTBOARD > Lifting axle control > OptiTurn
Lifting axle
control
OptiTurn
Manual activation/deactivation:
When activated at standstill, the last axle is
relieved as when cornering.
Handbrake must be o and ignition on.
Auto function:
By disabling the auto function, you
can ensure that the system remains
switched on or o while driving.

6 / 8
1: 2: 3:
AUTO
Lifting axle function: Traction help
Purpose of this function: to create more traction on the truck’s towing axle by lifting or (par-
tially) relieving the load on the rst axle of the trailer.
9Load on the truck
9Load on the trailer
This function also works smoothly on vehicles not equipped with lifting bellows. In this
case, the front axle is not lifted, but rather relieved.
When fully loaded, the front axle is not fully relieved of its load, which also means it is not
lifted o the ground, even when lifting bellows are installed.
There are three ways to activate this feature:
9By disengaging the handbrake, touching nothing for 2 seconds, and then pressing the
brake pedal hard three times within 10 seconds.
9Automatic on rst departure after switching on the engine (See “Auto function” below).
9Manually using the Smartboard (see below).
From the homepage, press the following buttons to enter the appropriate menu:
SMARTBOARD > Lifting axle control > Traction help
Lifting axle
control
Traction help
Manual activation:
The rst axle is relieved just like when the
brake pedal is pressed three times.
Handbrake must be o and ignition on.
Auto function:
If enabled, the semi-trailer will activate
traction help on the rst departure after
starting the engine.

7 / 8
1: 2:
1
2
3
3
12
1: 2:
Axle
5. Reading the information
Besides controlling the functions of your trailer, the Smartboard can also display
information about the trailer.
Axle load
From the homepage, press the following buttons to enter the the appropriate menu:
SMARTBOARD > Axle load
Brake lining wear
From the homepage, press the following buttons to enter the the appropriate menu:
SMARTBOARD > brake lining wear
Brake lining wear
Brake lining wear OK
Wear threshold for brake lining
reached. Contact your STAS dealer
as soon as possible.

8 / 8
1: 2:
Saved error messages
From the homepage, press the following buttons to enter the the appropriate menu:
SMARTBOARD > Diagnostic memory
Diagnostic memory
Next
message
Previous
message
Table of contents
Other WABCO Controllers manuals
Popular Controllers manuals by other brands

Pride Mobility
Pride Mobility VR2 Basic operation instructions

Danfoss
Danfoss VLT AQUA Drive FC 202 installation manual

Linear Technology
Linear Technology DC1992A Demo Manual

Vacon
Vacon 10 quick guide

Stavoklima
Stavoklima DITRONIC User manual, Instructions for Mounting

OPW
OPW M00-051.00 FSC3000 Command-line configuration guide

Allen-Bradley
Allen-Bradley 1756 ControlLogix Reference manual

Mitsubishi Electric
Mitsubishi Electric MELSEC FX3U-485ADP-MB installation manual

IAI
IAI X-SEL Operation manual

Shimaden
Shimaden SR23 series installation manual

Berker
Berker 8536 52 00 operating instructions

Leviton
Leviton Decora Smart DW4BC Getting started guide