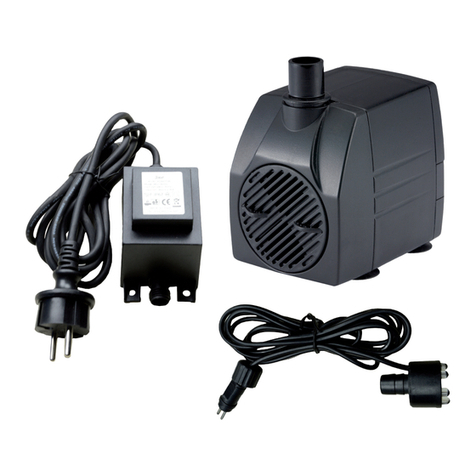
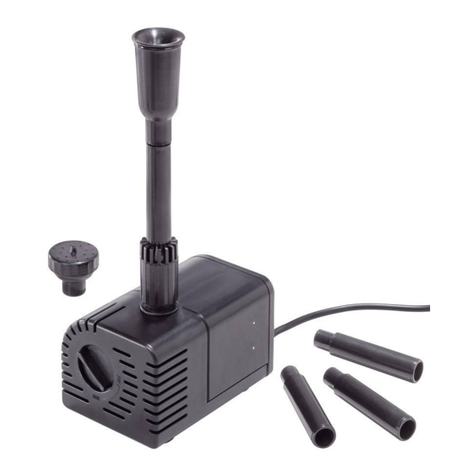
Waldbeck Lagoon 3000 User manual

Lagoon 3000 / 3600 / 4500 / 5200
Teichpumpe
Pond Pump
Pompe de bassin
Bomba para estanque
Pompa per stagno
10031484 100314845 10033391 10033392


3
DE
English 9
Français 15
Español 21
Italiano 27
Sehr geehrter Kunde,
wir gratulieren Ihnen zum Erwerb Ihres Gerätes. Lesen
Sie die folgenden Hinweise sorgfältig durch und befolgen
Sie diese, um möglichen Schäden vorzubeugen. Für
Schäden, die durch Missachtung der Hinweise und
unsachgemäßen Gebrauch entstehen, übernehmen wir
keine Haftung. Scannen Sie den QR-Code, um Zugriff
auf die aktuellste Bedienungsanleitung und weitere
Informationen rund um das Produkt zu erhalten.
INHALTSVERZEICHNIS
Sicherheitshinweise 4
Geräteübersicht 5
Inbetriebnahme / Wartung 6
Fehlerbehebung 7
Hinweise zur Entsorgung 8
Konformitätserklärung 8
TECHNISCHE DATEN
Artikel Lagoon 3000 Lagoon 4500
Stromversorgung 220 V ~ 50 Hz 220 V ~ 50 Hz
Leistung 10 W 30 W
Maximale Förderhöhe 2 m 4 m
Durchsatz 3000 Liter/Stunde 4500 Liter/Stunde
Artikel Lagoon 3600 Lagoon 5200
Stromversorgung 220 V ~ 50 Hz 220 V ~ 50 Hz
Leistung 20 W 40 W
Maximale Förderhöhe 2,8 m 4,8 m
Durchsatz 3600 Liter/Stunde 5200 Liter/Stunde

4
DE
SICHERHEITSHINWEISE
• Um die Gefahr von Stromschlägen zu reduzieren entfernen Sie keine der
Abdeckungen. Das Gerät enthält Teile, die dem Benutzer nicht zugänglich
sind.
• Die Gerätekennzeichnung bendet sich auf der Rückseite des Geräts.
• Stellen Sie keine mit Flüssigkeiten gefüllten Gefäße, wie Vasen oder
Gießkannen, darauf ab.
• Lassen Sie keine Gegenstände aus Metall auf dieses Gerät fallen.
• Stellen Sie keine schweren Gegenstände auf dieses Gerät.
• Benutzen Sie nur Zubehör und Anbauteile, die vom Hersteller zugelassen
sind.
• Ziehen Sie den Stecker aus der Steckdose wenn es gewittert, stürmt
oder Sie das Gerät längere Zeit nicht benutzen. So können Sie Schäden
vorbeugen.
• Lassen Sie Reparaturen nur von qualizierten Fachkräften durchführen.
• Eine Reparatur ist dann erforderlich, wenn das Gerät auf irgendeine Weise
beschädigt wurde, das heißt wenn Gegenstände darauf gefallen sind,
wenn es nicht ordnungsgemäß funktioniert oder fallengelassen wurde.
Versuchen Sie nicht das Gerät selbst zu reparieren. Durch Öffnen der
Abdeckung setzen Sie sich der Gefahr von Stromschlägen und anderen
Verletzungen aus.
• Ziehen Sie nicht am Kabel, knicken Sie es nicht und stellen Sie keine
schweren Gegenstände darauf.
• Fassen Sie den Stecker nicht mit nassen Händen an.
• Stellen Sie keine Quellen offener Flammen, z.B. brennende Kerzen, auf das
Gerät.
• Lassen Sie die Pumpe nie leer laufen.
• Verbinden Sie das Gerät niemals mit einer Wechselstrom. Es ist nur für
den Betrieb mit Gleichstrom ausgelegt.
• Betreiben Sie die Pumpe nur in Süßwasserteichen bei Temperaturen bis
maximal 50°C.
• Die Pumpe ist geeignet um Teichlter, Wasserfälle, Springbrunnen oder
Aquarienlter zu betreiben.
WARNUNG
Verletzungsgefahr! Önen Sie niemals das
Motorgehäuse, andernfalls besteht Lebensgefahr.

5
DE
GERÄTEÜBERSICHT
1Einstelldüse 7Motor-Block
2Filterkorb 8Unterlegscheibe
3Pumpen-Gehäuse 93/4“ > 1“ Anschluss
4Rotor-Baugruppe 10 Anschlussmuffe
5O-Ring 11 1 1/4“ Anschluss
6Lager

6
DE
INBETRIEBNAHME / WARTUNG
• Befestigen Sie zunächst eine Art Schleppseil (Nylonschnur o.ä.) an der
Pumpe, mit dem sie diese bei Bedarf aus dem Wasser ziehen können.
• Schließen Sie die entsprechenden Schläuche Ihres Aquariums/Teichs/
Springbrunnens etc. an der Pumpe an. Stellen Sie sicher, dass sich keine
Luftblasen im Rohrsystem benden.
• Installieren Sie die Pumpe mindestens 20 cm und höchstens 2,8 m (Lagoon
3600) bzw. 4,8 m (Lagoon 5200) unter der Wasseroberäche.
• Stellen Sie die Pumpe nicht in den Schmutz/Bodensatz auf dem Grund des
Wasser, sondern in eine etwas erhöhte Position.
• Schützen Sie das Stromkabel vor Beschädigungen durch Knicken und/oder
scharfe Kanten, wenn Sie es verlegen.
• Schließen Sie die Pumpe an die Steckdose an.
Hinweis: Betreiben Sie die Pumpe nie ohne den Filterkorb (1). Der
Filter schützt die Pumpe vor Verschmutzungen und Verstopfungen
durch Bodensatz, Staub und Schmutz. Betreiben Sie die Pumpe nicht im
Trockenen.
1. Stellen Sie an dem blauen Regler die Fließgeschwindigkeit ein.
2. Drehen Sie den Filterkorb wie in der Abbildung zu sehen, um ihn
abzunehmen.
3. Schieben Sie den blauen Schalter nach links, um den Motorblock zu öffnen.
4. Drehen Sie den Motorblock gegen den Uhrzeigersinn.
5. Säubern / tauschen Sie den Propeller.
6. Stellen Sie sicher, dass der O-Ring wie in der Abbildung gezeigt sitzt.

7
DE
Hinweis: Nehmen Sie die Pumpe im Winter aus dem Wasser und lagern Sie
sie in frostfreier Umgebung, wenn möglich in einem mit Wasser gefüllten
Behälter, um den O-Ring vor Austrocknung und . Säubern Sie die Pumpe
sorgfältig und prüfen Sie nach erneutem Zusammenbau auf etwaige
Schäden.
FEHLERBEHEBUNG
Problem Mögliche Ursache Lösungsansatz
Pumpe funktioniert nicht. Kein Strom. Mit Steckdose verbinden.
Überhitzung. Gerät abkühlen lassen.
Rotor blockiert. Blockaden beseitigen.
Kein Wasser. Wasser hinzufügen.
Pumpe gibt störende/laute
Geräusche ab.
Filtergehäuse blockiert
oder Schaft beschädigt.
Blockaden beseitigen.
Keramischer Schaft oder
Aufnahme haben starke
Gebrauchsspuren.
Schaft oder Aufnahme
ersetzen.
Ungenügende Wasser-
Förderleistung
Ventil geschlossen oder
verstopft
Ventil öffnen / reinigen
Filterkorb verstopft/
blockiert.
Filterkorb reinigen.
Impeller beschädigt.. Impeller auswechseln.
Zu niedrige Spannung An passender Spannung
anschließen.

8
DE
HINWEISE ZUR ENTSORGUNG
Bendet sich die linke Abbildung (durchgestrichene
Mülltonne auf Rädern) auf dem Produkt, gilt die
Europäische Richtlinie 2012/19/EU. Diese Produkte
dürfen nicht mit dem normalen Hausmüll entsorgt
werden. Informieren Sie sich über die örtlichen
Regelungen zur getrennten Sammlung elektrischer und
elektronischer Gerätschaften. Richten Sie sich nach
den örtlichen Regelungen und entsorgen Sie Altgeräte
nicht über den Hausmüll. Durch die regelkonforme
Entsorgung der Altgeräte werden Umwelt und
die Gesundheit ihrer Mitmenschen vor möglichen
negativen Konsequenzen geschützt. Materialrecycling
hilft, den Verbrauch von Rohstoffen zu verringern.
KONFORMITÄTSERKLÄRUNG
Hersteller:
Chal-Tec GmbH, Wallstraße 16, 10179 Berlin,
Deutschland.
Dieses Produkt entspricht den folgenden
Europäischen Richtlinien:
2014/30/EU (EMV)
2014/35/EU (LVD)
2011/65/EU (RoHS)

9
EN
Dear Customer,
Congratulations on purchasing this equipment. Please
read this manual carefully and take care of the following
hints to avoid damages. Any failure caused by ignoring
the items and cautions mentioned in the instruction
manual is not covered by our warranty and any liability.
Scan the QR code to get access to the latest user
mannual and other information about the product.
CONTENT
Safety Instructions 10
Product Overview 11
Initial Use / Maintenance 12
Troubleshooting 13
Hints on Disposal 14
TECHNICAL DATA
Item Lagoon 3000 Lagoon 4500
Power supply 220 V ~ 50 Hz 220 V ~ 50 Hz
Power consumtion 10 W 30 W
Maximum head 2 m 4 m
Flow rate 3000 Liter/hour 4500 Liter/hour
Item Lagoon 3600 Lagoon 5600
Power supply 220 V ~ 50 Hz 220 V ~ 50 Hz
Power consumtion 20 W 40 W
Maximum head 2.8 m 4.8 m
Flow rate 3600 liter/hour 5200 liter/Hour

10
EN
SAFETY INSTRUCTIONS
• Read all instructions before using.
• Do not let the cord hang over edge of table counter or touch hot surface.
• If liquid penetrates inside the battery housing, unplug the appliance and
have it checked by a qualied technician before it is used again.
• Do not place the appliance close to heating equipment or any heat source,
or in a location subjected to excessive dust or mechanical shocks.
• Do not expose the appliance to extreme temperatures. The appliance shall
be used in moderate climates.
• The use of attachments that are not recommended by the appliance
manufacturer may result in re, electric shock or personal injury.
• This appliance is not intended for use by persons (including children) with
reduced physical, sensory or mental capabilities, or lack of experience
and knowledge, unless they have been given supervision or instruction
concerning use of the appliances by a person responsible for their safety.
• Children should be supervised to ensure that they do not play with the
appliance.
• The appliance is not a toy. Do not let the children play it. Never let children
insert foreign objects into the appliance.
• Do not use the appliance for other than intended use. This appliance has
been designed solely for domestic use; the manufacturer‘s liability shall
not be engaged in the event of any professional use, by any misuse or by
any use not complying with the operating instructions.
• Any altering of the product itself or changing of the components is
forbidden.
• Do not connect the pump to any AC voltage power, it is intended ONLY for
DC Voltage power.
• Operate in freshwater only (never above 50°C).
• Do not strike the solar panel.
• Do not let the pump run dry.
WARNING
Risk of injury! Never open the motor housing, otherwise there
is a danger to life.

11
EN
PRODUCT OVERVIEW
1Adjuster 7Motor body
2Filter basket 8Washer
3Pump housing 93/4“ - > 1“ Outlet
4Rotor subassembly 10 Outlet nut
5O-Ring 11 1 1/4“ Outlet
6Bearing

12
EN
INITIAL USE / MAINTENANCE
• First attach a type of tow rope (nylon cord or similar) to the pump so that
you can pull it out of the water if necessary.
• Connect the corresponding hoses of your aquarium/pond/spring fountain
etc. to the pump. Make sure that there are no air bubbles in the pipe
system.
• Install the pump at least 20 cm and at most 2.8 m (Lagoon 3600) or 4.8 m
(Lagoon 5200) below the water surface.
• Do not place the pump in the dirt or sediment at the bottom of the water,
but in a slightly elevated position.
• Protect the power cable from damage from kinks and/or sharp edges when
laying it.
• Connect the pump to the power outlet.
Note: Never operate the pump without the lter basket (1). The lter
protects the pump from dirt and blockages caused by sediment, dust and
dirt. Do not operate the pump in dry conditions.
1. Adjust the ow rate in the direction as indicated by the arrow.
2. Turn the lter case in the direction as indicated by the arrow, then take it
out.
3. Move the blue switch to OPEN, then you can open the motor body, on the
contrary the motor body is locked.
4. Turn the motor body in the direction as indicated by the arrow, then take it
out.
5. Clean and change the impeller after taking out.
6. Make sure to put the O-ring at the right place (as shown in the pic).

13
EN
Note: In winter, take the pump out of the water and store it in a frost-free
environment, if possible in a container lled with water, to prevent the
O-ring from drying out and . Clean the pump carefully and check for any
damage after reassembly.
TROUBLESHOOTING
Problem Possible cause Suggested solution
Pump does not work. No power. Plug in.
Burned. Allow device to cool down.
Rotor is blocked. Clear blockages.
Running without water. Plug in again and add
water.
Noise. Filter housing is blocked or
shaft is broken.
Clean blockages after
opening.
Ceramic shaft or bearing:
Wearing occurs.
Change the shaft or
bearing.
Insufcient water
displacement.
Impeller broken. Change impeller.
Flow rate valve closed. Open the ow rate valve.
Filter housing is clogged. Clean blockages and
plug in.
Low voltage. Change to right voltage.

14
EN
HINTS ON DISPOSAL
According to the European waste regulation 2012/19/EU
this symbol on the product or on its packaging indicates
that this product may not be treated as household waste.
Instead it should be taken to the appropriate collection
point for the recycling of electrical and electronic
equipment. By ensuring this product is disposed of
correctly, you will help prevent potential negative
consequences for the environment and human health,
which could otherwise be caused by inappropriate waste
handling of this product. For more detailled information
about recycling of this product, please contact your local
council or your household waste disposal service.
DECLARATION OF CONFORMITY
Producer:
Chal-Tec GmbH, Wallstraße 16, 10179 Berlin,
Germany.
This product is conform to the following European
Directives:
2014/30/EU (EMC)
2014/35/EU (LVD)
2011/65/EU (RoHS)

15
FR
Chère cliente, cher client,
Toutes nos félicitations pour l’acquisition de ce nouvel
appareil. Veuillez lire attentivement et respecter
les instructions de ce mode d’emploi an d’éviter
d’éventuels dommages. Nous ne saurions être tenus
pour responsables des dommages dus au non-respect
des consignes et à la mauvaise utilisation de l’appareil.
Scannez le QR-Code pour obtenir la dernière version du
mode d‘emploi et à d‘autres informations concernant le
produit.
SOMMAIRE
Consignes de sécurité 16
Aperçu de l‘appareil 17
Mise en marche / maintenance 18
Résolution des problèmes 19
Informations sur le recyclage 20
Déclaration de conformité 20
FICHE TECHNIQUE
Article Lagoon 3000 Lagoon 4500
Alimentation 220 V ~ 50 Hz 220 V ~ 50 Hz
Puissance 10 W 30 W
Hauteur de
refoulement maximale
2 m 4 m
Débit 3000 litres/heure 4500 litres/heure
Article Lagoon 3600 Lagoon 5200
Alimentation 220 V ~ 50 Hz 220 V ~ 50 Hz
Puissance 20 W 40 W
Hauteur de
refoulement maximale
2,8 m 4,8 m
Débit 3600 litres/heure 5200 litres/heure

16
FR
CONSIGNES DE SÉCURITÉ
• Pour réduire les risques d‘électrocution, ne retirez aucun des capots.
L‘appareil contient des pièces inaccessibles à l‘utilisateur.
• La plaque d‘identication se trouve à l‘arrière de l‘appareil.
• Ne placez pas de récipients remplis de liquide, tels que des vases ou des
arrosoirs.
• Ne laissez pas tomber d‘objets métalliques sur cet appareil.
• Ne placez pas d‘objets lourds sur cet appareil.
• Utilisez uniquement des pièces et accessoires approuvés par le fabricant.
• Débranchez la che de la prise murale en cas de pluie, d‘orage, ou si vous
n‘utilisez pas l‘appareil pendant une longue période. De cette façon, vous
pouvez éviter les dommages.
• Faites réparer l‘appareil par des professionnels qualiés uniquement.
• Une réparation est nécessaire si le périphérique a été endommagé de
quelque manière que ce soit, c‘est-à-dire si des objets sont tombé dessus,
s‘il n‘a pas fonctionné correctement ou s‘il est tombé. N‘essayez pas de
réparer l‘appareil vous-même. Ouvrir le couvercle vous expose à un risque
de choc électrique ou d’autres blessures.
• Ne tirez pas sur le cordon, ne le pliez pas et ne placez pas d‘objets lourds
dessus.
• Ne touchez pas la che avec les mains mouillées.
• Ne placez pas de sources de ammes nues, par exemple des bougies
allumées, sur l‘appareil.
• Ne faites jamais fonctionner la pompe à vide.
• Ne connectez jamais l‘appareil à l‘alimentation de secteur. Il est conçu pour
un fonctionnement en courant continu uniquement.
• Utilisez la pompe uniquement dans des bassins d‘eau douce à des •
températures pouvant inférieures à 50 °C.
• La pompe convient aux bassins de rétention, aux cascades, aux fontaines
ou aux ltres d‘aquarium.
MISE EN GARDE
Risque de blessure ! n‘ouvrez jamais le boîtier du moteur, il y a
danger de mort.

17
FR
APERÇU DE L‘APPAREIL
1Buse de réglage 7Bloc moteur
2Panier ltre 8Rondelle
3Carter de la pompe 9Raccord 3/4“ > 1“
4Ensemble rotor 10 Manchon de raccord
5Joint torique 11 Raccord 1 1/4“
6Roulement

18
FR
MISE EN MARCHE / MAINTENANCE
• Fixez d’abord une sorte de câble de remorquage (corde en nylon ou
similaire) à la pompe, avec lequel vous pourrez la sortir de l’eau si
nécessaire.
• Branchez les tuyaux appropriés de votre aquarium / bassin / fontaine, etc.
à la pompe. Assurez-vous qu‘il n‘y a pas de bulles d‘air dans la tuyauterie.
• Installez la pompe à au moins 20 cm et au plus 2,8 m (Lagoon 3600) ou 4,8
m (Lagoon 5200) sous la surface de l‘eau.
• Ne placez pas la pompe dans la boue / les sédiments au fond de l’eau, mais
dans une position légèrement surélevée.
• Protégez le cordon d’alimentation des dommages causés par les plis ou les
arêtes vives lors de la pose.
• Branchez la pompe sur l‘alimentation électrique.
Remarque : Ne faites jamais fonctionner la pompe sans le panier-ltre
(1). Le ltre protège la pompe contre la saleté et l‘encrassement dû aux
sédiments, à la poussière et à la saleté. Ne faites jamais fonctionner la
pompe à vide.
1. Réglez la vitesse d‘écoulement avec le bouton bleu.
2. Tournez le panier-ltre comme indiqué pour le retirer.
3. Faites glisser le commutateur bleu vers la gauche pour ouvrir le bloc
moteur.
4. Tournez le bloc moteur dans le sens antihoraire.
5. Nettoyez / remplacez l‘hélice.
6. Assurez-vous que le joint torique est en place comme indiqué.

19
FR
Remarque : En hiver, sortez la pompe de l‘eau et rangez-la dans un
environnement hors gel, si possible dans un récipient rempli d‘eau, an
d‘éviter que le joint torique ne se dessèche. Nettoyez soigneusement la
pompe et vériez qu‘elle n‘est pas endommagée après le remontage.
RÉSOLUTION DES PROBLÈMES
Problème Cause possible Solution
La pompe ne fonctionne
pas.
Pas de courant. Branchez dans une prise.
Surchauffe. Laissez l'appareil refroidir.
Rotor bloqué. Eliminez le blocage.
Pas d'eau. Ajoutez de l'eau.
La pompe fait un bruit
désagréable / fort .
Le boîtier du ltre est
bloqué ou l'arbre est
endommagé.
Eliminez le blocage.
L'arbre en céramique
ou son support portent
des traces d'usure
importantes.
Remplacez l'arbre ou son
support.
Puissance de refoulement
insufsante
La soupape est fermée ou
bouchée.
Ouvrez / nettoyez la
soupape.
Le panier-ltre est bouché
/ bloqué.
Nettoyez le panier- ltre.
Roue à aubes
endommagée.
Remplacez la roue à aubes.
Tension insufsante Branchez la pompe sur une
tension appropriée.

20
FR
INFORMATIONS SUR LE RECYCLAGE
Vous trouverez sur le produit l’image ci-contre
(une poubelle sur roues, barrée d‘une croix), ce qui
indique que le produit se trouve soumis à la directive
européenne 2012/19/UE. Renseignez-vous sur les
dispositions en vigueur dans votre région concernant
la collecte séparée des appareils électriques et
électroniques. Respectez-les et ne jetez pas les
appareils usagés avec les ordures ménagères. La
mise en rebut correcte du produit usagé permet de
préserver l’environnement et la santé. Le recyclage des
matériaux contribue à la préservation des ressources
naturelles.
DÉCLARATION DE CONFORMITÉ
Fabricant :
Chal-Tec GmbH, Wallstraße 16, 10179 Berlin,
Allemagne.
Ce produit est conforme aux directives européennes
suivantes :
2014/30/UE (CEM)
2014/35/UE (LVD)
2011/65/UE (RoHS)
This manual suits for next models
3
Table of contents
Languages:
Other Waldbeck Pond Pump manuals
Popular Pond Pump manuals by other brands

EasyPro
EasyPro EX8800 Installation and service manual

Biotop Garden
Biotop Garden D0454 User instructions

Auga
Auga Compact C Operation instructions

Reefe
Reefe RP260 quick start guide

Hozelock Cyprio
Hozelock Cyprio Cascade 1500 Installation and operating instructions

Oase
Oase Aquamax Eco 12000 CWS operating instructions