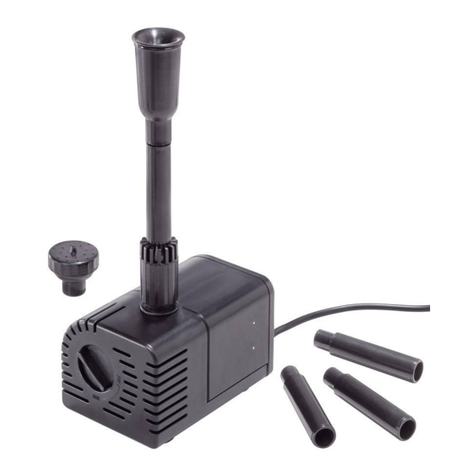
Waldbeck Nemesis Series User manual

Nemesis T35 / T45 / T60 / T90
Teichpumpe
Pond Pump
10033382 10031918 10033389 10033390


3
DE
English 9
Español 15
Français 21
Italiano 27
Sehr geehrter Kunde,
wir gratulieren Ihnen zum Erwerb Ihres Gerätes. Lesen
Sie die folgenden Hinweise sorgfältig durch und befolgen
Sie diese, um möglichen Schäden vorzubeugen. Für
Schäden, die durch Missachtung der Hinweise und
unsachgemäßen Gebrauch entstehen, übernehmen wir
keine Haftung. Scannen Sie den QR-Code, um Zugriff
auf die aktuellste Bedienungsanleitung und weitere
Informationen rund um das Produkt zu erhalten.
INHALTSVERZEICHNIS
Sicherheitshinweise 4
Geräteübersicht 5
Inbetriebnahme 6
Pege und Wartung 7
Fehlerbehebung 8
Hinweise zur Entsorgung 8
TECHNISCHE DATEN
Artikel T35 T45 T60 T90
Stromversorgung 220 V ~ 50 Hz
Leistung 35 W 45 W 60 W 90 W
Maximale Förderhöhe 2 m 2,5 m 3 m 4 m
Durchsatz 2000 l/Std. 2700 l/Std. 4500 l/Std. 6200 l/Std.
KONFORMITÄTSERKLÄRUNG
Hersteller:
Chal-Tec GmbH, Wallstraße 16, 10179 Berlin,
Deutschland.
Dieses Produkt entspricht den folgenden
Europäischen Richtlinien:
2014/30/EU (EMV)
2014/35/EU (LVD)
2011/65/EU (RoHS)

4
DE
SICHERHEITSHINWEISE
• Um die Gefahr von Stromschlägen zu reduzieren entfernen Sie keine der
Abdeckungen. Das Gerät enthält Teile, die dem Benutzer nicht zugänglich
sind.
• Die Gerätekennzeichnung be ndet sich auf der Rückseite des Geräts.
• Stellen Sie keine mit Flüssigkeiten gefüllten Gefäße, wie Vasen oder
Gießkannen, darauf ab.
• Lassen Sie keine Gegenstände aus Metall auf dieses Gerät fallen.
• Stellen Sie keine schweren Gegenstände auf dieses Gerät.
• Benutzen Sie nur Zubehör und Anbauteile, die vom Hersteller zugelassen
sind.
• Ziehen Sie den Stecker aus der Steckdose wenn es gewittert, stürmt
oder Sie das Gerät längere Zeit nicht benutzen. So können Sie Schäden
vorbeugen.
• Lassen Sie Reparaturen nur von quali zierten Fachkräften durchführen.
• Eine Reparatur ist dann erforderlich, wenn das Gerät auf irgendeine Weise
beschädigt wurde, das heißt wenn Gegenstände darauf gefallen sind,
wenn es nicht ordnungsgemäß funktioniert oder fallengelassen wurde.
Versuchen Sie nicht das Gerät selbst zu reparieren. Durch Öffnen der
Abdeckung setzen Sie sich der Gefahr von Stromschlägen und anderen
Verletzungen aus.
• Ziehen Sie nicht am Kabel, knicken Sie es nicht und stellen Sie keine
schweren Gegenstände darauf.
• Fassen Sie den Stecker nicht mit nassen Händen an.
• Stellen Sie keine Quellen offener Flammen, z.B. brennende Kerzen, auf das
Gerät.
• Lassen Sie die Pumpe nie leer laufen.
• Verbinden Sie das Gerät niemals mit einer Wechselstrom. Es ist nur für
den Betrieb mit Gleichstrom ausgelegt.
• Betreiben Sie die Pumpe nur in Süßwasserteichen bei Temperaturen bis
maximal 50°C.
• Die Pumpe ist geeignet um Teich lter, Wasserfälle, Springbrunnen oder
Aquarien lter zu betreiben.
WARNUNG
Verletzungsgefahr! Öff nen Sie niemals das
Motorgehäuse, andernfalls besteht Lebensgefahr.

5
DE
GERÄTEÜBERSICHT
1Vorderer Filter 8Endstückverschluss
2Flügelschrauben-Abdeckung 9Großes Auslassstück
3O-Ring 1 10 Kleines Auslassstück
4Gummilagerung 11 Dichtring
5Rotor 12 Großes Verbindungsstück
6Motor 13 O-Ring 2
7Saugnapf 14 Großer Filter

6
DE
INBETRIEBNAHME
• Befestigen Sie zunächst eine Art Schleppseil (Nylonschnur o.ä.) an der
Pumpe, mit dem sie diese bei Bedarf aus dem Wasser ziehen können.
• Schließen Sie die entsprechenden Schläuche Ihres Aquariums/Teichs/
Springbrunnens etc. an der Pumpe an. Stellen Sie sicher, dass sich keine
Luftblasen im Rohrsystem benden.
• Stellen Sie die Pumpe nicht in den Schmutz/Bodensatz auf dem Grund des
Wasser, sondern in eine etwas erhöhte Position.
• Schützen Sie das Stromkabel vor Beschädigungen durch Knicken und/oder
scharfe Kanten, wenn Sie es verlegen.
• Schließen Sie die Pumpe an die Steckdose an.
Hinweis: Betreiben Sie die Pumpe nie ohne den Filterkorb (1). Der
Filter schützt die Pumpe vor Verschmutzungen und Verstopfungen
durch Bodensatz, Staub und Schmutz. Betreiben Sie die Pumpe nicht im
Trockenen.
Nehmen Sie die Pumpe im Winter aus dem Wasser und lagern Sie sie in
frostfreier Umgebung, wenn möglich in einem mit Wasser gefüllten Behälter,
um den O-Ring vor Austrocknung und . Säubern Sie die Pumpe sorgfältig und
prüfen Sie nach erneutem Zusammenbau auf etwaige Schäden.

7
DE
PFLEGE UND WARTUNG
Wichtige Hinweise
• Reinigen Sie das Filtergehäuse und den Filterschwamm einmal im Monat
und auch, wenn die Pumpenleistung sich reduziert.
• Reinigen Sie die Pumpe bei häuger Benutzung.
• Den Netzstecker nie in Wasser eintauchen.
Reinigung der Pumpe
• Ziehen Sie den Netzstecker.
• Nehmen Sie die Springbrunnengruppe auseinander.
• Zerlegen Sie das Pumpengehäuse.
• Reinigen Sie Pumpe und den Filter mit einer weichen Bürste.
• Entfernen Sie den Schmutz vom Rotor.
Einlagerung im Winter
• Nehmen Sie die Pumpe aus dem Wasser.
• Überprüfen Sie die Pumpe auf Schäden.
• Lagern Sie die Pumpe in frostfreier Umgebung, wenn möglich in einem mit
Wasser gefüllten Behälter.

8
DE
FEHLERBEHEBUNG
Problem Mögliche Ursache Lösungsansatz
Pumpe funktioniert nicht. Kein Strom. Mit Steckdose verbinden.
Überhitzung. Gerät abkühlen lassen.
Rotor blockiert. Blockaden beseitigen.
Kein Wasser. Wasser hinzufügen.
Pumpe gibt störende/laute
Geräusche ab.
Filtergehäuse blockiert
oder Schaft beschädigt.
Blockaden beseitigen.
Keramischer Schaft oder
Aufnahme haben starke
Gebrauchsspuren.
Schaft oder Aufnahme
ersetzen.
Ungenügende Wasser-
Förderleistung
Ventil geschlossen oder
verstopft
Ventil öffnen / reinigen
Filterkorb verstopft/
blockiert.
Filterkorb reinigen.
Impeller beschädigt.. Impeller auswechseln.
Zu niedrige Spannung An passender Spannung
anschließen.
HINWEISE ZUR ENTSORGUNG
Bendet sich die linke Abbildung (durchgestrichene
Mülltonne auf Rädern) auf dem Produkt, gilt die
Europäische Richtlinie 2012/19/EU. Diese Produkte
dürfen nicht mit dem normalen Hausmüll entsorgt
werden. Informieren Sie sich über die örtlichen
Regelungen zur getrennten Sammlung elektrischer und
elektronischer Gerätschaften. Richten Sie sich nach
den örtlichen Regelungen und entsorgen Sie Altgeräte
nicht über den Hausmüll. Durch die regelkonforme
Entsorgung der Altgeräte werden Umwelt und
die Gesundheit ihrer Mitmenschen vor möglichen
negativen Konsequenzen geschützt. Materialrecycling
hilft, den Verbrauch von Rohstoffen zu verringern.

9
EN
Dear Customer,
Congratulations on purchasing this equipment. Please
read this manual carefully and take care of the following
hints to avoid damages. Any failure caused by ignoring
the items and cautions mentioned in the instruction
manual is not covered by our warranty and any liability.
Scan the QR code to get access to the latest user
mannual and other information about the product.
CONTENT
Safety Instructions 10
Product Overview 11
Operation 12
Care and Maintenance 13
Troubleshooting 14
Hints on Disposal 14
TECHNICAL DATA
Item T35 T45 T60 T90
Power supply 220 V ~ 50 Hz
Power consumtion 35 W 45 W 60 W 90 W
Maximum head 2 m 2,5 m 3 m 4 m
Flow rate 2000 L / hour 2700 L/hour 4500 L / hour 6200 L / hour
DECLARATION OF CONFORMITY
Producer:
Chal-Tec GmbH, Wallstraße 16, 10179 Berlin,
Germany.
This product is conform to the following European
Directives:
2014/30/EU (EMC)
2014/35/EU (LVD)
2011/65/EU (RoHS)

10
EN
SAFETY INSTRUCTIONS
• Read all instructions before using.
• Do not let the cord hang over edge of table counter or touch hot surface.
• If liquid penetrates inside the battery housing, unplug the appliance and
have it checked by a quali ed technician before it is used again.
• Do not place the appliance close to heating equipment or any heat source,
or in a location subjected to excessive dust or mechanical shocks.
• Do not expose the appliance to extreme temperatures. The appliance shall
be used in moderate climates.
• The use of attachments that are not recommended by the appliance
manufacturer may result in re, electric shock or personal injury.
• This appliance is not intended for use by persons (including children) with
reduced physical, sensory or mental capabilities, or lack of experience
and knowledge, unless they have been given supervision or instruction
concerning use of the appliances by a person responsible for their safety.
• Children should be supervised to ensure that they do not play with the
appliance.
• The appliance is not a toy. Do not let the children play it. Never let children
insert foreign objects into the appliance.
• Do not use the appliance for other than intended use. This appliance has
been designed solely for domestic use; the manufacturer‘s liability shall
not be engaged in the event of any professional use, by any misuse or by
any use not complying with the operating instructions.
• Any altering of the product itself or changing of the components is
forbidden.
• Do not connect the pump to any AC voltage power, it is intended ONLY for
DC Voltage power.
• Operate in freshwater only (never above 50°C).
• Do not strike the solar panel.
• Do not let the pump run dry.
WARNING
Risk of injury! Never open the motor housing, otherwise there
is a danger to life.

11
EN
PRODUCT OVERVIEW
1Front lter 8Outlet nut
2Impeller cover 9Big outlet
3O ring 1 10 Small outlet
4Rubber bearing 11 Gasket
5Rotor 12 Connecting thread
6Motor 13 O ring 2
7Suction cup 14 Big lter

12
EN
OPERATION
• Fasten a hauling rope to the pump. With this rope you can pull the pump
out of the water as needed. Make the necessary hose connections(if
required), or install a fountain attachment. After the installation, insure
that there are no air bubbles in the hose system(lay hose lines on an
incline).
• Install the pump horizontally on a xed support at least 20 cm under the
water surface. Comply with the maximum permitted immersion. Depth
(see the information on the model plate).
• Do not place the pump directly in the pond oor mud; place the pump on a
raised surface.
• Lay the power cord in a protected manner to exclude the possibility of
damage.
• Connect the pump to the electrical circuit.
Note: Never operate the pump without the lter basket. The lter basket
protects the pump from coarse dirt that can lead to plugging up the pump.
In winter, remove the pump from the water and store it in a frost-free
environment, if possible in a container lled with water, to prevent the O-ring
from drying out and . Clean the pump carefully and check for any damage after
reassembly.

13
EN
CARE AND MAINTENANCE
Important notes
• Clean the lter housing and the lter sponge once a month and also when
the pump capacity is reduced.
• Clean the pump if it is used frequently.
• Never immerse the mains plug in water.
Cleaning the pump
• Disconnect the mains plug.
• Disassemble the fountain group.
• Disassemble the pump casing.
• Clean the pump and lter with a soft brush.
• Remove the dirt from the rotor.
Storage in winter
• Remove the pump from the water.
• Check the pump for damage.
• Store the pump in a frost-free environment, if possible in a container lled
with water.

14
EN
TROUBLESHOOTING
Problem Possible cause Suggested solution
Pump does not work. No power. Plug in.
Burned. Allow device to cool down.
Rotor is blocked. Clear blockages.
Running without water. Plug in again and add
water.
Noise. Filter housing is blocked or
shaft is broken.
Clean blockages after
opening.
Ceramic shaft or bearing:
Wearing occurs.
Change the shaft or
bearing.
Insufcient water
displacement.
Impeller broken. Change impeller.
Flow rate valve closed. Open the ow rate valve.
Filter housing is clogged. Clean blockages and
plug in.
Low voltage. Change to right voltage.
HINTS ON DISPOSAL
According to the European waste regulation 2012/19/EU
this symbol on the product or on its packaging indicates
that this product may not be treated as household waste.
Instead it should be taken to the appropriate collection
point for the recycling of electrical and electronic
equipment. By ensuring this product is disposed of
correctly, you will help prevent potential negative
consequences for the environment and human health,
which could otherwise be caused by inappropriate waste
handling of this product. For more detailed information
about recycling of this product, please contact your local
council or your household waste disposal service.

15
ES
Estimado cliente:
Le felicitamos por la adquisición de este producto. Lea
atentamente el siguiente manual y siga cuidadosamente
las instrucciones de uso con el n de evitar posibles
daños. La empresa no se responsabiliza de los daños
ocasionadospor un usoindebidodel producto oporhaber
desatendido las indicaciones de seguridad. Escanee el
código QR para obtener acceso al manual de usuario más
reciente y otra información sobre el producto:
ÍNDICE DE CONTENIDOS
Indicaciones de seguridad 16
Vista general del aparato 17
Puesta en funcionamiento 18
Limpieza y cuidado 19
Resolución de anomalías 20
Retirada del aparato 20
DATOS TÉCNICOS
Artículo T35 T45 T60 T90
Alimentación 220 V ~ 50 Hz
Potencia 35 W 45 W 60 W 90 W
Altura máxima de
bombeo
2 m 2,5 m 3 m 4 m
Caudal 2000 l/h 2700 l/h 4500 l/h 6200 l/h
DECLARACIÓN DE CONFORMIDAD
Fabricante:
Chal-Tec GmbH, Wallstraße 16, 10179 Berlín
(Alemania).
Este producto cumple con las siguientes direcvas
europeas:
2014/30/UE (EMC)
2014/35/UE (baja tensión)
2011/65/UE (refundición RoHS)

16
ES
INDICACIONES DE SEGURIDAD
• Para reducir el riesgo de una descarga eléctrica, no retire las carcasas. El
aparato contiene piezas que no son accesibles para el usuario.
• La placa técnica del aparato se encuentra en la parte posterior de la
bomba.
• No coloque recipientes llenos de agua encima del aparato, como jarrones o
regaderas.
• No deje caer objetos de metal sobre el aparato.
• No coloque objetos pesados encima del aparato.
• Utilice solamente accesorios y piezas de repuesto autorizados por el
fabricante.
• Desconecte el enchufe de la toma de corriente en caso de lluvia o
tormenta, o si no va a utilizar el aparato durante un largo periodo de
tiempo. De este modo, evitará que el aparato se dañe.
• Solamente un personal técnico cuali cado debe llevar a cabo las
reparaciones.
• Será necesario reparar el aparato cuando se haya visto dañado de
alguna manera, es decir, si ha caído algún objeto encima, si no funciona
correctamente o si se ha dejado caer. No intente reparar el aparato usted
mismo. Si abre la carcasa, corre el peligro de sufrir una descarga eléctrica u
otro tipo de daño.
• No tire o doble el cable ni coloque objetos pesados sobre él.
• No toque el enchufe con las manos mojadas.
• No sitúe fuentes de ignición, como velas encendidas, cerca del aparato.
• No deje que la bomba funcione cuando está vacía.
• No conecte el aparato a una corriente alterna. La bomba está diseñada
solamente para funcionar con una corriente continua.
• Utilice la bomba en un estanque de agua dulce a una temperatura máxima
de 50 °C.
• La bomba está concebida para utilizarse con ltros de estanque, cascadas,
fuentes decorativas o ltros de acuario.
ADVERTENCIA
¡Riesgo de lesiones! Nunca abra la carcasa del motor, existe
peligro de muerte.

17
ES
VISTA GENERAL DEL APARATO
1Filtro frontal 8Tuerca nal
2Carcasa del propulsor 9Pieza de salida grande
3Junta tórica 1 10 Pieza de salida pequeña
4Cojinete de goma 11 Junta
5Rotor 12 Pieza de unión grande
6Motor 13 Junta tórica 2
7Ventosa 14 Filtro grande

18
ES
PUESTA EN FUNCIONAMIENTO
• Ate a la bomba una especie de cable de remolque (cable de nylon, etc.) con
el que podrá sacar la bomba del estanque en caso de ser necesario.
• Conecte el tubo correspondiente de su acuario/estanque/fuente
decorativa, etc. a la bomba. Asegúrese de que no hay burbujas de aire en el
sistema de tubos.
• No instale la bomba en la suciedad/sedimento del fondo del agua, sino en
una posición más elevada.
• Si cambia el cable de alimentación de lugar, asegúrese de no doblarlo y/o
que no cuelgue de cantos alados para evitar dañarlo.
• Conecte la bomba a la toma de corriente.
Atención: no utilice la bomba sin el cesto ltrante (1). El ltro protege la
bomba de la suciedad y obstrucciones que provoca el sedimento, el polvo y
la suciedad. No ponga la bomba en marcha en un lugar seco.
En invierno, saque la bomba del agua y guárdela en un entorno protegido
contra las heladas, de ser posible, en un recipiente lleno de agua para evitar
que la junta tórica se deseque. Limpie la bomba con cuidado e inspecciónela
para detectar posibles daños después de volver a montarla.

19
ES
LIMPIEZA Y CUIDADO
Indicaciones importantes
• Limpie la carcasa del ltro y la esponja ltrante una vez al mes, si
disminuye la potencia de bombeo.
• Limpie la bomba si la utiliza a menudo.
• Nunca sumerja el cable de alimentación en agua.
Limpieza de la bomba
• Desconecte el aparato.
• Desmonte la parte de la fuente.
• Retire la carcasa de la bomba.
• Limpie la bomba y el ltro con un cepillo suave.
• Retire la suciedad del rotor.
Almacenamiento en invierno
• Saque la bomba del agua.
• Compruebe que la bomba no presenta daños.
• Guarde la bomba en un entorno protegido contra las heladas, de ser
posible, en un recipiente lleno de agua.

20
ES
RESOLUCIÓN DE ANOMALÍAS
Anomalía Posible causa Posible solución
La bomba no funciona. No hay corriente. Conéctela a una toma de
corriente.
Sobrecalentamiento. Deje que el aparato se
enfríe.
El rotor está bloqueado. Retire el elemento
bloqueador.
No hay agua. Añada agua.
Pumpe gibt störende/laute
Geräusche ab.
La carcasa del ltro está
bloqueada o la caja está
dañada.
Retire el elemento
bloqueador.
La caja de cerámica o la
entrada tienen un gran
desgaste.
Cambie la caja o la entrada.
Ungenügende Wasser-
Förderleistung
Válvula cerrada o
bloqueada.
Abra/Limpie la válvula.
Cesto ltrante bloqueado. Limpie el cesto ltrante.
Propulsor dañado. Cambie el propulsor.
Corriente demasiado baja. Conecte al aparato a otra
corriente.
RETIRADA DEL APARATO
Si el aparato lleva adherida la ilustración de la izquierda
(el contenedor de basura tachado) entonces rige
la normativa europea, directiva 2012/19/UE. Este
producto no debe arrojarse a un contenedor de basura
común. Infórmese sobre las leyes territoriales que
regulan la recogida separada de aparatos eléctricos y
electrónicos. Respete las leyes territoriales y no arroje
aparatos viejos al cubo de la basura doméstica. Una
retirada de aparatos conforme a las leyes contribuye
a proteger el medio ambiente y a las personas a su
alrededor frente a posibles consecuencias perjudiciales
para la salud. El reciclaje ayuda a reducir el consumo
de materias primas.
This manual suits for next models
8
Table of contents
Languages:
Other Waldbeck Pond Pump manuals
Popular Pond Pump manuals by other brands

WilTec
WilTec 62547 Operation manual

Pond Boss
Pond Boss 52735 manual

EasyPro
EasyPro Rocking Piston PA86A Installation, Operation, Maintenance Guidelines

Hozelock Cyprio
Hozelock Cyprio EasyClear 3000 1760 Installation and operating instructions

Messner
Messner System M 800 operating instructions

fish mate
fish mate 2000 instructions