manuals.online logo
Brands
  1. Home
  2. •
  3. Brands
  4. •
  5. Walker Bay
  6. •
  7. Boat
  8. •
  9. Walker Bay 275 RID User manual

Walker Bay 275 RID User manual

275 RID
™
Assembly Instructions
web: www.walkerbay.com email: info@walkerbay.com
®
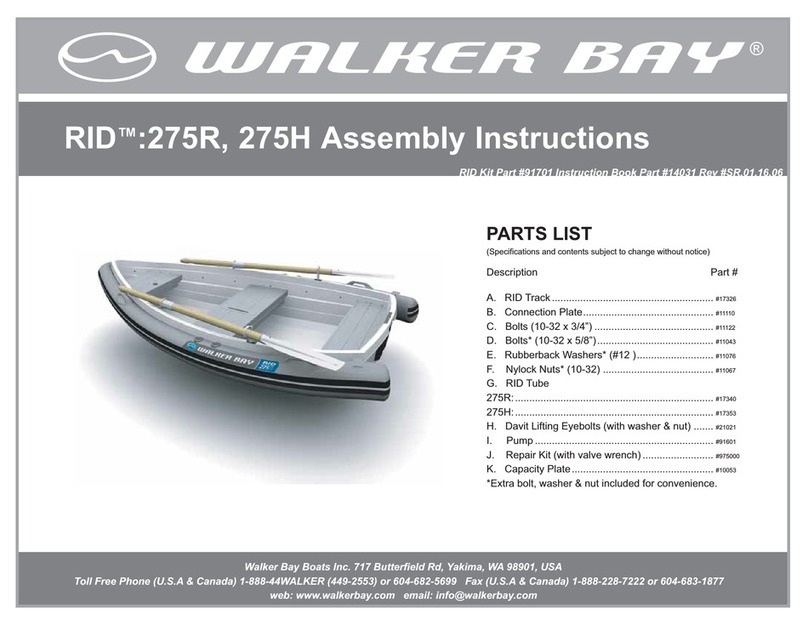
PARTS LIST
(Specifications and contents subject to change without notice)
Description Part #
A. RID Track...............................................2000010520
Part No. 1000130023 v.2 Lscsep01
D. Bolts* (10-32 x 5/8”).........................................11043
E. Rubberback Washers* (#12 )...........................11076
F. Nylock Nuts* (10-32) .......................................11067
G. RID Tube.................................................3001020351
H. Pump......................................................1000330002
C. Repair Kit (with valve wrench)...............3000030046
B. Capacity Plate..................................................10053
*Extra bolt, washer & nut included for convenience.
Tools you will need:
Remove paper template.
Drill with bit #11 [3/16]
Screwdriver
RETROFIT RID TRACK ASSEMBLY INSTRUCTIONS FOR NON RID READY BOATS
Cut out template on corner of page.
Align port (left) template with outside of
port gunwale lip and first rib on aft edge.
Using a drill gun & bit #11, drill first
hole. Be careful to drill hole perpen-
dicular to hull.
Insert bolt and washer from inside
boat. From outside, attach nut
loosely, do not tighten yet.
Align track with gunwale lip and drill
Distance between the set of holes to drill.
positioning for the tracks
NOTE: the distance of the holes of the track varies in the tirhd track in both sides of the hull
remaining holes to match pre-drilled
holes in track.
Insert bolts & washers for each hole,
attaching nut loosely.
Align last hole in track
with hole drilled on boat.
1
2
1
2
2
1
1
2
26”
26”
2set of holes
1set of holes
3set of holes
2set of holes
1set of holes
3set of holes
On assembled boat, locate RID plugs along each
side of the hull. Gently tap RID plugs out with a
hammer.
Once RID plugs are dislodged,
carefully pry plugs out with claw of
hammer
To secure track to hull, insert bolt and washer
from inside of hull and nut from outside of hull.
TRACK
RID TRACK ASSEMBLY INSTRUCTIONS FOR RID READY BOATS
2set of holes
1set of holes
3set of holes
positioning for the tracks
NOTE: the distance of the holes of the track varies in the middle track in both sides of the hull
1
2
2
1
1
2
2set of holes
1set of holes
3set of holes
TUBE INSTALLATION INSTRUCTIONS
If alone, try sliding tube on with boat upside down.
Partially inflate tube (1/4 full) and apply liquid soap and water to track runner on
tube to help feed tube into track with greater ease.
Begin by sliding BOTH sides of tube halfway down first track set. (as
After installing the first set of tracks proceed with the mid set of tracks.
Don’t forget to use liquid soap for a easier sliding
shown in Illustration).
NOTE:
Before you begin the installation process, make sure your boat hull is completely
stabilized. The boat should not be able to move freely in any direction.
Before installing tube note tube’s serial number located in this*position on the
tube. You will need it to complete your Warranty Registration Card.
If possible, have one person feed tube into track, while other person pulls tube.
Make sure the front of the
tube is well aligned
with the front of the hull.
DO NOT FORCE TUBE INTO TRACK.
Use care when feeding tube runner
TRACK
RUNNER
into track.
1st SET OF TRACKS
2nd SET OF TRACKS
After installing the second set of tracks proceed
with the front set of tracks.
Using wrench provided in repair kit,
hand tighten each valve.
DO NOT OVER TIGHTEN VALVE.
Inflate chambers in sequence shown until
wrinkles disappear.
Peel backing from capacity plate and apply
new plate on inside of the stern, over top
of existing plate.
WARNING
!
TUBE PROVIDES FLOTATION AND STABILITY.
CAPACITY LABEL IS VOID UNLESS TUBE IS INFLATED.
3rd SET OF TRACKS
3
5
4
CAUTION
!
CAUTION
!
Do not use oily or abrasive substances.
Do not use products that contain: phosphates, chlorine, solvents, non-
biodegradable or petroleum based products.
Do not use Armor All® automotive cleaning agent and preservative on
tube.
Read labels and instructions carefully to avoid products that could be
harmful to polypropylene, PVC or other plastics.
Use only diluted citrus-based cleaners. They are excellent for marine
cleaning purposes, and safe to use. Full strength citrus-based cleaners
can discolor PVC.
Use household cleaners sparingly and do not discharge them into
waterways.
Avoid contact of the tubes’ fabric with hazardous or harmful materials
such as: battery acid, oil, gasoline, vinyl preserving agents, or alcohol
based cleaning solutions, waxes, or solvents.
Avoid contact of sharp or abrasive objects with the tube. They can
puncture the tube.
Do not mix cleaners and work in a well ventilated area.
EGAROTS
ECNANETNIAM
Risk of fire. Do not store fuel, fuel tanks, fuel lines or any fuel related
components in direct sunlight. Read Owner’s Manual provided with your
outboard motor for storage information.
Avoid storing boat in water when not in use to prevent contact with
hazardous chemicals due to pollution, abrasion from foreign objects and
accumulation of marine growth.
Use a boat cover or storage bag. Avoid unnecessary exposure of the
tubes to direct sunlight. If a bag or cover is not provided with your boat,
accessory covers are available. For information contact your local dealer.
Do not store boat where it may come in contact with sharp or abrasive
objects.
Do not store boat where rodents may have access to it, they can chew
through the tube’s fabric creating a leak.
TUBES - After use, rinse boat with mild liquid soap and fresh water, rinse
away sand and debris.
Apply 303 Aerospace Protectant at least once per season to protect tube
from UV (ultra violet) rays. Walker Bay® recommends 303 because it is free
of silicone oils, waxes, glycerin, or petroleum distillates unlike many other
protectants. 303 leaves a like-new, non-oily, anti-static finish that does not
attract dust. 303 can be purchased through the manufacturer’s website:
www.303products.com
VALVES - Tighten air valves several times per season. Loose valves may
result in air leaks or loss of pressure in the tube. Tighten valves with the tool
provided in the repair kit.
DO NOT OVERTIGHTEN VALVES.
Valve replacement should be done by a trained professional. Contact your
dealer to replace valves.
Avoid storing the tube in sunlight.
For longterm or winter storage you may remove the tube.
If you store the boat with the tube attached you must release some air
pressure as the air inside the tube expands and contracts with temperature
variation.
Rinse boat with mild soap and fresh water after use. Rinse away sand or
debris.
Dry boat before storing to prevent accumulation of mould.
Store boat in a cool and dry place.
CAUTION
!
For large tears or repairs to seams or bulkheads it is recommended that
the tube be returned to your local dealer for repair by a trained profesional.
TUBE REPAIRS
For repairs, parts, or service contact your local dealer.
LARGE REPAIRS TO SKIN - SEAMS -
BULKHEADS
SMALL TEARS - CUTS - PUNCTURES
Tears, leaks, or punctures less than 0.5 inches or 1cm can be repaired with
the repair kit provided.
1. Prepare a round patch no less than 3 inches or 7 centimeters in diameter.
2. Clean the patch and the area surrounding the leak with Isopropyl Alcohol.
IMPORTANT: patch and tube must be clean or the patch may not adhere
properly.
3. To contain excess glue, use masking tape to tape off the area around the
patch. Excess glue will discolor.
4. Apply 3 thin, even coats of repair kit adhesive to both the surface of the
tube and the patch. Wait 5 minutes between each coat.
5. After the 3rd coat, wait 10-15 minutes before applying the patch. Use a
hand roller to apply the patch evenly. Pay special attention to the edges.
6. Wait 24 hours before re-inflating tube. Inflate air chamber(s) to working
pressure and check water-tightness and/or air-tightness before using.
FINDING SMALL LEAKS
1. Mix a solution of 4 cups of fresh water and 1 cup of mild non-anti-
bacterial liquid soap. Do not use a spray bottle containing any household
cleaners.
2. Inflate tube approximately to working pressure.
3. Spray the soapy solution over suspected area of leak.
4. Look for air bubbles. Bubbles around an air valve indicate it is probably
loose. Use the tool included in the repair kit and gently tighten valve. Bubbles
on the surface of the tube indicate a puncture or leak.
5. Repair the tube by following the procedure for SMALL TEARS - CUTS -
PUNCTURES or contact your local dealer.
RID RETROFIT TEMPLATE
PORT (LEFT) SIDE
RID RETROFIT TEMPLATE
STARBOARD (RIGHT) SIDE

Other Walker Bay Boat manuals

Walker Bay 8 User manual

Walker Bay

Walker Bay 8 User manual

Walker Bay Airis Sport Instruction Manual

Walker Bay

Walker Bay Airis Sport Instruction Manual

Walker Bay AIRIS Instruction Manual

Walker Bay

Walker Bay AIRIS Instruction Manual

Walker Bay 275R User manual

Walker Bay

Walker Bay 275R User manual

Walker Bay AIRIS Instruction Manual

Walker Bay

Walker Bay AIRIS Instruction Manual

Walker Bay Genesis Console 310 Installation guide

Walker Bay

Walker Bay Genesis Console 310 Installation guide

Walker Bay AIRIS 16425 PLAY 8 Instruction Manual

Walker Bay

Walker Bay AIRIS 16425 PLAY 8 Instruction Manual

Walker Bay Generalion User manual

Walker Bay

Walker Bay Generalion User manual

Walker Bay 310R User manual

Walker Bay

Walker Bay 310R User manual

Walker Bay Airis Sport Instruction Manual

Walker Bay

Walker Bay Airis Sport Instruction Manual

Walker Bay AIRIS Instruction Manual

Walker Bay

Walker Bay AIRIS Instruction Manual

Walker Bay RID 275H User manual

Walker Bay

Walker Bay RID 275H User manual

Walker Bay 8 User manual

Walker Bay

Walker Bay 8 User manual

Walker Bay Generation 450 Instruction Manual

Walker Bay

Walker Bay Generation 450 Instruction Manual

Walker Bay Genesis Instruction Manual

Walker Bay

Walker Bay Genesis Instruction Manual

Walker Bay WB 8S User manual

Walker Bay

Walker Bay WB 8S User manual

Walker Bay 310 FTD Instruction Manual

Walker Bay

Walker Bay 310 FTD Instruction Manual

Popular Boat manuals by other brands

Zodiac PRO 550 owner's manual

Zodiac

Zodiac PRO 550 owner's manual

Lowell DOWNEAST 36 instructions

Lowell

Lowell DOWNEAST 36 instructions

Oru Kayak Beach LT owner's manual

Oru Kayak

Oru Kayak Beach LT owner's manual

Zodiac YACHTLINE 490 owner's manual

Zodiac

Zodiac YACHTLINE 490 owner's manual

Yamaha WaveRunner GP800R Service manual

Yamaha

Yamaha WaveRunner GP800R Service manual

B&G X-35 Performance guide

B&G

B&G X-35 Performance guide

Sea Eagle Stealth Stalker 10 Instruction & owner's manual

Sea Eagle

Sea Eagle Stealth Stalker 10 Instruction & owner's manual

Four winns 1992 Cruiser owner's manual

Four winns

Four winns 1992 Cruiser owner's manual

Sea Eagle RazorLite 393RL Instruction & owner's manual

Sea Eagle

Sea Eagle RazorLite 393RL Instruction & owner's manual

Zodiac MILPRO HEAVY DUTY Series owner's manual

Zodiac

Zodiac MILPRO HEAVY DUTY Series owner's manual

Pescador PT200-HF owner's manual

Pescador

Pescador PT200-HF owner's manual

Scout Boats 222 Sport Fish owner's manual

Scout Boats

Scout Boats 222 Sport Fish owner's manual

Anderson Model Pro 600 Assembly instructions

Anderson Model

Anderson Model Pro 600 Assembly instructions

Supra SUNSPORT 20V owner's manual

Supra

Supra SUNSPORT 20V owner's manual

Zodiac MilPro SRMN 500 owner's manual

Zodiac

Zodiac MilPro SRMN 500 owner's manual

Jeanneau SUN ODYSSEY 35 manual

Jeanneau

Jeanneau SUN ODYSSEY 35 manual

Rangertugs R-29 Sedan owner's manual

Rangertugs

Rangertugs R-29 Sedan owner's manual

Tyco R/C BATBOAT instructions

Tyco R/C

Tyco R/C BATBOAT instructions

manuals.online logo
manuals.online logoBrands
  • About & Mission
  • Contact us
  • Privacy Policy
  • Terms and Conditions

Copyright 2025 Manuals.Online. All Rights Reserved.