manuals.online logo
Brands
  1. Home
  2. •
  3. Brands
  4. •
  5. Walker Edison
  6. •
  7. Indoor Furnishing
  8. •
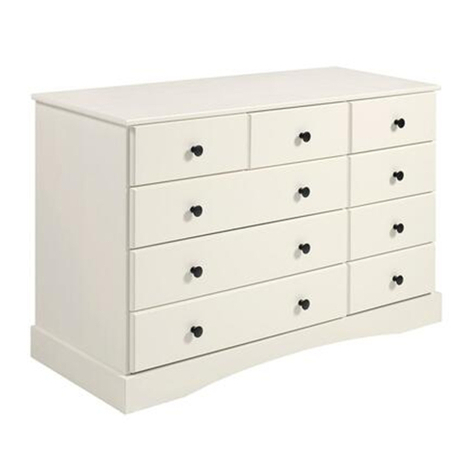
  9. Walker Edison TNNB3B User manual

Walker Edison TNNB3B User manual

Assembly Instructions
Copyright © 2018, by Walker Edison Furniture Co., LLC, All rights reserved.
Please visit our website for the most current instructions, assembly tips, to report damage
or request parts. www.walkeredison.com
Revised 10/2022
P.1
TNNB3B
I. Ensure that all parts and hardware are available before beginning assembly.
II. Follow each step carefully to ensure the proper assembly of this product.
III. Two people are recommended for ease in the assembly of this product.
IV. The three main types of hardware used to assemble this product are wood
dowels, screws and bolts.
V. The provided glue is to secure wood dowels in place. When first inserting dowels, locate
the appropriate hole for the dowel, place a small amount of glue in the hole and insert
the dowel. Wipe away excess glue immediately.
In future assembly steps when dowels are necessary to attach assembly parts together,
place a small amount of glue on the end of the dowel before attaching parts together.
Wipe away excess glue immediately.
VI. A Phillips head screwdriver and hammer is required for the assembly of this product.
VII. Power tools should not be used to assemble this product.
VIII. Maintenance Guide
To maintain long term performance and easy gliding of your solid wood drawers, we recommend
applying wax to the wooden guide rails.
1. Bee's wax is recommended or Paraffin wax from a standard candle can be used.
2. Apply the wax by rubbing it on the wooden guide rails where there is wood-on-wood contact
when opening and closing the drawer. (Wax should be room temperature, do not melt the wax
onto the wood)
3. Wax should be applied every few months for the first year and then only when needed after
that to keep the drawers sliding smoothly.
General Assembly Guidelines
P.2
Top panel
10 pc1
201 pc
5Drawer front 04 pcs Drawer runner
Description Qty
Part# Description Qty
Part#
Drawer bottom
13 0 pcs8
14 0 pcs4
0 pcs4
60 pc3 s
Parts List
Base panel
Middle crossbeam
Drawer back
80 pcs2
Bottom crossbeam
90 pcs4
Leg
10 0 pcs2
Back Panel
11 0 pcs4
Drawer Left Side
12 04 pcs
Drawer SideRight
P.3
7Back lock
16 0 pc1
The side drawer with
WARNING LABEL,
nshould be mou ted
in highest drawer.
4x
Left side panel
Right side panel
23 01 pc
24 0 pc1
5
14
712
11
8
9
9
9
9
2
1
10
16
6
8
10
12
13
13
13
13
13
13
13
13
6
6
24
23
Philips head screwdriver required for assembly
(not included)
Hammer recommended for assembly
(not included)
Hardware List
The hardware quantities listed above are required for proper assembly.
Some extra hardware may also have been included.
A
B
E
F
G
H
Ø8*20mm Wood dowel 16 pcs
Ø8*30mm Wood dowel 54 pcs
Ø4,0*25mm Screw 16 pcs
22 pcs
Ø4,0*30mm Screw 38 pcs
Ø7,0*45mm Screw 04 pcs
DØ3,5*35mm Screw 12 pcs
C16 pcs
Screw
P.4
J22 pcs
I-Glue 01 pc
Ø3,5*12mm
K-Corner 04 pcs
M
N
Washer 02 pcs
Wall anchor 01 pc
-
-
LØ6mm 01 pc
-
Cam bolt
Cam lock
Ø7,0*33mm
Ø15*12mm
O-Hex Key 01 pc
P.5
Screw cam bolts (H) into parts (1), (23) and (24) with a screwdriver.
Insert wood dowel (B) and glue ( ) intoI
part (2), (6), (8), (11), (12), (23) and (24).
B38
Ø8*30mm
I01
H22
H
H
H
H
H
H
H
H
H
H
H
1
Insert ood dowelw
A and glue ( ) 13( ) into part ( ).I
Step 3
A
13
8x A
Step 2
A
Step 1
A16
Ø8*20mm
I01
Attention to the
dowel size:
Ø8*20mm
H
H
H
H
H
H23
H
H
H
H
H
H
24
Please assemble on
a clean soft surface
to avoid damage.
3x
B
B
6
2x
B
B
8
B
B
B
B
2
B
B
23
B
B
24
4x
B
B
11
4x
BB
12
B
A
6
6
Step 5
Step 4
E16
Ø4,0*25mm
J06
P.6
Secure part (13) to part (23) and (24) with screw (E) and a screwdriver.
Secure parts (2) and (6) to part (23). Insert cam locks (J)
into part (2) (6), and tighten with a screwdriver.
E
13
E
13
E
13
E
E
13
E
13
E
13
E
13
E
E
13
TOP
TOP
J
J
J
2
6
6
unpainted!
E
E
E
E
E
E
J
J
E
13
24
23
23
beveled
side!
J
J
1st
2nd
3nd
Step 6
Step 7
P.7
J06
Secure part (24) to part (2) and (6). Insert cam locks (J)
into part (2) (6) and tighten with a screwdriver.
Secure part (1) to parts (23) and (24). Insert cam locks (J)
into parts (23) and (24). Tighten with a screwdriver. J06
J
J
J
2
6
J
J
J
6
23
1
J
J
J
24
J
J
J
24
J
1st
2nd
3nd
J
1st
2nd
3nd
Step 8
Step 9
P.8
C
10
10
Secure back lock (16) as shown above with screw (C)
and screwdriver. Ø3,5*12mm
C08
10
J04
J
J
J
J
Name and address of
the supplier and date of
production.
D
D04
Ø3,5*35mm
10
Insert back panel (10) between parts (23) and (24), secure with
cam locks (J) after this attach part (10) with part (2) using
screw (D) and tighten with a screwdriver.
24
23
2
10
10
D
D
D
D
CC
CC10
CC
16
CC
16
C
J
1st
2nd
3nd
Step 10
Step 11
P.9
9
9
D08
Ø3,5*35mm
2
D
D
D
D
8
8
G
Secure parts (8) to part (2) O .with screw (G) and hex key ( )
Secure parts (9) x2 to part (23) and parts (8) x2 with screw
(D) using the predrilled holes through (23) into parts (9).
Secure parts (9) x2 to part (24) and parts (8) x2 with screw (D)
using the predrilled holes through (24) into parts (9)
8
Ø * mm7,0 45
G04
O01
G
G
G
G
O
D
9
D
23
24
23
8
8
9
9
Step 13
P.10
F04
Ø4,0*30mm
Secure part ( ) to part ( ) with screw ( )9 8 F and screwdriver.
Step 12
8
8
F
F
F
F
F
9
9
9
9
Ø3,5*12mm
C08
K04
Joint parts (23), (24) and (10) using metal corner (K)
and screw (C) and screwdriver.
K
K
K
K
10
C
K
C
10
23
24
23
Step 15
P.11
Insert ood dowel ( ) into part ( ) to be the stop of the drawer.w B 13 B08
Ø8*30mm
B
B
B
B
Step 14
13
B
13
B
F32
Ø4,0*30mm
11
7
14
12
Secure part (11) and (12) to part (5)
with screw (F) and screwdriver (not included).
Insert part (14) and (7) between parts (11) and (12).
Secure part (7) with screw (F) and screwdriver.
5
712
5
12
F
FF
F
F
4x
F
F
F
11
11
F
B
B
B
13
13
13
F
P.12
B08
Ø8*30mm
B
B
Step 16
B
The side drawer wit WARNING LABEL,h the
nshould be mou ted in highest drawer.
Drawer Stop
Insert wood dowel (B) on the inside of the drawers, with the drawer inside the unit,
after having passed the wood dowel that is in the drawer runner.
Make sure the wood dowel is flush with the panel.
Ø6mm
Back panel
Top
Top
Wall
1º 2º
F
M
NN
M
F
L
=
=
P.13
WARNING
Serious or fatal injuries can occur from furniture tipping over. To prevent the
furniture from tipping over we recommend that it is permanently fixed to the wall.
Wall anchor and hardware are included with this product.
Please make sure hardware is suitable for your walls before installing, as different
wall materials may require different types of anchors.
Name and address
information for the
manufacturer responsible for
the anti-tip hardware and date
of production can be found on
the label on the back of the furniture.
Attach screw (F) into washer (M),
securing wall anchor (N) at the top
middle part (1).
Drill your wall with a 6mm drill (not included)
and insert hardware (L), securing wall anchor
(N) gift asher (M) and screw (F) in the wall.
L01
F02
Ø4,0*30mm
M02
N01
Step 17
Assembly Complete!
Maintenance Guide
To maintain long term performance and easy gliding of your solid wood drawers,
we recommend applying wax to the wooden guide rails.
1.Bee's wax is recommended or Paraffin wax from a standard candle can be used.
2.Apply the wax by rubbing it on the wooden guide rails where there is wood-on-wood
contact when opening and closing the drawer. (Wax should be room temperature, do
not melt the wax onto the wood)
3.Wax should be applied every few months for the first year and then only when
needed after that to keep the drawers sliding smoothly.
P.14
20
lbs
75
lbs
Step 18

Other Walker Edison Indoor Furnishing manuals
Walker Edison IAND2D User manual

Walker Edison

Walker Edison IAND2D User manual

Walker Edison D42CORMB User manual

Walker Edison

Walker Edison D42CORMB User manual

Walker Edison B48MXEB User manual

Walker Edison

Walker Edison B48MXEB User manual

Walker Edison W70FPBDSD User manual

Walker Edison

Walker Edison W70FPBDSD User manual

Walker Edison DWASH1D User manual

Walker Edison

Walker Edison DWASH1D User manual

Walker Edison BU60BALWM User manual

Walker Edison

Walker Edison BU60BALWM User manual

Walker Edison HT68FRA User manual

Walker Edison

Walker Edison HT68FRA User manual

Walker Edison Nyla HO30NYFC User manual

Walker Edison

Walker Edison Nyla HO30NYFC User manual

Walker Edison OWCLST User manual

Walker Edison

Walker Edison OWCLST User manual

Walker Edison DM42CHMG User manual

Walker Edison

Walker Edison DM42CHMG User manual

Walker Edison AF16RCSTGL User manual

Walker Edison

Walker Edison AF16RCSTGL User manual

Walker Edison BDOM3F User manual

Walker Edison

Walker Edison BDOM3F User manual

Walker Edison CIORACHS User manual

Walker Edison

Walker Edison CIORACHS User manual

Walker Edison B44DIAZ User manual

Walker Edison

Walker Edison B44DIAZ User manual

Walker Edison W70CLA4DR User manual

Walker Edison

Walker Edison W70CLA4DR User manual

Walker Edison AF42HAMCT User manual

Walker Edison

Walker Edison AF42HAMCT User manual

Walker Edison BU56SBD3DR User manual

Walker Edison

Walker Edison BU56SBD3DR User manual

Walker Edison 848PCSB User manual

Walker Edison

Walker Edison 848PCSB User manual

Walker Edison W70ARSMD User manual

Walker Edison

Walker Edison W70ARSMD User manual

Walker Edison BR3DODDNS User manual

Walker Edison

Walker Edison BR3DODDNS User manual

Walker Edison W70NOR User manual

Walker Edison

Walker Edison W70NOR User manual

Walker Edison W70FPAB User manual

Walker Edison

Walker Edison W70FPAB User manual

Walker Edison VUO43CT User manual

Walker Edison

Walker Edison VUO43CT User manual

Walker Edison BR2DSLNS User manual

Walker Edison

Walker Edison BR2DSLNS User manual

Popular Indoor Furnishing manuals by other brands

Rapidline VIVA Assembly instructions

Rapidline

Rapidline VIVA Assembly instructions

HULALA HOME SFWS0077 manual

HULALA HOME

HULALA HOME SFWS0077 manual

SEI BELMAR CK543200TX Assembly instructions

SEI

SEI BELMAR CK543200TX Assembly instructions

bizzotto KENYA 5732011 Assembly instructions

bizzotto

bizzotto KENYA 5732011 Assembly instructions

Seconique Furniture TORTILLA 54271-DS Assembly instructions

Seconique Furniture

Seconique Furniture TORTILLA 54271-DS Assembly instructions

Furniture of America Kaliyah CM3194PC Assembly instructions

Furniture of America

Furniture of America Kaliyah CM3194PC Assembly instructions

Eisys iMove-F Assembly manual

Eisys

Eisys iMove-F Assembly manual

Julian Bowen Limited Ravello RAV004 Assembly instructions

Julian Bowen Limited

Julian Bowen Limited Ravello RAV004 Assembly instructions

fantastic furniture Alfa manual

fantastic furniture

fantastic furniture Alfa manual

SMITH SYSTEM Planner Studio Bench Assembly instructions

SMITH SYSTEM

SMITH SYSTEM Planner Studio Bench Assembly instructions

aspenhome Lift Top Cocktail Table I215-9100 Assembly instructions

aspenhome

aspenhome Lift Top Cocktail Table I215-9100 Assembly instructions

Boyel Living BL-TV01-BK manual

Boyel Living

Boyel Living BL-TV01-BK manual

Tavistock CM800W Installation & Aftercare Instructions

Tavistock

Tavistock CM800W Installation & Aftercare Instructions

Whalen Huntingdon EC-HUDF Instruction booklet

Whalen

Whalen Huntingdon EC-HUDF Instruction booklet

LG OUTDOOR Marseille MAR10 quick start guide

LG OUTDOOR

LG OUTDOOR Marseille MAR10 quick start guide

Argos HOME 466/3175 quick start guide

Argos

Argos HOME 466/3175 quick start guide

overstock 194S9429TP-LCPW Assembly instruction

overstock

overstock 194S9429TP-LCPW Assembly instruction

KI CrossRoads Newspaper Display Unit Assembly instructions

KI

KI CrossRoads Newspaper Display Unit Assembly instructions

manuals.online logo
manuals.online logoBrands
  • About & Mission
  • Contact us
  • Privacy Policy
  • Terms and Conditions

Copyright 2025 Manuals.Online. All Rights Reserved.