Wallair W-Style Premium 100 User manual

Einleitung
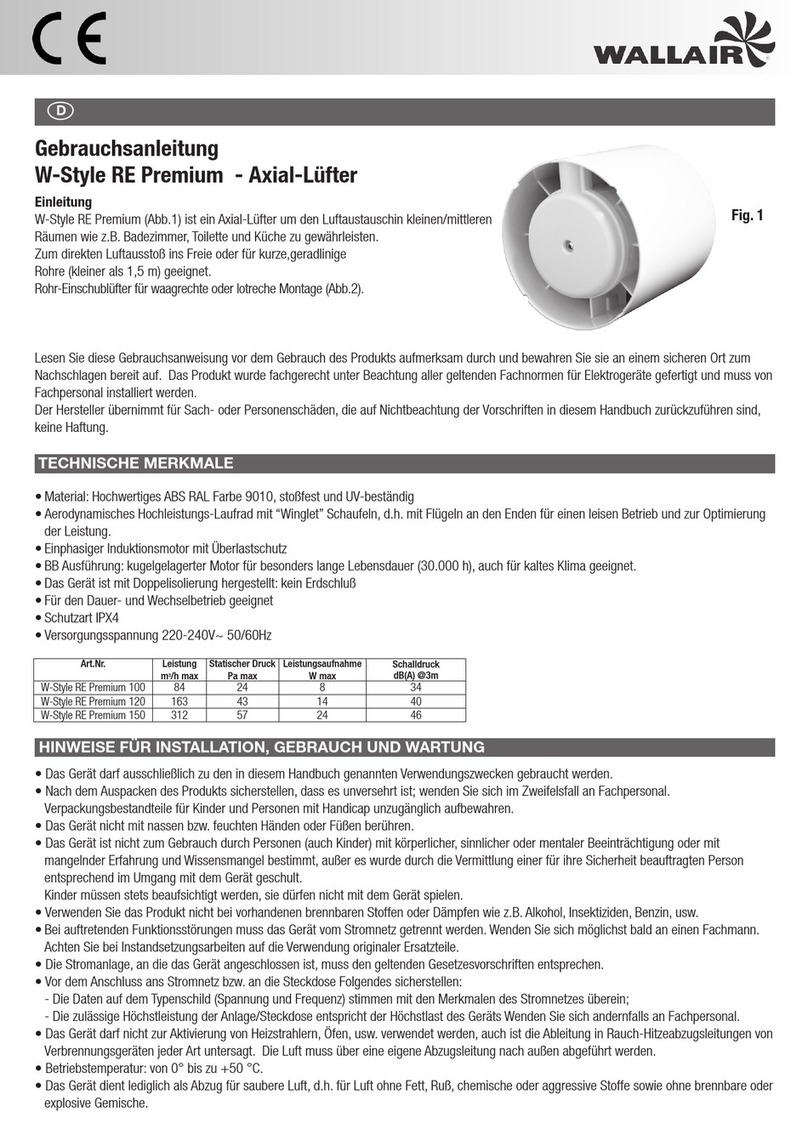
W-Style Premium (Abb.1) ist ein Axial-Lüfter um den Luftaustauschin kleinen/mittleren
Räumen wie z.B. Badezimmer, Toilette und Küche zu gewährleisten.
Zum direkten Luftausstoß ins Freie oder für kurze, geradlinige Rohre (kleiner als 1,5 m) geeignet.
Zur Installation an Wand, Decke oder Fenster geeignet (Abb.2).
Lesen Sie diese Gebrauchsanweisung vor dem Gebrauch des Produkts aufmerksam durch und
bewahren Sie sie an einem sicheren Ort zum Nachschlagen bereit auf. Das Produkt wurde fachgerecht unter Beachtung aller geltenden
Fachnormen für Elektrogeräte gefertigt und muss von Fachpersonal installiert werden.
Der Hersteller übernimmt für Sach- oder Personenschäden, die auf Nichtbeachtung der Vorschriften in diesem Handbuch zurückzuführen sind,
keine Haftung.
• Material: Hochwertiges ABS RAL Farbe 9010, stoßfest und UV-beständig
• Designer Verkleidung der Vorderseite, zu Reinigungszwecken werkzeugfrei abnehmbar.
• Hinterer Verstärkungsring, damit der Schaft bei der Installation nicht verbiegt
• Aerodynamisches Hochleistungs-Laufrad mit “Winglet” Schaufeln, d.h. mit Flügeln an den Enden für einen leisen Betrieb und zur Optimierung
der Leistung.
• Einphasiger Induktionsmotor mit Überlastschutz
• BB Ausführung: kugelgelagerter Motor für besonders lange Lebensdauer (30.000 h), auch für kaltes Klima geeignet.
• Das Gerät ist mit Doppelisolierung hergestellt: kein Erdschluß
• Für den Dauer- und Wechselbetrieb geeignet
• Schutzart IPX4
• Versorgungsspannung 220-240V~ 50/60Hz
• Das Gerät darf ausschließlich zu den in diesem Handbuch genannten Verwendungszwecken gebraucht werden.
• Nach dem Auspacken des Produkts sicherstellen, dass es unversehrt ist; wenden Sie sich im Zweifelsfall an Fachpersonal. Verpackungsbe-
standteile für Kinder und Personen mit Handicap unzugänglich aufbewahren.
• Das Gerät nicht mit nassen bzw. feuchten Händen oder Füßen berühren.
• Das Gerät ist nicht zum Gebrauch durch Personen (auch Kinder) mit körperlicher, sinnlicher oder mentaler Beeinträchtigung oder mit mangeln-
der Erfahrung und Wissensmangel bestimmt, außer es wurde durch die Vermittlung einer für ihre Sicherheit beauftragten Person entsprechend
im Umgang mit dem Gerät geschult.
Kinder müssen stets beaufsichtigt werden, sie dürfen nicht mit dem Gerät spielen.
• Verwenden Sie das Produkt nicht bei vorhandenen brennbaren Stoffen oder Dämpfen wie z.B. Alkohol, Insektiziden, Benzin, usw.
• Bei auftretenden Funktionsstörungen muss das Gerät vom Stromnetz getrennt werden. Wenden Sie sich möglichst bald an einen Fachmann.
Achten Sie bei Instandsetzungsarbeiten auf die Verwendung originaler Ersatzteile.
• Die Stromanlage, an die das Gerät angeschlossen ist, muss den geltenden Gesetzesvorschriften entsprechen.
• Vor dem Anschluss ans Stromnetz bzw. an die Steckdose Folgendes sicherstellen:
- Die Daten auf dem Typenschild (Spannung und Frequenz) stimmen mit den Merkmalen des Stromnetzes überein;
- Die zulässige Höchstleistung der Anlage/Steckdose entspricht der Höchstlast des Geräts Wenden Sie sich andernfalls an Fachpersonal.
• Das Gerät darf nicht zur Aktivierung von Heizstrahlern, Öfen, usw. verwendet werden, auch ist die Ableitung in Rauch-Hitzeabzugsleitungen von
Verbrennungsgeräten jeder Art untersagt. Die Luft muss über eine eigene Abzugsleitung nach außen abgeführt werden.
• Betriebstemperatur: von 0°bis zum +50°C.
• Das Gerät dient lediglich als Abzug für saubere Luft, d.h. für Luft ohne Fett, Ruß, chemische oder aggressive Stoffe sowie ohne brennbare oder
explosive Gemische.
Gebrauchsanleitung
W-Style Premium - Axial-Lüfter
D
TECHNISCHE MERKMALE
Art.Nr. Leistung
m3/h max
Statischer Druck
Pa max
Leistungsaufnahme
W max
Schalldruck
dB(A) @3m
W-Style Premium 100 83 27 8 26
W-Style Premium 120 140 40 14 34
W-Style Premium 150 253 51 24 42
HINWEISE FÜR INSTALLATION, GEBRAUCH UND WARTUNG
Fig. 1

2
Modello Portata
m3/h max
Pressione statica
Pa max
Consumo
W max
Pressione sonora
dB(A) @3m
W-Style Premium 100 83 27 8 26
W-Style Premium 120 140 40 14 34
W-Style Premium 150 253 51 24 42
BASISAUSFÜHRUNG
Betätigung des Lüfters über den separaten ON/OFF-Schalter oder einen Lichtschalter (Abb.14A).
MIT ZUGSCHNURSCHALTER
Betätigung des Lüfters über den eingebauten Zugschnurschalter (Abb.14C).
MIT TIMER (mit Abschaltverzögerung)
Der Lüfter ist mit einem Timer ausgestattet, der durch Betätigung des Trimmers (Abb. 15B) zwischen 1 Minute und circa 25 Minuten eingestellt
werden kann.
Funktionsweise: Bei Anschluss nach Schaltplan gemäß Abbildung 14B wird der Lüfter nach dem Einschalten des Lichts mit einer Verzögerung
von max. 1,5 Sekunden aktiviert. Nach dem Ausschalten des Lichts läuft der Lüfter noch den eingestellten Zeitraum weiter.
MIT FEUCHTIGKEITSSENSOR UND TIMER
Der Lüfter ist mit einer Feuchtigkeitssonde ausgestattet, die Auslöseschwelle liegt zwischen 50% und 95% relativer Luftfeuchte. Der Timer
reguliert die Einschaltzeit zwischen ca. 1 und 25 Minuten durch Betätigung der entsprechenden Trimmer (Abb. 15D).
Wird der Trimmer HY vollständig gegen den Uhrzeigersinn gedreht, wird die Feuchtigkeitsmessfunktion abgeschaltet.
Funktionsweise des automatischen Feuchtigkeitsmessers: Bei Anschluss nach Schaltplan gemäß Abbildung 14D wird der Lüfter bei Überschrei-
ten der relativen Feuchtigkeit aktiviert. Bei Unterschreiten des Grenzwerts läuft der Lüfter noch den eingestellten Zeitraum weiter.
Funktionsweise über separates Schalter: Bei Anschluss nach Schaltplan gemäß Abbildung 14D wird der Lüfter nach dem Einschalten des Lichts
mit einer Verzögerung von max. 1,5 Sekunden aktiviert. Nach dem Ausschalten des Lichts läuft der Lüfter noch den eingestellten Zeitraum weiter.
Funktionsweise über Zugschnurschalter (HTPC Ausführug – Abb.15C): nach dem Einschalten aktiviert der Lüfter mit einer Verzögerung von max
1,5 Sekunden. Nach dem Ausschalten läuft der Lüfter noch den eingestellten Zeitraum weiter.
Achtung: Liegt der Feuchtigkeitsgehalt über dem eingestellten Grenzwert, so hat der Automatikbetrieb Vorrang vor dem manuellen Betrieb, d.h.
der Lüfter kann mit dem Schalter nicht abgeschaltet werden.
AUSFÜHRUNGEN
• Das Gerät vor Witterungseinflüssen (Regen, Sonne, Schnee, usw.) schützen).
• Das Gerät oder Teile davon nicht in Wasser oder andere Flüssigkeiten tauchen.
• Schalten Sie den Hauptschalter der Anlage bei Funktionsstörungen oder zur Reinigung stets ab.
• Für die Installation ist ein mehrpoliger Schalter im Versorgungsnetz gemäß der Installationsregeln erforderlich, um in den Zustand der Über-
spannungskategorie III die komplette Abschaltung versorgen (Öffnungsabstand der Kontakte von mindestens 3mm).
• Wenn das Stromversorgungskabel beschädigt ist, darf dessen Austausch nur durch den Hersteller, den Kundendienst oder autorisiertes Perso-
nal erfolgen, um Gefährdungen zu vermeiden.
• Das Abzugs- und Ausstoßgitter darf nicht verstopfen, um eine optimale Luftdurchlässigkeit zu gewährleisten.
• Eine angemessene Rückkehr der Luft in den Raum unter Beachtung der geltenden Vorschriften beachten, um einen korrekten Gerätebetrieb zu
gewährleisten.
• Ist in dem Raum, in dem das Gerät installiert ist, auch ein mit Brennstoff betriebenes Gerät im Einsatz (Boiler, Metanheizung, usw. in einem
nicht dichten Raum), muss ein geeigneter Lufteintritt sichergestellt werden, um eine gute Verbrennung und den korrekten Betrieb der Geräte zu
gewährleisten.
• Die Installation muß so ausgeführt werden, daß das Laufrad beim Prüffingerkontakt von der Ausblasseite her, gemäß den gelteenden Unfall-
verhütungsvorschriften (Probefühler der Vorschriften EN61032 gemäss), nicht zugänglich ist.
• Deckenmontage
Um die Schutzart IPX4 zu gewährleisten ist für die Deckenmontage ein spezielles, nicht im Lieferumfang enthaltenes Montageset erforderlich. Für
die Versorgungskabel stets nur den Eingang an der Rückseite verwenden. Kann es am Entlüftungsrohr zur Kondenswasserbildung kommen, ist
ein Ableitungssystem erforderlich, das verhindert, dass das Kondenswasser durch den Lüfter in die Umgebung gelangt.
Achtung:Ohne entsprechendes Montageset darf das Produkt nicht an der Decke montiert werden.
• Fenstermontage
Im Fall von Festermontage ist ein spezielles nicht im Lieferumfang enthaltenes Montageset erforderlilch.
Achtung:Ohne entsprechendes Montageset darf das Produkt nicht am Fenster montiert werden.
KONFORMITÄT NACH NORMEN
2006/95/EC Niederspannungsrichtlinie (LVD)
2004/108/EC Elektromagnetische Verträglichkeit (EMV)
nach der folgenden Normen:
elektrische Sicherheit
EN60335-1(2008); EN 60335-2-80(2005); EN 60335-2-80/A2(2009)
Elektromagnetische Verträglichkeit
EN 55014-1(2006)+A1+A2; EN 55014-2(1997)+A1(2001)+A2(2008)+IS1(2007)
EN 61000-3-2(2006)+A1(2009)+A2(2009); EN 61000-3-3(2008).

3
Introduzione
W-Style Premium (fig.1) è un aspiratore assiale progettato per garantire il ricambio
dell’aria in ambienti di piccole/medie dimensioni quali stanze da bagno,
toilette e cucine.
Adatto per l’espulsione dell’aria direttamente verso l’esterno o in presenza
di brevi canalizzazioni lineari (inferiore a 1,5 m).
Installabile a parete, soffitto e a vetro (fig.2).
Leggere questo manuale con attenzione prima di usare il prodotto e conservarlo in un posto sicuro così da poterlo consultare all’occorrenza.
Il prodotto è costruito a regola d’arte e nel rispetto delle normative vigenti in materia di apparecchiature elettriche e deve essere installato da per-
sonale tecnicamente qualificato.
La ditta costruttrice non si assume responsabilità per danni a persone o cose derivanti dalla mancata osservanza delle norme contenute nel pre-
sente libretto.
• Materiale: ABS colore RAL 9010 di alta qualità, resistente agli urti e ai raggi UV
• Copri-frontale design smontabile per pulizia senza l’utilizzo di utensili
• Anello posteriore di rinforzo per prevenire che il canotto si deformi durante l’installazione
• Ventola aerodinamica ad alta efficienza, con pale a “winglet”, cioè provviste di alette di estremità per ottimizzare la silenziosità e il rendimento
• Versione BB: motore montato su cuscinetti a sfera che garantiscono al prodotto un ciclo di vita più lungo (30.000h) e che lo rendono adatto anche per
climi freddi
• Realizzato in doppio isolamento: non necessita della messa a terra
• Adatto per funzionamento continuo o ad intermittenza
• Grado di protezione IPX4
• Tensione di alimentazione 220-240V~ 50/60Hz
• L’apparecchio non deve essere utilizzato in applicazioni diverse da quelle indicate in questo manuale.
• Dopo aver rimosso il prodotto dall’imballo, assicurarsi della sua integrità; in caso di dubbio, rivolgersi a personale qualificato. Non lasciare parti
dell’imballo alla portata di bambini o persone diversamente abili.
• Non toccare l’apparecchio con mani/piedi umidi o bagnati.
• L’apparecchio non è destinato a essere usato da persone (bambini compresi) le cui capacità fisiche, sensoriali o mentali siano ridotte oppure
con mancanza di esperienza e di conoscenza, a meno che esse abbiano potuto beneficiare, attraverso l’intermediazione di una persona respon-
sabile della loro sicurezza, di una sorveglianza o di istruzioni riguardanti l’uso dell’apparecchio.
I bambini devono essere supervisionati per assicurarsi che non giochino con l’apparecchio.
• Non impiegare il prodotto in presenza di sostanze o vapori infiammabili, come alcool, insetticidi, benzina, etc.
• In caso si rilevi qualsiasi tipo di anomalia nel funzionamento, scollegare l’apparecchio dalla rete elettrica e rivolgersi al più presto a personale
qualificato. In caso di riparazione, richiedere esclusivamente ricambi originali.
• L’impianto elettrico a cui e’ collegato il prodotto deve essere conforme alle normative vigenti.
• Prima di collegare il prodotto alla rete di alimentazione o alla presa elettrica accertarsi che:
- i dati di targa (tensione e frequenza) siano rispondenti a quelli della rete di distribuzione elettrica;
- la portata dell’impianto/presa sia adeguata alla potenza massima dell’apparecchio. In caso contrario rivolgersi a personale qualificato.
• L’ apparecchio non deve essere impiegato come attivatore di scaldabagni, stufe, ecc., nè deve scaricare in condotti adibiti all’evacuazione di
aria calda/fumi derivanti da alcun tipo di apparecchio a combustione. Deve espellere l’aria all’esterno tramite un proprio condotto specifico.
• Temperatura di funzionamento: da 0°C fino a +50°C.
• L’apparecchio è destinato ad estrarre solo aria pulita, ossia senza elementi grassi, fuliggine, agenti chimici e corrosivi, miscele infiammabili o
esplosive.
• Non lasciare l’apparecchio esposto ad agenti atmosferici (pioggia, sole, neve, etc.).
• Non immergere I’apparecchio o altre sue parti in acqua o liquidi.
• Spegnere l’interruttore generale dell’impianto ogni qual volta si rilevi un’anomalia di funzionamento o si effettuino operazioni di pulizia.
Manuale istruzioni
W-Style Premium - Aspiratore assiale
Fig. 1
CARATTERISTICHE TECNICHE
Modello Portata
m3/h max
Pressione statica
Pa max
Consumo
W max
Pressione sonora
dB(A) @3m
W-Style Premium 100 83 27 8 26
W-Style Premium 120 140 40 14 34
W-Style Premium 150 253 51 24 42
PRECAUZIONI PER L’INSTALLAZIONE, L’USO E LA MANUTENZIONE

4
BASE
L’aspiratore si aziona tramite interruttore separato ON/OFF oppure tramite l’interruttore luce (fig. 14A).
PULL CORD
L’aspiratore si aziona tramite interruttore pull cord integrato (fig.14C).
CON TIMER (con ritardo di spegnimento)
L’aspiratore è provvisto di circuito timer, regolabile da circa 1 minuto a circa 25 minuti agendo sul trimmer (fig. 15B).
Funzionamento: collegato secondo lo schema di figura 14B, dopo l’accensione luce, l’aspiratore si attiva con un ritardo di 1,5 secondi max. Dopo
lo spegnimento luce, l’aspiratore continua a funzionare per il periodo di tempo pre-impostato.
CON UMIDOSTATO TEMPORIZZATO
L’aspiratore è provvisto di circuito con sonda di rilevazione umidità, la cui soglia di intervento è regolabile dal 50% al 95% di Umidità Relativa, e di
timer regolabile da circa 1 minuto a circa 25 minuti agendo sui rispettivi trimmer (fig. 15D).
Girando il trimmer HY completamente in senso orario, la funzione umidostato viene esclusa.
Funzionamento automatico umidostato: collegato secondo lo schema di figura 14D quando la percentuale di Umidità Relativa supera la soglia
di intervento pre-impostata, l’aspiratore si avvia automaticamente; quando la percentuale di Umidità Relativa scende sotto la soglia, l’aspiratore
continua a funzionare per il periodo di tempo pre-impostato.
Funzionamento con collegamento a interruttore: collegato secondo lo schema di figura 14D, dopo l’accensione luce, l’aspiratore si attiva con un
ritardo di circa 1,5 secondi max; dopo lo spegnimento l’aspiratore continua a funzionare per il periodo di tempo pre-impostato.
Funzionamento tramite interruttore pull cord integrato (versione HTPC): collegamento come fig. 15C. Dopo l’accensione, l’aspiratore si attiva con
un ritardo di circa 1,5 secondi max; dopo lo spegnimento l’aspiratore continua a funzionare per il periodo di tempo pre-impostato.
Attenzione: quando il livello di Umidità Relativa è superiore alla soglia di intervento pre-impostata, il funzionamento automatico con umidostato
ha priorità sul funzionamento manuale, cioè l’aspiratore non può essere fermato tramite interruttore.
VERSIONI
• Per l’installazione occorre prevedere nella rete di alimentazione, conformemente alle regole di installazione, un interruttore onnipolare che
consenta la disconnessione completa nelle condizioni della categoria di sovratensione III (distanza dei contatti uguale o superiore a 3 mm).
• Se il cavo di alimentazione è danneggiato, esso deve essere sostituito dal costruttore o dal suo servizio assistenza tecnica o comun-
que da una persona con qualifica similare, in modo da prevenire ogni rischio.
• Non ostruire la griglia di aspirazione o di espulsione per garantire l’ottimale passaggio dell’aria.
• Assicurare un adeguato rientro dell’aria nel locale, nel rispetto del regolamento vigente, al fine di garantire il corretto funzionamento dell’appa-
recchio.
• Qualora nell’ambiente in cui è installato il prodotto sia presente un apparecchio funzionante a combustibile (scaldacqua, stufa a metano etc.,
di tipo non a “camera stagna”), è indispensabilie assicurare un adeguato ingresso d’aria, per garantire una buona combustione e il corretto
funzionamento di tali apparecchi.
• Effettuare l’installazione in modo che la girante sia inaccessibile al lato della mandata, al contatto del Dito di Prova (sonde di prova “B” della
norma EN61032), secondo le vigenti norme antinfortunistiche.
• Installazione a soffitto
In caso di installazione a soffitto, per poter garantire il grado di protezione contro l’umidità IPX4, è necessario utilizzare l’apposito kit per instal-
lazione a soffitto non in dotazione. Per i cavi di alimentazione utilizzare solo l’ingresso posteriore. Qualora esistesse la possibilità di formazione
di condensa lungo il tubo di espulsione dell’aria, prevedere un sistema di drenaggio che impedisca alla condensa di scaricarsi nell’ambiente
attraverso il ventilatore.
Attenzione: non montare il prodotto a soffitto senza apposito kit.
• Installazione a vetro
In caso di installazione a vetro è necessario utilizzare l’apposito kit non in dotazione.
Attenzione: Non montare il prodotto a vetro senza l’apposito kit.
Model Airflow
m3/h max
Static pressure
Pa max
Power
W max
Sound pressure
dB(A) @3m
W-Style Premium 100 83 27 8 26
W-Style Premium 120 140 40 14 34
W-Style Premium 150 253 51 24 42
CONFORMITA’ NORMATIVA
2006/95/EC Direttiva Bassa Tensione
2004/108/EC Direttiva di Compatibilità Elettromagnetica
secondo lo stato dell’arte delle seguenti norme:
Sicurezza elettrica
EN60335-1(2008); EN 60335-2-80(2005); EN 60335-2-80/A2(2009)
Compatibilità Eletromagnetica
EN 55014-1(2006)+A1+A2; EN 55014-2(1997)+A1(2001)+A2(2008)+IS1(2007)
EN 61000-3-2(2006)+A1(2009)+A2(2009); EN 61000-3-3(2008).

5
Introduction
W-Style Premium (fig. 1) is an axial fan designed to ensure
air extraction in small/medium-sized rooms such as bathrooms, toilets and kitchens.
Suitable for air discharge directly to the outside or in the presence of short linear
duct (less than 1.5 m).
Wall, ceiling or window installation (fig.2).
Read this manual carefully before using the product and keep it in a safe place for reference.
This product was constructed up to standard and in compliance with regulations relating to electrical equipment and must be installed by techni-
cally qualified personnel.
The manufacturer assumes no responsibility for damage to persons or property resulting from failure to observe the regulations contained in this
booklet.
• Material: High quality, impact and UV-resistant ABS colour RAL 9010
• Design front cover removable for cleaning without the use of tools
• Rear reinforcement ring to prevent spigot deformation during installation
• High efficiency aerodynamic fan with “winglet” blades to optimise quietness and efficiency
• Single phase induction motor with integral thermal protection
• BB version: motor mounted on ball bearings that guarantee a longer product life cycle (30,000 h) and suitable for cold climates
• The fan is double insulated: no earth connection is required
• Suitable for continuous or intermittent operation
• IPX4 degree of protection
• Power supply 220V to 240V~ 50/60Hz
• The device should not be used for applications other than those specified in this manual.
• After removing the product from its packaging, verify its condition. In case of doubt, contact a qualified technician. Do not leave packaging
within the reach of small children or people with disabilities.
• Do not touch the appliance with wet or damp hands/feet.
• The device is not intended for use by persons (including children) with reduced physical, sensory or mental capacities or those with a lack of
experience and knowledge, unless they have been given supervision or instruction concerning use of the device from a person responsible for
their safety.
Children should be supervised to ensure that they do not play with the device.
• Do not use the product in the presence of flammable vapours, such as alcohol, insecticides, gasoline, etc.
• If any abnormalities in operation are detected, disconnect the device from the mains supply and contact a qualified technician immediately. Use
original spare parts only for repairs.
• The electrical system to which the device is connected must comply with regulations.
• Before connecting the product to the power supply or the power outlet, ensure that:
- the data plate (voltage and frequency) correspond to those of the electrical mains
- the electrical power supply/socket is adequate for maximum device power. If not, contact a qualified technician.
• The device should not be used as an activator for water heaters, stoves, etc., nor should it discharge into hot air/fume vent ducts deriving from
any type of combustion unit. It must expel air outside via its own special duct.
• Operating temperature: 0°C up to +50 °C.
• The device is designed to extract clean air only, i.e. without grease, soot, chemical or corrosive agents, or flammable or explosive mixtures.
• Do not leave the device exposed to atmospheric agents (rain, sun, snow, etc.).
• Do not immerse the device or its parts in water or other liquids.
• Turn off the main switch whenever a malfunction is detected or when cleaning.
Installation manual
W-Style Premium - Axial fan
G
Fig. 1
TECHNICAL SPECIFICATIONS
PRECAUTIONS FOR INSTALLATION, USE AND MAINTENANCE
Model Airflow
m3/h max
Static pressure
Pa max
Power
W max
Sound pressure
dB(A) @3m
W-Style Premium 100 83 27 8 26
W-Style Premium 120 140 40 14 34
W-Style Premium 150 253 51 24 42

6
STANDARD
The fan is operated using a separate ON/OFF switch or via a light switch (fig. 14A).
PULL CORD
The fan is operated using an integrated pull cord switch (fig.14C ).
WITH TIMER (over-run)
The fan is provided with a timer circuit which is adjustable from aprox. 1 minute to 25 minutes via trimmer (fig. 15B).
Operation: connected according to the diagram in figure 14B, after the light is switched on, the fan activates with a delay of max 1.5 seconds.
After the light is switched off, the fan continues to function for a pre-set period of time.
WITH HUMIDISTAT & TIMER
The fan is equipped with a humidity detector, whose threshold is adjustable from 50% to 95% Relative Humidity, and with a timer which is
adjustable from aprox. 1 minute to 25 minutes via corresponding trimmer (fig. 15D).
Turn the trimmer HY completely clockwise and the humidistat function is deactivated.
Automatic humidistat operation: connected according to the diagram in figure 14D, when the percentage of Relative Humidity exceeds the pre-
set intervention threshold, the fan starts up automatically. When the percentage of Relative Humidity goes below the threshold, the fan continues
to function for a pre-set period of time.
Operation with switch connection: connected according to the diagram in figure 14D, after the light is switched on, the fan activates with a delay
of aprox. 1.5 seconds. After it is switched off, the fan continues to function for a pre-set period of time.
Operation via pull cord switch (HTPC version): connected according to the diagram in figure 15C. By switching on, the fan activates with a delay
of aprox. 1.5 seconds. After switching off, the fan continues to function for a pre-set period of time
Attention: When the relative humidity level is higher than the pre-set threshold, automatic operation with humidistat has priority over manual
operation, or rather the fan cannot be stopped via switch.
VERSIONS
• For installation an omnipolar switch should be incorporated in the fixed wiring, in accordance with the wiring regulations, to provide a full
disconnection under overvoltage category III conditions (contact opening distance equal to or greater than 3mm).
• If the supply cord is damaged, it must be replaced by the manufacturer, its service agent or similarly qualified persons in order to avoid a
hazard.
• Do not obstruct the fan or exhaust grille to ensure optimum air passage.
• Ensure adequate air return into the room in compliance with existing regulations in order to ensure proper device operation.
• If the environment in which the product is installed also houses a fuel-operating device (water heater, methane stove etc., that is not a “sealed
chamber” type), it is essential to ensure adequate air intake, to ensure good combustion and proper equipment operation.
• Install the product so that the impeller is not accessible from the air outlet side as verified by contact with the Test Finger (test probe “B” of the
norm EN61032) in compliance with the current safety regulations.
• Ceiling installation
In order to guarantee the IPX4 degree of protection against moisture in case of ceiling installation, use the appropriate ceiling mount kit, which
is not included. Use only the rear entry hole for supply cables. If there is a possibility of condensation along the air discharge duct, provide a
drainage system to prevent condensation from discharging into the environment through the fan.
Attention: do not mount the product on the ceiling without this kit.
• Window installation
In case of window installation it is necessary to use the appropriate window kit, which is not included.
Attention: do not mount the product on the window without this kit.
STANDARD CONFORMITY
2006/95/EC Low Voltage Directive (LVD)
2004/108/EC Electromagnetic Compatibility (EMC),
in conformity with the following standards:
Electrical Safety
EN60335-1(2008); EN 60335-2-80(2005); EN 60335-2-80/A2(2009)
Electromagnetic Compatibility
EN 55014-1(2006)+A1+A2; EN 55014-2(1997)+A1(2001)+A2(2008)+IS1(2007)
EN 61000-3-2(2006)+A1(2009)+A2(2009); EN 61000-3-3(2008).

7
Introduction
W-Style Premium (figure 1) est un aérateur axial conçu pour garantir le renouvellement
de l’air dans des endroits de petites/grandes dimensions tels que les salles de bain,
toilettes et cuisines.
Adapté pour l’expulsion de l’air directement vers l’extérieur ou à travers
de courtes canalisations linéaires (inférieur à 1,5 m).
Installation murale, au plafond ou à la fenêtre (fig.2).
Lisez ce manuel avec attention avant d’utiliser le produit et conservez-le dans un endroit sûr afin de pourvoir le consulter si nécessaire.
Le produit est construit selon les règles de l’art et conformément aux normes en vigueur en matière d’appareils électriques, et doit être installé
par du personnel techniquement qualifié.
L’entreprise de construction n’assume aucune responsabilité pour les dommages causés aux personnes ou aux choses dérivant du non-respect
des normes contenues dans ce manuel.
• Matériau : ABS couleur RAL 9010 de haute qualité, résistant aux chocs et aux rayons UV
• Façade design démontable pour un nettoyage sans l’utilisation d’outils
• Anneau de renfort arrière pour éviter que le tube se déforme durant l’installation.
• Hélice aérodynamique à haute efficacité, avec des pales en “winglet”, c’est à dire pourvues d’ailettes d’extrémité qui optimisent le silence et le
rendement.
• Moteur monophasé à induction avec protection thermique
• Version BB: moteur monté sur des roulements à billes qui garantissent au produit un cycle de vie plus long (30 000 h) et qui le rendent aussi adapté aux
climats froids.
• Construit ave une double isolation: il n’y a pas besoin de connection à une prise de terre
• Adapté à un fonctionnement en continu ou intermittent
• Degrés de protection IPX4
• Tension d’alimentation 220-240V~50/60Hz
• L’appareil ne doit pas être utilisé pour des applications autres que celles indiquées dans ce manuel.
• Après avoir déballé le produit, assurez-vous qu’il soit intact ; en cas de doute, adressez-vous au personnel qualifié. Ne laissez pas les parties
de l’emballage à la portée des enfants ou de personnes handicapées.
• Ne touchez pas l’appareil avec les mains/pieds humides ou mouillés.
• L’appareil n’est pas conçu pour être utilisé par des personnes (y compris les enfants) aux capacités physiques, sensorielles ou mentales
réduites ou bien manquant d’expérience et de connaissance, sauf si elles ont pu bénéficier, par l’intermédiaire d’une personne responsable de
leur sécurité, d’une surveillance ou d’instructions concernant l’utilisation de l’appareil.
Les enfants doivent être surveillés afin de s’assurer qu’ils ne jouent pas avec l’appareil.
• N’utilisez pas le produit en présence de substances ou vapeurs inflammables, comme l’alcool, insecticides, essence, etc.
• En cas d’une quelconque anomalie dans le fonctionnement, débranchez l’appareil du réseau électrique et adressez-vous au plus vite au
personnel qualifié. En cas de réparation, demandez des pièces de rechange exclusivement originales.
• L’installation électrique à laquelle le produit est raccordé doit être conforme aux normes en vigueur.
• Avant de brancher le produit au réseau d’alimentation ou à la prise électrique, assurez-vous que :
- les données de la plaque signalétique (tension et fréquence) correspondent à celles du réseau de distribution électrique ;
- le débit de l’installation/prise soit approprié à la puissance maximum de l’appareil. Dans le cas contraire, adressez-vous à du personnel
qualifié.
• L’ appareil ne doit pas être utilisé comme activateur de chauffe-eau, poêles, etc., et ne doit pas évacuer dans des conduits utilisés pour l’éva-
cuation d’air chaud/ fumées provenant d’un quelconque appareil à combustion. Il doit expulser l’air à l’extérieur à travers un conduit spécifique.
• Température de fonctionnement: 0° jusqu’à +50 °C.
• L’appareil est conçu pour extraire uniquement de l’air pur, c’est à dire sans éléments graisseux, suie, agents chimique ou corrosifs, mélanges
inflammables ou explosifs.
• Ne laissez pas l’appareil exposé aux agents atmosphériques (pluie, soleil, neige, etc.).
Manuel d’instructions
W-Style Premium - Aérateur axial
F
Fig. 1
CARACTÉRISTIQUES TECHNIQUES
PRÉCAUTIONS POUR L’INSTALLATION, L’UTILISATION ET L’ENTRETIEN
Model Débit
m3/h max
Pression statique
Pa max
Consommation
W max
Pression acoustique
dB(A) @3m
W-Style Premium 100 83 27 8 26
W-Style Premium 120 140 40 14 34
W-Style Premium 150 253 51 24 42

8
BASE
L’aérateur s’active au moyen de l’interrupteur séparé ON/OFF ou bien de l’interrupteur de la lumière (fig. 14A).
AVEC INTERRUPTEUR À TIRETTE
L’aérateur s’active au moyen de l’interrupteur à tirette intégré (fig.14C)
AVEC TIMER (avec extinction temporisée)
L’aérateur est pourvu d’un circuit timer, réglable d’environ 1 minute à 25 minutes en agissant sur le trimmer (fig.15B).
Fonctionnement : une fois raccordé selon le schéma indiqué à la figure 14B, et une fois la lumière allumée, l’aérateur s’active avec un retard de
1,5 secondes max. Après l’extinction de la lumière, l’aérateur continue de fonctionner durant la période de temps prédéfinie.
AVEC HYGROSTAT TEMPORISÉ
L’aérateur est pourvu d’un circuit avec une sonde de mesure d’humidité, dont le seuil d’intervention est réglable de 50% à 95% d’Humidité
Relative, et d’un timer réglable d’environ 1 minute à 25 minutes en agissant sur les trimmer respectifs (fig. 15D).
En tournant complètement le trimmer HY dans le sens horaire, la fonction hygrostat est exclue.
Fonctionnement automatique de l’hygrostat : une fois raccordé selon le schéma indiqué sur la figure 14D, lorsque le pourcentage d’Humidité
Relative dépasse le seuil d’intervention prédéfini, l’aérateur s’active automatiquement ; lorsque le pourcentage d’Humidité Relative descend en-
dessous du seuil, l’aérateur continue de fonctionner durant la période de temps prédéfinie.
Fonctionnement avec raccordement à un interrupteur : une fois raccordé selon le schéma indiqué sur la figure 14D, après avoir allumé la
lumière, l’aérateur s’active avec un retard d’environ 1,5 secondes max. ; après l’extinction, l’aérateur continue de fonctionner durant la période
de temps prédéfinie.
Fonctionnement avec interrupteur à tirette (version HTPC) : raccordé selon le schéma indiqué à la figure 15C. Après l’allumage, l’aérateur s’active
avec un retard d’environ 1,5 secondes max ; après l’extinction, l’aérateur continue de fonctionner durant la période de temps prédéfinie.
Attention: quand le niveau d’humidité Relative est supérieur au seuil d’intervention prédéfini, le fonctionnement automatique avec hygrostat est
prioritaire sur le fonctionnement manuel, c’est à dire que l’aérateur ne peut être arrêté au moyen de l’interrupteur.
VERSIONS
• Ne plongez pas l’appareil ou ses parties dan l’eau ou d’autres liquides.
• Éteignez l’interrupteur général de l’installation chaque fois qu’une anomalie dans le fonctionnement se présente ou durant le nettoyage.
• Pour l’installation, prévoyez dans le réseau d’alimentation électrique, conformément aux prescriptions de sécurité, un interrupteur omnipolaire
de sectionnement, assurant la complète déconnexion dans la condition de catégorie de surtension III (avec une distance d’ouverture des
contacts égale ou supérieure à 3mm).
• Si le câble d’alimentation est endommagé, es doit être remplacer par le fabricant, sa service d’assistance ou personnel qualifié de façon
similaire pour éviter de danger.
• Ne bouchez pas la grille d’aspiration ou d’expulsion de l’air afin de garantir un meilleur passage de l’air.
• Assurez-vous que l’air arrive adéquatement dans la pièce, conformément au règlement en vigueur, afin de garantir le bon fonctionnement de
l’appareil.
• Si la pièce d’installation de l’appareil est équipée d’un appareil fonctionnant avec un combustible (chauffe-eau, poêle au méthane, etc., de type
non avec “chambre étanche”), il est indispensable d’assurer une entrée d’air adéquate, afin de garantir une bonne combustion et le fonctionne-
ment correct de ces appareils.
• Installer l’appareil de sorte que la turbine n’entre pas en contact, côté refoulement, avec le doigt d’essai (sonde de test “B” de la norme
EN61032) conformément aux normes contre les accidents en vigueur.
• Installation au plafond
En cas d’installation au plafond, afin de garantir le degré de protection contre l’humidité IPX4, il est nécessaire d’utiliser le kit spécial pour instal-
lation au plafond non fourni. Pour les câbles d’alimentation, utiliser seulement l’entrée située à l’arrière. Si une éventuelle condensation se forme
le long du tuyau d’expulsion de l’air, prévoir un système de drainage qui empêche la condensation de se répandre dans le local à travers le
ventilateur.
Attention: ne pas monter le produit au plafond sans le kit spécial.
• Installation à la fenêtre
En cas d’installation à la fenêtre, il est nécessaire d’utiliser le kit spécial pour l’installation à la fenêtre non fourni.
Attention : ne pas monter le produit à la fenêtre sans le kit spécial.
CONFORMITE’ AUX NORMES
2006/95/EC Basse Tension (DBT)
2004/108/EC Compatibilité Électromagnétique (CEM),
in conformité aux normes suivantes::
Sécurité électrique:
EN60335-1(2008); EN 60335-2-80(2005); EN 60335-2-80/A2(2009)
Compatibilité Électromagnétique
EN 55014-1(2006)+A1+A2; EN 55014-2(1997)+A1(2001)+A2(2008)+IS1(2007)
EN 61000-3-2(2006)+A1(2009)+A2(2009); EN 61000-3-3(2008).
Art.Nr. Bereik
max. m3/h
Statische druk
max. Pa
Verbruik
max. W
Geluidsdichtheid
dB(A) @3m
W-Style Premium 100 83 27 8 26
W-Style Premium 120 140 40 14 34
W-Style Premium 150 253 51 24 42

9
Introductie
W-Style Premium (fig.1) is een axiale luchtafzuiger, ontworpen om de luchtverfrissing te garanderen
in kleine/middelgrote ruimtes, zoals badkamers,
toiletten en keukens
Geschikt om de lucht direct naar buiten te blazen of met het gebruik
van korte lineaire afvoerbuizen (korter dan 1,5 m).
Te installeren in muren, plafonds en glas (fig.2).
Lees deze handleiding aandachtig voordat u het product in gebruik neemt en bewaar het op
een veilige plaats, zodat u deze kunt raadplegen indien het nodig is.
Het product is vakkundig geconstrueerd en in overeenstemming met de huidige regelgeving met betrekking tot technische apparatuur, en moet
geïnstalleerd worden door technisch gekwalificeerd personeel.
De fabrikant is niet aansprakelijk voor schade aan personen of eigendommen als gevolg van niet-naleving van de regels in dit boekje.
• Materiaal: ABS kleur RAL 9010 van hoogwaardige kwaliteit, stootbestendig en UV-resistent
• Frontcover design, demonteerbaar voor reiniging, zonder het gebruik van gereedschap
• Versterkingsring achterzijde om te voorkomen dat de mof vervormt tijdens de installatie
• Aerodynamische ventilator met hoog rendement, met bladen met “winglets”, die zijn voorzien van vleugeltjes op het uiteinde om het rend
ment te optimaliseren en geluid te reduceren
• Versie BB: motor gemonteerd op kogellagers die een langere levensduur van het product garanderen en die het ook geschikt maakt voor koude
klimaten
• Dubbel geïsoleerd: aarding niet nodig
• Geschikt voor doorlopend en onderbroken gebruik
• Beschermingsgraad IPX4
• Voedingsspanning 220-240V~ 50/60Hz
• Het apparaat mag niet worden gebruikt voor andere toepassingen dan vermeld in deze handleiding.
• Controleer eerst de conditie van het apparaat nadat u het uit de verpakking hebt gehaald, neem bij twijfel eerst contact op met gekwalificeerd
personeel. Laat geen onderdelen van de verpakking binnen het bereik van kleine kinderen of personen met een handicap.
• Raak het apparaat niet als uw handen/voeten vochtig of nat zijn.
• Het apparaat is niet bestemd voor gebruik door personen (inclusief kinderen) met verminderde lichamelijke, zintuiglijke of verstandelijke verm
gens, noch door personen met een gebrek aan kennis en ervaring, behalve met de tussenkomst van een persoon die verantwoordelijk is voor
hun veiligheid, die toezicht houdt of instructies geeft over het gebruik van het apparaat. Kinderen moeten onder toezicht staan om te voorkomen
dat zij met het apparaat gaan spelen.
• Gebruik het apparaat niet in de nabijheid van ontvlambare substanties of gassen zoals alcohol, insecticiden, benzine, etc.
• Indien zich onregelmatigheden voordoen tijdens de werking, dient u de stekker van het apparaat onmiddellijk uit het stopcontact te halen en
contact op te nemen met gekwalificeerd personeel. Gebruik voor herstellingen enkel originele onderdelen.
• De elektrische installatie waar het apparaat op aangesloten is moet volledig voldoen aan de huidige regelgeving.
• Voordat u het apparaat aansluit op het voedingsnetwerk of stopcontact, moet u zich er eerst van verzekeren dat:
- de gegevens op het plaatje (voltage en frequentie) overeenkomen met deze van de elektriciteitsvoorziening;
- het bereik van de installatie/stekker geschikt is voor de maximale potentie van het apparaat. Neem contact op met gekwalificeerd personeel
als dit niet het geval is.
• Het apparaat mag niet gebruikt worden als activeringsmiddel voor boilers, kachels, etc., noch dient de afvoer aangesloten te worden op buizen
die bestemd zijn voor de afvoer van warme lucht/rook van enig welk apparaat dat op brandstof werkt. De lucht moet worden afgevoerd door
een eigen specifieke afvoerbuis.
• Werkingstemperatuur: van 0°C tot +50°C.
• Het apparaat is enkel ontworpen voor de afvoer van schone lucht, dus zonder vetten, roetdeeltjes, chemische en bijtende stoffen, ontvlambare
of explosieve mengsels.
• Het apparaat mag niet blootgesteld worden aan atmosferische elementen (regen, zon, sneeuw, etc.).
• Dompel het apparaat of de onderdelen, niet onder in water of andere vloeistoffen.
Handleiding
W-Style Premium - Axiale luchtafzuiger
O
Fig. 1
TECHNISCHE EIGENSCHAPPEN
Art.Nr. Bereik
max. m3/h
Statische druk
max. Pa
Verbruik
max. W
Geluidsdichtheid
dB(A) @3m
W-Style Premium 100 83 27 8 26
W-Style Premium 120 140 40 14 34
W-Style Premium 150 253 51 24 42
VOORZORGSMAATREGELEN VOOR INSTALLATIE, GEBRUIK EN ONDERHOUD

10
BASIS
De luchtafzuiger wordt bediend via een aparte ON/OFF-schakelaar of door de lichtschakelaar (afb. 14A).
TREKKOORD
De luchtafzuiger wordt bediend via een geïntegreerd trekkoord (fig.14C).
MET TIMER (met uitschakelvertraging)
De ventilator is voorzien van een timercircuit, instelbaar tussen ongeveer 1 minuut en ongeveer 25 minuten werkend op de trimmer (fig. 15B).
Werking: aangesloten volgens het schema van figuur 14B, na het inschakelen van het licht zal de ventilator na 1,5 seconde starten. Na het
uitschakelen van het licht zal de ventilator gedurende de vooraf ingestelde tijd blijven werken.
MET GETIMEDE HYGROSTAAT
De ventilator is voorzien van een circuit met vochtdetectieprobe, waarvan de grenswaarden instelbaar zijn tussen 50% en 5% relatieve luchtvoch-
tigheid, en een instelbare timer van ongeveer 1 minuut tot ongeveer 25 minuten, reagerend op hun respectievelijke trimmers (fig. 15D).
Door de trimmer HY volledig met de klok mee te draaien, wordt de hygrostaatfunctie uitgeschakeld.
Automatische werking hygrostaat: aansluiting volgens het schema van figuur 14D. Wanneer het luchtvochtigheidspercentage hoger is dan de vo-
oraf ingestelde waarde zal de ventilator automatisch starten; wanneer het luchtvochtigheidspercentage lager is dan de vooraf ingestelde waarde
zal de ventilator stoppen na de vooraf ingestelde stoptijd.
Werking met aansluiting op de lichtschakelaar: aansluiting volgens het schema van figuur 14D, na het inschakelen van het licht zal de ventilator
na maximaal 1,5 seconde starten. Na het uitschakelen van het licht zal de ventilator gedurende de vooraf ingestelde tijd blijven werken.
Werking met geïntegreerd trekkoord (versie HTPC): aansluiting volgens fig. 15C. na het inschakelen zal de ventilator na maximaal 1,5 seconde
starten; na het uitschakelen zal de ventilator gedurende de vooraf ingestelde tijd blijven werken.
Let op: wanneer het relatieve luchtvochtigheidsniveau hoger is dan de vooraf ingestelde waarde zal de automatische hygrostaatfunctie voorrang
hebben op de handmatige bediening; waarbij de ventilator niet kan uitgeschakeld worden met de schakelaar.
VERSIES
OVEREENSTEMMING NORMEN
2006/95/EC Laagspanningsrichtlijn
2004/108/EC Richtlijn elektromagnetische compatibiliteit
Overeenkomstig state of the art van de volgende normen:
Elektrische veiligheid
EN60335-1(2008); EN 60335-2-80(2005); EN 60335-2-80/A2(2009)
Elektromagnetische compatibiliteit
EN 55014-1(2006)+A1+A2; EN 55014-2(1997)+A1(2001)+A2(2008)+IS1(2007)
EN 61000-3-2(2006)+A1(2009)+A2(2009); EN 61000-3-3(2008).
• Schakel de hoofdschakelaar uit wanneer u storingen opmerkt of bij schoonmaakwerkzaamheden.
• Voor de installatie moet men een unipolaire schakelaar voorzien, conform de regels voor installatie, die de totale loskoppeling toelaat bij
overbelasting van categorie III (afstand tussen de contacten groter of gelijk aan 3 mm).
• Als het netsnoer beschadigd is, dient deze, om elk gevaar te voorkomen, te worden vervangen door de fabrikant of zijn technische
dienstverlener, of door een gelijkwaardig gekwalificeerd persoon.
• Om een optimale luchtstroom te garanderen, mag het rooster voor luchttoevoer of –afvoer niet geblokkeerd worden.
• Om de goede werking van het apparaat te verzekeren dient u ervoor te zorgen dat er voldoende lucht terug binnenkomt in de ruimte, in
overeenstemming met de bestaande regelgeving.
• Indien er in de omgeving waarin het apparaat een apparaat geïnstalleerd is dat op brandstof werkt (boiler, gaskachel etc. Van het niet-
“gasdichte” type), is het noodzakelijk om voldoende luchttoevoer te verzekeren, zodat een goede verbranding en werking van deze apparaten
gegarandeerd kan worden.
• Installeer dusdanig dat de waaier niet toegankelijk is voor de afvoerzijde, bij contact met de Dito di Prova (testsonde “B” van norm EN61032), in
overeenstemming met de geldende veiligheidsnormen.
• Plafondinstallatie
Teneinde de beschermingsgraad tegen vocht IPX4 te garanderen bij installatie in het plafond, dient de niet-bijgeleverde specifieke
plafondmontagekit gebruikt te worden. Gebruik voor de netsnoeren alleen de ingang aan de achterkant. Indien het mogelijk is dat er condens
ontstaat langs de luchtafvoerbuis, zorg dan voor een afwateringssysteem om te voorkomen dat het condenswater via de luchtafzuiger in de
ruimte komt.
Let op: installeer het product niet in het plafond zonder de juiste montagekit.
• Installatie in glas
Bij installatie in glas is het noodzakelijk om de niet-bijgeleverde, speciale montagekit te gebruiken.
Let op: installeer het product niet in glas zonder de juiste montagekit.

11
Decke (Zubehör nach Anfrage)
soffitto (accessorio a richiesta)
ceiling (accessory on demand)
plafond (accessoire sur demande)
plafond (accessoire op aanvraag)
Fenster (Zubehör nach Anfrage)
vetro (kit a richiesta)
window (kit on demand)
vitre (kit sur demande)
glas (kit op aanvraag)
Wand
parete / pannello
wall
mur
muren / paneel
kurztes Rohr (kleiner als 1,5m) - breve canalizzazione (inferiore a 1,5m)
short length ducting (less than 1.5m) - conduit court (inférieur à 1,5m)
korte afvoerbuizen (korter dan 1,5 m)
Perimeter-Ansaug
aspirazione perimetrale
perimetrical exhausting
aspiration périmetrique
Perimetrische ventilatie
INSTALLATION - INSTALLAZIONE - INSTALLATION - INSTALLATION - INSTALLATIE (Fig/Abb.2)

12
4
6
1
5
W-Style Premium 100= ø99 mm
W-Style Premium 120= ø119 mm
W-Style Premium 150= ø149 mm
7
8
6
Ø
MONTAGE UND ELEKTRISCHE ANSCHLÜßE - MONTAGGIO E COLLEGAMENTI ELETTRICI
MOUNTING AND ELECTRICAL WIRING - MONTAGE ET BRANCHEMENTS ELECTRIQUES
MONTAGE EN ELEKTRISCHE BEDRADING

13
4 x ø 5 mm
9A
10A 11A
13A
12A
ø 10mm
2 X 0,5 ÷ 1,5 mm2
3 X 0,5 ÷ 1,5 mm2
3 X 0,5 ÷ 1,5 mm2
4 X 0,5 ÷ 1 mm2
{
BASE/STD
{
T-HT
Ød
Ød
AUFPUTZ-KABEL
CAVO A PARETE
SURFACE CABLE CÂBLE Á MUR
MUURKABEL
H03VV-F ; H05VV-F

14
H03VV-F ; H05VV-F
(sez. max 1 mm²)
11B
12B 13B
10B
9B 4 x ø 5 mm
14A 15A
2 X 0,5 ÷ 1,5 mm2
3 X 0,5 ÷ 1,5 mm2
3 X 0,5 ÷ 1,5 mm2
4 X 0,5 ÷ 1 mm2
{
BASE/STD
{
T-HT
UNTERPUTZ-KABEL CAVO SOTTOTRACCIA
RECESSED CABLE ENTRY CÂBLE SOUS GAIN
HULPKABEL
H03VV-F ; H05VV-F
BASIS

15
+
-
TIMER
14B 15B
+
-
HY
14D 15D
TIMER
+
-
CLICK
16 17
14C 15C
N
L
N
L
PULL CORD
N
L
N
L
PULL CORD
PULL CORD (PC) HTPC
TIMER
HT

16
21 22
23 24
25
18 19 20
ON
OFF
WARTUNG / REINIGUNG - MANUTENZIONE / PULIZIA - MAINTENANCE / CLEANING
MAINTENANCE / NETTOYAGE - ONDERHOUD / REINIGING

17
Informativa sullo smaltimento delle unità a fine vita.
Questo prodotto è conforme alle Direttiva EU 2002/96/EC.
Il simbolo del cassonetto barrato riportato sull’apparecchiatura indica che il prodotto alla
fine della propria vita utile deve essere raccolto separatamente dagli altri rifiuti. L’utente
dovrà, pertanto, conferire l’apparecchiatura giunta a fine vita agli idonei centri di raccolta
differenziata dei rifiuti elettronici ed elettrotecnici, oppure riconsegnarla al rivenditore al
momento dell’acquisto di una nuova apparecchiatura di tipo equivalente.
L’adeguata raccolta differenziata per l’avvio successivo dell’apparecchiatura dimessa al
riciclaggio, al trattamento e allo smaltimento ambientale compatibile contribuisce ad
evitare possibili effetti negativi sull’ambiente e sulla salute e favorisce il riciclo dei materiali
di cui è composta l’apparecchiatura.
Lo smaltimento abusivo del prodotto da parte dell’utente può implicare sanzioni amministrative previste dalla norma-
tiva vigente.
Information on disposal of units at the end of life.
This product complies with EU Directive 2002/96/EC.
The symbol of the crossed-out dustbin indicates that this product
must be collected separately from other waste at the end of its life. The user
must, therefore, dispose of the product in question at suitable
electronic and electro-technical waste disposal collection centres, or else send the product back to the retailer
when purchasing a new, equivalent type device.
Separate collection of decommissioned equipment for
recycling, treatment and environmentally compatible disposal helps to
prevent negative effects on the environment and on health and promotes the recycling of the materials that make up
the equipment.
Improper disposal of the product by the user may result in administrative sanctions as provided by law.
Informations sur l’élimination des appareils en fin de vie.
Ce produit est conforme aux Directives EU 2002/96/EC.
Le symbole du conteneur barré indiqué sur l’appareil indique que le produit hors d’usage doit être éliminé séparément
des autres déchets. L’utilisateur devra donc confier l’appareil hors d’usage à des centres de tri sélectif spécialisés
pour les appareils électroniques et électroniques, ou bien le remettre au revendeur lors de l’achat d’un nouvel appa-
reil de même type.
Le tri sélectif adéquat pour l’envoi successif de l’appareil hors d’usage au recyclage, au traitement et à l’élimination
environnementale compatible contribue à éviter les éventuels effets négatifs sur l’environnement et sur la santé et
favorise le recyclage des matériaux dont est composé l’appareil.
L’élimination abusive du produit de la part de l’utilisateur peut impliquer des sanctions administratives prévues par la
norme en vigueur.
SMALTIMENTO E RICICLAGGIO
DISPOSAL AND RECYCLING
ÉLIMINATION ET RECYLCLAGE
Aufklärung über die Entsorgung des Altgeräts.
Dieses Produkt stimmt mit der EU-Richtlinie 2002/96/EG.
Das Symbol mit der durchgestrichenen Mülltonne auf dem Gerät besagt, dass das
Altgerät getrennt von anderem Müll entsorgt werden muss. Der Nutzer
muss das Altgerät zu einem Entsorgungszentrum
für Elektro- und Elektronikaltgeräte bringen oder es beim Händler
beim Kauf eines entsprechenden Neugeräts zurückgeben.
Eine entsprechende Mülltrennung und eine anschließende Weiterleitung des Altgeräts an
Recycling, Aufbereitung und umweltfreundliche Entsorgung trägt zur Vermeidung
etwaiger negativer Auswirkungen auf Umwelt und Gesundheit bei und fördert das Recycling der Materialien,
aus denen das Gerät gebaut ist.
Die unrechtmäßige Entsorgung durch den Nutzer kann im Rahmen der geltenden Gesetzesvorschriften rechtlich geahn-
det werden.
ENSTORGUNG UND RECYCLING

Informatie over het verwijderen van de kapotte eenheden.
Dit product voldoet aan de norm EU 2002/96/EC.
Het symbool met doorkruiste vuilniscontainer geeft aan dat het product
bij verwijdering gescheiden van ander afval moet worden ingezameld. De gebruiker
moet het kapotte aparaat dus aandienen bij het juiste afvalinzamelingscentrum voor
elekronisch en elektrisch afval, of bij de dealer inleveren
bij het kopen van een nieuw apparaat van gelijkwaardig type.
Adequate gescheiden inzameling van apparatuur die aangeboden wordt voor
recyclage, behandeling en geschikte milieuvriendelijke verwijdering, draagt bij tot
het voorkomen van eventuele schadelijke gevolgen voor milieu en gezondheid en bevordert de
recyclage van de materialen waaruit de aparatuur bestaat.
Illegale dumping van het product door de gebruiker kan door de wet bepaalde administratieve sancties met zich
meebrengen.
VERWIJDERING EN RECYCLING

NOTES

Dipl. Ing. Özpolat Kunststoerzeugnisse GmbH · Alter Weg 11, 15 · 64385 Reichelsheim · Telefon +49 - (0) 6164/642010 ·
info@aircircle.deinfo@aircircle.de
000452 - 01 - 0615
This manual suits for next models
3
Table of contents
Languages:
Other Wallair Fan manuals
Popular Fan manuals by other brands

Orbegozo
Orbegozo PWO 1947 instruction manual

Vortice
Vortice QBK HE SAL instruction manual

CFM
CFM MFT Series Installation & maintenance

Spruce
Spruce DynaVent RV Series installation instructions

Amaircare
Amaircare Airwash MultiPRO BOSS AH2000 CART Operating and maintenance manual

Craftmade
Craftmade Fredricksburg FB60 installation instructions