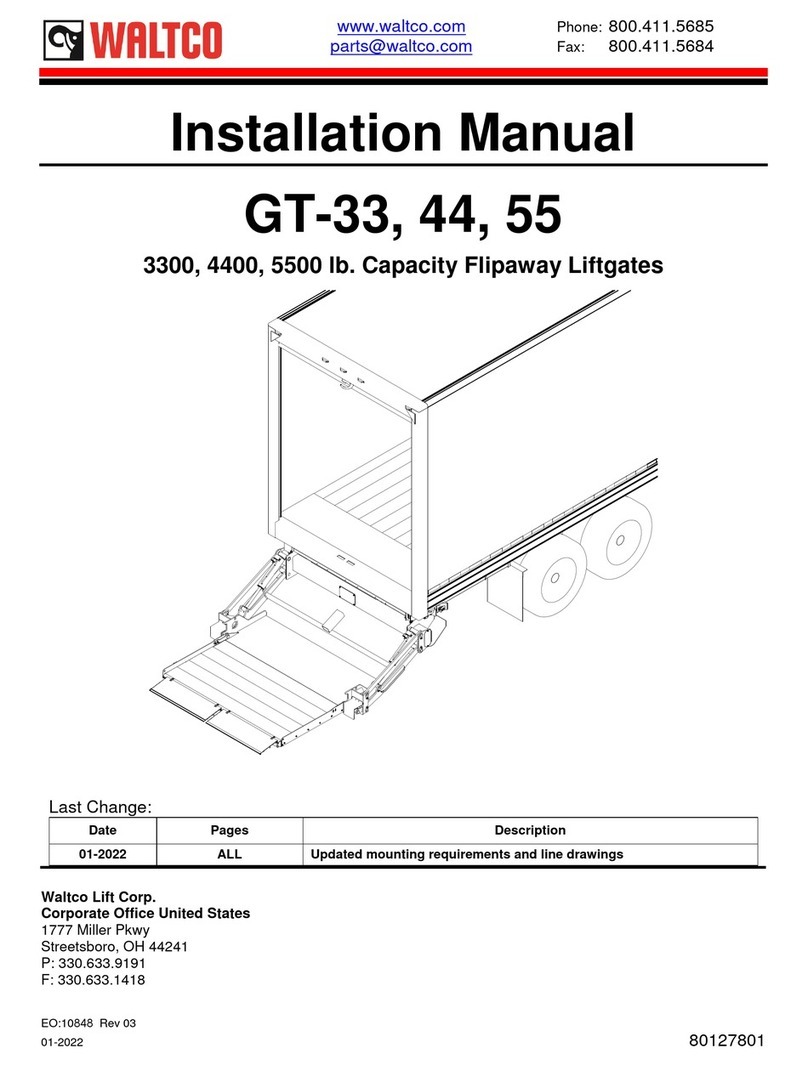
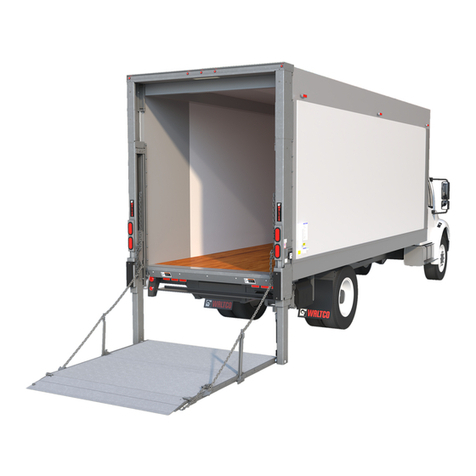
WALTCO FM Series User manual

1
www.waltco.com Phone: 800.411.5685
Owner's Manual
FM SERIES
1000 lb. - 1650 lb. lb. Capacity Rail Liftgates
Last Change(s)
Date Page(s) Description
1-2021 Released For Production
Waltco Lift Corp. Waltco Lift Corp.
Corporate Office United States Canada
1777 Miller Pkwy 90 North Queen St.
Streetsboro, OH 44241 Etobicoke, ON M8Z 2C5
P: 330.633.9191 P: 888.343.4550
F: 330.633.1418
EO:10700 Rev 01
01-2021 80144702

2
Table of Contents
Improper operation and/or maintenance of this liftgate could result in severe
personal injury or death.
Read and understand the contents of this manual and all warnings and
operation decals before operating and/or performing maintenance on this
liftgate.
Introduction........................................................................................................................................................................
3
Safety Information.............................................................................................................................................................
4
Warranty.......................................................................................................................................... 6
Liftgate Terminology................................................................................................................................................................
7
Basic Mounting Requirements.....................................................................................................................................................
8
Operation Instructions...........................................................................................................................
9
Preventative Maintenance.....................................................................................................................
16
Placement of Decals.....................................................................................................................................................................
21
Lubrication Instructions...............................................................................................................................................................
22
Schematics...........................................................................................................................................................................
23
How to Order parts..........................................................................................................................................................................
24

3
Introduction
If anyone observes improper installation, improper operation, or damage, they should immediately contact a
qualified person for assistance and correction. We strongly urge anyone that has any questions or doubts as
to the installation, condition, use, operation, maintenance or repair of the liftgate to contact us at Waltco
where we have qualified personnel that will be happy to assist you. Telephone numbers and addresses of
these locations are listed in the Owner's Manual and Installation Instructions.
INSTALLATION
Waltco liftgates should only be installed by those with sufficient basic skills to understand the installation
and operation of the liftgate, along with the equipment on which the liftgate is being installed. Waltco's
installation instructions are not intended to give rationale for all the instructions that are given; however, it is
the intent of these instructions to give the installer both the operations and what we believe to be the most
desirable sequence of implementing these operations. These instructions can in no way expand into an area
where they will replace a qualified person, or clear thinking and a basic knowledge that must be possessed by
the installer.
It has been our experience that a knowledgeable journeyman following these instructions and observing the
operation of the liftgate will have a sufficient comprehension of the liftgate to enable this person to
troubleshoot and correct all normal problems that may be encountered.
Failure to follow the installation instructions, adjustments and mounting dimensions may result in improper
and unsafe operation of the liftgate. Unauthorized alterations of the liftgate can cause an undesirable and
dangerous condition.
OWNER'S MANUAL
The Waltco Owner's Manual is intended to act as a guide for operation and routine maintenance but is no
way intended to encourage usage or repair of the liftgate by those who are not qulaified to do so.
The contents of the Owner's Manual include, but are not limited to general operation instructions, routine
lubrication, parts list, and an outline of things that should be checked but may not be obvious to those not
technically qualified. The manual assumes the liftgate is properly installed, undamaged and operates
correctly. Improper installation, improper operation, or damage should be immediately corrected by a qualified
person.
INSPECTION
As part of the regular inspection of a liftgate and after damage or suspicion of an overload, inspect for wear
or structural damage and make necessary repairs or replacements. Check all structural components and their
attachment to the liftgate for cracked welds, loose fasteners, wear and part deformation. Check cylinder and
hose for leaks. Inspections and repairs should be made by a qualified mechanic.
REPLACEMENT PARTS
Use only Waltco original equipment replacement parts. Components of other liftgate manufacturers may
outwardly appear to be the same but are not interchangable with Waltco products. Waltco components are
specifically designed for safety requirements, reliability and compatibility with our products. Refer to your
Waltco Parts Manual when ordering parts. NOTE: When ordering, give model and serial number fo liftgate.
DECALS
It is important that every vehicle that has a WALTCO Liftgate have legible DECALS clearly posted on the
vehicle and an OWNER'S MANUAL in the vehicle at all times as a guide for proper operation and
maintenance. Additional DECALS and OWNER'S MANUALS can be obtained from WALTCO LIFT CORP.
80101388 Rev 04 EO10758

4
Chapter 1 Safety Information
WARNING
Read, understand, and follow all of the warnings listed below.
Failure to follow these warnings could result in severe personal injury of death.
*Read and understand the Owner's Manual, all decals and warnings on liftgate before operating liftgate.
*Do not operate liftgate without a thorough knowledge and understanding of the operation of the liftgate.
*Liftgate hazards can result in crushing or failing.
*This liftgate is designed for loading and unloading cargo. If personnel are required to ride the liftgate, observe and familiarize
yourself with the liftgate operation, decals and manuals. Ensure stable footing at all times.
*Do not ride liftgate with unstable loads.
*Wheeled loads must be properly retained from rolling.
*Tall, high center of gravity loads must be retained from falling over.
*Never overload liftgate:
Load platform as close to the vehicle and towards the middle of the platform as possible. Refer to Owner's Manual and
capacity decal of liftgate for maximum load and load placement.
*Keep hands and feet clear of all potential pinch points.
*Never use liftgate if it shows any signs of structural damage such as cracked welds, bent or distorted members.
*Do not attempt any repairs unless you are qualified to do so. Care should be taken when work is performed on a disabled
liftgate located near moving traffic. When possible, the vehicle should be moved away from traffic areas for repair.
Precautionary measures should be taken to ensure personal safety including those recommended in Federal Motor Vehicle
Safety Standards 571.125.
*When welding to liftgate, or liftgate components, take all necessary safety precautions, including using respiratory protection
and other pertinent personal protective gear when welding harmful materials.
*All protective covers, guards, and safety devices must be in place and access doors closed before operating liftgate.
*Do not allow anyone to stand in or near area in which Platform will open and close before opening and closing Platform.
*Do not allow anyone to stand near the Platform where a falling load could land on them.
*Platform is always to be properly stored and secured for transit. See the Owner's Manual for details.
*Take care to retain cargo during transit for liftgate Platforms which function as the tailgate or door of the cargo area. Small
objects can fall through the space between the vehicle and the folded Platform.
*A Lock-Out device or Shut-Off Switch should always be used to prevent unauthorized use of liftgate.
*For liftgates with Runners, never use liftgate if Runners do not travel up or down freely and smoothly.
*For liftgates with Roller Lifting Chain, the Chain should be replaced every (5) five years or 15,000 cycles, whichever comes
first. Replace only with Waltco approved Roller Chain.
*Never transfer loads which exceed lifting capacity on or over any part of the Platform or Bed Extension unless the liftgate is
equipped with a special reinforced Platform and Platform Support Bars for use when the Platform is used as a loading ramp
(dock board). Refer to the "Using Platform as a loading ramp" Chapter in the Operation Instructions of the BZ/RZ series
Owner's Manual.
*For liftgates equipped with Trailer Hitches, never exceed the rated capacity of the hitch. Do not exceed the vehicle's weight
rating. Refer to the vehicle's Owner's Manual.
*Vehicle must comply with all state and federal standards.
*Follow the "Maintenance Guide" chapter in the Owner's Manual.
80101253 Rev 05 EO10758

5
Chapter 1 Safety Information
Liftgates with Tilt Function
*Proper use of the Control Switches is of extreme importance.
*Improper use of Tilt Switch could cause load to fall from the Platform or damage the liftgate.
*Platform should be in a generally horizontal position when raising or lowering with a load.
*In any tilt position, the Platform may vary from level while raising or lowering the Platform.
Liftgates equipped with spring operated Cam Closer
*Replace Cam Release Spring every (5) five years or 15,000 cycles, whichever comes first.
RGL Series Liftgates
*Make certain Platform Brake mechanisms are operating properly.
*The Runners are always to remain powered up against the Upstop Pins when in transit.
*Inspect cables every (3) three months or 750 cycles, whichever comes first. Cables must be replaced if they show signs
of wear, distortion, kinking or if any broken wires are visible.
*Replace cables every (5) five years or 10,000 cycles, whichever comes first.
MDL Series Liftgates
*Make certain Platform Brake mechanisms are operating properly.
*The Platform Retaining Bar should be lowered into H-Frame Storage Plate when in transit.
*Inspect Roller Chains every (3) three months or 750 cycles, whichever comes first. Roller Chains must be measured and
checked for signs of stretching. If the chain is stretched by more than 3% they should be replaced.
*Replace Roller Chains every (5) five years or 15,000 cycles whichever comes first. Replace only with WALTCO
APPROVED Roller Chain.
*Check that all connecting links at each end of Roller Chain are properly secured with proper cotter pins monthly.
This is the Safety Alert Symbol. This manual uses this symbol to alert you to potential personal injury hazards.
Obey all safety messages that follow this symbol to avoid personal injury or death.
SIGNAL WORDS
WARNING
Indicates a potentially hazardous situation, which if not
avoided, could result in death or serious injury. WARNING
Black letters on an orange background.
CAUTION
Indicates a potentially hazardous situation, which if not
avoided, may result in minor or moderate injury. CAUTION
May also be used to alert against unsafe practices.
Black letters on an yellow background.
NOTICE
Indicates a potentially hazardous situation, which if not
avoided, could result in property damage. NOTICE
80101253 Rev 05 EO10758
6
WALTCO warrants its products free of defects in materials and workmanship.
WALTCO will replace components found defective during the warranty period. Labor will be reimbursed according to our
flat rate labor schedule at the prevailing shop rate.
Contact our Sales or Warranty departments for the warranty period of your model or for information regarding our flat rate
labor schedule.
WALTCO Warranty Claim Procedure
For consideration, all claims must be received within 30 days of repair and include the following information:
• Liftgate Serial Number
• Description of problem and corrective actions
• Itemization of the labor charge to include the number of hours and labor rate
Replacement warranty parts can be obtained by contacting Waltco’s Parts Department. Parts must be returned
for inspection when requested.
Exclusions:
Waltco’s warranty does not include reimbursement for service calls, vehicle rental, towing, travel time, fabrication of parts
available from WALTCO, damage from misuse or abuse, negligence, accidents, alteration, loss of income or overtime
expense, oil, or normal wear.
Diagnosis and troubleshooting time are included in the flat rate labor times.
Warranty and technical information is available from WALTCO’s toll free customer service lines from 8:00 a.m. to 5:00 p.
m. EST.
Waltco Lift Corp
1777 Miller Parkway
Streetsboro OH, 44241
Sales Direct Line: 1-800-211-3074
Parts Direct Line: 1-800-411-5685
www.waltco.com
We're behind you all the way!
EO: 7714 Rev 01 80101667
5-2015

7
Chapter 2 Liftgate Terminology
1. Header Extrusion 8. Serial Number Tag 15. Access Door Panel (not shown)
2. Column Extrusion 9. Switch Assembly 16. Storage Latch
3. Crossbeam Box (Housing) 10. Pump Unit 17. Platform Latch
4. Door Assembly 11. Lift Cylinder 18. Gas Shock (not shown)
5. Platform Assembly 12. Lock Valve 19. Header Lights
6. Runner (Slider) Assembly 13. Lifting Chain (not shown) 20. Camera Mount
7. Platform Side Rails 14. Chain Anchor Bolt

8
Chapter 2 Liftgate Terminology
EXPLANATION OF SERIAL NUMBER TAG
MODEL NAME DESCRIPTION CAPACITY
FM1000 Final Mile Lift 1000 lbs.
FM1650 Final Mile Lift 1650 lbs.

9
Chapter 3 Operation Instructions
TO OPEN PLATORM
Manual Close
Pull upward locking handle on control side to
"UNLOCKED" postion as shown.
Hold locking handle, Use left hand to open
the platform by grabing the end of platform.
Never force platform open.
Keep hands away from pinch points.

10
Chapter 3 Operation Instructions
TO STORE PLATORM
Manual Close
Lift the locking handle in the "UNLOCKED" position,
while holding the locking handle.
Lift close the platform with your left hand
by grabbing the end of the platform side bar.
Keep hands away from pinch points.
Release locking handle into "LOCKED" position.
Inspect latch to confirm platform is
locked.

11
Chapter 3 Operation Instructions
LOADING OF PLATFORM
Load and unload from rear of platform and not side of
platform. Never remove hand rail to load or unload
platform.
Always load as close to center of platform and as close
to truck as possible.
Never operate fork lift trucks on or over
any part of liftgate.
This unit is intended for loading and
unloading of cargo only. Do not use for
anything but its intended use.
POWER OFF TO LIFTGATE (OPTIONAL SWITCH)
Turn power off to liftgate by turning off the Cab Shut-Off
switch inside cab of vehicle. This may be a toggle or
rotary type switch.
Turn power off to liftgate to prevent
unauthorized use of liftgate.

12
Chapter 4 Preventitive Maintenance
PLATFORM ADJUSTMENT
Unfold and raise platform to bed level and check for:
1.) If platform travels more than 1/4" above the top of
the crossbeam box, see below for adjustment.
2.) If platform is uneven see below for adjustment.
Lower platform to ground. Remove access door from
crossbeam box.
Adjust platform so it is level with top of crossbeam
box.
Never adjust platform to travel more than
1/4" above the crossbeam box.
Never adjust nut out less than 3/8" from
end of anchor bolt.
Never have any part of your body
underneath the platform while making
adjustments.
1.) Lower platform to the ground
2.) Adjust the chains and check level
3.) Repeat above until platform is flush with the cross
beam box

13
Chapter 4 Preventative Maintenance
HYDRAULICS
Inspect for oil leaks in:
Hydraulic Cylinder
Hydraulic hoses - Replace hoses if they show signs of
excessive abrasion.
Hydraulic fittings and valves
Tighten or replace all hydraulic components as may
be required to stop oil leakage.
CHECK AND FILL HYDRAULIC RESERVOIR
Lower platform to ground and remove access door.
Remove breather and fill reservoir with hydraulic fluid until
1/2" from top. (See recommended fluids below)
Cycle liftgate several times to release trapped air from
system.
Replace breather cap.
HYDRAULIC FLUIDS
Fluids are available from the Waltco Parts Dept. 1-800-411-
5685 www.waltco.com
NOTE:
Do not use the following fluids:
Brake Fluid
Power steering fluid
Automatic Transmission Fluid (ATF)
Motor Oil

14
Chapter 4 Preventative Maintenance
There is no speed adjustment on this liftgate.
Lowering speed is controlled by the Pressure
Compensative Flow Valve plumbed at cylinder.
Regardless of weight on platform, liftgate should lower at
approximately six (6) inches per second.
Bed height (inches) = Lowering Time (seconds)
6
This liftgate must have correct
pressure compensative flow valve
installed!
INSPECT DECALS AND LUBRICATE LIFTGATE
Inspect all decals per Chapter 5 of this manual.
Replace any that are missing or damaged.
Lubricate liftgate per Chapter 6 of this manual.
ANNUAL INSPECTION
Drain hydraulic fluid and replace with new fluid per
recommended fluids chart.

15
Chapter 5 Placement of Decals
All decals must be in place and legible or all warranties are void.
ITEM DECAL QTY PART NO. LOCATION
1
Safety Instructions 1 80100850
Locate in a conspicuous place near controls.
Operation Decal 1 80101696
Hazard Decal 1 80101370
Remote Circuit Breaker Decal 1 80100828
1000 lb Capacity Decal
4
80100250
Locate one in a conspicuous place near controls, and
one on driver side column. Locate one on both sides of
platform.
1650 lb Capacity Decal 80100268
2 Platform Caution Decal 4 75089296
Locate one in a conspicuous place near controls.
Locate one in a conspicuous place on driver side of
vehicle.
Locate one on either side of platform
3 Access Door Decal 2 75089282 Locate one on chain anchor bracket.
Locate one on back of crossbeam box.
4 Cab Shut off Decal 1 75089267 Locate next to cab shut-off switch inside vehicle
5Hazard Decal 2 80101370 Locate on access door
6 Warning Decal 1 80100829
Locate next to liftgate circuit breaker.
In applications where more than one circuit breaker is
used, decal must be placed in both locations.
To maximize decal adhesion to surfaces: If your liftgate is equipped with dual
-Surface must be dry and clean controls, an additional Safety Instruction
-Firm pressure must be applied to decal decal (80100850) is to be placed in a
-Minimum surface temperature 65 degrees F conspicuous place near the second set
(Heat gun may be used to heat surface) of controls.

16
Chapter 6 Lubrication Instructions
Suggested Minimum Lubrication Schedule (in days)
Lubricate lifting chains including sections in crossbeam
box, rails & runner assemblies with oil.
Monthly
Cycles
Light Duty Medium Duty Heavy Duty
< 250 45 30 21
250 - 350 30 21 14
Lubricate latch, inside rails, crossbeam box and platform
hinges with machine oil or motor oil.
350 - 450 21 14 7
> 450 Contact Factory
*
Lubricate every 30 days if cycles are
Lubricate driver and passenger side rails. unknown.

17
Chapter 7 SCHEMATICS
ELECTRICAL / HYDRAULIC SCHEMATIC
LIGHTING WIRING SCHEMATIC

18
How To Order Parts
Repairs should be made only by authorized mechanic using WALTCO Replacement parts.
When ordering repair or replacement parts, please include all of the information asked for below. if this
information is not available, a complete written description or sketch of the required part will help WALTCO
identify and deliver the needed part to you.
THE FOLLOWING INFORMATION MUST BE INCLUDED:
1SERIAL NUMBER - [WALTCO liftgate serial numbers can be found on the Specification tag attached to the mount
frame. (On older units, the Specification Tag is located on the side or bottom of the platform)]
2MODEL NUMBER - [Or capacity]
3PLATFORM SIZE
THEN INCLUDE THE FOLLOWING INFORMATION:
4PART NUMBERS
5DESCRIPTION
6 QUANTITY REQUIRED
MAIL, E-MAIL OR PHONE YOUR REQUEST TO :
Waltco lift Corp.
1777 Miller Parkway
Streetsboro, OH 44241
1-800-411-5685
FAX: 1-800-411-5684
E-MAIL: [email protected]
ALL PARTS ARE F.O.B. FROM THE SHIPPING FACTORY
PLEASE NOTE:
To assure you of continuing and effective quality control, our warranty policy permits replacement of hydraulic
cylinders, valves and motor pump units when their factory seals are intact. Parts under warranty will be
exchanged after careful inspection of the returned assemblies.
80101389 EO10758
REV 03

19
Every vehicle that has a WALTCO liftgate must have legible
WARNING AND OPERATION DECALS clearly posted on the
vehicle and an OWNER'S MANUAL in the vehicle at all times as
a guide for proper operation and maintenance.
Additional WARNING DECALS, OPERATION DECALS and OWNER'S MANUALS can
be obtained from WALTCO LIFT CORP.
NOTE:
When ordering, give model
and serial number of the liftgate
80001519 Rev 02 EO5534A

20
IMPORTANT
KEEP THIS OWNER'S MANUAL IN THE VEHICLE
WARNING
Improper operation and maintenance of this
liftgate could result in severe personal
injury or death.
Read and understand the contents of this
manual and all warning and operation
decals before operating and/or performing
maintenance on this liftgate.
For SAFETY information on this liftgate see
Chapter 1 of this manual
80101519 EO10758
REV 03
This manual suits for next models
2
Table of contents
Other WALTCO Lifting System manuals
Popular Lifting System manuals by other brands

Eagle Equipment
Eagle Equipment MTP-11V3 Installation & operation manual

Upright
Upright X20N Operator's manual

Thunderstone
Thunderstone Thunder Power Tarp 6000XR Series Operation instructions

TECNA
TECNA 9502RL instruction manual

ShoreStation
ShoreStation SSV30108EDC Service manual

Rotary
Rotary MASTER GEAR MGE 2.0 Operation & maintenance manual