Wanbo X1 User manual

PORTABLE PROJECTOR
User Manual
Please read through this manual in detail before using
Thanks for ordering our company’s product, please read this manual throughly before using for
the sake of your safty and interests. We assumes no responsibility for any personal injury, loss
of property or others that caused by inappropriate operation if you don’t follow the instructions
stated hereof.

Important Safety Precautions
The following safety instructions will ensure long service life of the machine,
and avoid any fire or electric shock. Please ensure to read carefully and pay
high attention on all the following warnings
Don’t install in places
with poor ventilation
Don’t block the vent
(Inlet or Outlet)
Don’t install close to any
temperature or smoking sensors
(May cause sensors failures)
Don’t install in areas that directly blown by
cold and warm wind of air conditioner
(Otherwise, it may cause failure due to
vapor condensation or rise of temperature)
Don’t install in dusty
and smoky areas
Don’t install in places that
hot and humid

Pay Attention to Heat Dissipation
Please leave at least 30cm between projectors and objects around to
maintain projectors’ performance and reliability
Attention
Please avoid watching lens directly so as to prevent our eyes from being
hurt as projectors are with very high brightness
Dissipation Hole
30cm 30cm
30cm
30cm

Size
Desktop
Manual
3W
1.35:1
±40°
LED
220*185*80mm
LCD
1236g
Display
Technology
Weight
Keystone
Correction
Light Source
Type
Product
Type
Focusing
Method
HornThrow Ratio
Basic Parameters
Packing List
Please check if any accessory is missing when opening, please contact
your distributor if it has any shortage
Power Line
Projector
PORTA BLE PROJ ECTOR
User Man ual
Please read through this manual in deta il before using
Thanks for or dering our compa ny’s product, please read th is manual thr oughly before u sing for
the sake of y our safty and in terests. We ass umes no resp onsibility for a ny personal inju ry, loss
of property or o thers that cause d by inappro priate operati on if you don’t fo llow the instru ctions
stated hereof.
User Manual
Remote Control

Product Brief
Please check projector components and functions before using
Remote Control
Signal Receiving
Window
ON/OFF
Up Down
Left Right
Back
USB interface HDMI Interface
Lens
Focus Wheel
Keystone Correction

Remote Control
Projection size / Distance
Projection size
(inch, no keystone correction)
Screen
length * width (m)
50
72
84
100
120
0.67×1.11
0.98×1.59
1.10×1.86
1.36×2.21
1.65×2.66
Lens ~ screen (m)
1.50
2.00
2.50
2.84
3.50
Mute
Mouse mode (Android) / signal
source switching (multimedia)
Indicator Light
Arrow keys
OFF/ON
Previous
Set up
Next
OK
Home
Multi-Function Keys
Volume+
Return
Volume-

Hanger InstallationHorizontal Placement
You can place horizontal or via hanger installation.
Note: hanger is non-attached accessory!
Installation and Adjustment
Keystone
Correction Loop
Focus Wheel
1 Installation
2 Adjust Focal Length
Achieve satisfactory picture imaging effect via adjusting the
keystone correction loop and focus wheel on the machine.
When keystone distortion occurs (as per diagram 1), it is
recommended to adjust the keysone correction loop; when
the image is blurred (as per diagram 2), it is recommended
to adjust the focus wheel to improve picture clarity.
If satisfactory clarity can not be achieved followed setps
above, please move the product forward or backward as
appropriate.
Diagram 1
Keystone Distortion
Blurred Distortion
Diagram 2

1. Press the button on the remote control to turn off the machine
2. Press the button on the back of machine body to turn off the machine.
Note: Please pull out the plug in time to save energy once the machine is
turned off.
3 Shutdown Safely
Mobile phone screen/same screen
WAY1:
1. Click WiFi and find "WANBO X1-xxxxxx", then input password "12345678"
on your iPhone.
2. Click "Screen Mirroring"on your iPhone.
WAY2:
1. Click "OK" on the remote control, connect home WiFi; Then connects the
same WiFi on your iPhone.
2. Click "Screen Mirroring" on your iPhone.
Connect with IOS Phone:

1. Click "Wireless Projection" on your phone.
2. Select "WANBO X1" , complete screen sharing.
Connect with Android:
Connect by Cables:
1. Connect iPhone and projector through "USB" port with Phone USB cable.
2. Click "Trust" .

Projection Setting Function details (Android)
Installation Mode
There are four installation modes (Front Projection, Rear Projection, Rear
Projection Lifting, Front Projection Lifting). Users can choose installation
mode by pressing the left and right direction keys of the remote control, and
install the projector as you like.
Keystone Correction
Keystone correction includes four-point keystone correction and vertical
keystone correction. Users can choose four-point keystone correction or
vertical keystone correction by pressing the confirmation key or left and right
direction key on the remote-control under keystone correction option.
Under the four-point keystone correction option: select manual keystone
correction, press confirmation key in the remote control to enter the manual
keystone interface, then operate according to the screen prompts.
Under the Vertical Keystone Correction option: Screen option shows
infinite zoom and manual keystone correction, infinite zoom can reduce or
enlarged screen with an adjustment range between 80% and 100%. Manual
Keystone Correction adjusts value through left and right direction keys of the
remote control to ensure pictures to be the best.
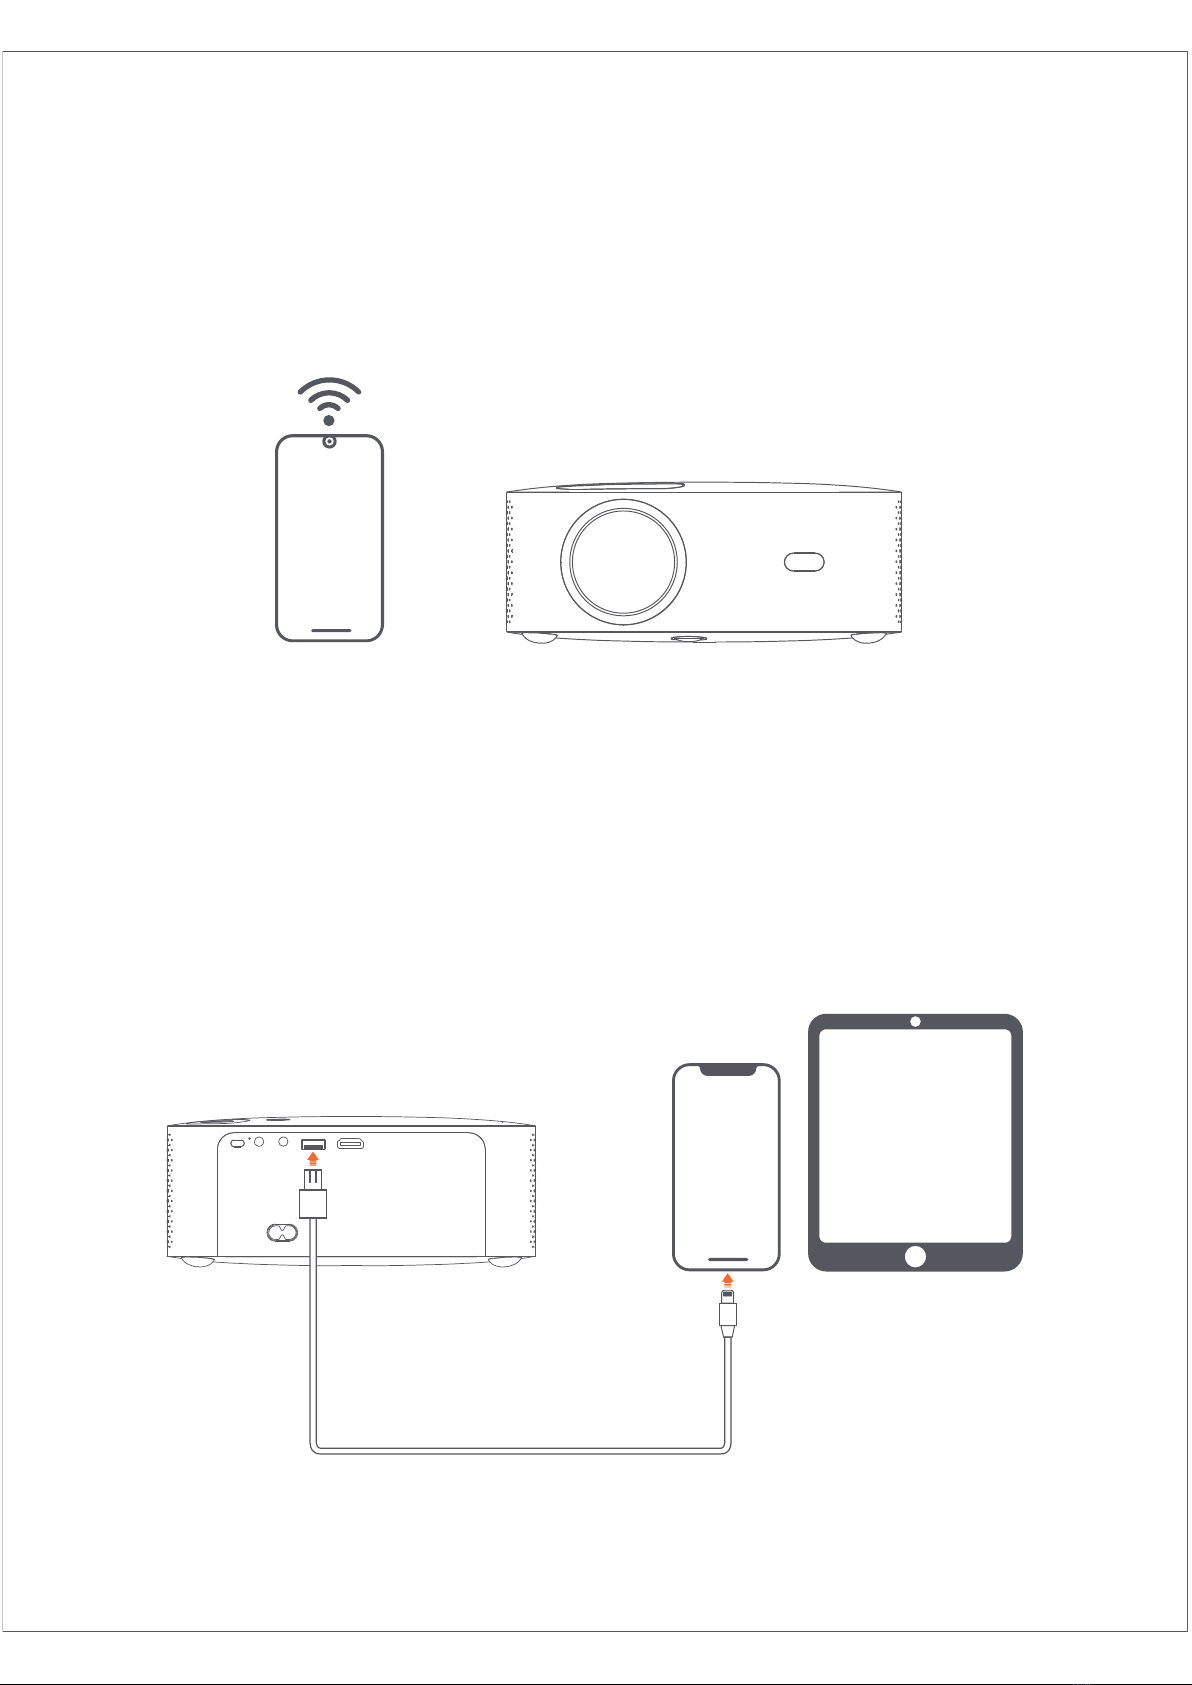
WIFI Connection Description: Enter setting option, click Network Settings,
open the WIFI setting switch, select the network required. If no WIFI
displayed, we can search and add WIFI manually.
Bluetooth Connection Description: Enter setting option, click Bluetooth
setting, open the Bluetooth switch, choose Bluetooth device to match (Note:
Bluetooth can connect audio only but can not connect mobile phone.
Clarity Adjustment: Adjust focus first and then adjust distance of placement
if not clear.

Mobile Phone Projection / Same Screen
(Android Version)
System upgrade (Android Version)
Upgrade online
Online update through system upgrade.
U disk upgrade (Local upgrade)
Copy the upgrade firmware to U disk root directory in FAT32 format, insert
the U disk into the USB interface of projector, then select U disk upgrade.
Mandatory upgrade
Copy the upgrade firmware to U disk root directory in FAT32 format. Insert
the U disk into the USB interface under turn off condition of the projector,
meanwhile, long press the device power button for 5 seconds to start
automatic upgrade.
Firstly, make sure Projector and mobile phone under the same WiFi, open
Eshare of the projector, and then open video apps in your mobile phone
(such as Youtube, Netflix), click TV icon in the upper right corner of the video
to project).
iPhone uses Airplay mirror for same screen and projection; Android phone
can project directly with Eshare, Android computer can download Eshare or
use HDMI cable to complete projection.
Note: The above operations need to be done under the same WIFI, all devices
should connect to the same WIFI (wireless network).

Poisonous and harmful substance, Element name
and content
Part name
Shell
Optical Machine
Circuit Board
Fan
Other Wires
Remote Control
Power Supply
Hazardous substances
Lead
(Pb
Mercury
(Hg
Cadmium
(Cd
Hexavalent
chromium
(Cr(VI)
Polybro
minated
Biphenyls
(PBB
Polybro
minated
Diphenyl
Ethers
(PBDE
O
O
O
O
X
O
O
O
O
O
O
O
O
O
O
O
O
O
O
O
O
O
O
O
O
O
O
O
O
O
O
O
O
O
O
O
O
O
O
O
O
O
O: Content of the hazardous substance in all homogeneous materials of the
component is under the limits of SJ/T11363-2006.
X: Content of the hazardous substance exceeds the limit requirements
specified by SJ/T11363-2006 in at least one homogeneous material of the
component. The components labeled "X" " have no substitutive due to
global technology development limits. Circuit board assembly *: including
printed circuit board and its components, electronic components, etc.
The number in the logo represents the normal environmental service
life of the product. (Battery Excluded)

Customer Name: Purchase of Shop:
Customer ID Customer Tel:
Fault Description (Please describe in detail for quick maintenance):
Warranty Card
Certificate
QC: 05
1. We offer "three guarantees " for this product, One year warranty for non-
artificial damaged since purchasing (subject to purchase record).
2. We will provide warranty service for any default caused by product
technical reasons during warranty period.
3. Following situations are out of the range of guarantee:
① Accessories out of the mainframe
Unauthorized disassembly and repair without our consent.
Damage that caused by external force and other natural disasters.
4. Please fill this card and contact your distributor when products have quality
problem
5. This warranty is limited to product maintenance during the warranty period,
no other liability
After-Sale Service Card

FCC Warnning:
Any Changes or modifications not expressly approved by the party responsible
for compliance could void the user's authority to operate the equipment.
This device complies with part 15 of the FCC Rules. Operation is subject to
the following two conditions:
(1) This device may not cause harmful interference, and
(2) this device must accept any interference received, including interference
that may cause undesired operation.
Note: This equipment has been tested and found to comply with the limits for
a Class B digital device, pursuant to part 15 of the FCC Rules. These limits
are designed to provide reasonable protection against harmful interference
in a residential installation. This equipment generates uses and can radiate
radio frequency energy and, if not installed and used in accordance with the
instructions, may cause harmful interference to radio communications.
However, there is no guarantee that interference will not occur in a particular
installation. If this equipment does cause harmful interference to radio or
television reception, which can be determined by turning the equipment off
and on, the user is encouraged to try to correct the interference by one or
more of the following measures:
-Reorient or relocate the receiving antenna.
-Increase the separation between the equipment and receiver.
-Connect the equipment into an outlet on a circuit different from that to which
the receiver is connected.
-Consult the dealer or an experienced radio/TV technician for help. This
equipment complies with FCC radiation exposure limits set forth for an
uncontrolled environment. This equipment should be installed and operated
with minimum distance 20cm between the radiator & your body.

www.szwanbo.cn
SHEN ZHEN WANBO TECHNOLOGY CO., LTD.
Table of contents
Other Wanbo Projector manuals