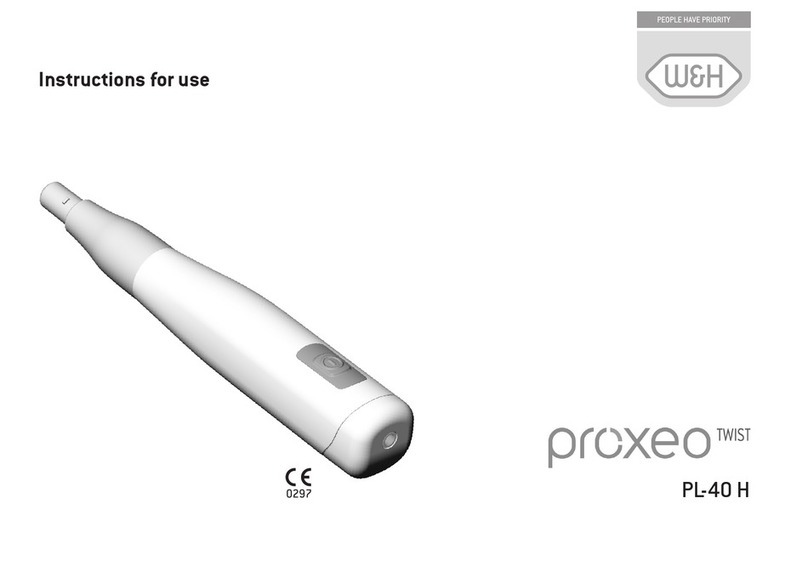
W&H proxeo TWIST User manual

Instructions for use
PL-40 H

2
Contents
Symbols.......................................................................................................................................................................................................... 4
1. Introduction ............................................................................................................................................................................................... 7
2. Scope of delivery....................................................................................................................................................................................... 9
3. Safety notes ............................................................................................................................................................................................ 10
4. Description............................................................................................................................................................................................... 15
Handpiece drive.................................................................................................................................................................................. 15
Foot control C-NW ............................................................................................................................................................................... 16
Status LED handpiece drive ................................................................................................................................................................17
Status LED foot control....................................................................................................................................................................... 18
5. Start-up .................................................................................................................................................................................................... 19
Charging the battery........................................................................................................................................................................... 19
Query battery status .......................................................................................................................................................................... 20
Pairing ..................................................................................................................................................................................................21
Assembly/removal of the Prophy Angle ............................................................................................................................................ 23
6. Handpiece drive ...................................................................................................................................................................................... 24
Switch on/off....................................................................................................................................................................................... 24
Test run................................................................................................................................................................................................ 25
7. Hygiene and maintenance...................................................................................................................................................................... 26
General notes...................................................................................................................................................................................... 26
Limitations on processing.................................................................................................................................................................. 27
Initial treatment at the point of use .................................................................................................................................................. 28
Manual cleaning.................................................................................................................................................................................. 29
Manual disinfection............................................................................................................................................................................30
Automated cleaning and disinfection ............................................................................................................................................... 31
Drying.................................................................................................................................................................................................. 32
Inspection, Maintenance and Testing................................................................................................................................................ 33
Packaging............................................................................................................................................................................................ 34
3
Contents
Sterilization......................................................................................................................................................................................... 35
Storage ................................................................................................................................................................................................ 36
8. Replacing the O-ring................................................................................................................................................................................ 37
9. Servicing .................................................................................................................................................................................................. 38
10. Accessories, consumables, spare parts and other recommended medical devices by W&H........................................................ 40
11. Technical data........................................................................................................................................................................................ 41
12. Data on electromagnetic compatibility according to IEC/EN 60601-1-2.......................................................................................... 44
13. Disposal.................................................................................................................................................................................................. 47
Explanation of warranty terms................................................................................................................................................................... 48
Authorized W&H service partners.............................................................................................................................................................. 49

4
Symbols
Do not dispose of with domestic
waste
WARNING!
(risk of injury)
ATTENTION!
(to prevent damage occurring)
General explanations,
without risk to persons or
objects
Follow instructions for use
Manufacturer
Date of manufacture
CE mark
with identification number
of the Notified Body
XXXX
Medical device
Thermo washer disinfectable
Sterilizable
up to the stated temperature
Class II medical
electrical equipment
Not for re-use
2
Non-ionizing electromagnetic
radiation
Catalogue number
Serial number
DC – direct currentNon-sterilizable

5
Symbols
Not suitable for intracardiac
application – Type BF appliance
Data Matrix code
for product information including
UDI (Unique Device Identification)
This way up
Fragile, handle with care
Keep dry
“Der Grüne Punkt” (The Green
Dot) trademark of Duales
System Deutschland GmbH
Trademark of RESY OfW GmbH
for identification of recyclable
transport and outer packaging
of paper and cardboard
Caution! According to Federal
law restricts this device to sale
by or on the order of a physician,
dentist, veterinarian or with the
descriptive designation of any
other practitioner licensed by
the law of the State in which the
practitioner practices to use or
order the use of the device.
Data structure in accordance with
Health Industry Bar Code
MEDICAL – GENERAL MEDICAL
EQUIPMENT AS TO ELECTRICAL
SHOCK, FIRE AND MECHANICAL
HAZARDS ONLY IN ACCORDANCE
WITH ANSI/AAMI ES60601-
1:2005/(R)2012 + A1:2012 +
C1:2009/(R)2012 + A2:2010/
(R)2012, ANSI/AAMI ES60601-
1:2005/A2:2021, CAN/CSA-C22.2
No. 60601-1:14, CAN/CSA-C22.2
No. 60601-1:14/A2:22, IEC
80601-2-60:2019. 25UX –
Control No.
25UX
Temperature limitation
-20 °C (-4°F) Min.
+60 °C (+140°F)Max.
8 %
80 % Humidity limitation

6
Symbols l
RCM – Australian / New Zealand
GITEKI (MIC) – Japan
ANATEL – Brazil
FCC / IC – USA / Canada
R209 - J00204

7
1. Introduction
For your safety and the safety of your patients
These Instructions for Use explain how to use your medical device. However, we must also warn against possible hazardous
situations. Your safety, the safety of your team and, of course, the safety of your patients are of paramount importance to us.
Observe the safety notes.
Intended use
PL-40 H: Battery driven electrical drive unit with wireless foot controller to perform cleaning and polishing of tooth surfaces and
fillings.
Misuse may damage the medical device and hence cause risks and hazards for patient, user and third parties.
Qualifications of the user
We have based our development and design of the medical device on the target group “dentist, dental hygienist,
dental employees (prophylaxis) and dental assistants”.

8
Introduction
Hereby, W&H declares that the medical device is in compliance with Directive 2014/53/EU (RED).
The full text of the EU declaration of conformity is available at the following internet address https://wh.com
Responsibility of the manufacturer
The manufacturer can only accept responsibility for the safety, reliability and performance of the medical device when it is used in
compliance with the following directions:
> The medical device must be used in accordance with these instructions for use.
> Only the components approved by the manufacturer may be replaced (O-ring).
> Modifications or repairs must only be undertaken by an authorized W&H service partner (see page 49).
> The electrical installation at the premises must comply with the regulations laid out in IEC 60364-7-710 (“Installation of
electrical equipment in rooms used for medical purposes”) or with the regulations applicable in your country.
> Unauthorized opening of the medical device invalidates all claims under warranty and any other claims.
Improper use, unauthorized assembly, modification or repair to the medical device, non-compliance with our instructions or the use
of accessories and spare parts which are not approved by W&H, invalidates all claims under warranty and any other claims.
Any serious incident that has occurred in relation to the medical device should be reported to the manufacturer and the
competent authority!

9
2. Scope of delivery
REF Description
30317000 Handpiece drive
07969610 Charger with adaptor
05882600 Handpiece holder
Optional included in set
30316000 Foot control C-NW with Stick

10
3. Safety notes
> Before using the medical device for the first time, store it at room temperature for 24 hours.
> Check the medical device for damage and loose parts each time before using.
> Do not operate the medical device if it is damaged.
> Always ensure that the correct operating conditions are provided.
> Perform a test run each time before using.
> Never touch the patient and the electrical contacts on the medical device simultaneously.
> Only put the medical device into operation when the handpiece sleeve is attached.
> Do not expose the medical device to any violent mechanical impacts.
Battery
> Do not charge the battery unattended.
> As soon as the charging cycles start to deteriorate send the medical device to an authorized W&H service partner.
> Defective or worn-out batteries must only be replaced by an authorized W&H service partner.
> Charge the battery of the medical device as soon as the status LED flashes.
> Incorrect use of the rechargeable battery can cause fire or corrosion.

11
Safety notes
The medical device is classed as “conventional equipment” (closed equipment without protection against the ingress of
water).
The medical device is not approved for operation in potentially explosive atmospheres.
Charger
> Only use chargers approved by W&H.
Hygiene and maintenance prior to initial use
> Clean and disinfect the medical device.
> Sterilize the handpiece sleeve.
System failure
A total system failure does not constitute a critical fault.
Simply switch the unit off and then on again.

12
Safety notes
Risks due to electromagnetic fields
This medical device is suitable for use on patients with cardiac pacemakers, if a safety distance between the medical device
and the cardiac pacemaker of at least 15 cm (5,9 inch) is maintained. The functionality of other active implantable medical
devices (AIMD) (e.g. ICD) can be affected by electric, magnetic and electromagnetic fields.
> Find out if the patient has other active implantable medical devices (AIMD) before using the medical device and inform
about the risks.
> Do not place the applied part on the patient’s body.

13
Safety notes
1,83 m
2,5 m
1,83 m1,83 m
The patient environment (see diagram) encompasses the area up to
2.50 m above the patient and 1.83 m in all horizontal directions.
The charger must not be used within
the patient environment.
1.83 m 1.83 m
1.83 m
2.5 m

14
Safety notes
The Prophy Angles are disposable articles.
> Use only Prophy Angles which are in perfect condition. Follow the operating instructions of the manufacturer.
> Insert the Prophy Angle only when the medical device is stationary.
> Never touch the Prophy Angle while it is still rotating.
> Only use Prophy Angles with plastic shanks for the Doriot system.
Prophy Angles with metal shanks damage the clamping chuck system.
2
Prophy Angle

15
4. Description Handpiece drive
ON/OFF button
Handpiece sleeve
Charging
socket
Coupling for
Prophy Angle
Nose
Status LED handpiece drive
(see page 17)
Status LED foot control
(see page 18)

16
Description Foot control C-NW
Charging LED (orange)
(see page 18 – 19)
Status LED (green)
(see page 18, 21)
Reset button Pairing button
Charging socket
Stick

17
Description Status LED handpiece drive
LED steady flashes flashes intermittently
GREEN eBattery is 25–100 % charged
ePairing successful
> Handpiece drive is ready for
operation (charging cable must
be disconnected)
ePairing active
ORANGE eBattery is charging
> Not ready for operation
eBattery is 2–25 % charged
> Complete the treatment
> Do not start any further treatment
> Charge the battery
eBattery is 1 % charged
> Charge the battery
RED eError message
> Contact an authorised W&H
service partner
Standby mode
> The handpiece can be activated with the ON/OFF button.
> If the handpiece drive is not used for longer than 4 minutes, it returns to standby mode automatically.

18
Description Status LED foot control
LED flashes flashes alternately
ORANGE eBattery of foot control is flat
> Complete the treatment
> Charge the battery of the foot control
ePairing unsuccessful
> Troubleshooting with pairing problems
(see page 22)
* The LED flashes for 40 milliseconds every 4 seconds
Standby mode
> The foot control can be activated by pressing.
LED steady steady flashes flashes intermittently*
GREEN eConnection to paired
medical device
established
eFoot control is attempting
to establish a connection to
the paired medical device
eBattery is flat
> Charge the battery
ORANGE eBattery is charging

19
5. Start-up Charging the battery
Attach the adaptor to the
power supply unit.
LED orange: Battery is
charging.
LED off: Battery is
charged.
Charge the medical device fully before you use them for the first time.
Insert the charging cable into the handpiece
drive charging socket until it audibly engages.
Plug the charger into an
power socket.
Connect the charging cable
into the foot control charging
socket.
LED orange: Battery is charging.
LED green: Battery is charged.
The handpiece drive does not switch to standby mode and it is not ready for operation until it is
connected to the charging cable.
click!

20
Start-up Query battery status
LED flashes Battery status
3 x green 75–100 %
2 x green 50–75 %
1 x green 25–50 %
orange 2–25 %
> Briefly press the ON/OFF button:
You can query the battery status when the handpiece drive is switched on and during the charging process.
This manual suits for next models
1
Table of contents
Other W&H Dental Equipment manuals

W&H
W&H proxeo TWIST PL-40 HW User manual

W&H
W&H Roto Quick RQ-03 User manual

W&H
W&H assistina MB-300 User manual

W&H
W&H Perfecta 900 User manual

W&H
W&H proxeo ULTRA PB-5 L User manual

W&H
W&H S-NW User manual

W&H
W&H Assistina MB-302 User manual

W&H
W&H Osstell Beacon User manual

W&H
W&H Endea Endo Cursor EB-62 User manual

W&H
W&H Assistina MB-302 User manual