HERSTELLERINFORMATIONEN
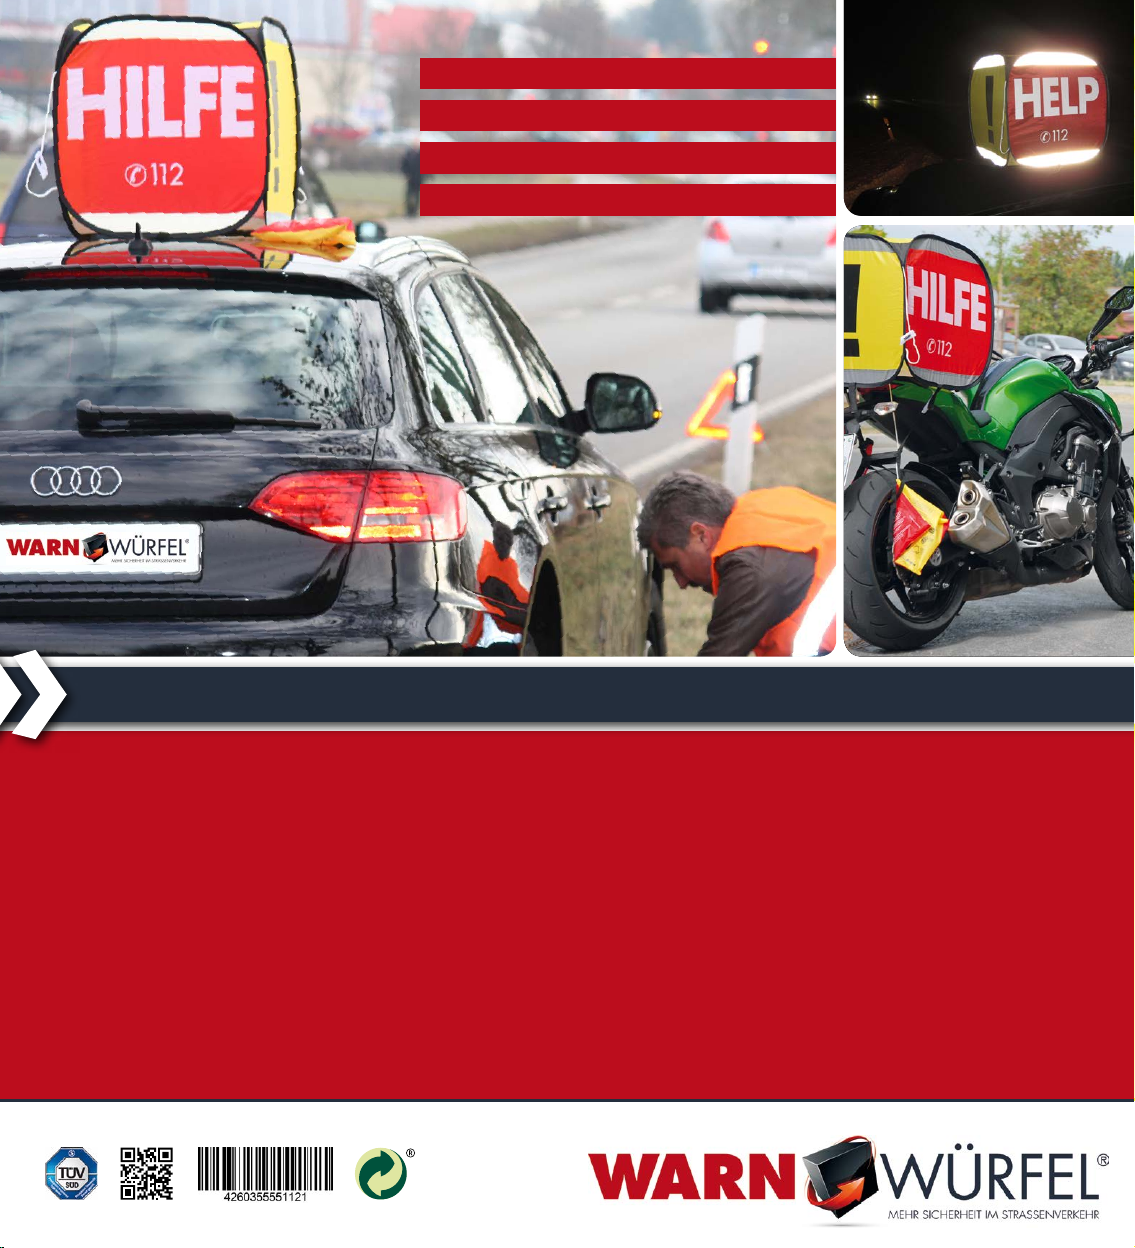
Bei dem Warnwürfel handelt es sich um eine zusätzliche Warneinrichtung zu den gesetzlich
vorgeschriebenen Warneinrichtungen wie Warnblinkanlage/Warndreieck. TÜV geprüft,
für die in den öffentlichen Straßenverkehr eingebrachten sicherheitsrelevanten Gegenstände.
Hersteller
Warnwürfel GmbH
Marderstraße 3, D-85598 Baldham, Germany, www.warnwuerfel.de
Ausführung
Modell: Warnwürfel; in den Farben verkehrsrot und neongelb;
mit Reflektionsstreifen nach DIN EN 471; Internationale Notrufnummer: 112
Materialzusammensetzung: 100% Polyester
Größe im aufgebauten Zustand: 50cm x 50cm x 50cm
Größe Packmaß: 25 x 21cm x 4cm; Gewicht: 300g; Made in China
Pflegehinweise
Der Warnwürfel ist nicht waschbar. Die Reinigung mit einem feuchten Tuch bei Verschmutzung
wird empfohlen. Die Aufbewahrung ist in der vom Hersteller mitgelieferten Tasche vorgesehen.
Direkte Sonnenbestrahlung ist zu vermeiden.
Gefahrenhinweis
Aus Sicherheitsgründen beachten Sie bitte, unbedingt den Aufbau von der verkehrsabgewand-
ten Seite auszuführen. Zur Beeinträchtigung der Funktion kommt es bei starker Verschmutzung,
wenn das Stoffmaterial eingerissen oder der Verschluss als auch das Spannband beschädigt
sind. Anwendung nur bei Fahrzeugstillstand. Kein Kinderspielzeug. Bei unsachgemäßer
Anwendung wird keine Haftung übernommen.
BEDIENUNGSANLEITUNG AUTOMOBIL
Die Bedienungsanleitung ist vor Gebrauch sorgfältig zu lesen!
1. Legen Sie die Tasche, aus Sicherheitsgründen von der Beifahrerseite aus, auf das
Autodach. Der Fahrtrichtungspfeil hilft Ihnen dabei, die Tasche richtig zu platzieren.
Die Tasche ist gesichert durch eine Leine. Nehmen Sie nun die Spannbandenden und
stecken diese im Fahrzeuginneren zusammen.
2. Vermeiden Sie weites Öffnen der Türen auf der Verkehrsseite. Ein kleiner Türspalt oder
Fensterspalt reicht aus, um das Spannband ins Fahrzeuginnere zu führen. Bei viertürigen
Fahrzeugen empfiehlt es sich über die hinteren Fenster die Befestigung vorzunehmen,
damit lassen sich die vorderen Türen im Bedarfsfall weiterhin öffnen.
3. Ziehen Sie den Warnwürfel erst aus der Tasche, wenn sichergestellt ist, dass das
Spannband festgezogen ist.
4. Jetzt ziehen Sie den Warnwürfel aus der Tasche heraus. Er faltet sich zunächst liegend auf
eine Grundfläche von 50cm x 50cm auf. Klappen Sie eine Seitenfläche im 90°-Winkel
auf und ziehen an der dafür vorgesehenen Lasche mit der Aufschrift „Ziehen“. Dadurch
entfaltet sich der Warnwürfel auf seine ganze Größe.
5. Bringen Sie den Warnwürfel in die gewünschte Position (Aufschrift „Hilfe/Help“ oder
Achtung „!“), indem Sie den Warnwürfel auf dem Autodach einfach drehen. Durch die
angebrachten Klettstreifen wird dann der Warnwürfel endgültig fixiert.
6. Ändern Sie nach Bedarf Ihre Aufforderung von „Hilfe“ auf Achtung „!“ ab, indem Sie
den Warnwürfel einfach erneut drehen und mit den Klettstreifen wieder fixieren.
7. Achtung: Der Warnwürfel muß vor Weiterfahrt vom Auto entfernt werden.
Das Zusammenpacken erfolgt in umgekehrter Reihenfolge. Legen Sie dabei den
Warnwürfel drehend als „8“ zusammen und stecken ihn in die Tasche.
Erst dann den Spanngurt vom Autodach lösen.
BEDIENUNGSANLEITUNG MOTORRAD
Verfahren Sie wie oben beschrieben. Montieren Sie den Warnwürfel von der verkehrsab-
gewandten Seite, indem Sie die Montagebänder entweder durch das Hinterrad über die
Rücksitzbank bzw. über das Koffersystem spannen und festzurren.
Die Bedienungsanleitung ist für weitere Verwendung aufzubewahren.
Der Warnwürfel ist kein Ersatz für das gesetzlich vorgeschriebene Warndreieck.
MANUFACTURER‘S INFORMATIONS
The SOS Cube is an extra warning device in addition to the flashing warning lights and the
warning triangle required by law. Tested by TÜV as safety equipment used in road traffic.
Manufacturer
Warnwürfel GmbH
Marderstraße 3, D-85598 Baldham, Germany, www.warnwuerfel.de
Features
Model: SOS Cube; colours: red and neon yellow; with reflection stripes DIN EN 471;
International emergency call: 112
Materials: 100% polyester;
Size (mounted): 50cm x 50cm x 50cm
Size (packed): 25cm x 21cm x 4cm
Weight: 300g; made in China
Care Instructions
The SOS Cube is not washable. Wipe with a damp cloth if soiled. Avoid direct sunlight.
Hazard Warning
For safety reasons, be sure to set up the SOS Cube on the side away from the traffic.
Its function may be impaired in case of extreme soiling, torn fabric, or damage to the fixing
tape or Velcro strips.
Use only while the car is not moving. Not a toy. No liability shall be assumed for improper
use.
INSTRUCTIONS CAR
Read the instructions carefully before use!
1. Put the bag on the car roof from the side away from the traffic (for safety reasons). The
arrow indicating the direction of travel will help you to put the bag the right way round.
The bag is secured by a leash. Now take the ends of the tapes and bring them together
inside of the vehicle.
2. Avoid opening the doors wide on the traffic side – just a narrow gap in the door or
window will be sufficient for guiding the tape inside the vehicle. On vehicles with 4
doors, it is advisable to fix the SOS Cube through the rear windows allowing the front
doors to be opened if necessary.
3. Do not take the SOS Cube out of the bag until you are sure that the tapes are firmly fixed.
4. Now take the SOS Cube out of the bag. It unfolds flat on a surface measuring 50 cm x
50 cm. Lift up one side to a right angle (90°) and pull the ribbon labelled „Pull“. The SOS
Cube opens up to its full size.
5. To adjust the SOS Cube to the desired position, simply turn it on the car roof (displaying
„Help“ or the „!“ warning symbol). The SOS Cube is fastened in its final position using
the Velcro strips attached.
6. If necessary, you can change your call for „Help/SOS“ to the „!“ warning symbol by
simply turning the SOS Cube again and refastening it with the Velcro strips.
7. Attention: The cube must be removed before you continue your journey. Follow the
instructions in reverse order to refold and pack the SOS Cube again. Fold the SOS Cube
by twisting it into a figure of 8 and then put it back in the bag. Only then should the tapes
be removed from the car roof.
INSTRUCTIONS MOTORBIKE
Proceed as described above. Assemble your SOS Cube from the side away from the
traffic, by feeding the straps either through the rear wheel and over the pillion seat, or
around the case set, and tie down firmly.
Keep the instructions safe for further use.
The SOS Cube does not replace the warning triangle prescribed by law.
Die 4Ws: Empfehlenswerte Reihenfolge bei der Absicherung einer Panne:
1. Warnblinkanlage anschalten.
2. Warnweste anlegen.
3. Warndreieck in ausreichender Entfernung (100–200m) aufstellen.
4. Warnwürfel in gewünschter Position auf das Autodach anbringen.
Instructions for ensuring safety on breakdown (recommended order):
1. Switch on flashing hazard lights.
2. Put on reflective vest.
3. Set up warning triangle a sufficient distance away (100–200m).
4. Fix the SOS Cube in the desired position on the car roof.