Wasp Barcode Technologies WWS250i User manual

WWS250i

Table of Contents
Chapter 1 Introduction 4
Chapter 2 Barcode Symbologies 5
Chapter 3 Quick Start 6
Chapter 4 WWS250i Setup & Configuration 8
1. Setup & Configuration 8
2. Factory Default and Autosense Stand Mode 8
3. Connection and Scan Options 9
4. Start and Stop Pin 10
5. Interface Settings 11
6. Memory Mode 11-13
7. Beep Settings 14
8. Reading Mode/Vibration Setting 15
9. Smartphone Connection/Keyboard 16
10. Set Scanner ID 17
11. Interblock/Intercharacter Delay and Caps Lock 18
12. Keyboard Language 19
13. Preamble/Postamble, Terminator, and Code ID 20
14. Enable/Disable Barcode Symbologies 21
Code 39 and Interleaved 2 of 5 Settings 22
Code 93 and MSI Plessey Settings 23
Code 128 Settings 24
Codabar and UPC-A Settings 25
UPC-A Supplement Settings / UPC-A to EAN-13/UPC-E Settings 26
UPC-E Supplement/EAN-8 Settings 27
EAN-8 Supplemental and EAN-13 Settings 28
EAN-13 Supplemental Settings 29
Chapter 5 Bluetooth Settings 30
Appendix A Barcode Test Symbols 31-32
Appendix B ASCII Table 33-36
Appendix C Function Codes for PC 37
Appendix D Technical Specifications 38
Appendix E Warranty Information and FAQ 39
Appendix F Barcode Glossary 40

2
FCC WARNING STATEMENT
CANADIAN DOC STATEMENT
CE MARKING AND EUROPEAN UNION COMPLIANCE
WASTE ELECTRICAL AND ELECTRONIC EQUIPMENT
ROHS STATEMENT OF COMPLIANCE
NON-MODIFICATION STATEMENT
This equipment has been tested and found to comply with the limits for a Class B digital device, pursuant to Part 15 of the
FCC Rules. These limits are designed to provide reasonable protection against harmful interference in a residential installation.
This equipment generates, uses and can radiate radio frequency energy and, if not installed and used in accordance with the
instructions, may cause harmful interference to radio communications. However, there is no guarantee that interference will not
occur in a particular installation. If this equipment does cause harmful interference to radio or television reception, which can be
determined by turning the equipment off and on, the user is encouraged to try to correct the interference by one of the following
measures:
• Reorient or relocate the receiving antenna.
• Increase the separation between the equipment and receiver.
• Connect the equipment into an outlet on a circuit different from that to which the receiver is connected.
• Consult the dealer or an experienced radio/TV technician for help.
This digital apparatus does not exceed the Class B limits for radio noise for digital apparatus set out in the Radio Interference
Regulations of the Canadian Department of Communications.
Le présent appareil numérique n’émet pas de bruits radioélectriques dépassant les limites applicables aux appareils numériques
de las classe B prescrites dans le Réglement sur le brouillage radioélectrique édicté par les ministère des Communications du
Canada.
Testing for compliance to CE requirements was performed by an independent laboratory. The unit under test was found
compliant with all the applicable Directives, 2004/108/EC and 2006/95/EC.
The WEEE directive places an obligation on all EU-based manufacturers and importers to take-back electronic products at the end
of their useful life.
This product is compliant to Directive 2002/95/EC.
Changes or modifications to this document are not expressly approved. Any unapproved changes will void the compliance
agreement with the parties responsible for creating this document.
2 3
WARNING AND CAUTION
1. Do not put metals into contact with the terminals in connectors.
2. Do not use scanner near any inflammable gases.
If the following conditions occur, immediately power off the host computer, disconnect the interface cable, and contact your nearest dealer.
1. Smoke, abnormal odors or noises come from the scanner.
2. Drop the scanner so as to affect the operation or damage its housing.
Do not:
1. Put the scanner in places with excessively high temperatures such as under direct sunlight.
2. Use the scanner in extremely humid areas or during drastic temperature changes.
3. Place the scanner in oily, smokey or steam-filled environments such as on a cooking range.
4. Cover or wrap up the scanner in poorly-ventilated areas such as under a cloth or blanket.
5. Insert or drop foreign materials or water into scanning window or vents.
6. Use the scanner while hand is wet or damp.
7. Use the scanner with anti-slip gloves containing plasticizer and chemicals or organic solvents such as benzene, thinner, insecticide etc to
clean the housing.
8. Scratch or modify the scanner and bend, twist, pull or heat its interface cable.
9. Put heavy objects on interface cable.
Do not stare at the light source from the scanning window or point the scanning window at other people’s eyes. Eyesight may be damaged by
direct exposure to scanning light.
Do not put the scanner on an unstable or inclined plane. The scanner may drop, creating injuries.
Once the interface cable is damaged, such as having exposed or broken copper wires, stop using immediately and contact your dealer.
Otherwise, it could result in fire or electrical shock.

4
Chapter 1
4
Introduction
Barcoding is the most common Automated Data Collection (ADC) technology. It provides timely, error-free information that
can be used to increase productivity, accuracy, and efficiency in the workplace. Virtually every type of industry is using
barcodes to replace keyboard data entry. Studies have shown that a proficient data entry operator will make one error for every
300 characters that are manually entered. The error rate using barcodes is negligible and can be error-free using barcode
symbologies with the check digit enabled.
The Wasp Charged Coupled Device (CCD) technology is a technique whereby a barcode is photographed, digitized, and
electronically sampled by built-in photodetectors. The detectors process the measurement of every bar and space using the
number of adjacent photodetectors which contrast a black mark and a white space. Of all the hand-held barcode scanning
devices on the market, the CCD reader is the easiest to use and most cost effective for the typical business user.
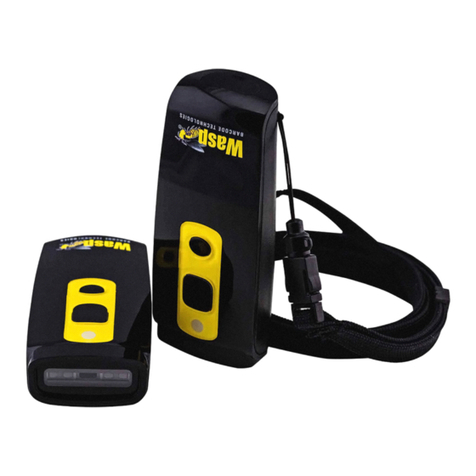
The Wasp WWS250i Scanner is an extended distance scanner with a depth of reading of up to one foot depending on the mil size
of the barcode. To activate the scanner, the user simply points the scanning aperture towards the barcode, pulls the trigger, and
aims the red LED beam across the barcode.
LED Light Indicator
Scan/Wake Scanner (After Idle)
Toggle Keyboard On/Off & Connect Via BT
Cable/Charge Port

4
Chapter 2
5
Barcodes are symbols consisting of a series of bars and spaces which can be applied to packages, cartons, bottles, and other
commercial products. The bars and spaces in each symbol are grouped in such a way to represent a specific ASCII character
or function. The interpretation of these groups is based on a particular set of rules called symbologies. Various symbologies
have been developed for particular applications. Some examples are shipping and receiving, manufacturing, retail, healthcare,
transportation, document processing and tracking, and libraries.
The resolution of a barcode is dependent on the narrowest element of a barcode (X dimension), and can vary from high density
(nominally less than 0.009 in./0.23 mm), medium density (between 0.009 in./0.23 mm and 0.020 in./0.50 mm), and low density
(greater than 0.020 in./0.50 mm). Medium and low densities are the most common since these are the easiest to read (scan)
with nearly all scanning devices. The Wasp WWS250i scanner can read barcodes with X-dimensions as low as 5 mils (0.005
in/0.13mm).
The Wasp WWS250i Scanner can read the most popular barcode symbologies including Code 39, Code 93, Code 128, Interleaved
2 of 5, UPC-A, UPC-E, EAN/JAN-8, EAN/JAN-13, Codabar, and MSI/Plessey. The WWS250i Scanner is also capable of reading
popular 2D barcode symbologies, including Aztec Code, Codablock A and F, Data Matrix, EAN-UCC Composite Codes, MaxiCode,
MicroPDF417, PDF417, QR Code, Micro QR Code, and Chinese Sensible Code.
Please see test chart on pages 31-32.
Barcode Symbologies

6
Chapter 3 QUICK START
Quick Start
1. Unpack.
Open the box and remove all the pieces from their protective packaging.
2. Charging the WWS250i.
You must charge the scanner for 4 hours before first using it. To charge the
scanner plug the power supply in to the bottom of the scanner.
3. Setting up Bluetooth.
If you already have Bluetooth setup on your PC or device, please continue to the next step.
To setup Bluetooth on your PC you will need to insert the CD with the Bluetooth software on it. Follow the instruction on the CD
for installing the Bluetooth software.
4. Connecting the scanner to a Bluetooth device.
The scanner will connect to most Bluetooth devices that support HID connection.
You will need to open your Bluetooth software and search for Bluetooth devices. The Bluetooth software can be found by clicking
the Bluetooth symbol on the start bar near the computer time. If the Bluetooth symbol is
not found, there could be a problem
with the Bluetooth installation.
Once you have the Bluetooth software open you will need to scan the Set Connection
barcode (pg 9). This will make the scanner
ready
to be detected by the Bluetooth software.
The following screens are Microsoft’s standard Bluetooth wizard.
*Most Bluetooth wizards will have similar steps. Instructions for XP users are displayed below. Instructions for Win7 users
begin on page 7
Check the “My device is setup and ready to be found.” and click Next.
The scanner will show up in the list of Bluetooth devices found. Select the Wasp Barcode Bluetooth
Keyboard and click Next.
If Wasp Barcode Bluetooth Keyboard does not show up in the available devices please check the
following:
1. Make sure the scanner is on by pressing the trigger.
2. If you are using a pre-installed Bluetooth
adapter, make sure the adapter supports HID.
The next step will ask you to setup a passkey for the device. By default the scanner will not have a
passkey set. Please select “Don’t use a passkey” and click Next.
You can set a passkey later if you prefer,see Start/Stop Pin on page 10 for details.

6
Chapter 3
7
The Complete Wizard screen appears. Just click Finish to complete.
Once the wizard is complete the scanner will show up as a Wasp Keyboard. Click OK to close the
screen. You are now ready to use the WWS250i.
(XP Instructions, cont.)
Win7 Instructions
On the Add a Device screen, select Wasp Barcode. Click the Next button.
Enter the Pairing Code provided into your mobile device. Once the PC detects the pairing code
has been entered and a connection has been established, the Next button will become enabled.
Click Next to contine.
You can verify that your device has been added by clicking the Devices and Printers link on the
screen. Click Close to close the connection wizard.
QUICK START

8
Chapter 4
8
SETUP AND CONFIGURATION/FACTORY DEFAULT/AUTOSENSE STAND MODE
Use the Factory Default barcode to reset the scanner to the Default settings.
Factory Default
In order to configure the Wasp WWS250i Scanner, you must familiarize yourself with the setup procedures on the following pages.
The default settings of the scanners are identified on each page and clearly marked using an asterisk (*). The default settings have
been preprogrammed for the most common barcode configurations. Use the setup & configuration barcodes only to customize the
WWS250i Scanner settings. If you need to configure the Scanner, the default settings will be overwritten. All the programmed settings
are stored permanently in non-volatile memory.
In order to configure the Wasp WWS250i Scanner, two basic steps need to be followed:
(1) Locate the group that contains the options to be changed.
(2) Scan the barcode representing the option to be changed. The scanner will sound two beeps.
To change Minimum/Maximum Length:
(1) Scan the Minimum or Maximum Length barcode associated with the symbology.
(2) Scan a 2 digit value from the numbers on page 10.
(3) Scan the Minimum or Maximum Length barcode again.
Example: To have a minimum length barcode of 1, you must scan a 0 then 1, then scan the minimum barcode again. To have a
maximum length barcode of 10, you must scan a 1 then 0, then scan the maximum barcode again.
Setup & Configuration
Factory Default

8
Chapter 4
9
CONNECTION AND SCAN OPTIONS
Check Version
Scan the Check Version barcode to verify your current firmware’s version number.
Check Version
Set Connection
Scan this barcode to break your current connection and enable your device to connect to a new Bluetooth host.
Set Connection
Bluetooth SPP (Bluetooth COM)
The Bluetooth SPP (Serial Port Protocol) creates a virtual Bluetooth comport. This setting is not recommended. Only use this option if
you have software capable of capturing data off of a comport.
Bluetooth SPP (Bluetooth COM)
Bluetooth HID
Use this setting (on by default) to pair with most Bluetooth connections. Bluetooth HID works just like a keyboard..
Bluetooth HID*
*Default Setting

10
Chapter 4
10
CONNECTION AND SCAN OPTIONS
11
Start and Stop Pin
Use the Start and Stop Pin barcodes if you are prompted for a password during Bluetooth pairing. To use this setting:
1. When prompted for a password, scan the Start Pin barcode
2. For each digit in the password shown on your screen, scan the corresponding barcode (below).
3. Scan ENTER.
4. Scan the Stop Pin barcode.
Now the Pin is set and the scanner should pair to the PC. Test the connection by scanning a barcode from WordPad, NotePad or the
equivalent and verifying the scan is correct.
Start Pin
Stop Pin
ENTER
Scan the numbers for your password, then scan ENTER.
When numbers have been entered, scan Stop Pin.

10
Chapter 4
INTERFACE SETTINGS AND MEMORY MODE
11
Memory Mode
Interface Settings
Delete Last Record
After scanning the above barcode, the scanner will be able to collect barcode data off-line. The barcode data will be stored in the format
of: < Date >, < Time >, < Barcode Data > < CR > (see below to change formats)
To retrieve stored data, please connect the scanner to the host with cable.
Access removable storage device “MiniScan” from which you may open or copy the file “BARCODE.txt” to your computer.
To delete ONE stored data, please scan below barcode or press Delete Button.
To delete ALL stored data, simply delete the file “BARCODE.txt” in the removable storage device “MiniScan” until you hear two beeps.
To exit memory mode, scan any interface barcode in the “interface” section of the manual.
Scan any one of the barcodes below to reset the scanner back to the desired interface:
*
After scanning the above barcode, the scanner will be able to collect barcode
data off-line. The barcode data will be stored in the format of:
< Date >, < Time >, < Barcode Data > < CR >
To retrieve stored data, please connect the scanner to the host with cable,
access removable storage device “MiniScan” from which you may open
or copy the file “BARCODE.txt” to your computer.
To delete ONE stored data, please scan below barcode or press Delete Button.
To delete ALL stored data, simply delete the file “BARCODE.txt” in the
removable storage device “MiniScan” until you hear two beeps.
. R005$
*.R005$*
MEMORY MODE
- 25 - - 26 -
TERMINATOR
LF
CR + LF
NONE
SPACE
TAB
. D012$
CR
. D011$
. D013$
. D010$
. D015$
. D014$
. C035$
*.c035$*
Memory Mode
Delete Last Record
Delete Button
WIRELESS SCANNER SETTINGS
GROUP-13
Emulates a USB virtual com device that transmit each
barcode data to the host after decode. Barcode data is
sent via USB cable directly. For VCP driver, please contact
our sales representative or technical support team.
. C006$
USB VCP
. C008$
USB HID
INTERFACE
BT SPP
. E042$
. E043$
Memory Mode
. C035$
Emulates a Bluetooth HID keyboard that transmits
each barcode data to the host after decode. Wireless
scanner operates in this mode right out of box. Please
see next page for details.
Emulates a USB keyboard that transmits each barcode
data to the host after decode. Barcode data is sent via
USB cable directly.
Emulates a USB mass storage device that saves each
barcode data during off-line data collection. See Memory
Mode chapter (Group 23) for details.
Emulates a Bluetooth SPP device that transmits each
barcode data in serial communication to the host
after decode. Please see next page for details.
BT HID

12
Chapter 4
MEMORY MODE MEMORY MODE
Example: To set Date to 2014-08-01 (Year-Month-Day):
1. Scan [
Set Date
]
2. Scan [1], [4], [0], [8], [0], [1] on page 11 & 12.
3. Scan [
Set Date
]
Example: To set Time to 08:10:30 am (Hr:Min:Sec)
1. Scan [
Set Time
]
2. Scan [0], [8], [1], [0], [3], [0] on page 11 & 12.
3. Scan [
Set Time
]
. R006$
*.R006$*
SET DATE
. R007$
*.R007$*
SET TIME
* To avoid Time and Date being reset to factory default due
to running out of battery, please fully charge the scanner for
at least 3 hours before use.
- 27 - - 28 -
Example:
To change Data Format to
<Barcode Data>, <Date>, <Time>
1. Scan [
Data Format
]
2. Scan [4], [2], [3] on page 11.
3. Scan [
Data Format
]
The default Data Format is
<Date>, <Time>, <Barcode Data>
below are the codes for each item:
. R011$
*.R011$*
DATA FORMAT
2
4
Date
Barcode Data
Code Item Code Item
3 Time
Memory Mode
Example: To set Date to 2014-08-01 (Year-Month-Day):
1. Scan [Set Date]
2. Scan [1], [4], [0], [8], [0], [1] on page 10. (yymmdd)
3. Scan [Set Date]
Example: To set Time to 08:10:30 am (Hr:Min:Sec)
1. Scan [Set Time]
2. Scan [0], [8], [1], [0], [3], [0] on page 10. (hhmmss)
3. Scan [Set Time]
* To avoid Time and Date being reset to factory default due to running out of battery, please fully charge the scanner for at least 3 hours before use.
The default Data Format is <Date>, <Time>, <Barcode Data>. Below are the codes for each item:
Code Item
2 Date
3 Time
4 Barcode Data
Example:
To change Data Format to <Barcode Data>, <Date>, <Time>
1. Scan [Data Format]
2. Scan [4], [2], [3] on page 10.
3. Scan [Data Format]
MEMORY MODE

12 13
Chapter 4
The default Date Format is DD/MM/YYYY (Code = 09). Below is full list of available formats and their setup codes:
Code Format
01 DD-MM-YYYY
02 MM-DD-YYYY
03 DD-MM-YY
04 MM-DD-YY
05 YYYY-MM-DD
06 YY-MM-DD
07 DD-MM
08 MM-DD
09 DD/MM/YYYY
10 MM/DD/YYYY
11 DD/MM/YY
12 MM/DD/YY
13 YYYY/MM/DD
14 YY/MM/DD
15 DD/MM
16 MM/DD
Example:
To set Date Format to MM/DD/YY (Code =12)
1. Scan [Date Format]
2. Scan [1], [2] on page 11.
3. Scan [Date Format]
The default Time Format is HH:MM:SS (Code = 01). Below are available formats and their setup codes:
Code Format
01 HH:MM:SS
02 HH:MM
Example:
To set Time Format to HH:MM (Code = 02)
1. Scan [Time Format]
2. Scan [0], [2] on page 11 & 12.
3. Scan [TimeFormat]
The default Date Format is DD/MM/YYYY (Code = 09), below
is full list of available formats and their setup codes:
Example:
To set Date Format to MM/DD/YY (Code =12)
1. Scan [
Date Format
]
2. Scan [1], [2] on page 11.
3. Scan [
Date Format
]
. R008$
*.R008$*
DATE FORMAT
MEMORY MODE
01
02
03
04
05
06
07
08
DD-MM-YYYY
MM-DD-YYYY
DD-MM-YY
MM-DD-YY
YYYY-MM-DD
YY-MM-DD
DD-MM
MM-DD
Code Format Code Format
09
10
11
12
13
14
15
16
DD/MM/YYYY
MM/DD/YYYY
DD/MM/YY
MM/DD/YY
YYYY/MM/DD
YY/MM/DD
DD/MM
MM/DD
The default Time Format is HH:MM:SS (Code = 01), below
are available formats and their setup codes:
Example:
To set Time Format to HH:MM (Code = 02)
1. Scan [
Time Format
]
2. Scan [0], [2] on page 11 & 12.
3. Scan [
TimeFormat
]
. R009$
*.R009$*
TIME FORMAT
MEMORY MODE
01 HH:MM:SS
Code Format Code Format
02 HH:MM
- 29 - - 30 -
MEMORY MODE

14
The ‘Beep and Delay’ configuration supports the general control options for the Wasp WWS250i Scanner. These options include the volume,
intercharacter delay, and interblock delay.
Interblock delay (see page 18) is the minimum time interval between two adjacent scans. If the processing speed of your host device is slower than
your scanning speed, a longer interblock delay may ensure the data integrity.
Intercharacter delay (see page 18) is the time period that the scanner will wait before transmitting the next character. If data sent by the scanner has
incorrect or missing characters, a longer intercharacter delay may solve the problem. The intercharacter delay should be changed only if the transfer
rate cannot be maintained between the scanner and the keyboard buffer of the computer.
Note: The default for the intercharacter delay is set to ‘140us’ and is the most common configuration; however, your PC may be different. When you
scan a barcode, if some stray or scrambled characters appear, increase the intercharacter delay to slow down the transfer rate.
Single long beep
Single beep
Single short beep
Two beeps
Two short beeps
Four beeps (Hi-Lo-Hi-Lo)
Five beeps
Three beeps
Three short beeps
Several short beeps
Off
Flashing Blue
Green for 2 sec
Flashing Red
Solid Red
Solid Green
*
Power up
Good read
The scanner reads a Code39 of ASCII in configuration procedure
i. Wireless connection
ii. The scanner successfully reads a configuration barcode
Good read (Batch mode/Memory mode)
Out of range/Poor connection
Low power
Wireless disconnection
i. The scanner reads a barcodes while disconnected.
ii. The scanner reads an unexpected barcode during configuration procedure.
(scan [ABORT] to abort and start over)
The scanner switches from one communication mode to another
Standby or Power off
Disconnected or Discoverable
Good Read
Low power
Charging
Fully Charged
Beeper Indication
LED Indication
Beep Settings
WWS250i
Chapter 4 BEEP SETTINGS
. D012$
. D013$
CR+LF
. D014$
TAB
. D015$
SPACE
. D010$
NONE
. D016$
ESC
. D011$
LF
.F019$
BEEP HIGH
.F022$
BEEP LOW
BEEP OFF
. F012$
.F018$
BEEP MEDIUM
GROUP-3
GENERAL SETTINGS -
BEEP TONE, VIBRATOR, TERMINATOR
BEEP TONE
VIBRATOR
TERMINATOR
1. For the BT HID/ USB HID interface the default terminator is CR.
2. For the BT SPP/ USB VCP interface the default terminator is CR+LF.
3. Below is the position of Terminator among output data string:
[Preamble] [Symbology ID] [Barcode Length] [Barcode Data] [Postamble] [Terminator]
4. By default, with Preamble, Postamble, Barcode Length and Symbology ID
disabled, the scanner data output will be:
[Barcode Data] [Terminator]
NOTES:
CR
. D034$
. D035$
VIBRATOR OFF
VIBRATOR ON

14 15
Trigger*
Continuous
Auto-Sensing
Vibration Off*
Vibration On
*Default
Chapter 4
READING MODE/VIBRATION SETTING
GENERAL SETTINGS
BEEPER
. P023$
. A007$
. F012$
ABORT
CHECK
VERSION
BEEP OFF
. F018$
READING MODE
. F002$
TRIGGER
CONTINUOUS
. F005$
AUTO-SENSING
. F007$
. A001$
DEFAULT
BEEP ON
VIBRATOR
. D035$
*.D035$*
VIBRATOR ON
. D034$
*.D034$*
VIBRATOR OFF
- 17 - - 18 -
*.F007$*
GENERAL SETTINGS
BEEPER
. P023$
. A007$
. F012$
ABORT
CHECK
VERSION
BEEP OFF
. F018$
READING MODE
. F002$
TRIGGER
CONTINUOUS
. F005$
AUTO-SENSING
. F007$
. A001$
DEFAULT
BEEP ON
VIBRATOR
. D035$
*.D035$*
VIBRATOR ON
. D034$
*.D034$*
VIBRATOR OFF
- 17 - - 18 -
*.F007$*
Reading Mode
Vibration
Gives haptic feedback on successful scan (or wake from sleep).

16
Chapter 4
SMARTPHONE CONNECTION/KEYBOARD
Getting Connected - iOS & Android
1. Press the trigger for 1 second to power up the scanner.
2. Scan below configuration barcode to clear last pairing record.
Touch Keyboard - iOS
To toggle iOS Touch Keyboard, please press this button.
Touch Keyboard - Android
While connected with the scanner, the Touch Keyboard on the Android
smartphone or tablet might disappear. To resolve this issue, please
change settings on Android device with below steps:
1. Enter “Settings”
2. Enter “Language & input”
3. Tap on “Default keyboard”
4. Turn off “Physical keyboard”, or Turn on “On-screen keyboard” and the
Touch Keyboard will function properly again.
3. Scan below configuration barcode; the scanner will emit several beeps.
4. Select “Wasp Bar/Wireless Scanner” from discovered device list.
5. The scanner will beep twice to verify the connection.
Smartphone/Tablet Connection Smartphone/Tablet Touch Keyboard
- 13 - - 14 -
SMARTPHONE/TABLET CONNECTION
Getting Connected - iOS & Android
1. Press the trigger for 1 second to power up the scanner.
2. Scan below configuration barcode to clear last pairing record.
3. Scan below configuration barcode; the scanner will emit several beeps.
SMARTPHONE/TABLET TOUCH KEYBOARD
Touch Keyboard - Android
Touch Keyboard - iOS
To toggle iOS Touch Keyboard, please press this button.
While connected with the scanner, the Touch Keyboard on the
Android smartphone or tablet might disappear. To resolve this
issue, please change settings on Android device with below steps:
1. Enter “Settings”
2. Enter “Language & input”
3. Tap on “Default keyboard”
4. Turn off “Physical keyboard”, or Turn on “On-screen keyboard”
and the Touch Keyboard will function properly again.
iOS Hotkey Button
. E043$
BT mode - HID
*.E043$*
4. Select “Wireless Scanner” from discovered device list.
5. The scanner will beep twice to verify the connection.
Disconnect
. E031$
*.E031$*
Tap to
connect
Slide to
turn off

17
Chapter 4 SET SCANNER ID
To customize your own Bluetooth device name for the wireless scanner, please follow below steps:
Scan up to 16 alphanumeric characters from Full ASCII Table (GROUP 46-52) as your desired ID name.
Scan a desired BT mode in Interface Settings (page 11) to complete the configuration.
*Note:
1. If you have connected the scanner with the host BEFORE customizing your Bluetooth device name, please remove the device and
create a new connection to make sure device name is refreshed. For PC, it is recommended to restart the Bluetooth adaptor in order
to refresh device name.
2. At Step 3, the scanner will beep three times as an alert if more than 16 characters are entered.
3. To reset the Bluetooth device name to default (”WASP BARCODE”), please simply do Step 1 & 5, skipping Step 2 to 4.
Set Scanner ID
WIRELESS SCANNER SETTINGS
Default Wireless ID
. B022$
STEP 1
STEP 5
Scan a desired BT mode in BLUETOOTH PROFILE (GROUP 14)
to complete the configuration.
STEP 4
Set Wireless ID
. B023$
GROUP-18
SET BLUETOOTH DEVICE ID
STEP 2
Set Wireless ID
. B023$
Scan up to 16 alphanumeric characters from Full ASCII
Table (GROUP 46-52) as your desired ID name.
STEP 3
*Note:
1. If you have connected the scanner with the host BEFORE
customizing your Bluetooth device name, please remove
the device and create a new connection to make sure
device name is refreshed. For PC, it is recommended to
restart the Bluetooth adaptor in order to refresh device name.
2. At Step 3, the scanner will beep three times as an alert that
more than 16 characters are entered.
3. To reset the Bluetooth device name to default (”WASP
BARCODE”), please simply do Step1 & Step 5, skipping Step 2
to Step 4.
To customize your own Bluetooth device name for the
wireless scanner, please follow below steps:

17 18
Chapter 4
INTERBLOCK/INTERCHARACTER DELAY AND CAPS LOCK
0ms * 10ms 50ms
100ms 200ms
140us * 500us 1ms
4ms 16ms
500ms
Interblock Delay
Intercharacter Delay
*Default
• Caps Lock Auto (For PC XT/AT only):
In Auto mode, the scanner will keep track of the Caps Lock status automatically. For some PCs, the scanning performance may be
compromised because of the auto tracing. If the scanning performance is poor (or cannot scan) or the scanner cannot output the
upper/lower case characters correctly, try to select one of the next two choices instead of auto tracing.
• Caps Lock Off:
When the keyboard is in the unshifted state
(Caps Lock is not pressed), select “Lower Case.”
• Caps Lock On:
When the keyboard is in the shifted state (Caps Lock is on),
select “Upper Case.”
Caps Lock On
Caps Lock Off *
Caps Lock Auto

19
Chapter 4
19
KEYBOARD LANGUAGE
The ‘Keyboard Language’ setting controls the key codes for your keyboard’s language.
*
KEYBOARD LAYOUT
. C010$
ENGLISH
(USA)
. C018$
ENGLISH
(UK)
. C011$
GERMAN
. C012$
FRENCH
. C013$
SPANISH
. C014$
ITALIAN
. C009$
JAPAN
(106 key)
CANADIAN
(TRADITIONAL)
. C034$
NORWEGIAN
. C029$
SWEDISH
. C026$
PORTUGUESE
. C031$
CANADIAN
(FRENCH)
. C025$
- 19 - - 20 -
HUNGARIAN
(101 KEY)
BRAZILIAN
(PORTUGUESE)
SLOVAK
SWISS
(FRENCH)
DUTCH
DANISH
BELGIAN
(AZERTY)
. C016$
SWISS
(GERMAN)
KEYBOARD LAYOUT
. C017$
CZECH
(QWERTY)
. C022$
CZECH
(QWERTZ)
HUNGARIAN
(QWERTZ)
. C021$
. C015$
ALT CODE
. C024$
. C023$
. C033$
. C032$
. C027$
. C028$
. C030$
- 21 - - 22 -
Other manuals for WWS250i
1
This manual suits for next models
1
Table of contents
Other Wasp Barcode Technologies Barcode Reader manuals

Wasp Barcode Technologies
Wasp Barcode Technologies WPL614 User manual

Wasp Barcode Technologies
Wasp Barcode Technologies WWS250i User manual

Wasp Barcode Technologies
Wasp Barcode Technologies WPL308 Series User manual

Wasp Barcode Technologies
Wasp Barcode Technologies WWS550i User manual

Wasp Barcode Technologies
Wasp Barcode Technologies WWS150i User manual