manuals.online logo
Brands
  1. Home
  2. •
  3. Brands
  4. •
  5. Waterway
  6. •
  7. Water Filtration System
  8. •
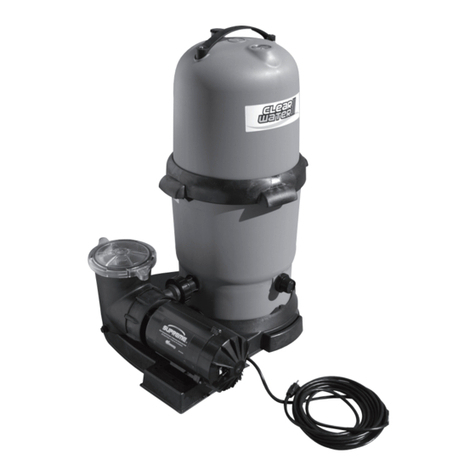
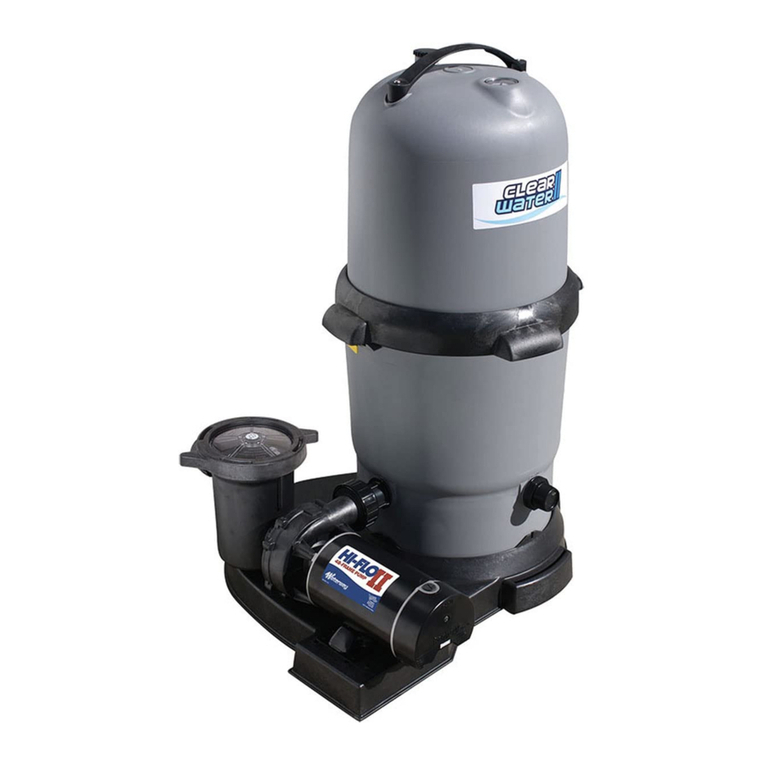
  9. Waterway Clear Water II User manual

Waterway Clear Water II User manual

2200 East Sturgis Road, Oxnard, CA 93030 • Ph. (805) 981-0262 • Fax (805) 981-9403
www.waterwayplastics.com • w[email protected]om 810-0074.0908
© Copyright 2008 Waterway Plastics
DELUXE SYSTEM
OWNER’S MANUAL
Cartridge Filter
If the pressure gauge on your lter reads 5 PSI or higher than the
original starting pressure, the lter needs to be cleaned. The ClearWater
II Cartridge Filter System features the exclusive 1-2-3 Safety Locking
System to ensure safe and simple lter maintenance.
1. Turn o pump. WARNING: Never attempt to clean lter while
pump is running. This is a pressurized vessel. It could cause
severe injury or harm to your person. Plug skimmer and pool
return lines or drain pool water level to below pool return line.
2. Slowly open the air release knob on top of lter until the pressure
gauge reads “0”. Open drain cap at bottom of lter and allow water
to ow.
3. Press the yellow safety latch on the underside of the locking nut and
turn the nut counterclockwise to remove the lid. Rinse the cartridge
element with a garden hose. There is no need to remove the element
from the lter.
4. Reassemble lid and follow start-up procedures from original
instructions.
My Original Starting Pressure is ________ PSI (Pounds per
Square Inch). I should clean the lter at ________ PSI.
Waterway Plastics manufactures its products and equipment in accordance
with very high standards of workmanship. We use the best materials available
and maintain the highest quality procedures practical in the industry. In
accordance, Waterway warrantys its products as follows:
All plastics parts such as jets, valves, skimmers,manifolds, suctions, lights,
and other plastic components manufactured by Waterway will be replaced or
repaired, if the defects are determined by Waterway to be the responsibility of
Waterway Plastics, for a period of three years from the date of installation. The
warranty does not cover lter cartridges, D.E. grids, O-rings, pressure gauges,
pump seals, light bulbs or any parts not manufactured by Waterway. Warranty
applies to OEM’s and Distributors of Waterway Products.
The Supreme and Hi-Flo Pumps will receive limited warranty from any defect
in material or workmanship for one year from the date of manufacture. This
includes the motor but not the motor seal.
All thermoplastic molded lter bodies and rotational molded sand lter bodies
have a warranty of ten years, warranted on a pro-rata life basis.If a defect
becomes apparent during the rst year, the body will be exchanged for a
new body if the defects are determined by Waterway to be the responsibility
of Waterway Plastics. If a defect becomes apparent after the rst year from
the date of manufacture which, in the opinion of Waterway, will require
replacement, the body will be exchanged for a new tank on an adjusted
service pro-rata life basis. Charges to the owner, on the pro-rata life basis, will
be determined by the actual number of months installed beginning with the
date of installation.
Products that fail or become defective during the warranty period, except as a
result of improper installation, bad water chemistry, accidents or negligence
on behalf of the owner, freezing, earthquakes, re oods, or other acts of
nature, shall be repaired or replaced at Waterway’s option without charge
to the owner. This process will be completed within 90 days of receipt of the
defective product barring delays caused by the acquisition of component parts
not manufactured at our facility.
To obtain warranty replacements or repair, defective products should be
returned (transportation paid) to the place of purchase, or to Waterway. It
should include a description of the defect and the circumstances surrounding
the incident or problem.
Waterway shall not be responsible for cartage, removal and/or reinstallation
labor, or any other such costs incurred in obtaining warranty replacements.
Warranty applies to OEM’s and Distributors of Waterway Products.
This warranty gives you specic legal rights. You may also have other rights
which very from state to state.
CLEANING INSTRUCTIONS
LIMITED WARRANTY
Our ClearWater II Cartridge Filter System is shipped from Waterway
complete with everything you need right in the box. Assemble lter
system only after above-ground pool is installed. Fill pool with water.
Do not raise water level above pool return line.
The pool equipment should be located between pool skimmer and
return line. The ltration system should not be closer than 2 ft. and not
further than 5 ft. from the pool. The ClearWater II Cartridge Filter System
needs to be on a completely at surface (e.g. patio block, cement slab,
etc.). The pump will require a 110 volt/20 amp service.
WARNING: A GFCI is required. Follow national and local
building and safety codes.
Before opening shipping carton, make sure box is in the upright
position. Inside the carton, you will nd:
1. One base
2. One pump (packaged in separate box)
3. One lter
4. Two lengths of 6 ft. hose
5. One bag with ttings
WARNING! READ ALL INSTRUCTIONS AND WARNING
LABELS BEFORE OPERATING FILTER!
1. Place lter and base on a level, secure surface. Open ttings bag and
remove coupling assembly (Detail 2). Assemble 2" gasket, coupling,
coupling o-ring, and 2" union nut, and thread into inlet side of lter.
2. Open pump trap lid and remove 2" gasket. Place 2" gasket into union
nut. Hand tighten union nut to suction side of pump (Detail 2).
3. Place the pump on the base to the left of the lter. The pump should
align wth coupling on lter side marked “Inlet”. There is no need to
disassemble lter or pump assemblies.
4. Thread 2" union nut to pump discharge (Detail 2). Thread gate valve
with gasket to pump trap suction side (Detail 2).
5. Secure pump to base using the pin and anchor assemblies (Detail 1).
6. From the ttings package, remove 1 " hose adapter and o-ring
(Detail 2). Thread into outlet side of the lter tank.
7. Remove 4 hose clamps from the ttings bag. Select one of the hose
lengths and slip one clamp over the end of the hose adapter. Place
the end of the hose on to the gate valve (pump suction) and the
other end to the hose adapter end of the pool skimmer. Repeat steps
with lter outlet to pool return.
8. Remove the lid handle, #4a, from the ttings bag and attach it to the
top of the lid assembly, #4, as shown (Detail 3). Secure Clearwater
Filter to Clearwater Filter Base using #15a phillips head screws (2),
(Detail 4 & 5). Fill pool until water level is halfway up length of
skimmer throat.
9. Open air release knob. Plug in and turn on pump. Air will pass out of
the lter through the air release knob. Once water discharges from
knob, close it.
NOTE: To remove lid assembly, take o lter nut, #6, insert lter
wrench, #9a, in notch between lter body, #9 and lid assembly, #4,
twist and separate as shown in Detail 5.
CLEARWATER II CARTRIDGE FILTER SYSTEM OWNER’S MANUAL CLEARWATER II CARTRIDGE FILTER SYSTEM REPLACEMENT PARTS
INSTALLATION INSTRUCTIONS
Item Part No. Description
1 830-4000SS Pressure Gauge
1a 805-0224 O-Ring
1b 519-7431 Pressure Gauge - Fitting Adapter
1c 805-0117SD O-Ring
2 602-0200 Air Relief Plug
3 805-0207 O-Ring - Air Relief
4 511-7327 Lid Assembly - Small (75 or 100 sq. ft.)
511-7337 Lid Assembly - Large (150 or 200 sq. ft.)
5 805-0460 Lid O-Ring
6 718-7251 Filter Nut (sold with Lid Assembly only)
6a 519-7451 Lock-Tab
7 519-7441 Wing Nut
8 817-0075P Cartridge - 75 sq. ft.
817-0100P Cartridge - 100 sq. ft.
817-0150N Cartridge - 150 sq. ft.
817-0200N Cartridge - 200 sq. ft.
9 515-7257 Body – Filter Bottom
9a 519-7470 Filter Wrench (see Detail 5)
10 417-6240 1 " MPT x 1 " Smooth Male Hose Adapter
11 805-0224 O-Ring
12 872-9002 Corrugated Hose - Black
13 872-0010 Hose Clamp - Stainless Steel
14 500-5300 Drain Assembly
14a 505-2030 Drain Cap
15 672-7401 ClearWater II Base
15a 819-0004 #10 x 1 S/S Phillips Head Screw
16 415-5001 2 Union Nut
17 419-7241 Coupling
18 711-4010 2 Union Gasket
19 PSP1100 1 HP - 1-Speed Supreme Pump
PSP1150 1  HP - 1-Speed Supreme Pump
PSP1200 2 HP - 1-Speed Supreme Pump
PSP2100 1 HP - 2-Speed Supreme Pump
PSP2150 1  HP - 2-Speed Supreme Pump
PSP2200 2 HP - 2-Speed Supreme Pump
20 429-7221 Pin & Anchor Assembly
21 311-1520 Faceplate - Supreme Pump
22 805-0330 O-Ring
23 319-1510 Supreme Pump Trap Body
24 319-1530 Supreme Trap Basket
25 805-0439 O-Ring
26 511-1310 Trap Lid
27 319-1540 C-Clip Supreme Pump
28 711-4000 1 " Union Gasket
29 WV001H Gate Valve
20
19
DETAIL 1 DETAIL 2
DETAIL 4
11
11
18
14
14a
16
17
10
12
13
28
29
13
12
6
4
9
9a
15a
15a
6
6a
5
2
3
6a
5a 4b
1
4
7
8
1a
1b 1c
9
16
17
19
20
27
21
22
23
11
11
18 14
15
14a
15a (x 2)
24
25
26
28
29
13
12 10
12
13
DETAIL 5
15a
DETAIL 3
4a
4b

Other Waterway Water Filtration System manuals

Waterway CLEARWATER II User manual

Waterway

Waterway CLEARWATER II User manual

Waterway Crystal Water User manual

Waterway

Waterway Crystal Water User manual

Waterway 640-476x V User manual

Waterway

Waterway 640-476x V User manual

Waterway SVL56 User manual

Waterway

Waterway SVL56 User manual

Waterway pro clean plus User manual

Waterway

Waterway pro clean plus User manual

Waterway 640-476x User manual

Waterway

Waterway 640-476x User manual

Waterway clear water II User manual

Waterway

Waterway clear water II User manual

Waterway Carefree FS016 User manual

Waterway

Waterway Carefree FS016 User manual

Waterway TWM User manual

Waterway

Waterway TWM User manual

Waterway 640-479X V User manual

Waterway

Waterway 640-479X V User manual

Waterway Clear Water II User manual

Waterway

Waterway Clear Water II User manual

Waterway 640-477XV User manual

Waterway

Waterway 640-477XV User manual

Waterway 640-475x V User manual

Waterway

Waterway 640-475x V User manual

Waterway proclean plus PCCF-075 User manual

Waterway

Waterway proclean plus PCCF-075 User manual

Waterway 640-472x V User manual

Waterway

Waterway 640-472x V User manual

Waterway 640-134x V User manual

Waterway

Waterway 640-134x V User manual

Waterway 640-477x V User manual

Waterway

Waterway 640-477x V User manual

Waterway Crystal Water User manual

Waterway

Waterway Crystal Water User manual

Waterway ClearWater Series User manual

Waterway

Waterway ClearWater Series User manual

Waterway 640-479X V User manual

Waterway

Waterway 640-479X V User manual

Popular Water Filtration System manuals by other brands

Evolution Aqua evoUV Series Installation and operating manual

Evolution Aqua

Evolution Aqua evoUV Series Installation and operating manual

FDM P 605 manual

FDM

FDM P 605 manual

FUHR acuraStrainline FMC-03-10/G40-A2 operating manual

FUHR

FUHR acuraStrainline FMC-03-10/G40-A2 operating manual

Prince Castle 102 Series operating instructions

Prince Castle

Prince Castle 102 Series operating instructions

Nikken PiMag operating manual

Nikken

Nikken PiMag operating manual

Sears 625.349224 owner's manual

Sears

Sears 625.349224 owner's manual

Whirlpool WHAB-6012 Installation instructions and use and care guide

Whirlpool

Whirlpool WHAB-6012 Installation instructions and use and care guide

MS Schippers MS Reverse Osmosis 30 manual

MS Schippers

MS Schippers MS Reverse Osmosis 30 manual

VINCENT PF-2 Instructions for use

VINCENT

VINCENT PF-2 Instructions for use

Purlette PL400G owner's manual

Purlette

Purlette PL400G owner's manual

Atoll A-550 box STD Installation operation & maintenance

Atoll

Atoll A-550 box STD Installation operation & maintenance

ControlOMatic TechniChlor operating instructions

ControlOMatic

ControlOMatic TechniChlor operating instructions

Pentair STA-RITE SAND DOLLAR Installation and user guide

Pentair

Pentair STA-RITE SAND DOLLAR Installation and user guide

Merlin 58182 quick start guide

Merlin

Merlin 58182 quick start guide

Everpure Steam Filtration System DEV9108-25 Specification sheet

Everpure

Everpure Steam Filtration System DEV9108-25 Specification sheet

Sunnen PF-150 Inspection and Installation Procedure

Sunnen

Sunnen PF-150 Inspection and Installation Procedure

Steinbach speedclean 00-40380 manual

Steinbach

Steinbach speedclean 00-40380 manual

AQUAMAXX HOB-1.5 installation guide

AQUAMAXX

AQUAMAXX HOB-1.5 installation guide

manuals.online logo
manuals.online logoBrands
  • About & Mission
  • Contact us
  • Privacy Policy
  • Terms and Conditions

Copyright 2025 Manuals.Online. All Rights Reserved.