Wattbike Pro User manual
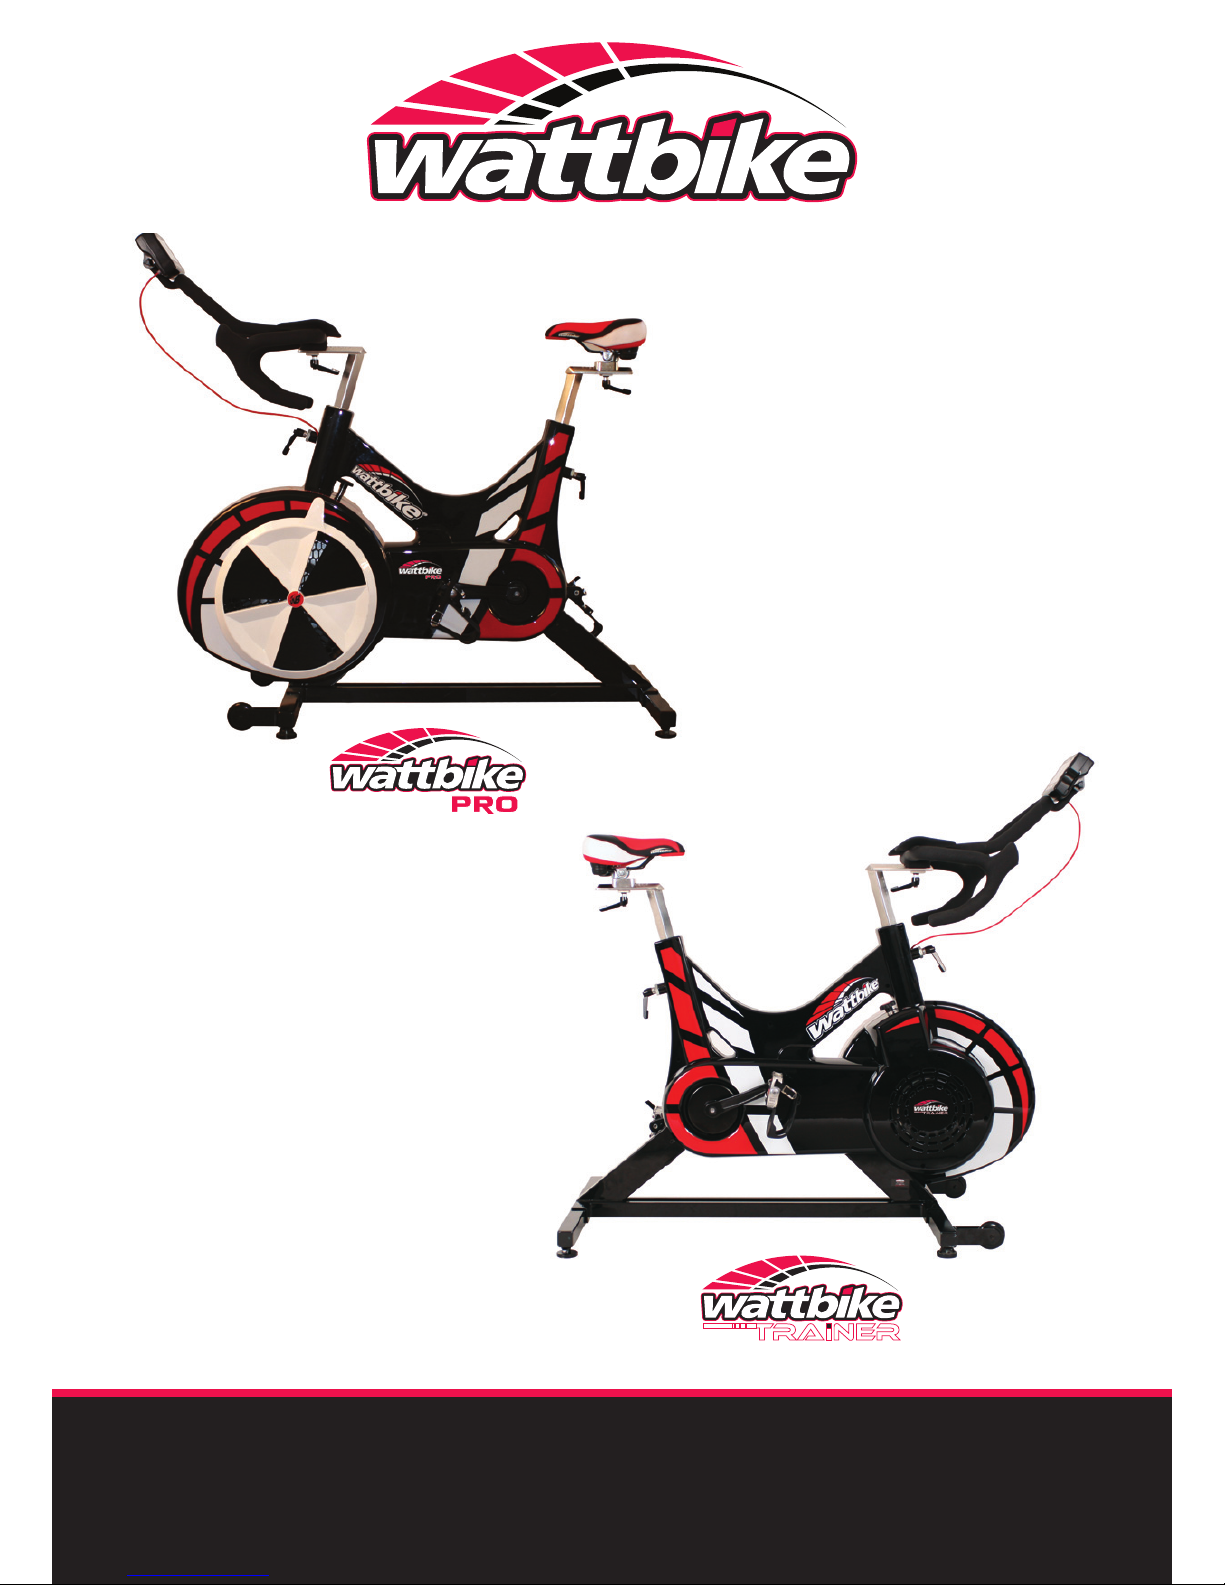
ASSEMBLY & SERVICE MANUAL

2
Contents
1. Important Safety Instructions
2. Assembly and Set Up
3. Wattbike Set Up
4. Wattbike Performance Computer
5. The Wattbike Unique Dual Braking
System
6. Preventative Maintenance and
Troubleshooting
7. Calibration

3
1. Important Safety Instructions
The Wattbike has been designed in accordance with current safety standards and any features which may cause injury have
been avoided or made as safe as possible. Incorrect repairs and any structural modications may endanger the safety of the
user. Please read and adhere to the following safety instructions:
Assembly
• KeepchildrenandbystandersawayfromtheWattbikeduringassembly
• DonotassembletheWattbikeoutsideinwetordampweatherorinadampenvironmentasthismaycausedamage
to the performance computer and measurement system
• Makesurethatassemblyisdoneinanappropriateworkspace
• Someaspectsofassemblywillrequiretwopeople,thesewillbeidentiedwiththissymbol
• Someaspectsofassemblywillrequiretools(5,6mmHex(Allen)Key),thesewillbeidentiedwiththissymbol
• DonottryandchangethedesignorfunctionalityoftheWattbike.Thiscouldcompromisesafetyandvoidthewarranty
• DonotusetheWattbikeuntilithasbeenfullyassembled
• Doallassemblystepsinthesequencegiveninthismanual
• Replacinganycomponents(exceptthesaddleandpedals)withnonWattbikecomponentsmaycompromisesafety
and may void the warranty.
General
• TheWattbikeshouldberegularlyexaminedforanydamageorwearandregularmaintenanceshouldbeperformed
as outlined in this manual
• Donotinsertanyobject,handsorfeetintoanyopeningonorunderneaththeWattbike
• DonotattempttoremoveanycoversormodifyyourWattbikeunlessitispartofarecognizedmaintenance
programme as outlined in this manual
• DonotuseaUSBcablelongerthan3metres
• DonotchargethebatteryunlesstheWattbikePerformanceComputerisOFF
• DonotstandonorkickanypartoftheWattbike
• Donotextendthesaddleorhandlebarheightabovetheminimummarking.Thesaddleheightrangeis59cmto84
cm.Thehandlebarheightrangeis55cmto74cm
• Broken,damagedorworncomponentsmayendangersafetyorreducethelifetimeoftheWattbikeandshouldbe
replaced immediately
• MultipleWattbikesshouldnotbestackedtogether.Areasonabledistanceshouldbemaintainedbetweeneach
Wattbike.DuringusetherecommendedminimumdistancebetweenWattbikesis1metre.
Using the Wattbike
• Discussyourhealthprogrammeandtnessregimenwithyourdoctororasuitablyqualiedhealthcareprofessional
beforeembarkingonanexerciseprogramme.Baseyourprogrammeofexerciseontheadvicegivenbyyourdoctor.
Incorrectorexcessiveexercisemaydamageyourhealth
• StopexercisingontheWattbikeifyoufeeldizzyorfaint
• Exerciseslowlyuntilyoureachalevelofcomfort
• OnlyusetheWattbikeforitsintendedpurpose,asdescribedinthismanual,improperusemayresultininjury
• DonotletunsupervisedchildrenoperatetheWattbike
• Donotusewithoutappropriatefootwear(cyclingortrainingshoes)
• Donotuseoutsideinwetordampweatherorinadampenvironmentasthismaycausedamagetotheperformance
computer and measurement system
• EnsuretheWattbikeispositionedonastablebaseandisproperlylevelled.
Warning
YourWattbikeisdesignedforexerciseandtraininginacommercialandconsumerenvironmentbyadultsandchildren.Foryour safety the
Wattbike should only be used for it’s intended purpose. Any other use of the Wattbike is prohibited and may be dangerous. The manufacturers
cannot be held liable for damage or injury caused by improper use of the Wattbike.
• TheWattbikeisheavy(55kg).Makesureyouholditsecurelywhilstttingtherearandfrontfoot,whenloweringittotheground
and when moving it around. It is recommended that two adults are used to assemble and move the Wattbike.
• TheWattbikeisdesignedforamaximumuserweightof330lb(23.6st)/150kg.DONOTexceedthemaximumuserweight.
• TheWattbikeshouldnotbeusedbyadults/childrenunder150cmstallorwithaninsidelegmeasurementoflessthan60cms.
• Heartratemonitoringsystemsmaybeinaccurate.Overexercisemayresultinseriousinjuryordeath.Ifyoufeelfaintstop
exercisingimmeadiately.
• Donotpushyourselftoexcess.Usecommonsense when cycling.

4
2. Assembly and Set Up
Instructions for Assembly
Toolsrequired:5mm,6mmHex(Allen)Key
TheWattbikemustbeassembledwithduecarebyatleasttwoadults.Ifindoubtcalluponthehelpofatechnicallyqualied
person.
TheWattbikeis654mmwide,1230mmlongandhasamaximumheightof1300mm.
WhentakingtheWattbikeoutofthepackingboxdonotliftorcarrytheWattbikebikeusingtheplastic covers – take a rm hold
of the frame and steel handlebar and saddle stems - two adults are needed to lift the Wattbike.
TheWattbikeisheavy–55kg.Makesureyouholditsecurelywhilstttingtherearandfrontfeet,when lowering it to the ground
and when moving it around.
2.1 Unpacking Small Parts
LeavingthemainbodyoftheWattbikeinthebox,unpackandlayoutalltheitemsfromthepackagingandensurethatyou
have all the items below:
1. Rearfoot(nowheelsattached)(Partnumber(PN):4171WBRB1001A)
2. Frontfoot(wheelsattached)(PN:4171WBFR1001A)
3. Right&Leftpedals-TheseareacombinationpedalwithLookKEO,SPDandtoeclip
options.(PN:1261-WBE148-001)
4. RecreationalWattbikesaddle(Racesaddlesareavailableasoptionalextra)
(PN:1710-FM333W-001)
5. HandlebarswithWattbikePerformanceComputerbracketattached(PN:1321WBH001001)
6. WattbikePerformanceComputer(PN:4173-WB1001-001)
7. 4x6mmHex(Allen)Keyscrews(PN:164P-CP041A-05)withwashers(PN:2120-WASHER-004),forrearandfrontfeet
8. Saddlebottomplate(onehole)(PN:1176-WABI10-007),adjustmentlever(PN:1729-WABI10-006)andwasher
(PN:212-1070-8)
9. Handlebarbottomplate(twoholes)(PN:1176-WABI10-008),5mmHex(Allen)Key40mmscrew
(PN:164P-M6BB04-002,adjustmentlever(PN:1729-WABI10-006)andwasher(PN:212-1070-8)
10. 2x25mmthumbscrewsand2smallwashers(PN:4758-M8TD18-001)forxingtheWattbikePerformanceComputer
to the handlebar bracket
11. Plug-inbatterycharger(PN:2440-ICN98C-001)
12. 3mUSBcable(PN:2430-ICP98C-002)
13. CDROMwiththeWattbikeExpertSoftware
2.2 Unpacking Main Body of the Wattbike
Withasuitableassistant,lifttheWattbikeoutoftheboxholdingtheWattbikeasshownintheimage,
andlowergentlyontotheground.DonotletgooftheWattbikeaswithoutthefrontandbackfoot
the Wattbike is not yet fully stable.
2.3 Attach Rear Foot
AskyourassistanttoliftuptherearoftheWattbiketoanangleofapproximately30degreesandhold
the bike in this position whilst you t the rear foot using two of the screws and washers provided – do
not support the weight of the Wattbike on the fan cage. Tighten the screws securely but do not over
tighten the screws.
Gently lower the Wattbike to the oor.
1.
3.
5.
4.
6.
8.
7.
9.
10.
11.
12.
13.
2.

5
2.4 Attach Front Foot
Ask your assistant to lift the front of the Wattbike so that the weight is supported on the back foot and
hold the bike in position whilst you t the front foot using the remaining two screws and washers.
Tighten the screws securely but do not over tighten the screws.
Gently lower the Wattbike to the oor.
2.5 Attach Pedals
Screwtherightpedalontotherightcrank.Tightensecurelyusinga6mmHex(Allen)Key.Repeatfortheleftpedal.
2.6 Attach Saddle
Raisethesaddlestemposttomark12togivesucientheighttowork.
Thread the saddle bottom plate onto the adjustment lever and large spring washer. Place the saddle
ontopofthestemtothefurthestbackwardadjustmentpoint,andscrewthesaddlebottomplate
and adjustment lever and large spring washer up into the saddle. Tighten securely but do not over
tighten.
2.7 Attach Handlebars
Raisethehandlebarstemposttomark13togivesucientheighttowork.
NOTE - Be careful when adjusting the stem height not to disturb the Wattbike cable.
It is easier with an assistant. Ask your assistant toholdthehandlebarsinplaceontopof,andtowards
the furthest forward adjustment point of the handlebar stem.
Place the handlebar bottom plate underneath the stem with the small hole of the handlebar bottom
plate facing the front. Attach the adjustment lever and large spring washer up through the large hole on the handlebar bottom
plate.Tightensecurely(butnottootightly).
Usingthe5mmHex(Allen)Key40mmscrewsecurethehandlebarsthroughthesmallholeofthehandlebarbottomplate.
Tightensecurely(butnottootightly)usinga5mmHex(Allen)key.
2.8 Attach Wattbike Performance Computer
SecuretheWattbikePerformanceComputer(WPC)tothebracketusingthe2x25mmthumbscrews.
Tightensecurely(butnottootightly).
Plug in the cable to the sensor socket on the back of the Wattbike Performance Computer.
NOTE - The Wattbike Performance Computer should always be switched o when attaching the
cable.
Sockets
There are four sockets on the back of the Wattbike Performance Computer
• SENSOR – to connect the WPC to the Wattbike
• CHARGE–toconnectthe12Vbatterychargeadapter
• HEART RATE – to connect to a Polar heart rate receiver
• USB–toconnecttheWattbiketoaPC(donotuseaUSBcableofmorethan3minlength)
2.9 Saddle and handlebar horizontal and vertical set up
Thesaddleandhandlebarscanbemovedhorizontallyandverticallyusingtheadjustment levers.
NOTE – The adjustment levers on the Wattbike are of a ratchet type, to move the lever pull the
lever outwards.
There are two adjustment levers on the frame of the Wattbike to set the height of the saddle
andhandlebar stems,and twoadjustment levers to set the horizontal position of the saddle and
handlebars.
Thesaddleheightrangeis59cmto84cm.Thehandlebarheightrangeis55cmto74cm.
NOTE – Do not extend the saddle or handlebar height above the minimum marking.
Thehorizontalsaddleandhandlebaradjustmenthasarangeof6cmforboth.Measurefrom the back of the saddle block for
saddleadjustment,andthefrontofthehandlebarblockforhandlebaradjustment.
6
We reserve the right to carry out preliminary assembly work at the Wattbike factory. The Wattbike and all its components are
subjecttoconstant,innovativequalityassurance.Wereservetherighttoperformtechnicalmodications.
PleasekeeptheWattbikeoriginalpackagingsothatitcanbeused,ifnecessarytotransporttheWattbikeatalaterdate.
Alwaysstorepackingmaterialinawaythatwillnotcauseanydanger.Keepplasticbagsawayfromchildren.
3. Wattbike Set Up
Thecorrectsetupiscrucialtomaximiseperformance,preventinjuryandensurethemostcomfortableridingonyourWattbike.
Thecorrectsequenceforsetupis,saddleheight,horizontalsaddleposition,handlebarheightandhorizontalhandlebarposition.
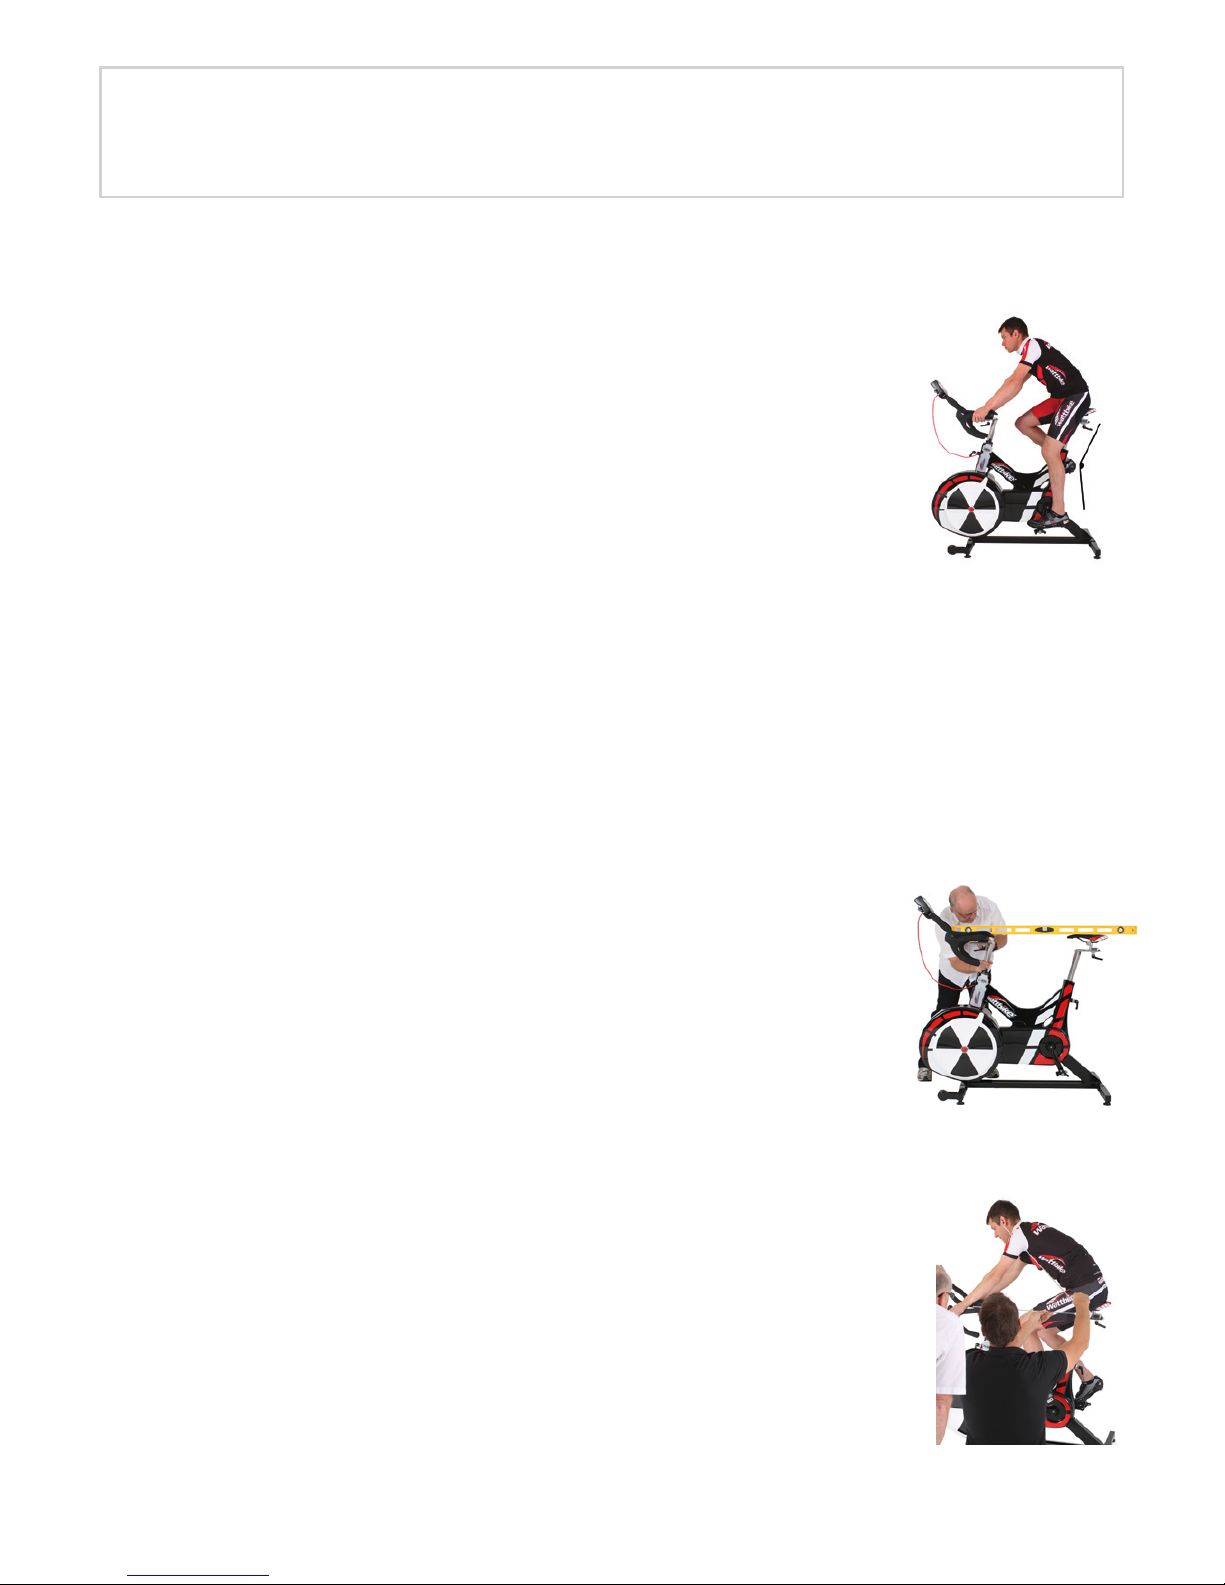
Beforestarting,ensurethatyoursaddleishorizontal,useaspiritlevelifnecessary.
3.1 Saddle Height
The easiest way to get a rough height for the saddle height is to standtheridernexttothebikewith
theheelpushedintothebackstabiliser,andthenliftthesaddleupsothatthetopofthesaddleis
level with the boney protrusion of the hip.
Sit the rider on the Wattbike and align the crank arms with the seat post,placetheheelofthefooton
thecrankarmnearesttheoor–thelegshouldbestraight(butnotlockedout).
Whenclippedin(orwithfeetinthetoeclips)andwiththepedalatitslongeststroke(inlinewiththe
seatpost)thereshouldapproximately25-30degreesbendontheknee.Theridershouldbeableto
‘drop the ankle’.
Raise/lower the saddle height to get the correct leg position. ALWAYS DISMOUNT THE WATTBIKE BEFORE MAKING
ADJUSTMENTS TO THE SADDLE.
Nowgettheridertopedalbackwards,theyshouldbeabletocompleterotationswithonlya slight rocking of hips and without
the legs locking out.
3.2 Saddle Horizontal Position
Withthefeetclippedin(orinthetoeclips)bringthecrankarmsparalleltotheoor,dropa plumb line from the inside of the
knee,intheindentationnexttothepatella-itshouldbisectthepedalspindle.Adjustthesaddlefore/afttoensurethattheknee
is over the pedal spindle.
NOTE – if you need to move the saddle fore/aft severely, you may need to raise/lower the saddle to compensate
The dierence between the forward and back positions of the saddle fore/aft adjustment is 6 cm
3.3 Handlebar Height (saddle to handlebar dierence)
Adjustthe handlebar height so that it is no more than 4 to 10 cm lower than the saddle height
(dependingontnessand exibility, a higher handlebar height maybemorecomfortable) – for
generalexerciseclassesthesaddleandhandlebarsshouldbeatthesameheight-Usealongspirit
level from the saddle across to the handlebar to set this height.
Once the handlebar height has been set, check it by asking the rider to lift their hands o the
handlebars – they should be able to hold position.
NOTE – with the saddle and handlebar both set at maximum height there is a saddle to handlebar
dierence of 7 cm – for safety reasons do not go above minimum markings – extra long stems are
available which increase the settings by 10 cm.
3.4 Handlebar Horizontal Position
Ask your participant to place their hands on top of the handlebars and bring the crank arms parallel
totheoor –drop aplumb linefromthe elbow,it shouldfall throughtheinsideoftheknee,inthe
indentationnexttothepatellaandshouldbisectthepedalspindle–adjusthandlebarsfore/afttoget
the correct position. ALWAYS DISMOUNT THE WATTBIKE BEFORE MAKING ADJUSTMENTS TO THE
SADDLE OR HANDLEBARS.
Analternativemethodistolookattheangleofthebackwhichshouldbeat45°paralleltotheoorwith
anupperarmtotorsoangleof90°.
Thedierencebetweentheforwardandbackpositionsofthehandlebarfore/aftadjustmentis6cm.
By following these simple steps the rider will be placed in the optimum position for both comfort and
eectivecyclingtechnique.Anyslightvariationincorrectsetupwillalterthealignmentofthejoints,
musclesandsubsequentlytechnique.Ensurethatyoufollowthesesimplestepswitheverynewrider
andrecapwhererequiredwithyourexisting,regularriders.
25-30°

7
3.5 Correct Positions
4. Wattbike Performance Computer
OperatingtheWattbikeisveryeasy.SimplysitontheWattbike,turnontheWattbikePerformanceComputer(WPC),select‘Just
Ride’,pressENTER and start pedaling. The Wattbike Performance Computer will start immediately and show the ‘Main menu’.
LearninghowtoadjusttheresistancelevelsandfamiliarizingyourselfwiththeWPCisjustaseasy.
TheWattbike Performance Computer is tted with a rechargeable battery and does not require an external power supply.
Whencyclingatacadenceof50r/mandabovethebatteryisrechargedwiththehelpofanintegratedgenerator.Itcanalso
berechargedusinganexternalplug-inbatterychargeralthoughtheneedforexternalrechargingisalmosteliminatedbythe
additionofthegenerator.YoushouldrechargeyourWattbikePerformanceComputerusingtheexternalplug-inbatterycharger
oncepermonth.ALWAYSchargethebatterywiththeWattbikePerformanceComputerswitchedoandonlyusethebattery
chargersuppliedwithyourWattbike,failuretodosomaydamagetherechargeablebatteries.TheWPCcanonlyoperatewith
theoriginalfactorysuppliedaccu-batteries.PleasecontactyourWattbikedistributorifyouexperienceanybatteryproblems.
TheWPClinkswithaGarminorSuuntoANTSportheartratechestbeltforheartratedisplay,oruncodedpolarbeltswithan
additional reciever.
Warning
• Heartratemonitoringsystemsmaybeinaccurate.Overexercisemayresultinseriousinjuryordeath.Ifyoufeelfaint stop
exercisingimmeadiately.
There is a RESET button on the back of the Wattbike Performance Computer – this should only be used if the Wattbike
Performance Computer display stops working or shows inconsistent data.
NOTE – You will not lose any data saved in the Memory if you activate the RESET button. If in doubt contact your local Wattbike
distributor.
5. The Wattbike Unique Dual Braking System
Thebrakingsystemisclassiedas‘unadjustable’,althoughboththeairbrakeandmagneticbrakeareadjustable manually.
Air Brake Damper Lever
TheWattbikefeaturesauniquepatentprotecteddualbrakingsystemtorecreatethefeelofcycling
on the at and whilst climbing.
Theairbrakedamperleverrecreatesthefeelofcyclingontheatusingdierentresistances.The
‘gearlever’canbemovedfrom‘1throughto10’where‘1’representsthelightestgearingand‘10’the
heaviest. The damper lever regulates the ow of air entering the ywheel. By increasing the aperture
the ow of air and the resistance is increased.
Formostworkoutsituationstheriderwillonlyneedtoapplytheairbrakedamperlever.Theresistancecanbeadjustedduring
aworkout,justasonaroadcyclewithoutcompromisingthevalidityofthedata.
Magnetic Brake Lever
The addition of a magnetic brake lever allows the rider to increase the resistance beyond the Air Brake
DamperLever.Themagnetic brake lever rotates clockwise through one complete turn and is marked
‘1’throughto‘7’where‘1’representsalevelroadand‘7’averysteepgradient.
The combination of an air brake damper lever and magnetic climb lever means that the Wattbike can
beusedforhighcadencelowwattageatoneextremeandlowcadencehighwattageattheother.
Overall riding position Tri-bar Drops

6. Preventative Maintenance and Troubleshooting
The Wattbike is constructed from high performance components and is designed to be almost maintenance free and should
withstandheavyusage.Ifyounoticeanyunusualsymptoms,suchasloudnoisesorgrindingduringoperation,stopusingyour
Wattbike and contact your local Wattbike distributor.
Foranormalserviceallthatisrequiredis5mm,6mmHex(Allen)Keys.
Donotusecorrosiveorabrasivematerialstocleantheequipment.Ensurethatsuchmaterialsarenotallowed to pollute the
environment.
Daily Maintenance
ToensureyourWattbikestaysinrstclassconditionremoveallsweat,dust,dirtorothersubstancesbyusingaclean,softcloth
and a non-abrasive liquid cleaner. Wipe down the exterior covers and frame, saddle, handlebar andWattbike Performance
Computer.
Make sure that the handlebar stem and saddle stem are not over the MIN markers.
Weekly Maintenance
Vacuum the oor under and around the Wattbike.
Inspectthefeetscrews,saddleandhandlebarslidersandWattbikePerformanceComputerbracketforlooseness.Tightenas
necessary.
Inspect the saddle and handlebar stem adjustments.Tighten as necessary. Check that the pedals are secure.Tighten as necessary.
Ensurethatnosweat/liquidispoolingonthemetalworkorcovers.
Check that the battery level on the WPC is high or medium. Go to SET UP then PROPERTIES to check and use the supplied
charger if battery reads low.
Monthly Maintenance
Checkforsmoothandquietoperationofallmovingparts.
Check your WPC rmware version - go to SET UP then PROPERTIES. Compare to the latest WPC rmware version at wattbike.
com and update if necessary.
Six Monthly Maintenance
Toolsneeded2.5mmHex(Allen)Key,alongandthincross-headscrewdriver,15mmspanner.
Lubricate the chain and check that internal parts are moving freely. You will need to remove the right side cover to lubricate
thechain,thiswillnotinvalidateyourwarranty.Todothis:removethemagneticresistanceknobandspinthisdownbelowthe
cover;removethe12screwsattachingthecover;removetherightpedal.Thecoverwillnowcomeawayandotheframe.
Lubricatethechainwiththeagrease,makesurethatallthemovingpartsarerunningsmoothlyandremoveanydust/materials
from the area.
Replacethecover,pedal,screwsandmagnetic-resistanceknob
7. Calibration
The Wattbike is factory calibrated and does not need further calibration. It is recommended that you set the zero state before
each use by:
Select Setup from the Main menu then Memory and simultaneously press all four buttons.
RotatethepedalsbackwardsforafewrevolutionstounloadtheWattbike.Thecranksshouldbeunladenedandinahorizontal
position.
Press ENTER–themonitorwillautomaticallysetzero.
The Wattbike Warranty and Regulatory Information can be found at wattbike.com/warranty

www.wattbike.com
Contact Details
Corporate Headquarters
Wattbike Ltd
VermontHouse,NottmSthandWilfordIndEst
Ruddington Lane
NottinghamNG117HQ
UnitedKingdom
Tel:+441159455454
Email: info@wattbike.com
Web: wattbike.com
Other manuals for Pro
1
This manual suits for next models
1
Table of contents
Other Wattbike Exercise Bike manuals

Wattbike
Wattbike PRO/TRAINER User manual

Wattbike
Wattbike ATOM User manual

Wattbike
Wattbike AtomX User manual
Wattbike
Wattbike ICON User manual

Wattbike
Wattbike Studio Edition User manual

Wattbike
Wattbike ATOM User manual

Wattbike
Wattbike ATOM User manual

Wattbike
Wattbike Wattbike User manual

Wattbike
Wattbike Wattbike User manual

Wattbike
Wattbike Pro User manual


