5
SAFETY INSTRUCTIONS
Read and understand the owner’s manual and labels affixed to the machine. Learn its application and
limitations as well as the specific potential hazards. Retain these instructions for future reference. The
operator is responsible for following the warnings & instructions in this manual and on the product.
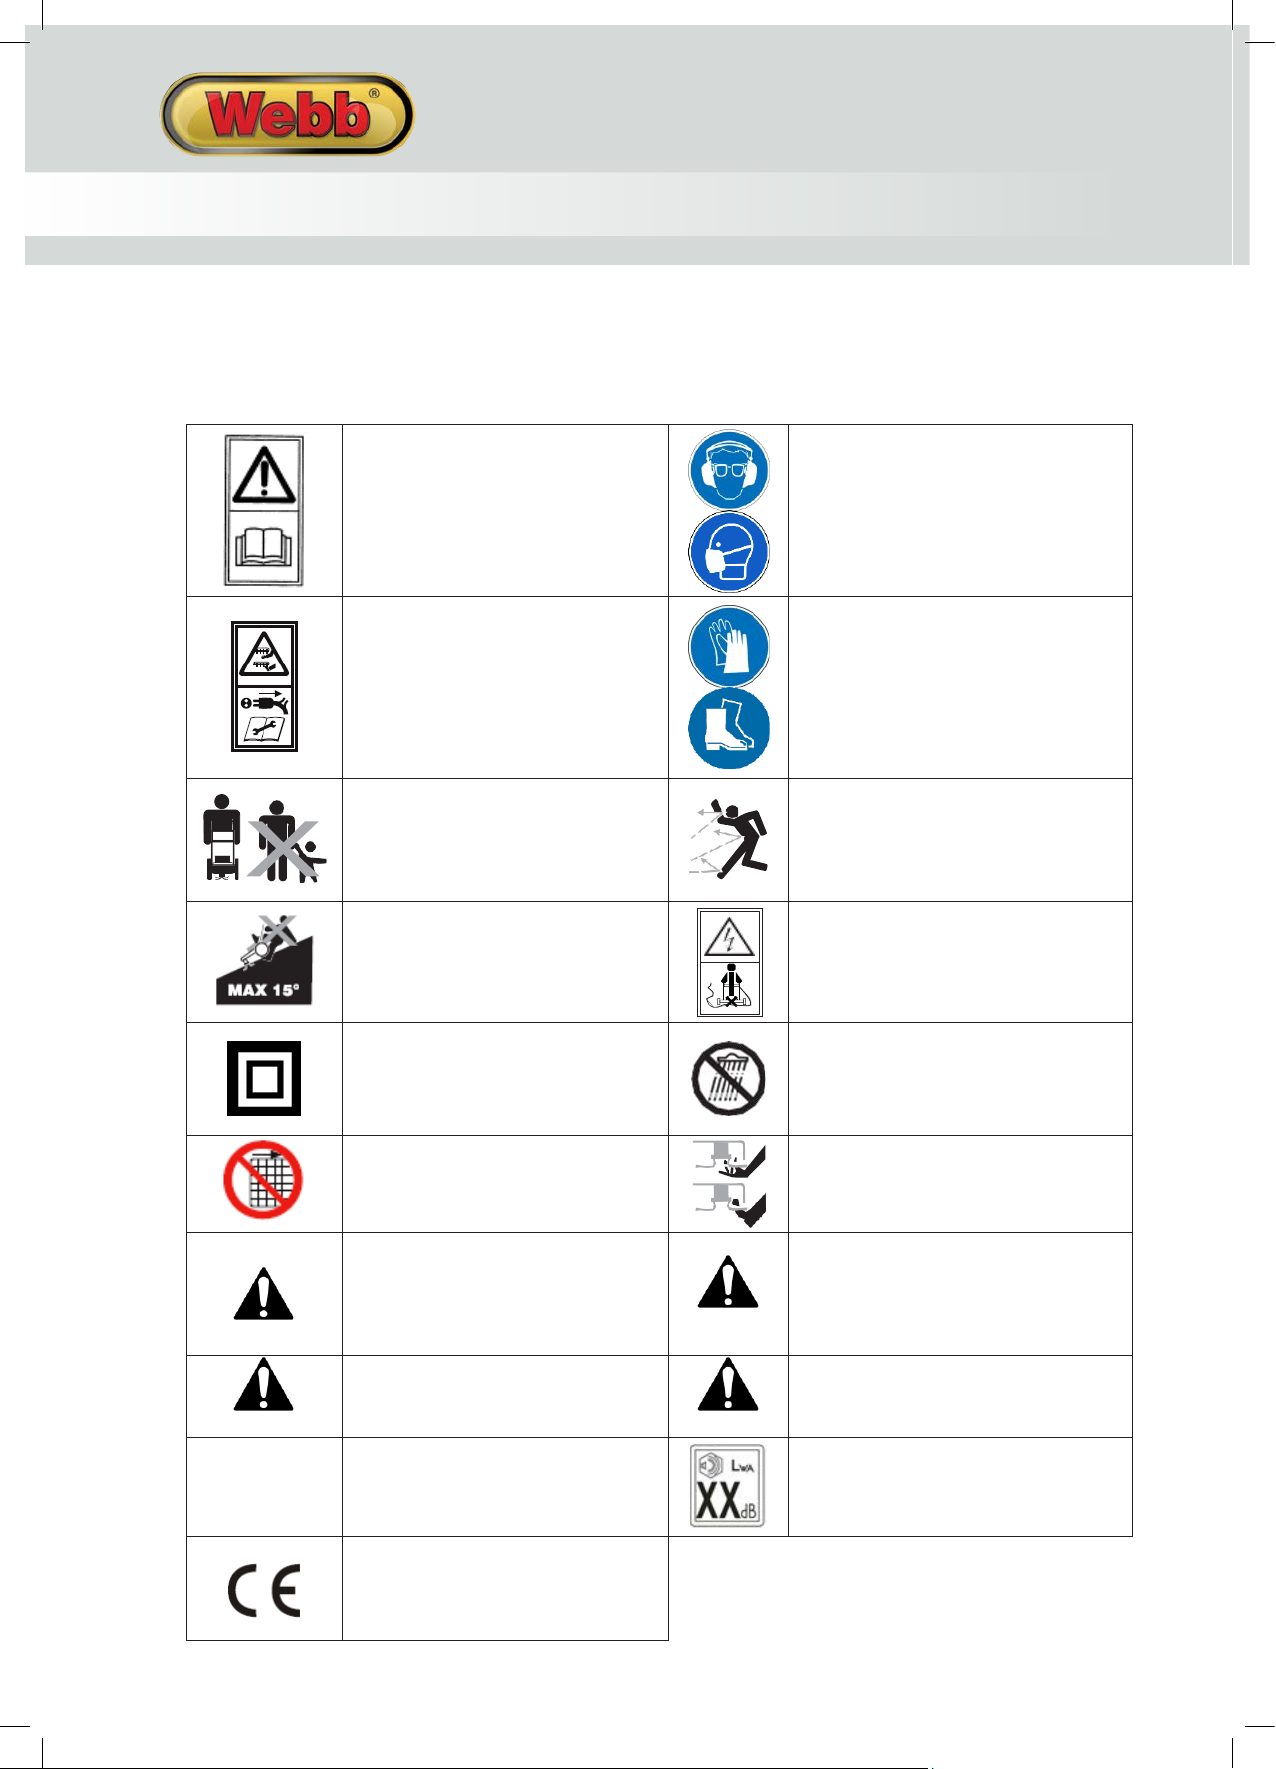
Read & understand the instruction
manual before using the machine.
Failure to follow instructions could
result in death or serious injury.
Please keep in a safe place for future
reference.
Whenever the machine is in use, safety
goggles or glasses must be worn to
safeguard against flying objects.
Hearing protection must also be used
to protect the operators hearing.
Face masks are also recommended to
avoid inhalation of debris.
BEWARE OF SHARP TINES.
Tines continue to rotate after the
motor is switched off. Remove the
electrical plug from the power supply
before any maintenance or if the
power cable is damaged.
Always wear gloves to protect your
hands.
Wear foot protection or sensible shoes
when using the machine. Steel‐toed
shoes are recommended
DANGER
Keep all bystanders & animals away
from the machine during operation.
If approached, stop the machine
immediately.
DANGER —THROWN DEBRIS
Remove objects that can be thrown by
the machine in any direction.
DANGER —SLOPES
Use extra caution on slopes. Do not
use on slopes greater than 15°.
It is advised to work across inclines.
Keep the electrical cable away from the
cutting blades
CLASS II
The machine is double insulated and
earthing wire is unnecessary
Do not expose to rain or damp
conditions.
Keep guards in place and in working
order. Replace damaged, missing, or
failed parts before operating.
DANGER —SHARP TINES
Keep hands and feet away from
rotating parts
Safety alert symbol. Used to alert
you to potential personal injury
hazards. Obey all safety messages
that follow this symbol to avoid
possible injury.
Indicates an imminently hazardous
situation which, if not avoided, will
result in serious injury
Indicates a potentially hazardous
situation which, if not avoided, could
result in serious injury
Indicates a potentially hazardous
situation which, if not avoided, may
result in minor or moderate injury.
Used without the safety alert symbol
indicates a potentially hazardous
situation which, if not avoided, may
result in property damage.
Noise Level ‐ See label on machine
CE Marking ‐ the product meets
demand and regulations set by the
EU
GENERAL SAFETY RULES
WARNING
Before you put the machine into operation, you must read this instruction manual.
When using this machine, observe the following safety instructions to remove the risk of personal injury or
material damage. Please also observe the special safety instructions in the respective chapters. Where
applicable, follow the legal directives or regulations for the prevention of accidents in relation to the use of
this machine.
When using electric tools, basic safety precautions, including the following, should always be followed to
reduce the risk of serious personal injury and/or damage to the unit.
GENERAL OPERATION
1. Read this instruction manual carefully in its entirety before attempting to assemble this machine. Read,
understand, and follow all instructions on the machine and in the manual(s) before operation. Keep this
manual in a safe place for future and regular reference and for ordering replacement parts.
2. Be completely familiar with the controls and the proper use of this machine before operating it.
3. This machine is a precision piece of power equipment, not a plaything. Therefore, always exercise extreme
caution. This machine has been designed to perform one job: to cut out moss and weeds from the root.
Do not use it for any other purpose.
4. Never allow children under 16 years of age to operate this machine. Children 16 and over should read and
understand the instructions and safe operation practices in this manual and on the machine and should be
trained and always supervised by an adult.
5. Only responsible individuals who are familiar with these rules of safe operation should be allowed to use
this machine.
6. Thoroughly inspect the area where the equipment is to be used. Remove all stones, sticks, wire, bones,
toys, and other foreign objects, which could be tripped over or picked up and thrown by the scarifier.
Thrown objects can cause serious personal injury.
7. Plan your scarifying pattern to avoid discharge of material toward roads, pathways, bystanders, and the
like. Also, avoid discharging material against a wall or obstruction, which may cause discharged material to
ricochet back toward the operator.
8. To help avoid tine contact or a thrown object injury, stay in operator zone behind handles and keep
children, bystanders, helpers, and pets at least 20 metres from scarifier while it is in operation. Stop
machine if anyone enters area.
9. Always wear safety glasses or safety goggles during operation and while performing an adjustment or
repair to protect your eyes. Thrown objects which ricochet can cause serious injury to the eyes.
10. Wear sturdy, rough‐soled work shoes and close‐fitting trousers and shirts. Shirts and trousers that cover
the arms and legs and steel‐toed shoes are recommended. Never operate this machine in bare feet,
sandals, slippery or light‐ weight (e.g. canvas) shoes.
11. Do not put hands or feet near or under rotating parts. Always keep clear of discharge area, as the rotating
tines can cause injury.
12. Never operate the scarifier without proper shields, guards, control lever or other safety protective devices
in place and working.
13. Never operate the scarifier with damaged safety devices. Failure to do so, can result in personal injury.
14. Many injuries occur because of the tines being pulled over the foot during a fall caused by slipping or
tripping. Do not hold on to the scarifier if you are falling; release the handle immediately.
15. Never pull the scarifier back towards you while you are walking. If you must back the scarifier away from a
wall or obstruction, first look down and behind to avoid tripping and then follow these steps:
A. Step back from the scarifier to fully extend your arms.
B. Be sure you are well balanced with sure footing.
C. Pull the scarifier back slowly, no more than halfway towards you.
D. Repeat these steps as needed.