weinor BiLine Combio-868 MVLED Instruction manual


Assembly and installation instructions
Item number 116692-0000
We reserve the right to make technical
changes
Version 2
15.11.2013
Page 1/28
BiLine Combio-868 MVLED/ MLED
Remote-receiver BiLine
Combio-868 MVLED/MLED
Récepteur radio BiLine
Combio-868 MVLED / MLED
MLED remote-receiver for controlling the awning motor and
LED lighting; MVLED for controlling the Valance Plus
Récepteur radio MLED pour la commande du moteur du
store et de l'éclairage LED; MVLED pour la commande de
Volant Plus
ENGLISH
FRANÇAIS
Please read these instructions and observe their contents and warnings before
commencing any assembly work. This information is critical to the installation and the
proper use of the material.
Follow the assembly steps precisely and observe the tips, notes and
recommendations.
Only trained personnel may put the units into operation.
Avant le montage, veuillez lire ces instructions et en respecter le contenu ainsi que les
avertissements. Ces indications sont essentielles en vue du montage et de l'utilisation
correcte du matériel.
Respectez les étapes de montage indiquées et tenez compte des remarques et
des recommandations.
Seul du personnel formé est habilité à effectuer la mise en service des
installations.
Assembly and installation instructions
Instructions de montage et d'installation
Item number/ Numéro d'article We reserve the right to make technikal changes/
116692-000000 Sous réserve de modifications techniques
Version 2 15.11.2013 Page 1/28

Assembly and installation instructions
Item number 116692-0000
We reserve the right to make technical
changes
Version 2
15.11.2013
Page 2/28
BiLine Combio-868 MVLED/ MLED
Contents
1Notes on the assembly and installation instructions............................................... 3
1.1 Qualifications .........................................................................................................................3
1.2 Notes on remote control units................................................................................................3
1.3 Depiction................................................................................................................................3
1.3.1 Warnings...........................................................................................................................3
1.3.2 Tips and recommendations...............................................................................................3
1.3.3 Illustrations........................................................................................................................3
1.3.4 Instructions requiring action ..............................................................................................3
2Safety notes ................................................................................................................. 4
2.1 Fundamental safety notes......................................................................................................4
2.2 Dangers of electricity .............................................................................................................4
2.3 Risk of fire when operating a radiant heater (MVLED only)...................................................4
2.4 Risks from the Valance Plus (MVLED only)...........................................................................4
2.5 Intended use..........................................................................................................................4
2.6 Improper use..........................................................................................................................4
3Description of device .................................................................................................. 5
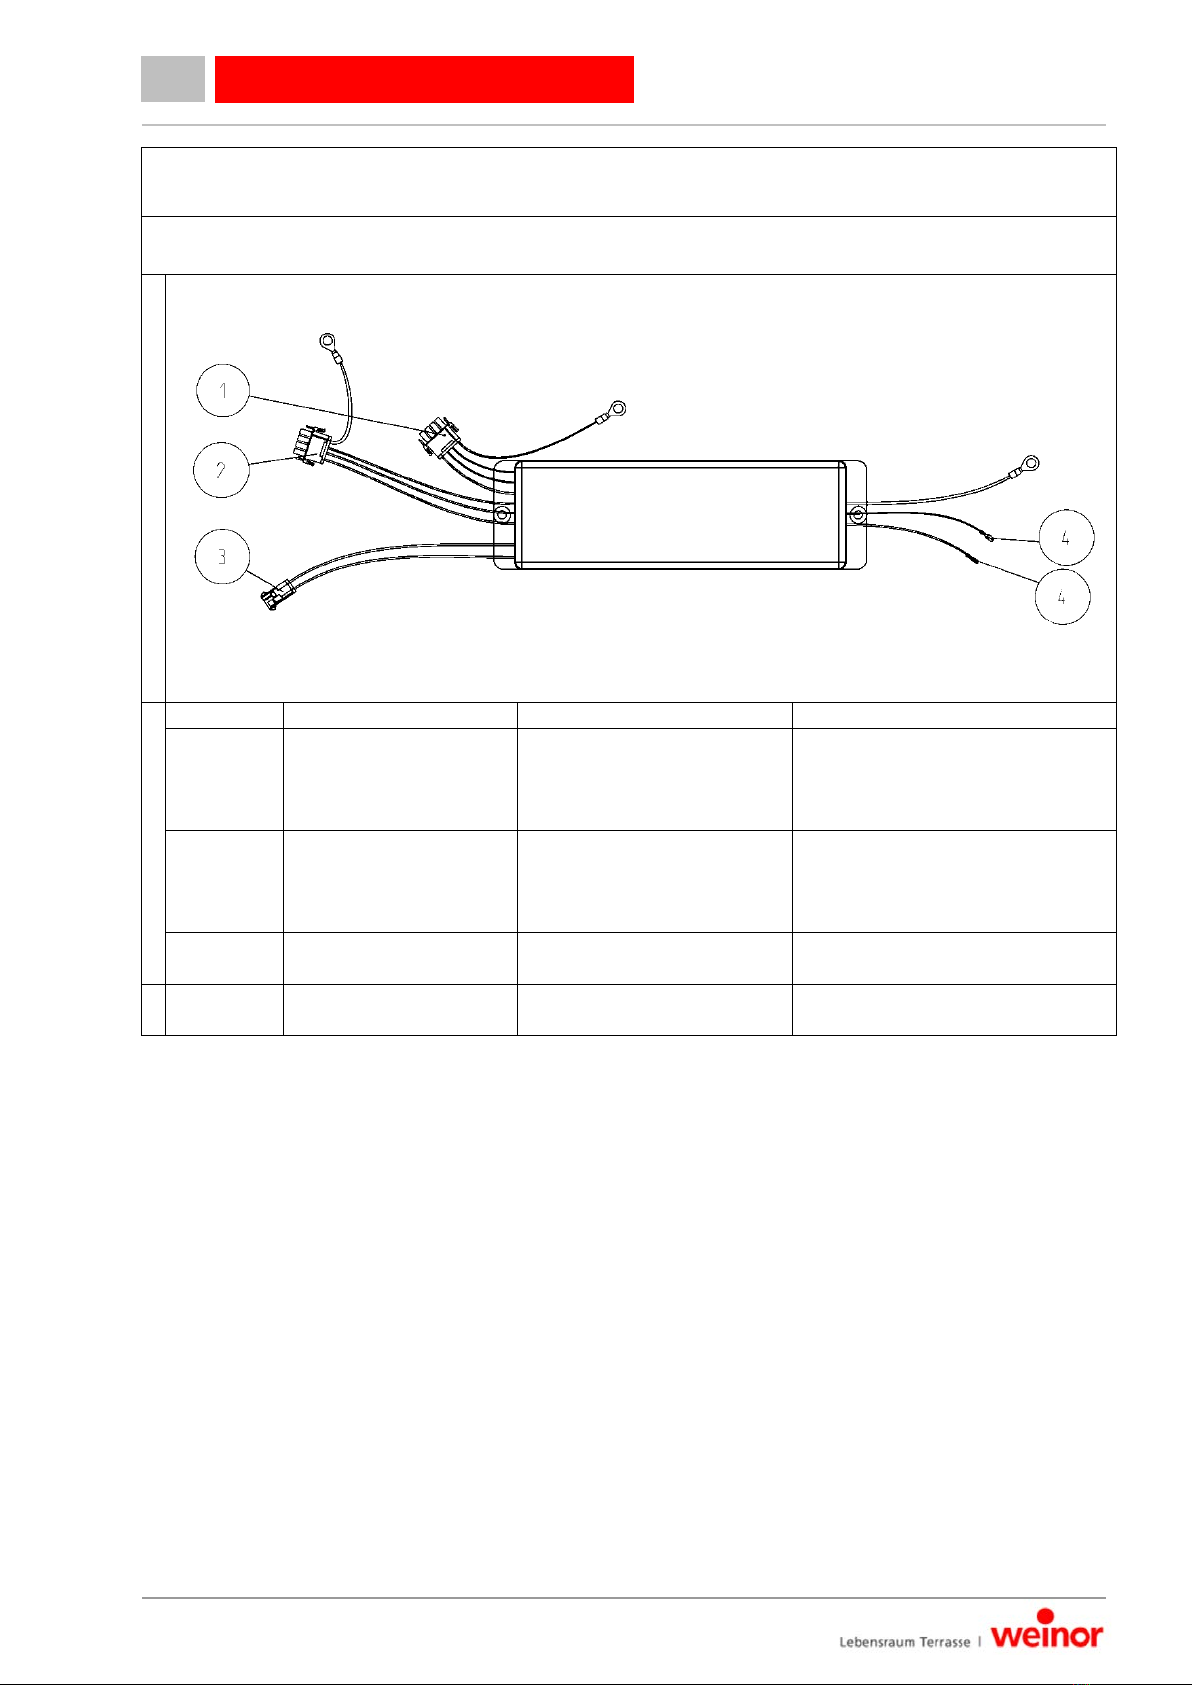
3.1 Summary of device components............................................................................................5
3.2 Function.................................................................................................................................6
3.2.1 Connection lead ................................................................................................................6
3.2.2 Connector pin assignment.................................................................................................6
3.2.3 Valance Plus (MVLED only)..............................................................................................6
3.2.4 Scope of delivery...............................................................................................................6
3.3 Operation...............................................................................................................................7
4Getting started............................................................................................................. 8
4.1 Pre-programmed system .......................................................................................................8
4.2 Unprogrammed system..........................................................................................................8
4.3 Checking the functions...........................................................................................................8
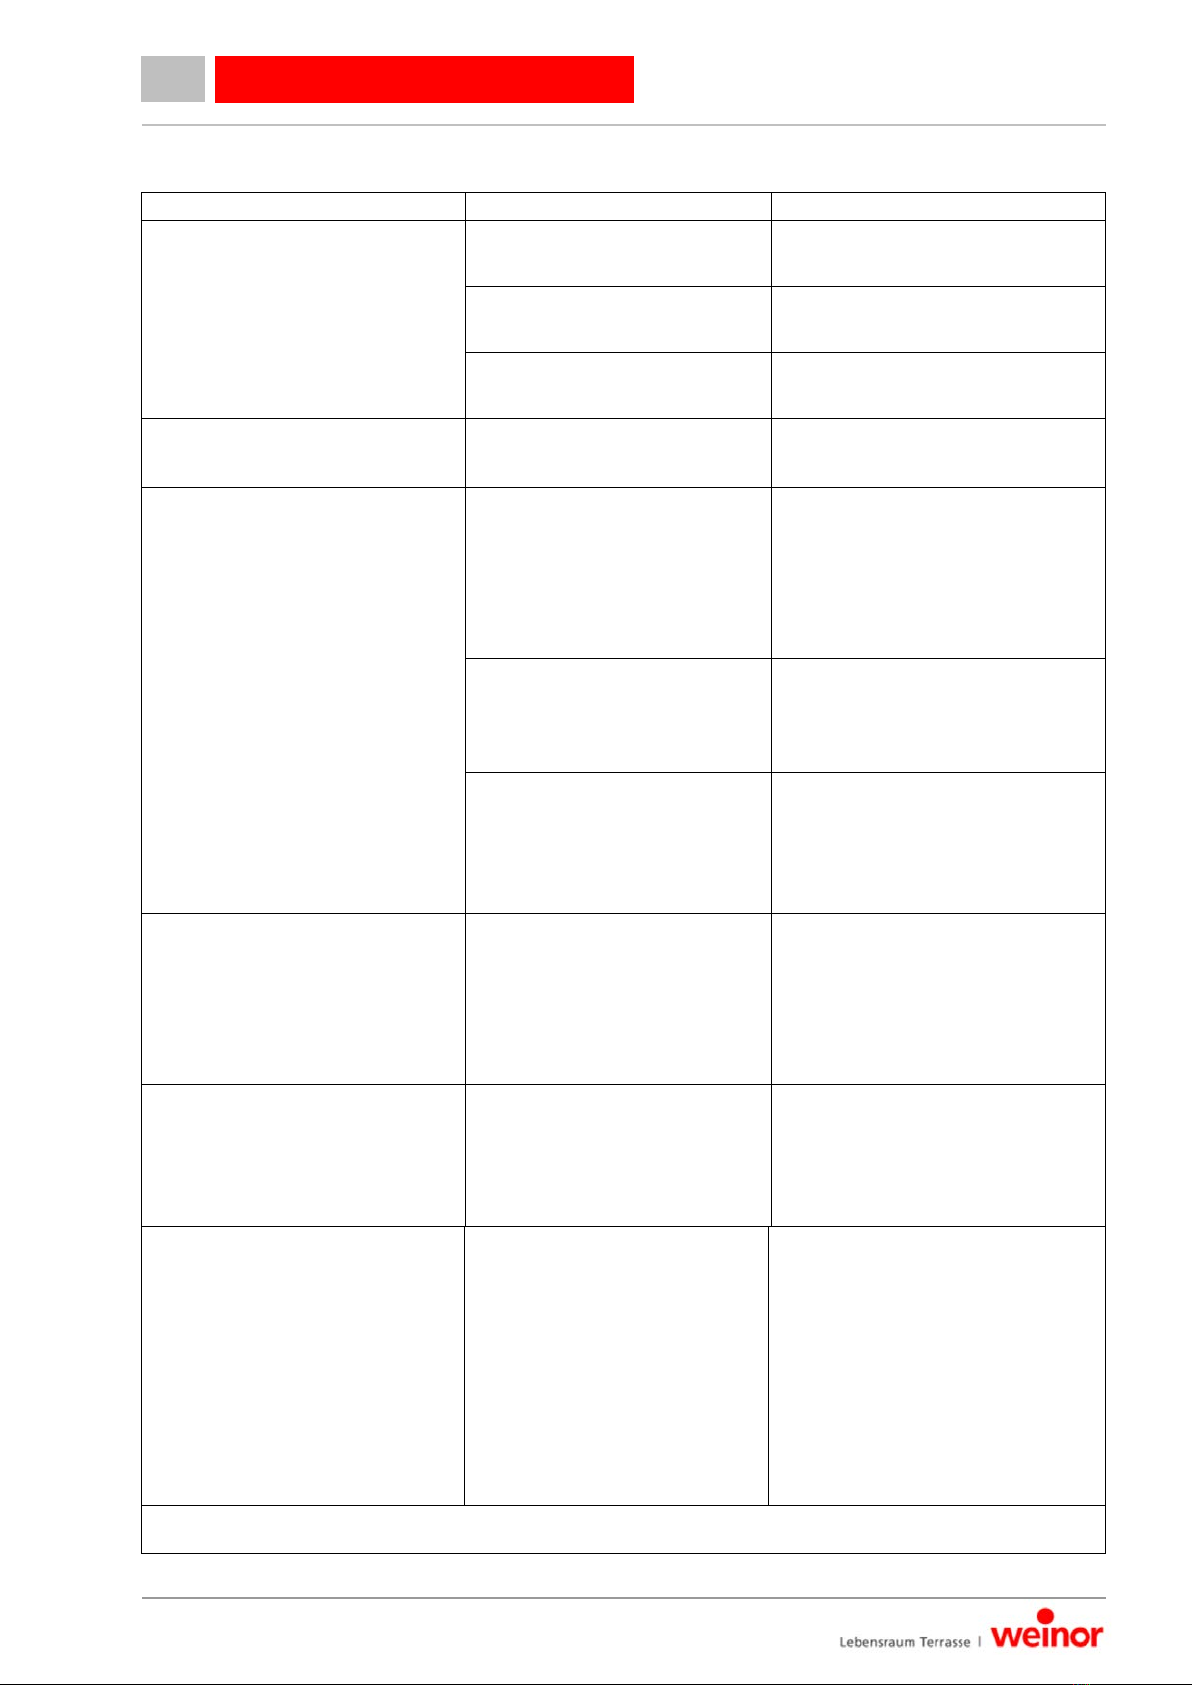
5Troubleshooting .......................................................................................................... 9
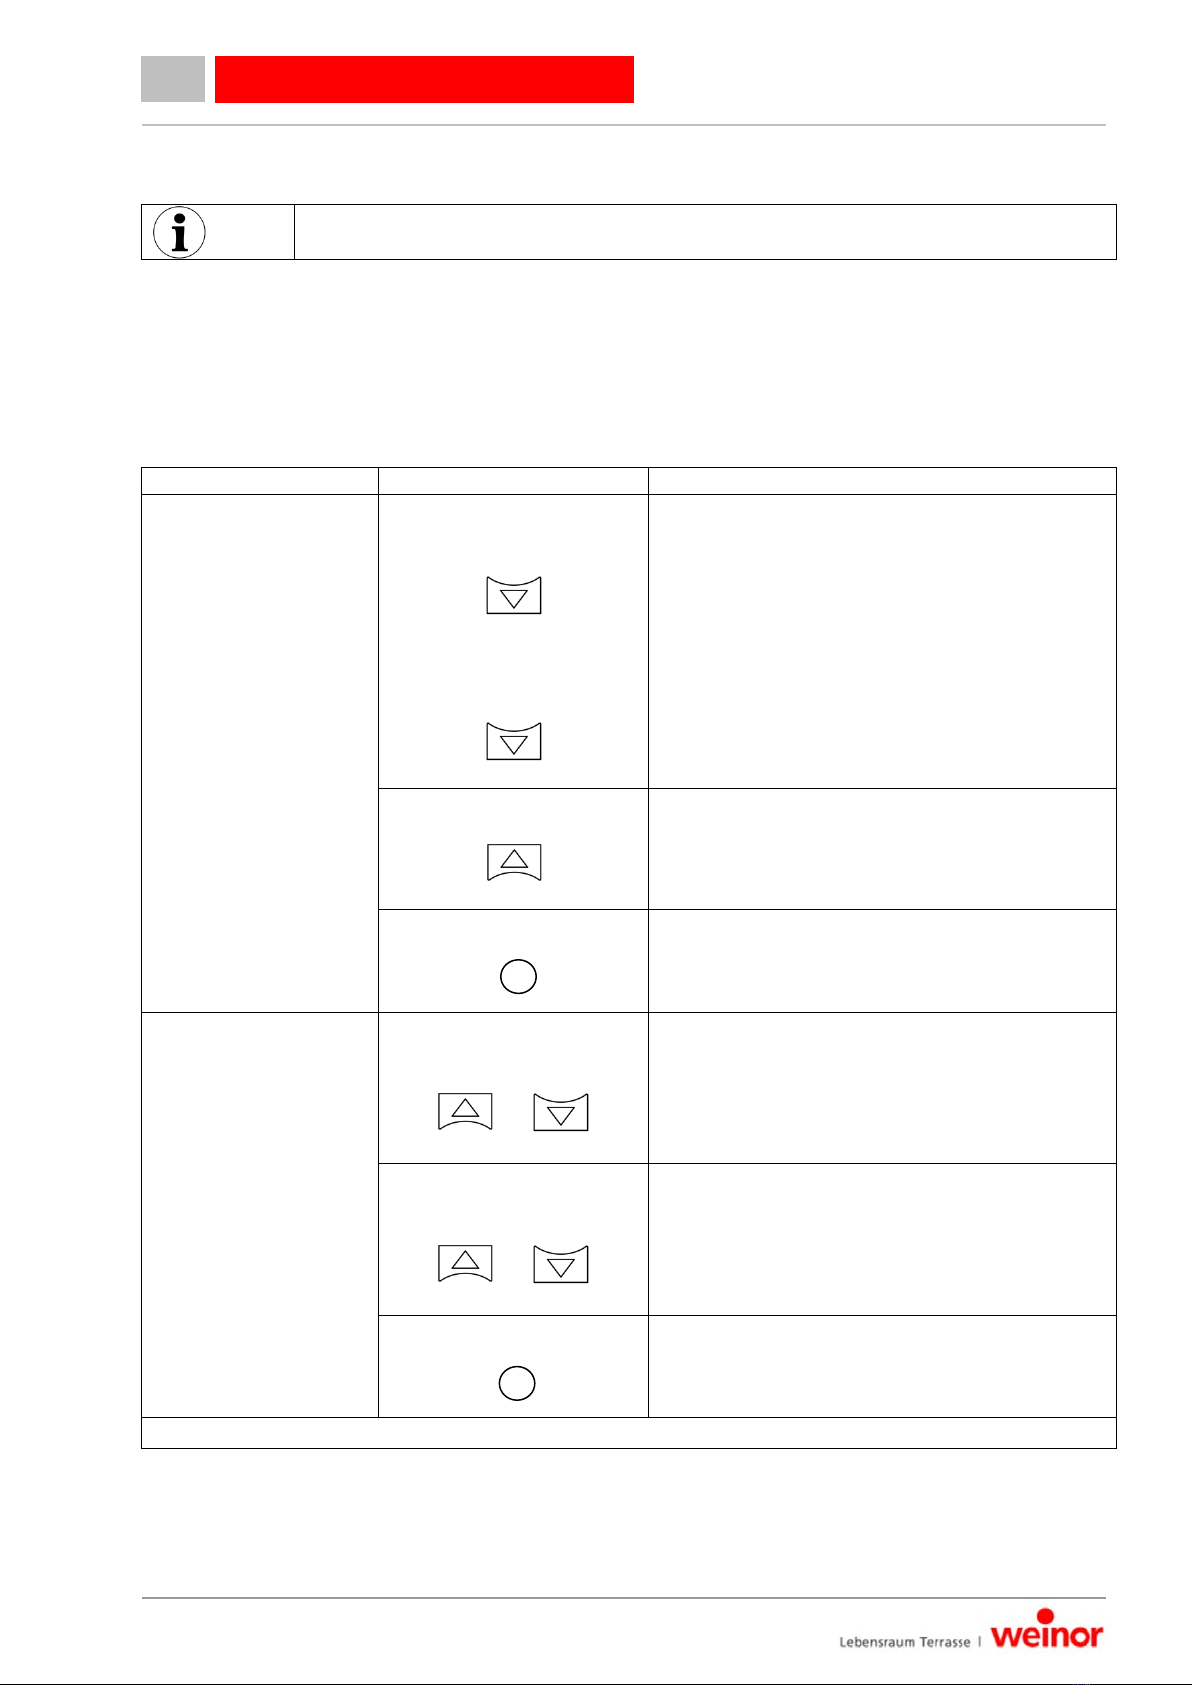
6Programming ............................................................................................................. 10
6.1 Programming the remote-receiver.......................................................................................10
6.2 Programming the awning.....................................................................................................10
6.3 Programming the light..........................................................................................................11
7Maintenance and repairs........................................................................................... 12
7.1 Maintaining the remote-receiver ..........................................................................................12
8Technical data............................................................................................................ 13
9Disposal...................................................................................................................... 13

Assembly and installation instructions
Item number 116692-0000
We reserve the right to make technical
changes
Version 2
15.11.2013
Page 3/28
BiLine Combio-868 MVLED/ MLED
Notes on the assembly and installation instructions1
Qualifications1.1
These instructions are intended for weinor retailers and partners and assume relevant
knowledge. All installation work must be performed by a trained electrician.
Notes on remote control units1.2
•Remote control units transmitting on the same frequency may disrupt reception.
•
The range of the transmitted signal is restricted by law and structural measures.
Depiction1.3
Warnings1.3.1
The warnings differentiate between personal injury and damage to property. The signal word
"Danger" is used for personal injury, and "Caution" for property damage.
Immediate danger to life and limb!
Immediate danger to product and environment!
Tips and recommendations1.3.2
Highlights useful tips and information that enable quick and correct assembly.
Illustrations1.3.3
Notes on item numbers can be found in the text in parentheses, e.g.
(1)
.
Instructions requiring action1.3.4
Instructions requiring action are written in bold print. If the instruction requiring action consists of
several individual steps, these are numbered in the order in which they are to be carried out.
Example:
1.
Getting started
Press the Program key.
Press the Learn key.
DANGER
CAUTION

Assembly and installation instructions
Item number 116692-0000
We reserve the right to make technical
changes
Version 2
15.11.2013
Page 4/28
BiLine Combio-868 MVLED/ MLED
Safety notes2
Fundamental safety notes2.1
•Keep unauthorised persons away from the unit until it is ready for use.
•The connected electrical load must tally with that listed in the technical data.
•The regulations of the local energy providers and the VDE 0100 provisions for humid and wet
areas must be observed.
•
Only connect the remote-receiver to devices approved by weinor.
Dangers of electricity2.2
•Work involving connections to 230 V mains may only be carried out by a trained electrician.
•Disconnect the unit from the power supply before performing any work.
•weinor recommendation: a residual current circuit breaker (trip switch) should also be fitted to
protect the indoor installation.
Risk of fire when operating a radiant heater (MVLED only)2.3
•Check the safety function: the awning must extend fully first, followed by the Valance Plus.
•The optional heater must be connected and protected with fuses separately (see the heater's
assembly instructions).
Risks from the Valance Plus (MVLED only)2.4
•Check the retraction protection: the awning must extend fully first, followed by the Valance
Plus. In the case of retraction, the Valance Plus must retract fully first, followed by the
awning.
•
While the Valance Plus is extending, touching it may result in electrostatic discharge.
Intended use2.5
The Combio-868 MVLED/MLED remote-receiver is exclusively intended for controlling weinor
awning drives and the weinor lighting system.
Improper use2.6
The remote-receiver may only be used on the condition that a malfunctioning hand transmitter or
remote-receiver does not pose a danger to people, animals or objects. The device may only be
connected to devices and units approved by weinor. The system may not be operated in areas
where the transmitted signals might interfere with other devices (e.g. in hospitals or at airports).

Assembly and installation instructions
Item number 116692-0000
We reserve the right to make technical
changes
Version 2
15.11.2013
Page 5/28
BiLine Combio-868 MVLED/ MLED
Description of device3
Summary of device components3.1
Fig. 1: Combio-868 MVLED/MLED remote-receiver
Item
Connection
Connector
Wire colour
1
Awning motor
AMP female connector,
4-pole
Blue (N)
Black (UP or DOWN)
Brown (UP or DOWN)
Green/yellow (PE)
2
Valance Plus motor
(Combio-868 MVLED
only)
AMP female connector,
4-pole
Blue (N)
Black (UP or DOWN)
Purple (UP or DOWN)
Green/yellow (PE)
3
Mains
AMP male connector, 2-
pole
Blue (N)
Black (L)
4
Light
2 flat plugs
Red
Black

Assembly and installation instructions
Item number 116692-0000
We reserve the right to make technical
changes
Version 2
15.11.2013
Page 6/28
BiLine Combio-868 MVLED/ MLED
Function3.2
Connection lead3.2.1
The MVLED/MLED remote-receiver can be fitted to any connection that has its own connector.
The receiver has connection leads for the awning, valance (MVLED only), light and mains
supply. The remote-receiver is supplied pre-fitted to the awning and with all the cables ready-
connected.
Connector pin assignment3.2.2
The following connector pin assignment is used (see Fig. 1 for details):
•2-pole AMP male connector, 230 V
•2 flat plugs, 2.8x0.8, male/female: light LED
•
4-pole AMP female connector: motors for awning and Valance Plus
Valance Plus (MVLED only)3.2.3
The Valance Plus has a total height of up to 210 cm. You will need to adapt the actual extension
height required to the conditions on site. You can do this by programming the end position (see
separate instructions).
The cable for the valance motor is laid with protection in a corrugated pipe, through the Arm
profiles.
Scope of delivery3.2.4
In the case of individual deliveries, the MVLED/MLED remote-receiver is delivered as follows:
•Remote-receiver with connection leads for the awning, Valance Plus (MVLED only), light and
mains supply
•
Operating instructions

Assembly and installation instructions
Item number 116692-0000
We reserve the right to make technical
changes
Version 2
15.11.2013
Page 7/28
BiLine Combio-868 MVLED/ MLED
Operation3.3
To switch the hand transmitter channel, see the hand transmitter operating
instructions.
The MVLED/MLED remote-receiver has been pre-set in the factory to perform the following
functions when used together with a hand transmitter:
•Channel 1 = Awning and Valance Plus
•Channel 2 = Light
•Channel 3 = Other component (optional)
The table below describes the factory default settings.
Channel/Component
Component
Function
1 Awning and
Valance Plus
(MVLED only)
Briefly press DOWN
key
Briefly press DOWN
key
MVLED only
- Awning extends completely
- Valance Plus then extends
(to sun protection position)
Briefly press UP key
Valance Plus retracts completely, then
awning retracts automatically
Press STOP key
Stop
2 or 3 Light or other
component
Press and hold
UP/DOWN key
or
Switch on light
Press and hold
UP/DOWN key
or
Control dimming
Press STOP key
Switch off
Table 1: MVLED/MLED remote-receiver functions

Assembly and installation instructions
Item number 116692-0000
We reserve the right to make technical
changes
Version 2
15.11.2013
Page 8/28
BiLine Combio-868 MVLED/ MLED
Getting started4
Pre-programmed system4.1
The system is usually supplied pre-programmed. This means that all the components can be
controlled with the hand transmitter supplied. In this case, once the system is assembled and
installed, you can immediately start using the remote-receiver and check that all the functions
are working properly.
Unprogrammed system4.2
On rare occasions or if servicing has been carried out, however, the system will need to be
programmed on site. This is done by pairing up the hand transmitter and remote-receiver and
setting them to various functions (see Section 3).
Checking the functions4.3
Once all the installation work is completed, you will need to check that the system is working
properly and that the individual components are paired.
What to check
How to do it
Outcome
•
Are the awning and
Valance Plus working?
•Does the awning extend
fully first, followed by the
Valance Plus?
•Does the Valance
Plus retract fully first,
followed by the awning?
Briefly press DOWN key
Awning extends fully, followed
by Valance Plus (to sun
protection position).
Briefly press UP key
Valance Plus retracts fully,
followed by awning.
•Is the light working?
Double-click
The light switches on.
•Can the light be dimmed?
Press and hold the UP key
The light gets brighter.
Press and hold the DOWN
key
The light gets darker.
•Are all the sensors (if they
are being used)
programmed to the correct
direction?
•Simulated "wind" on the
sun/wind (or
sun/wind/rain) sensor
Awning retracts
•Shake the drop profile (if
an Agido product
protection sensor is
installed)
Awning retracts
Table 2: Checking the functions
If the components do not react as expected, check the table below to locate the likely cause.

Assembly and installation instructions
Item number 116692-0000
We reserve the right to make technical
changes
Version 2
15.11.2013
Page 9/28
BiLine Combio-868 MVLED/ MLED
Troubleshooting5
Type of fault
Cause
Remedy
Awning/light does not react to
the signal sent by the hand
transmitter
•No power supply •Reconnect power supply
•Awning/light has not
been programmed •Program awning/light
•Empty batteries in hand
transmitter •Replace batteries
Drive moves in wrong direction
•Directions have been
programmed incorrectly •Delete channel and
program correctly
Following a DOWN command,
awning extends only a short
way, then immediately retracts
•Receiver is in lock mode:
maximum wind factor on
sun/wind or sun/wind/rain
sensor exceeded
•Lock mode is removed
automatically 15 minutes
after the maximum wind
factor was last exceeded
•WeiTronic Agido-868
product protection sensor
has been triggered in last
few minutes
•The device unlocks
automatically after 15-20
minutes
•Programmed sun/wind or
sun/wind/rain sensor is
faulty or incorrectly
installed
•The device will only unlock
when the fault has been
remedied
Awning moves UP and cannot
be halted or extended
•"Wind alarm":
Programmed sun/wind
and/or sun/wind/rain
sensor or Agido-868
product protection sensor
has been triggered
•The device unlocks
automatically after the
designated period
Following an UP command,
the awning stops after a while
then continues
•Agido-868 battery empty
•Replace batteries in a
programmed WeiTronic
Agido-868 product
protection sensor
The awning cannot be
taught in
a) with the BiEasy hand
transmitter
b) with the Remoto hand
transmitter
a) the unidirectional
transmitter/ sensor
e.g. Remoto is still
taught in
b) the bidirectional
transmitter/ sensor
e.g. BiEasy is still
taught in
•delete old transmitter
completely then teach in
the awning with the new
transmitter
Table 3: Troubleshooting

Assembly and installation instructions
Item number 116692-0000
We reserve the right to make technical
changes
Version 2
15.11.2013
Page 10/28
BiLine Combio-868 MVLED/ MLED
Programming6
Programming the remote-receiver6.1
The system is usually supplied pre-programmed. Therefore, when the system is
delivered, all the components can be controlled with the hand transmitter supplied. On
rare occasions or if servicing has been carried out, however, the system will need to be
programmed on site. This is done by pairing up the hand transmitter and remote-receiver
and setting them to various functions.
Programming the awning6.2
1. In the case of receivers that have already been electrically installed, briefly disconnect the
power supply immediately before programming.
2. Start programming mode: within 5 minutes of disconnecting the power supply, press the
LEARN key (1) for 2 seconds on the hand transmitter. The remote-receiver then enters
programming mode for about 2 minutes. During this time, the awning moves up for 4
seconds and then down for 4 seconds.
3. Immediately after the awning starts moving up (within the first second), press the UP
key on the hand transmitter. The receiver confirms the command by briefly stopping the
awning and then moving it up further. If the receiver does not confirm the command, simply
repeat this step on one of the next cycles.
4. Immediately after the awning starts moving down (within the first second), press the
DOWN key on the hand transmitter. The receiver confirms this step by leaving programming
mode; the sun protection stops moving.
5. If integrated lighting is connected to the Combio-868 MVLED/MLED, the light programming
mode will start automatically. Now program the light by taking the following steps. For
designs with no light, stop programming mode by pressing
the STOP key.
1

Assembly and installation instructions
Item number 116692-0000
We reserve the right to make technical
changes
Version 2
15.11.2013
Page 11/28
BiLine Combio-868 MVLED/ MLED
Programming the light6.3
1. The light alternates between 100% and 50% power.
2. Press the learning key on the hand transmitter for 2 seconds.
This step does not apply to the unidirectional hand transmitter (Remoto).
The light is currently in learning mode.
3. On the hand transmitter, select the channel you want to use to program the lighting (e.g.
Channel 2).
4. Within the first second during which the lighting brightens to 100% power, briefly press the
UP key. The receiver confirms this command by briefly switching off and then on.
5. Then, within the first second during which the lighting dims to 50% power, briefly press the
DOWN key. The receiver confirms this programming by briefly switching off.
Initialise any other transmitters or sensors that are being used.
Finally, check that the awning and lighting have been successfully programmed.

Assembly and installation instructions
Item number 116692-0000
We reserve the right to make technical
changes
Version 2
15.11.2013
Page 12/28
BiLine Combio-868 MVLED/ MLED
Maintenance and repairs7
Electric shock!
Work involving 230 V mains may only be carried out by a trained electrician.
Disconnect the unit from the power supply before performing any work.
Maintaining the remote-receiver7.1
It is not possible to carry out repairs on the remote-receiver itself. In the event of a malfunction or
defect, the device will need to be replaced.
If a component does not react as expected, you must check the connections.
You should:
•check that the connectors are correct and have been tightly connected
•
test all line contacts
DANGER

Assembly and installation instructions
Item number 116692-0000
We reserve the right to make technical
changes
Version 2
15.11.2013
Page 13/28
BiLine Combio-868 MVLED/ MLED
Technical data8
Power supply
230 V
Frequency
50 HZ
Maximum power input of motor
250 W
Certified for Becker R30/17C PS(+), R40/17C PS(+),
50/11C PS(+)
Maximum power input of light
32 W;
at least. 1 – max. 11 LEDs, weinor system; max. 680 mA
IP code
IP 54
Permissible ambient temperature
20 to +80°C
Radio frequency
868.3 MHz
Radio protocol
WeiTronic/Elero/Griesser
Supply line
AMP male connector, 2-pole with earthing cable and ring-
type terminal for 6 m cable with safety plug
Awning motor input
AMP female connector, 4-pole
Blue – black – brown – green/yellow
Motor input for Valance Plus
(MVLED only)
AMP female connector, 4-pole
Blue – black – brown – green/yellow
Light connection
Female push-on connector, 2.8 mm (red/black)
Awning switching method
Awning runs on self-sustaining power until end position is
recognised;
coordinated operating mode with retraction protection (MVL
only)
Light switching mode
Light on/off
Dimming of light
Compatibility
•WeiTronic BiEasy hand transmitter
(bidirectional only)
•WeiTronic Remoto hand transmitter (unidirectional only)
•WeiTronic BiLine wall transmitter UniTec-868
•WeiTronic BiLine Agido-868 product protection sensor
•WeiTronic BiLine Sensero-868 AC Plus sun/ wind/ rain
sensor
•WeiTronic BiLine Aero-868 AC 230 sun/ wind sensor
•WeiTronic BiLine Aero-868 Solar sun/ wind sensor
•WeiTronic BiLine Lumero-868 sun sensor
Disposal9
Do not dispose of used or defective electrical or electronic devices in household waste. They must
be returned to the manufacturer or taken to a local collection point.
Instructions de montage et d'installation

Assembly and installation instructions
Item number 116692-0000
We reserve the right to make technical
changes
Version 2
15.11.2013
Page 14/28
BiLine Combio-868 MVLED/ MLED
Table des matières
1Remarques sur les instructions de montage et d'installation............................... 15
1.1 Qualification.........................................................................................................................15
1.2 Remarques sur les installations radio..................................................................................15
1.3 Moyen de représentation.....................................................................................................15
1.3.1 Avertissements................................................................................................................15
1.3.2 Conseils et recommandations.........................................................................................15
1.3.3 Illustrations......................................................................................................................15
1.3.4 Consignes opératoires ....................................................................................................15
2Consignes de sécurité .............................................................................................. 16
2.1 Consignes de sécurité fondamentales.................................................................................16
2.2 Dangers relatifs à l'électricité...............................................................................................16
2.3 Risque d'incendie lors de la mise en service d'un radiateur à infrarouge (uniquement
MVLED) ...............................................................................................................................16
2.4 Risque relatif au Volant Plus (uniquement MVLED)............................................................16
2.5 Utilisation conforme .............................................................................................................16
2.6 Utilisation abusive................................................................................................................16
3Description de l'appareil ........................................................................................... 17
3.1 Vue d'ensemble de l'appareil...............................................................................................17
3.2 Fonction...............................................................................................................................18
3.2.1 Câble de raccordement...................................................................................................18
3.2.2 Affectation des connecteurs............................................................................................18
3.2.3 Volant Plus (uniquement MVLED)...................................................................................18
3.2.4 Contenu de la livraison....................................................................................................18
3.3 Utilisation .............................................................................................................................19
4Mise en service.......................................................................................................... 20
4.1 Système paramétré..............................................................................................................20
4.2 Système non paramétré.......................................................................................................20
4.3 Vérification des fonctions.....................................................................................................20
5Dépannage ................................................................................................................. 21
6Paramétrage............................................................................................................... 22
6.1 Paramétrage du récepteur radio..........................................................................................22
6.2 Paramétrer le store..............................................................................................................22
6.3 Programmer l'éclairage........................................................................................................23
7Maintenance et réparation ........................................................................................ 24
7.1 Effectuer la maintenance du récepteur radio.......................................................................24
8Caractéristiques techniques..................................................................................... 25
9Mise au rebut.............................................................................................................. 25
Numéro d'article 116692-000000 Sous réserve de modifications techniques
Version 2 15.11.2013 Page 14/28
Instructions de montage et d'installation

Assembly and installation instructions
Item number 116692-0000
We reserve the right to make technical
changes
Version 2
15.11.2013
Page 15/28
BiLine Combio-868 MVLED/ MLED
Remarques sur les instructions de montage et d'installation1
Qualification1.1
Ces instructions s'adressent aux partenaires spécialisés weinor et implique de disposer des
connaissances correspondantes. Tous les travaux d'installation doivent être effectués par un
électricien.
Remarques sur les installations radio1.2
•Les installations émettant sur la même fréquence peuvent perturber la réception.
•
La portée du signal radio est limitée par la loi et les mesures structurelles.
Moyen de représentation1.3
Avertissements1.3.1
Les avertissements sont différenciés selon qu’ils concernent des personnes ou des biens
matériels. En cas de dommages aux personnes, le mot clé «Danger» est utilisé. En cas de
dommages matériels, le mot clé «Attention» est utilisé.
Danger imminent pour la vie ou l’intégrité corporelle!
Risque imminent pour le produit et l’environnement!
Conseils et recommandations1.3.2
Met en avant les informations et les conseils utiles en vue d’un montage correct et
rapide.
Illustrations1.3.3
Les renvois aux numéros de position sont indiqués en parenthèses dans le texte, par ex. (1).
Consignes opératoires1.3.4
Les consignes opératoires sont indiquées en gras. Si la consigne opératoire se compose de
plusieurs étapes, alors celles-ci sont numérotées suivant leur l'ordre d'exécution.
Exemple :
1.
Mise en service
Appuyer sur la touche de programmation.
Appuyer sur la touche de paramétrage.
DANGER
ATTENTION
Numéro d'article 116692-000000 Sous réserve de modifications techniques
Version 2 15.11.2013 Page 15/28
Instructions de montage et d'installation

Assembly and installation instructions
Item number 116692-0000
We reserve the right to make technical
changes
Version 2
15.11.2013
Page 16/28
BiLine Combio-868 MVLED/ MLED
Consignes de sécurité2
Consignes de sécurité fondamentales2.1
•Tenez les personnes non-autorisées à distance de l'installation jusqu'à ce que celle-ci soit
opérationnelle.
•La puissance de raccordement électrique doit correspondre aux données techniques.
•Les prescriptions des fournisseurs d'énergie locaux ainsi que les dispositions pour les locaux
mouillés et humides selon la norme VDE 0100 doivent être respectées.
•
Le récepteur radio doit uniquement être relié à des appareils autorisés par weinor.
Dangers relatifs à l'électricité2.2
•Les raccordements au réseau 230 V doivent uniquement être effectués par un électricien.
•Avant d'effectuer tous travaux, mettre l'installation hors tension.
•Recommandation de weinor: l'installation de la maison doit être sécurisée par un disjoncteur
différentiel.
Risque d'incendie lors de la mise en service d'un radiateur à infrarouge (uniquement2.3 MVLED)
•Vérifier la fonction de sécurité: le store doit être entièrement déployé avant le déploiement du
Volant Plus.
•Le chauffage optionnel doit être raccordé séparément et sécurisé (voir instructions de
montage du chauffage).
Risque relatif au Volant Plus (uniquement MVLED)2.4
•Vérifier la protection de rétractation: lors du déploiement, le store doit être déployé avant le
déploiement du Volant Plus. Lors de l'escamotage, le Volant Plus doit rentrer entièrement
avant l'escamotage du store.
•
Lorsque le Volant Plus se déploie, un contact peut entraîner une décharge électrostatique.
Utilisation conforme2.5
Le récepteur radio Combio-868 MVLED/ MLED est exclusivement destiné à la commande des
entraînements de stores weinor et du système d'éclairage weinor.
Utilisation abusive2.6
Le récepteur radio doit uniquement être utilisé dans le cas où un dysfonctionnement de
l'émetteur manuel ou du récepteur radio lui-même ne représente aucun danger pour les
personnes, les animaux ou les objets. L'appareil doit uniquement être raccordé avec les
installations et les appareils weinor autorisés. Le système ne doit pas être utilisé dans les zones
comportant d'autres appareils qui peuvent être perturbés par les signaux radio (par ex. dans des
hôpitaux et les aéroports).
Numéro d'article 116692-000000 Sous réserve de modifications techniques
Version 2 15.11.2013 Page 16/28
Instructions de montage et d'installation

Assembly and installation instructions
Item number 116692-0000
We reserve the right to make technical
changes
Version 2
15.11.2013
Page 17/28
BiLine Combio-868 MVLED/ MLED
Description de l'appareil3
Vue d'ensemble de l'appareil3.1
Illustration 2 : récepteur radio Combio-868 MVLED / MLED
Pos.
Raccord
Connecteur
Couleur du fil
1
Moteur du store
Douille AMP 4 pôles
Bleu (N)
Noir (HAUT ou BAS)
Brun (HAUT ou BAS)
Vert-jaune (PE)
2
Moteur du Volant
Plus (uniquement
pour Combio-868
MVLED)
Douille AMP 4 pôles
Bleu (N)
Noir (HAUT ou BAS)
Violet (HAUT ou BAS)
Vert-jaune (PE)
3
Réseau
Connecteur AMP 2 pôles
Bleu (N)
Noir (L)
4
Éclairage
2 fiches plates
Rouge
Noir
Numéro d'article 116692-000000 Sous réserve de modifications techniques
Version 2 15.11.2013 Page 17/28
Instructions de montage et d'installation

Assembly and installation instructions
Item number 116692-0000
We reserve the right to make technical
changes
Version 2
15.11.2013
Page 18/28
BiLine Combio-868 MVLED/ MLED
Fonction3.2
Câble de raccordement3.2.1
Le récepteur radio MVLED/ MLED est pourvu d'un propre connecteur pour chaque
raccordement. Sur celui-ci se trouve les câbles de raccordement pour le store, le Volant
(uniquement pour MVLED), l'éclairage et le raccordement au réseau. À la livraison du store, le
récepteur radio est déjà intégré et câblé.
Affectation des connecteurs3.2.2
L'affectation des connecteurs suivante est utilisée (pour les détails voir Fig. 1):
•Connecteur AMP 2 pôles, mâle: raccordement 230 V
•2 fiches plates 2,8 x 0,8 mâles/ femelles: éclairage LED
•
Connecteur AMP 4 pôles, femelle: moteurs pour store et Volant Plus
Volant Plus (uniquement MVLED)3.2.3
Le Volant Plus a une hauteur totale allant jusqu'à 210 cm. Les hauteurs de déploiement
effectives nécessaires doivent s'adapter à la situation sur place en possédant une position de fin
de course adaptée (voir instructions séparées).
Le chemin de câble pour le moteur du Volant passe dans un tube de protection ondulé installé
dans les profilés des bras.
Contenu de la livraison3.2.4
Lors d'une livraison seule, le récepteur radio MVLED/ MLED est livré comme suit:
•Récepteur radio avec câbles de raccordement pour le store, le Volant Plus (uniquement pour
MVLED), l'éclairage et le raccordement au réseau
•
Instructions d'utilisation
Numéro d'article 116692-000000 Sous réserve de modifications techniques
Version 2 15.11.2013 Page 18/28
Instructions de montage et d'installation

Assembly and installation instructions
Item number 116692-0000
We reserve the right to make technical
changes
Version 2
15.11.2013
Page 19/28
BiLine Combio-868 MVLED/ MLED
Utilisation3.3
Pour le changement de canal de l'émetteur manuel, voir instructions d'utilisation de
l'émetteur manuel.
À la livraison, le récepteur radio MVLED/ MLED, en lien avec un émetteur manuel, commande les
fonctions suivantes:
•Canal 1 = store et Volant Plus
•Canal 2 = éclairage
•Canal 3 = autres composants (en option)
Le tableau suivant décrit le réglage en usine.
Canal /
composants
Composants
Fonction
1 store et
Volant Plus
(uniquement
pour
MVLED)
Appuyer brièvement sur
la touche BAS
Appuyer brièvement sur
la touche BAS
uniquement MVLED
- Le store se déploie entièrement
- Le Volant Plus se déploie ensuite
(en position d'ombrage)
Appuyer brièvement sur
la touche HAUT
Le Volant Plus rentre entièrement avant
l'escamotage automatique du store
Appuyer sur la touche
ARRÊT
Arrêt
2 ou
3 éclairages
ou autres
composants
Maintenir la touche HAUT
/ BAS enfoncée
ou
Allumer l'éclairage
Maintenir la touche HAUT
/ BAS enfoncée
ou
Faire varier le régulateur
Appuyer sur la touche
ARRÊT
éteindre
Tableau 1: fonctions du récepteur radio MVLED/ MLED
Numéro d'article 116692-000000 Sous réserve de modifications techniques
Version 2 15.11.2013 Page 19/28
Instructions de montage et d'installation
This manual suits for next models
1
Table of contents
Languages:
Other weinor Remote Control manuals