6
4. INSTALLATION AND STRUCTURE
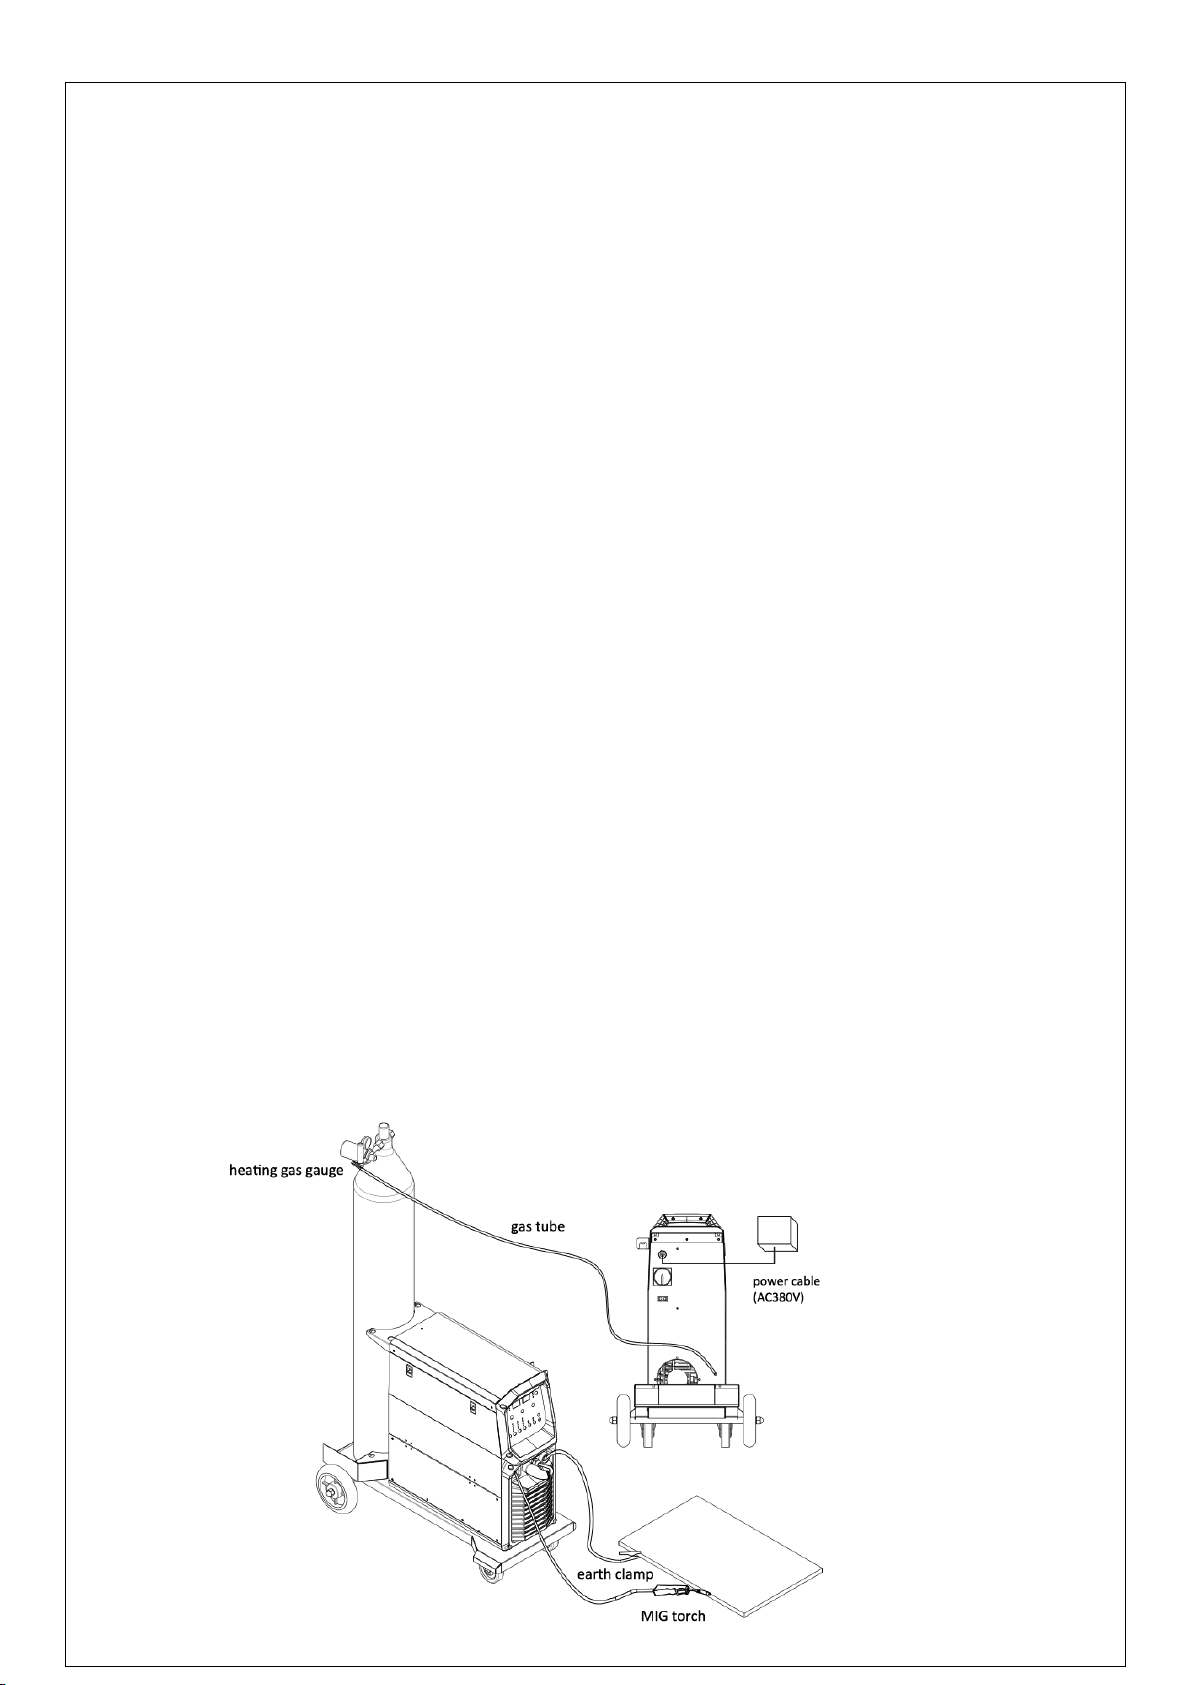
4.1. Input wire connection
Each welder is equipped with connection box, connect the power line with the power source 220V.
4.2. Output wire connection
Connect the gas bottle (equipped with the CO2 flow gauge) and the gas inlet with gas tube.
4.2.1 Connect the terminal of the earth clamp with the negative output, another side is clamped on the
workpiece
4.2.2 Connect the MIG torch with the output terminal on the wire feeding machine, insert the welding
wire through the MIG torch manually.
4.2.3 Connect the wire feeding machine input cable with the positive terminal of power source. The
control cable of wire feeding machine should be connected with the control connector of power source.
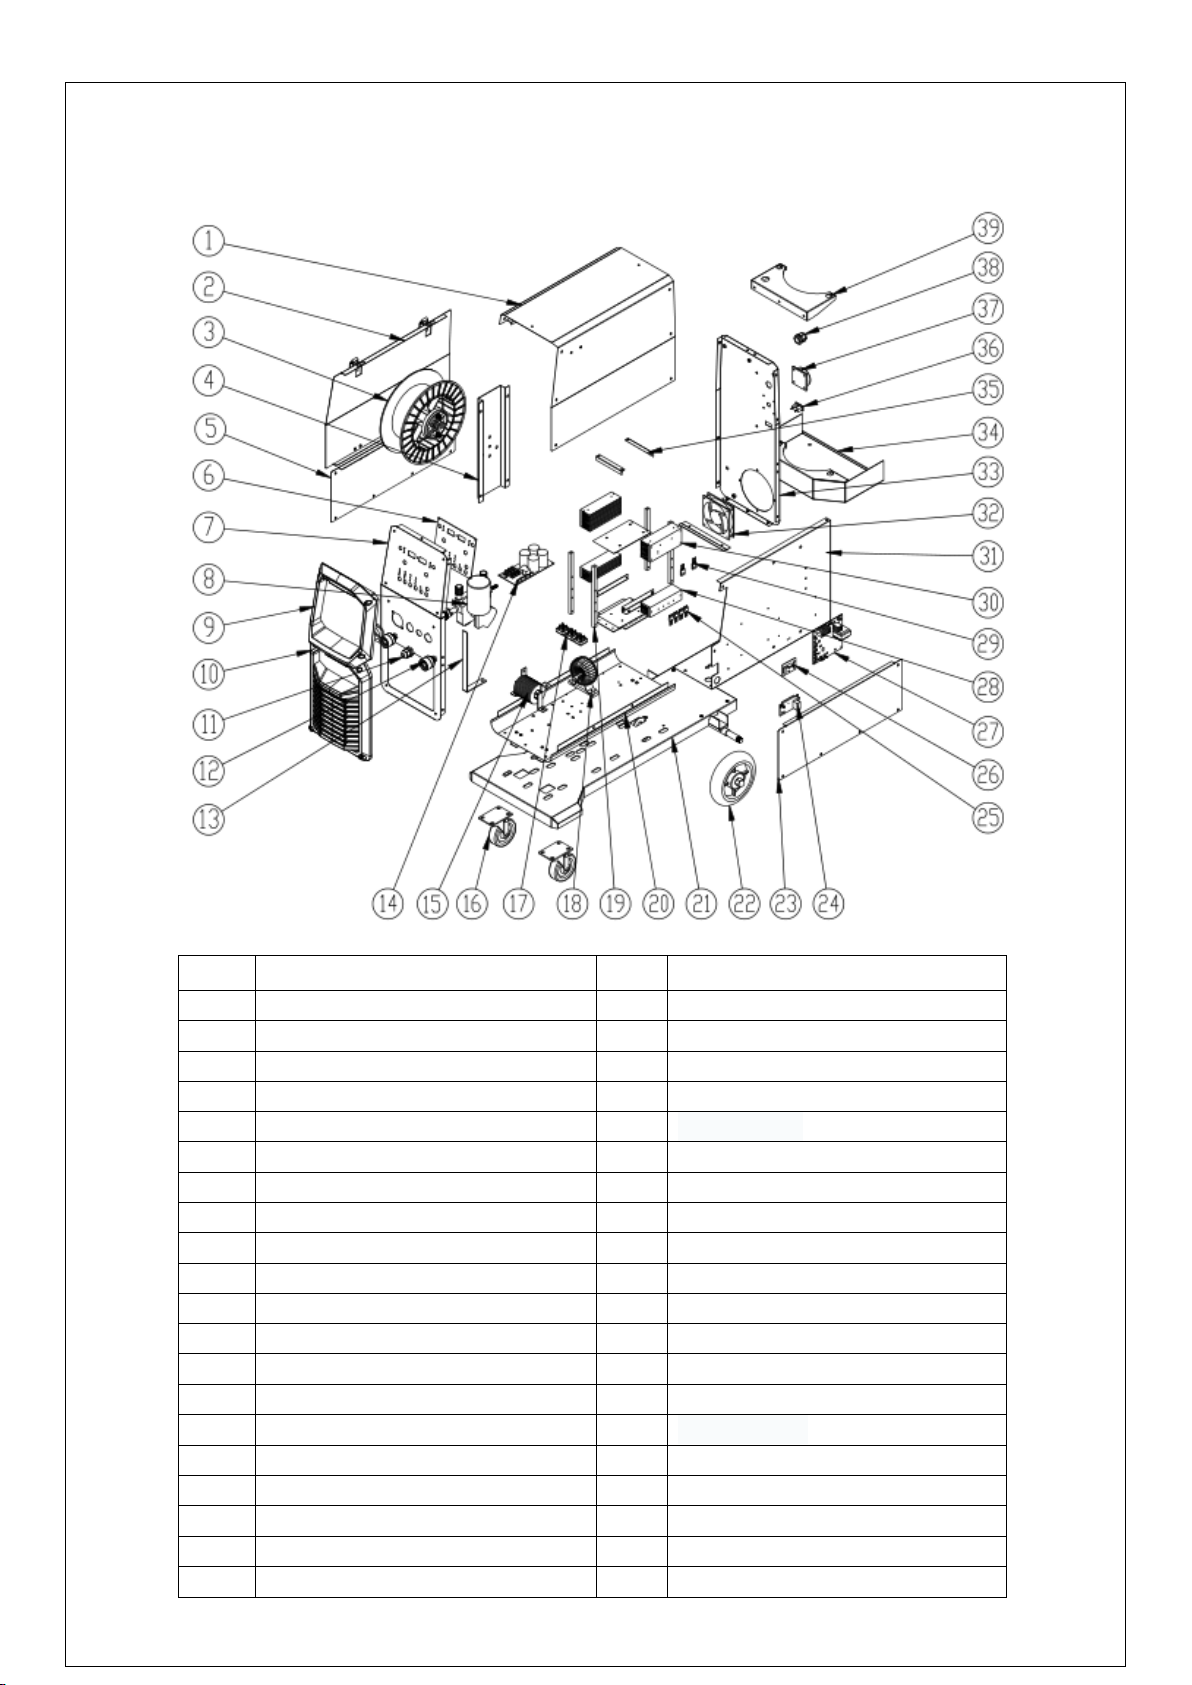
4.3. Welding wire reel installation
4.3.1 Install the wire reel on the holder of wire feeding machine, the hole of wire reel should align with
fixed pin on the holder.
4.3.2 Choose different wire feeding groove according to the wire dimension. (Note: aluminum welding
chooses U-shape groove, other welding wire choose the V-shape groove
4.3.3 Loose the nut of wire pressing roller, thread the welding wire from the spool through the input
guide tube, through the roller groove and into the outlet guide tube. Note: adjust the wire pressing
roller and impact the wire, to make sure the wire will not slide. Avoid the wire deformation due to the
oversize pressure
4.3.4 release the wire by rotating the wire reel anticlockwise. In order to avoid wire loose, the new wire
reel will fix the top of wire on the edge of wire reel. Please cut off this top of wire.
4.3.5 choose different wire feeding groove position according to the wire diameter.
4.3.6 Press “wire check” button to lead out the wire.