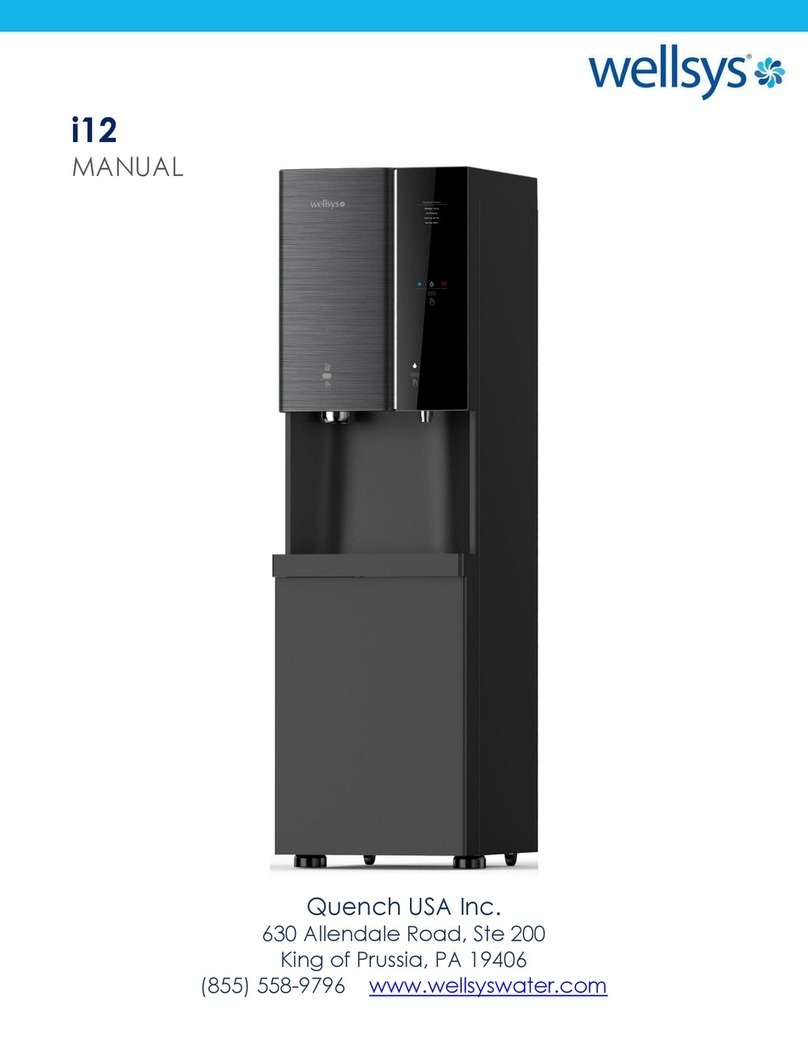
Wellsys WS 15000 User manual

®

WS 15000
User’s Manual
Water for Wellness
NOTE:
Please read these instructions before operating the
unit. Design and color may differ. Unit appearance,
speficiations, etc. are subject to change without
prior notice if necessary for improving unit perfor-
mance. The rated voltage of this unit is AC 120 V/ 60
Hz only.

Before You Begin
Please read the information contained in
this manual carefully before proceeding with
the install. Failure to do so can cause
damage and may void the manufacturer’s
warranty
Contents
(01) PRODUCT FEATURES PG. 1
(02) SAFETY PRECAUTIONS PGS. 4-5
(03) DIMENSIONS PG. 6
(04) INSTALLATION GUIDE PGS. 7-10
(05) HOW TO USE PGS. 11-13
(06) HOW TO CLEAN PGS. 14-17
(07) SPECIFICATIONS PG. 18
(08) TROUBLESHOOTING GUIDE PGS. 19-21

Product Features01
ICE AND TWO TYPES OF WATER
This product dispenses soft, chewable style ice along with both hot
and ambient temperature water.
HOT WATER SAFETY FUNCTION
This system will always default to ambient water in order to help
reduce the likelihood of accidentally dispensing hot water. In order to
dispense hot water, the user must select the hot icon and then may
push the dispense button. The unit will revert to ambient water after
5 seconds of inactivity in order to reengage the hot safety feature.
UV LED
This system incorporates a state-of-the-art LED UV-C light system that
has a life of 20,000 hours before needing to be replaced. UV-C light
is 200-280 nanometers which is best used when sanitizing purified
water. This light is activated for a duration of 1 hour every 2 hours
and engages with all water that melts from the ice tank to be re-used
to make more ice. This helps reduce the likelihood of bacterial growth
and bad taste that are traditionally found in ice systems.
ICE FILTER AND ICE DOOR DAMPER
This system uses technology that allows the ice bin to be closed off to
external contaminants . We do this by adding a door to the ice bin that
only opens when ice is dispensed and adding an air filter on the reser-
voir that prevents the smallest molecules from contaminating water.
This creates a sealed system that results in a much cleaner ice bin
and water reservoir. New technology, combined with proper mainte-
nance, and use of the Wellsys RO system results in a reliable Machine
and a safer experience.
ECO MODE
If the system is not used for a period of 1 hour after the Ice tank is
full the system automatically engages “ECO Mode”. This is where the
system turns off the ice making and the hot water for a period of 6
hours or until the system is used again. This feature conserves energy
and also improves the long-term reliability and performance of the
system.
03

Safety Precautions02
04
Do not use damaged power cords or compromised wall outlets.
There is a danger of an electric shock or fire.
Make sure the power cord is placed in a safe position where it will not be ob-
structed.
Unstable connection may cause fire.
Do not tug at the power cord to disconnect from the wall outlet. Hold the plug
to pull it out when needed.
Damage to the power cord can cause an electric shock.
Do not overload the outlet or circuit in which the system is plugged into.
It may cause a fire due to overheating at the outlet.
Do not touch the power plug with wet hands.
There is a danger of an electric shock.
Do not bend the power cord excessively or put heavy objects on the power
cord.
There is a danger of an electric shock or fire.
Unplug before cleaning inside of the unit, and do not use water directly on the
unit.
There is a danger of an electric shock.
Do not install the unit in or around damp areas, at a place near flammable
materials, or at a place exposed to rain or snow.
Do not put candles, lit cigarettes, etc. on the unit and do not install the unit
near a heating appliance.
There is a danger of a fire.
Do not put any covering on the rear or side of the unit.
Blocking the condenser may result in overheating and cause system
malfunction or system breakdown.
Do not let children hang on or climb the unit. There is a danger of fall.
Do not put a bowl containing water, chemicals, small metals, etc. on the unit.
If these materials fall into the unit, this may cause an electric shock or fire.

Safety Precautions (cont.)
02
05
If the unit is damaged or malfunctioning, do not attempt repair on your own
When dispensing ice from the unit, avoid placing the cup too close to the ice
dispense hole.
This could cause ice accumulation on the ice door and it might block ice from
dispensing. If this occurs, please use a long tool to remove the clogged ice.
When dispensing the ice, avoid using a glass cup or a cup containing liquid.
Do not insert or block the ice dispensing hole with foreign objects. This could
cause a product failure.
To avoid burns from hot water, use a deep container such as a cup while dis-
pensing hot water.
Install the unit at a place where the surface is flat. After installation, always
adjust the level of the unit by using a level gauge.
Tilting can cause performance degradation.
When transporting the unit, do not tilt it over 45°. Severe tilting can cause a
performance degradation.
Do not install the product in a sloped or unstable position.
This can cause a performance degradation, system failure or overall trouble.
Do not install the unit in a place where the temperature may drop below
50 °(10 °). Ice may not dispense properly because ice may melted each other,
and it may cause malfunction.
After transport, do not plug in for at least 30 minutes. This will allow the unit
to stabilize.
In case of abnormal noise, smell or smoke, please contact your distributor.

Dimensions
03
06

Installation Guide04
07
It is very important to follow all instructions listed. Failure to do so may cause
the system to not operate properly and may impact the long term reliability of
the system.
1. Check incoming water pressure and insure it is between 60-70PSI. If the
water pressure is above 70PSI then a pressure reducing valve must be installed
and set to lower the pressure to the optimal water pressure between 60-70PSI.
a. Failure to follow this step may have a negative impact on the reliability
of the system and may cause it to failure prematurely.
b. Failure to follow this step may also affect the taste of the ice and
water along with the replenishment rate of the ice.
c. Failure to follow this step may also impact the life of the filters in a
negative way
d. Failure to follow this step may also cause a leak or similar failure.
2. Flush the filters
a. Remove the filter enclosure from the box and visually inspect all
fittings
- You will notice that the RO membrane is not connected, this is shipped
this way to ensure the preservative remain inside the filter to protect the
membrane
b. Flush the Pre-Sediment and Pre-Carbon filters for 5 minutes
- Connect the source line into the input of the Pre-Sediment and a drain
to the output of the Pre-Carbon.
c. Turn the water on for 5 minutes then turn the water off.
- Remove the source and drain and reconnect the pre-existing
connections
d. Flush the Bio Sure Plus filter for 5 minutes
- Connect the source line into the input of the Bio Sure Plus filter
e. Connect the drain into the output of the Bio Sure Plus filter
- Turn the water on for 5 minutes and then turn the water off
f. Remove the source and drain and reconnect the pre-existing
connections
g. Reverse Flush the TCR Carbon Post filter
- Connect the source line into the output of the TCR filter
- Connect the drain into the input of the TCR Filter
h. Turn the water on for 5 minutes and then turn the water off
- Remove the source and drain and reconnect the pre-existing
connections
i. Flush all 5 filters together
- Connect the loose fittings to the RO
Installation Guide (cont.)
04
08
3. Connect the drain to the outside stem
4. Connect the product to the center stem
5. Connect the inline water coming from the Pre-Carbon through the ASO into
the input
a. Connect the source line to the source on the outside of the filter box
b. Connect the drain to the drain on the outside of the filter box
c. Connect a secondary drain to the top of the TCR
d. Turn the water on for 30 minutes or greater
6. With 60 PSI going into the system after 30 minutes your TDS should be
reduced approximately 98 percent after the RO membrane vs the incoming tap
TDS.
7. The TDS after the TCR filter should only be 5-8 points higher
a. As the system is flushing during each step inspect for any leaks and/or
loose connections
8. Sanitize the ice Bin and water reservoir
a. Remove the top lid by removing two screws on the back side of the top
panel
b. Remove the top panel
c. Remove the front panel by removing two screws found behind the drip
tray
d. Remove the ice and water spigots
e. Slid the front panel off
f. Remove the screws to be able to access the ice tank
g. Remove the lid to the ice tank with the insulation included
h. Remove the stainless-steel augers and the plastic bottom to the ice
tank
i. Spray the inside of the tank with hydrogen peroxide and wipe out with a
clean paper towel
j. Hydrogen peroxide should be approximately a 20 percent Hydrogen per
oxide to 80 percent water blend
k. Spray the plastic bottom with the same blend along with the stain
less-steel augers.
l. Reinstall the plastic bottom and the augers
m. Do one more light spray of hydrogen peroxide and put the top back on
along with the insulation and screws
n. Remove the lid to the water reservoir
o. Spray the inside of the reservoir in the same way and wipe out
p. Spray a light mist and then put the lid to the reservoir back on
q. Re-install the front panel and the top panel
Installation Guide (cont.)
04
09
9. Connecting the Filters to the WS 15000 (a 3 to 4-gallon bladder tank must
be used as well)
a. Mount the filter enclosure under the sink
b. Attach the supply line to the water Supply input on the filter enclosure
c. Attach the RO drain line to the RO drain connection on the filter enclo
sure
d. Connect the feed line from the filter enclosure to a T
e. Connect the T also to the bladder tank
10. Ensure that the pressure of the bladder meets the manufacturers recom-
mended pressure before allowing it to fill
a. You will then hear the compressor and the auger running
b. Please wait about 30-60 minutes for ice to be used after it starts
making ice
c. You must wait until the hot tank completely fills before turning on the
hot water switch which is located on the back of the system behind the
caution sticker (lower right side)
Note: In order to insure reliability and the highest performance only genuine
Wellsys filters should be used and must be changed on time. Please reference
below for the filter change schedule.
1. Pre-Sediment Filter 1 year or 2500 gallons max
2. Pre-Carbon filter 1 year or 2500 gallons max
3. Reverse Osmosis 3 years or 4500 gallons max
4. BIO-Sure Plus 1 year or 750 gallons
5. TCR 2 years or 2500 gallons
6. Air filter 2 years in office environment
Filter schedule is only an estimate and does not guarantee the life will last to
this length of time. Many factors may impact the life of each filter including
but not limited to poor water quality, low pressure, incorrectly installed and
neglect.

Installation Guide (cont.)
04
10
STAND FASTENING
1. Remove drip tray of Product & the Front Cover of Stand.
2. After placing the Product on the Stand, place your hand behind the
Stand to secure the M6 hexagonal bolts. (4X)
2a) After tightening, make sure it is stable and there is no
danger of falling.
3. Once fixed, restore back the Drip Tray of Product & the Front Cover
of Stand.
BRACKET FASTENING
1. Place the braket on the wall at the installation site and mark the
positions. (2x)
1a) There is only one bracket that could be fixed on the top or
bottom side of the stand.
2. Drill two holes in the marked position to fix the bracket to the wall.
3. Ensure the product is fixed with the wall-mounted bracket, so that
the product does not fall when it is pushed.
DRIP
TRAY
FRONT
COVER OF
STAND
BRACKET

How to Use
05
11
DISPLAY AND CONTROL PANEL

How to Use
05
12
WATER DISPENSE METHOD
PLEASE CONNECT THE POWER CORD BEFORE USE.
PLEASE SOFTLY TOUCH THE OPERATION BUTTONS.
ICE DISPENSE
Press the ICE DISPENSE button to dispense
the desired amount of ice. When pressing the
button, ICE LED will blink, and the and the
the machine will dispense ice.
AMBIENT WATER DISPENSE
Press the AMBIENT WATER SELECT button and then press
the WATER DISPENSE button to dispense the desired
amount of ambient water. When pressing the
button, the WATER LED will blink, and the machine will
dispense ambient water.
HOT WATER DISPENSE
Press the HOT WATER SELECT button and then press
the HOT DISPENSE button to dispense the desired
amount of hot water. When pressing the
button, the WATER LED will blink, and the and the
the machine will hot water.

How to Use
05
13
UV LED
A UV-C LED is installed on the lower part of the ice tank. It sanitizes
the melt water to provide you with more hygienic ice.
ECO Mode
Once the ice level is full, the unit will automatically turn on ECO mode.
The ECO mode saves energy by stopping the ice making operation (for
maximum of 6 hours). The machine can still be used to dispense ice
and water while ECO mode is on.
How to Assemble the Water Tray
Push the water tray onto the unit until you hear a "click" sound.
*This machine has an audible ‘beep’ indictor when the water or
ice is dispensed. To turn off the beep sound, simultaneously
press and hold for 5 seconds both the HOT WATER and AMBIENT
WATER select buttons until all LED indicators flash 5 times.
To enable the beep, follow the same process.
Ice Dispense Chute Cleaning Method
1. Pull down the ice dispense chute to remove it from the unit.
2. After cleaning, return the chute back to its original location.
3. Insert tab #1 into the hole and push the chute upward. Make
sure the front three tabs (#2) are properly locked into the unit.

How to Clean
06
14
Water Dispense Spoud Cleaning Method
1. Turn the water dispense faucet to
the left.
2. Wipe the inside of the faucet wifh
a soft cloth. Do not use detergents,
thinners, benzene, or wax for
cleaning. This may cause
discoloration or peeling off, and
may cause health problems.
3. After cleaning, assemble the
water dispense spout back by
turning it to the right.
ICE BIN CLEANING & EVAPORATOR CLEANING
- You need 100 ml (3.4 oz), 2.0 L (67.6 oz) measuring cup (2 EA), drain
hoses are required to clean the storage tank.
-You may pour the cleaning liquid into the ice maker tank.
Preparing for the cleaning & descaling : (Descaling may be optional if
the filters are changed on time and installed correctly. A visual
inspection for calcium, TDS and water pressure test should be used when
considering descaling. Please contact technical support for more
information)
1. Prepare (dispense from the unit) in advance 4 Liters (135 oz) of
clean water which will later be used for washing & rising the unit.
(Once removing the FRONT COVER, the unit will no longer able to
dispense the water & ice.)
2. Shutoff the water supply valve after emptying completely the ICE
BIN.

How to Clean (cont.)
06
15
3. After removing the WATER TRAY, remove the TOP COVER & FRONT
COVER by loosening the fixing screws. (Ice-making operation will be
halted.) (Be careful of SCREW loss when opening the product.)
4. Pay attention to the wire while placing the TOP COVER & FRONT
COVER to the side.
5. Connect the drain hoses to the two DRAIN VALVES,(located at the
bottom of the front side), and then proceed to drain completely.
Once completed, remove the drain hoses. (The hot water intake
operation must be performed after cleaning.)
6. Remove the ICE BIN COVER by loosening the fixing screws, and then
disassemble the 2 AUGERS by pulling upward. (During removal &
reassembling, be careful not to lose the CAPS on the AUGERS and
the screws.) (When assembling the auger, pay attention to the
shape of the joint.)
7. Remove the ICE BASKET from the unit
How to Clean (cont.)
06
16
Evaporator Cleaning
Descaling Operation
Note: This cleaning process must be followed annually or every six
months depending on unit condition.
1. Mix 100 ml (3.4 oz) of cleaning fluid with 2 liters (67.6 oz) of
pre-prepared clean water, and pour slowly into the WATER
RESERVOIR. Th is will also fill the EVAPORATOR with cleaning solu
tion. Please be careful not to overflow the tank.
If you put more quantity of the clean water than those indicated
above, it may affect the product operation and performance.
Pour the cleaning fluid and clean water slowly so that it does not enter
to the Air Filter Connection port or over flow.
2. Wait 30 minutes to remove the scale. While waiting, wash the
detached ICE BASKET thoroughly with clean water.
3. Connect the drain hoses to the two DRAIN VALVES, located at the
bottom of the front side, and drain once more. Once completed,
remove the drain hoses.
4. Slowly pour the remaining 2 liters (67.6 oz) of pre-prepared clean
water into the WATER RESERVOIR. Connect the drain hoses to the
two DRAIN VALVES, (located at the bottom of the frontside), and
drain once more. Once completed, remove the drain hoses.

How to Clean (cont.)
06
17
Ice Bin Cleaning
1. Spray the inside of the tank with hydrogen peroxide and wipe out
with a clean paper towel
Hydrogen peroxide should be approximately a 20%
hydrogen-peroxide to 80% water blend
Product Assembly and Verification
1. Attach the ICE BASKET, and then the 2 AUGERS. Please make sure to
insert tightly the CAPS (tips) of AUGGERS into the fastening groove.
2. Open the water supply valve, and then assemble the ICE BIN COVER
& FRONT COVER.
3. Please make sure that the unit is dispensing the water, when the
(1) Hot Water is selected and
(2) Water Dispense Button is pressed. (If the hot water dispense
operation is not performed, then that can lead to the product
failure or risk of fire.)
4. Attach the TOP COVER, and WATER TRAY.
5. Check if the product is operating normally. Even if the tank is
heated without water in the hot water tank, the temperature detects
and cut s off the power of the hot water tank.
Operation Check:
(1) Is the water dispensing smoothly as before?
(2) Does the ice-making operation is activated after 3 minutes?
Cleaning Checkpoints:
(1) Wash your hands first and put on sanitary gloves. Clean up the tank
with soft cloth or dry cleaner.
(2) Throw away used cleaner, sanitary gloves etc. after cleaning.
(3) Make sure thank tank cover is closed firmly is installed properly.
(4) Clean up the tank regularly every 6 months to a year.
Specications
07
18
- N Class in the climate class means moderate climate.
- IP Class indicates the degree of protection against dust and water.
- The storage tank capacity is based on the storage tank size, so it
may be different from the actual weight of ice in the tank.
- Power consumption may vary depending on the usage environment.

Troubleshooting Guide
08
19
wellsyswater.com
(855) 558 - 9796 option 3
Thank you for choosing Wellsys®
Other manuals for WS 15000
2
Table of contents
Other Wellsys Dispenser manuals
Popular Dispenser manuals by other brands

COX
COX Airflow 3 Instructions for use

AUTOMATED EQUIPMENT
AUTOMATED EQUIPMENT McDonald's DF22 Equipment manual

Boekel
Boekel 145600 operating instructions

Franke
Franke RODAN RODX627 Installation and operating instructions

egepack
egepack e One 45570 60500 quick start guide

JDE
JDE EXCELLENCE COMPACT TOUCH user manual