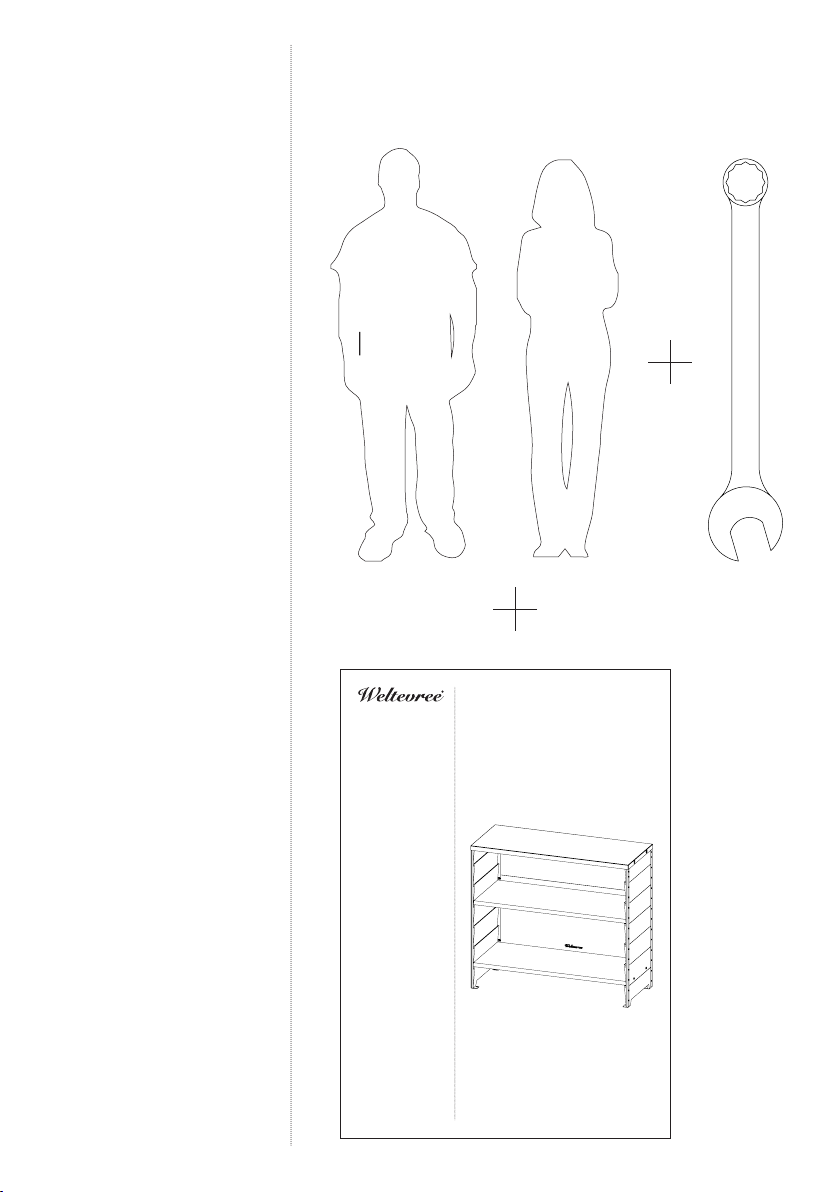
Weltevree Rabat Shelving low User manual

PRODUCT MANUAL
Rabat Shelving
low

RABAT SHELVING
by Lex Pott
NL
Gefeliciteerd met de aankoop van de Weltevree
Rabat Shelving!
In deze handleiding staat precies beschreven hoe je de Rabat Shelving
in elkaar zet. Ook bevat dit document algemene informatie over het
product, de garantie en handige tips voor het onderhoud.
Het design van de Rabat Shelving is geïnspireerd op het iconische
overlappende hout van huizen en schuren in Scandinavië. Deze
techniek is omgedraaid aan de binnenkant van de kast, waardoor er
functionele plankdragers ontstaan. De verfijnde Rabat Shelving is
geschikt om binnen én buiten te plaatsen, en doet het goed als room/
garden divider of uitbreiding van je outdoor keuken!
ENG
Congratulations on purchasing the Weltevree Rabat
Shelving!
This manual explains exactly how to assemble your Rabat Shelving.
The document contains other helpful information as well, such as
information about the product characteristics, warranty and mainte-
nance.
The inspiration for the Rabat Shelving comes from the iconic over-
lapping wood of sheds and houses in Sweden. This architectural
technique is turned around, creating a functional shelf support on the
inside. The refined Rabat Shelving is suitable for indoors and outdoors,
and works well as a room/garden divider or extension to your outdoor
kitchen!
DE
Glückwunsch zu Ihrem Weltevree Rabat Shelving!
Dieses Handbuch beschreibt genau, wie man das Rabat Shelving
montiert. Dieses Dokument enthält auch allgemeine Informationen
über das Produkt, die Garantie und praktische Tipps für die Wartung.
Die Inspiration für das Rabat Shelving stammt aus den ikonischen
überlappenden Holzprofilen, welche in Schuppen und Häusern in
Schweden verwendet werden. Für das Regal wurde diese architekto-
nische Technik umgedreht, wodurch die Einlegeböden leicht platziert
werden können. Das raffinierte Rabat Shelving ist für drinnen und
draußen geeignet, ist als Raum- oder Gartentrenner einsetzbar und ist
eine tolle Ergänzung zu Ihrer Outdoor-Küche!
uniquely
refined
closet for
indoors and
outdoors

DIMENSIONS &
SPECIFICATIONS
Rabat Shelving
Ontwerper /
Designer
/ Designer
Lex Pott
Materiaal /
Material
/ Material
Thermo vuren, verzinkt &
gepoedercoat staal /
Thermo pine, zinc plated & powder-
coated steel
/
Thermo-Fichte, verzinkter &
pulverbeschichteter Stahl
Afmetingen /
Dimensions
/ Größe
Length 40 cm / 15.75 inch
Width 98,5 cm / 38.75 inch
Height 88,5 cm / 34.9 inch
Gewicht /
Weight
/ Gewicht
28 kg / 57 lbs
Levering /
Delivery
/ Lieferung
In dozen /
In boxes
/ Verpackt
Onderhoud /
Maintenance
/ Wartung
Om de levensduur van de Rabat Shelving te verlengen is een behandeling met
houtolie voor de houten onderdelen aan te raden. Gebruik de olie vooraf om
het hout te conserveren en het vergrijzen te vertragen. Bovendien zorgt het
ervoor dat het hout makkelijker te reinigen is.
Reinig de Rabat Shelving twee keer per jaar met een zachte doek of een
borstel die niet schuurt. Gebruik lauw water of een milde zeep-oplossing. Spoel
de Rabat Shelving af met schoon water.
To prolong the life of the Rabat Shelving, a treatment with wood oil is
recommended. Use the oil before usage of the product to protect the wood,
making it easier to clean and slowing down the aging process.
Clean the Rabat Shelving twice a year with a soft cloth or a nonabrasive brush.
Use lukewarm water or a mild soap solution. Rinse the Rabat Shelving with
clean water.
Um die Lebensdauer Ihres Rabat Shelving zu verlängern, wird eine Behandlung
mit Holzöl emphohlen. Tragen Sie das Öl vor der ersten Verwenung auf, um das
Holz zu schützen, die Reinigung zu erleichtern und den Alterungsprozess zu
verlangsamen.
Reinigen sie des Rabat Shelving zweimal jährlich mit einem weichen Tuch
oder einer Bürste, die nicht reibt. Verwenden sie lauwarmes Wasser oder eine
milde Seifenlösung. Spülen sie das Rabat Shelving mit sauberem Wasser ab.
40 cm / 15,75 inch
98,5 cm / 38,75 inch
88,5 cm / 34,9 inch

MANUAL
PRODUCT MANUAL
Rabat Shelving
low
10
Benodigdheden:
2 Personen, steeksleutel 10,
Handleiding
Necessities:
2 Persons, open-ended spanner
10, Manual
Voraussetzungen:
2 Personen, 10er Maulschlüssel,
Anleitung

2 x - 4 mm
Inbussleutel /
Allen key
/
Inbusschlüssel
8x - M6
Hulsmoer /
Sleeve nut
/
Hülsenmutter
12x - M6 x 12 mm
Laagbolkopflensschroef /
Hexagon socket button head
screw with flange
/
Innensechskantschrauben
4x - M6 x 20 mm
Laagbolkopflensschroef /
Hexagon socket button head
screw with flange
/
Innensechskantschrauben
Onderdelen kleine doos /
Parts in small box
/
Teile in kleiner Box
8x
Borgmoer M6 mm /
Lock nut M6
/
Kontermutter M6

Onderdelen grote doos /
Parts in big box /
Teile in großer Box
1x
Linker zijpaneel /
Left side
panel
/ Linke Seitenwand
1x
Achterplaat /
Back panel
/
Rückwand
1x
Rechter zijpaneel /
right side
panel
/ Rechte Seitenwand
1x
Bovenkant /
Top
/
Oberseite des Schranks
1x
Onderste plank /
Bottom shelf
/ Unterer Regalboden
1x
Losse plank /
Loose shelf
/
Loser Regalboden
2x
Bevestigingstrip /
Mounting strip
/
Montagestreifen

Let op:
Zorg ervoor dat de ondergrond
schoon en vlak is.
Note:
Make sure that the surface is
clean and level.
Anmerkung:
Stellen Sie sicher, dass die
Oberfläche sauber und eben ist.
Stap 2
Plaats de onderste plank in de
onderste positie van de twee
zijpanelen.
Step 2
Place the bottom shelf in the
bottom position of the two side
panels.
Schritt 2
Legen Sie den untere
Regalboden in die untere
Position der beiden Seitenwände.
Plank met gaten aan voor en achterzijde /
Shelf with holes on the front and back /
Regalboden mit Löchern vorne und hinten
Stap 1
Om de levensduur van de Rabat
Shelving te verlengen is een
behandeling met houtolie voor
de houten onderdelen aan te
raden. Bovendien zorgt het
ervoor dat het hout makkelijker
te reinigen is.
Step 1
To prolong the lifespan of Rabat
Shelving, a treatment with wood
oil is recommended. This makes
it easier to clean and slows down
the aging process.
Schritt 1
Um die Lebensdauer des Rabat
Shelving zu verlängern, wird
eine Behandlung mit Holzöl
empfohlen. Dies erleichtert die
Reinigung und verlangsamt den
Alterungsprozess.

Stap 4
Plaats de bovenkant van de kast
over de zijpanelen heen.
Plaats de bevestigingstrip aan
de binnenzijde van de kast en
maak het geheel aan elkaar vast
met de hulsmoeren en de M6 x
20 mm bouten.
Step 4
Now place the top of the cabinet
over the side panels.
Place the mounting strip on the
inside of the cabinet and fasten
it together with the sleeve nuts
and the M6 x 20 mm bolts.
Schritt 4
Legen Sie die Oberseite des
Schranks über die Seitenwände.
Legen Sie den Montagestreifen
auf die Innenseite der
Seitenwändeund befestigen Sie
ihn mit den Hülsenmuttern und
den Schrauben M6 x 20 mm.
Stap 3
Zet de plank nu vast met
behulp van de hulsmoeren en
de M6 x 12 mm bouten.
Step 3
Secure the shelf using the
sleeve nuts and the M6 x 12 mm
bolts.
Schritt 3
Befestigen Sie den Regalboden
mit den Hülsenmuttern und
den Schrauben M6 x 12 mm.
4x

Stap 5
Zet de bovenste en onderste
plank verder vast aan de
voorzijde met behulp van de
M6 x 12 mm bouten en de
borgmoeren.
Step 5
Further secure the top and
bottom shelf at the front using
the M6 x 12mm bolts and the
lock nuts.
Schritt 5
Befestigen Sie den obere und un-
tere Regalboden vorne mit den
Schrauben M6 x 12 mm und den
Kontermuttern.
4x

Stap 7
Plaats nu de losse plank in de
gewenste positie.
Step 7
Now place the loose plank in the
desired position.
Schritt 7
Legen Sie nun die losen
Regalböden in die gewünschte
Position.
Stap 6
Plaats het achterpaneel aan
de achterzijde van de kast en
zet dit vast met de M6 x 12 mm
bouten en de borgmoeren.
Als de gaten niet uitlijnen draai
dan de andere boutjes weer
iets los zodat er meer speling
ontstaat.
Step 6
Place the back panel on the
back of the cabinet and secure
it with the M6 x 12mm bolts and
locknuts.
If the holes do not align, loosen
the other bolts slightly so that
there is more leeway.
Schritt 6
Setzen Sie die Rückwand auf
die Rückseite des Regals und
befestigen Sie sie mit den
Schrauben M6 x 12 mm und
den Kontermuttern.
Wenn die Löcher nicht
ausgerichtet sind, lösen
Sie die anderen Schrauben
leicht, damit mehr Spielraum
entsteht.
4x

Stap 8
Zet de kast vast aan de muur
door middel van de gaten
achterin de kast of bevestig aan
de vloer via de gaten onderin de
poten.
Step 8
Fix the cabinet to the wall
using the holes in the back of
the cabinet or fix it to the floor
through the holes at the bottom
of the legs.
Schritt 8
Befestigen Sie den Schrank mit
den Löchern an der Rückseite
des Schranks an der Wand oder
befestigen Sie ihn durch die
Löcher an der Unterseite der
Beine am Boden.

WARRANTY
Algemene voorwaarden
Raadpleeg voor meer informatie onze
algemene voorwaarden op:
https://www.weltevree.eu/nl/general-
conditions/
General conditions
For more information please read our
general conditions at:
https://www.weltevree.eu/general-
conditions/
Allgemeinen
Geschäftsbedingungen
Weitere Information finden Sie in
unsere Allgemeinen Geschäftsbedin-
gungen unter:
https://www.weltevree.eu/de/agb/
1.1 Contact
Telephone
+31 (0) 33 2037037
E-mail
info@weltevree.nl
www.weltevree.nl
© Weltevree®
Address
Weltevree
Nijverheidsweg-Noord 40a
3812 PM Amersfoort
The Netherlands
- facebook.com/weltevree
- twitter.com/weltevree
- instagram.com/weltevree
- pinterest.com/weltevreeshop
WARRANTY
Weltevree levert kwaliteit
Mocht er toch iets mis zijn, dan bie-
den wij standaard een garantie
van 1 jaar op problemen
veroorzaakt door productiefouten.
Weltevree delivers quality
Nonetheless, if you encounter any
problems with your product, we offer
a standard 1-year warranty on issues
caused by a manufacturers defect,
Weltevree liefert Qualität
Gibt es etwas an Ihrem Produkt zu
beanstanden, was auf einen Defekt
in der Herstellung zurückzuführen
ist, gilt eine 1 Jahre Hersteller
Garantie.
Bedankt voor je
aankoop!
Thank you for your
purchase! Vielen Dank für Ihren
Einkauf!
Voorwaarden
De klant kan geen beroep doen
op de garantie bij schade aan het
product wanneer:
a. de schade een gevolg is van
normale slijtage.
b. de schade een gevolg is van
onjuist gebruik
c. er geen of onjuist onderhoud is
uitgevoerd.
d. er wijzigingen of reparaties door
de klant of door onprofessionele
derden zijn gedaan.
e. de schade is veroorzaakt door
brand, bliksem, overstromingen,
natuurrampen en ontploffingen.
f. de schade het gevolg is van enig
overheidsvoorschrift inzake de aard
of de kwaliteit van de toegepaste
materialen.
Conditions
The customer can not claim the
warranty for damages to the product
when:
a. the damage is the result of normal
wear and tear.
b. the damage is the result of misuse.
c. the product is not properly
maintained.
d. the damage is the result of
modifications and repairs by the
customer or by third unprofessional
parties.
e. the damage is caused by fire,
lightning, floods, natural disasters and
explosions.
f. the damage is the result of any
government regulation regarding
the nature or quality of the materials
used.
Bedingungen
Die Garantie für Schäden am
Produkt greift nicht bei:
a. Normalen Gebrauchsspuren und
normalem Verschleiß.
b. Entstandenem Schaden durch
unsachgemäßem Gebrauch.
c. Schäden durch unsachgemäße
Pflege.
d. Änderungen oder Reparaturen die
am Produkt durch Sie oder unprofes-
sionelle Dritte vorgenommen wurden
e. Schäden, die durch Feuer, Blit-
zschlag, Hochwasser, Naturkatastrop-
hen und Explosionen entstanden
sind.
f. Schäden, welche durch staatliche
Regulierung in Bezug auf die Art
oder die Qualität der verwendeten
Materialien entstanden sind.
Table of contents
Other Weltevree Indoor Furnishing manuals
Popular Indoor Furnishing manuals by other brands

QVC
QVC Curl 3 PARTS LIST, USE & CLEANING

Radius
Radius BOOKSBAUM MAGAZIN manual

Furniture of America
Furniture of America CM3324PT/BT Assembly instructions

DURAVIT
DURAVIT Vitrium VT 7379 Mounting instructions

Colston
Colston 500-013 user manual

Oeseder Möbelindustrie
Oeseder Möbelindustrie 992 314 Assembly instructions

Madison Park Signature
Madison Park Signature Lauren Bar Cart Assembly instructions

HJH office
HJH office ERGO 100 Assembly instructions

Lightolier
Lightolier Calculite ProSpec PA1H3039 specification

MDB Family
MDB Family Combo Dresser Assembly and operation manual

Horreds
Horreds VX10 Assembly instruction

Costway
Costway Honey Joy HW66976 user manual