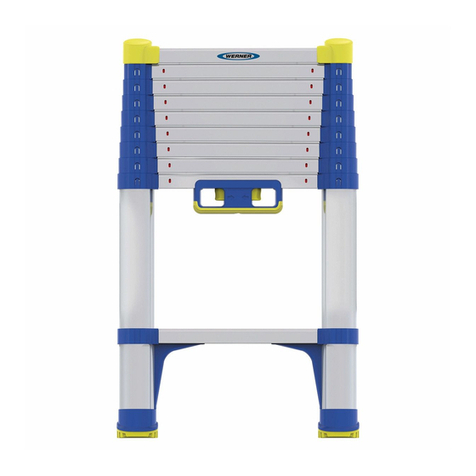
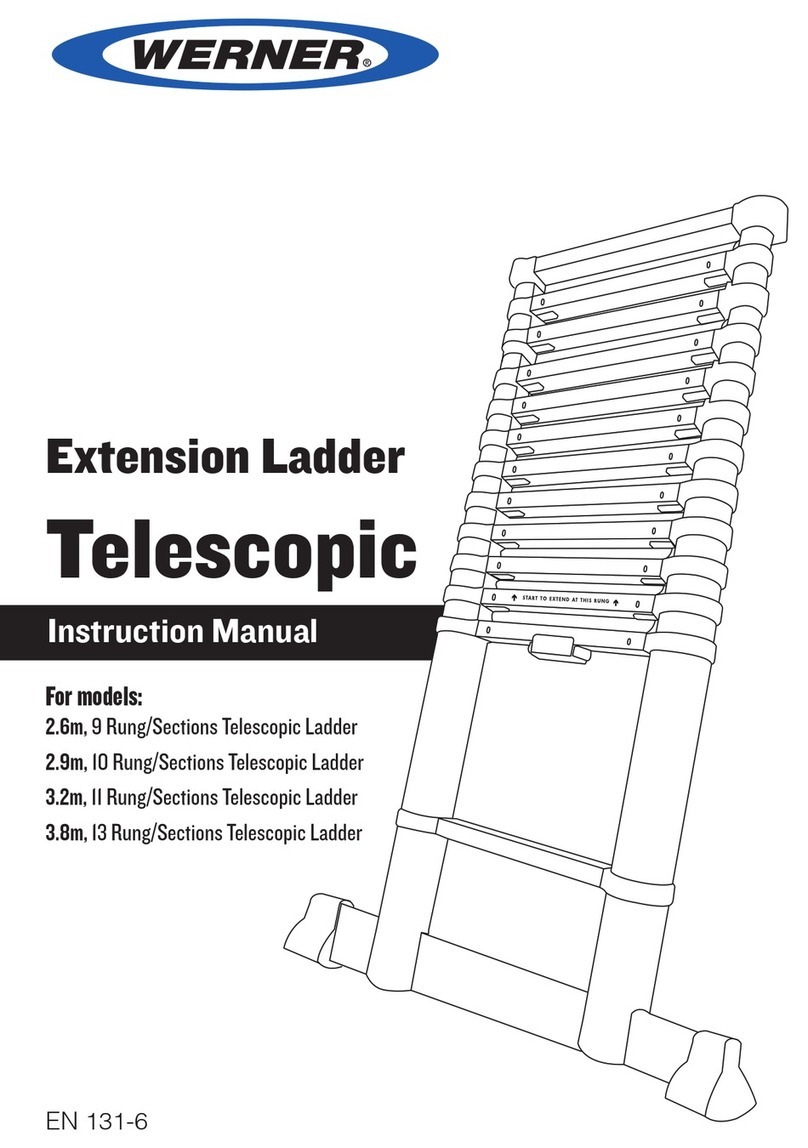
Werner Telescopic Extension Ladder Series User manual

INSTRUCTION MANUAL
Telescopic Extension Ladder
1
2
3
4
5
6
7
8
1
2
4
3
5
6
7
8
Wall Bumper
Lock Indicator
Rung
Support Ring
Lock Release
Stile Tube
Bottom Rung
Ladder Feet
2.6m, 8 Rung/Sections Telescopic Ladder
2.9m, 9 Rung/Sections Telescopic Ladder
3.2m, 10 Rung/Sections Telescopic Ladder
3.8m, 12 Rung/Sections Telescopic Ladder
EN 131
For model:
PN115159-01_IM_TelescopicLadder_Rev1018_PRINT.indd 1 10/18/18 5:03 PM

1
Safety 2
Quick Operating Guide 3
Operating and Usage Instructions 4 - 6
Leaning Ladder Guide 7 - 8
Ladder Safety Check 9
CONTENTS
PN115159-01_IM_TelescopicLadder_Rev1018_PRINT.indd 2 10/18/18 5:03 PM

2
Read the
instructions
max.
150 kg
Max. load (Load
includes user,
tools, materials
etc.)
Correct angle of
erection
Visual check
before use
Inspect ladder
feet
Maximum number
of users on the
ladder
Secure top/bottom
of ladder
Ladder extension
above landing
point
Erect on a level
base
Do not overreach
Ensure ground
is free from
contaminants
Do not step off
the side of a
ladder
Avoid wet
conditions
Erect on a rm
base
Avoid electrical
hazards
Only one person
per ascendable
leg of the ladder
Do not use the
ladder as a bridge
Ensure top of
ladder is correctly
positioned
Face ladder
when ascending
or descending
ladder
Do not climb top
1m of ladder
Safety
UP Only use the
ladder in the
direction as
indicated.
PN115159-01_IM_TelescopicLadder_Rev1018_PRINT.indd 3 10/18/18 5:03 PM

3
STEP 1
Always extend the ladder from the bottom.
Start to extend the ladder by pulling upward the
two black support rings of the third rung from
the bottom until the section locks. Repeat this
procedure for each next section until the desired
ladder length is reached.
2
STEP 2
Check and ensure that all extended sections are
fully locked and that the lock indicators are showing
full green. Never attempt to use or climb the ladder
if any of the lock indicators below each extended
section are showing full red or half red / half green.
STEP 3
Note the sloped shape of the ladder feet and
place the extended ladder the correct way round
(forwards) at an angle of 75 degrees to the ground
and supported at the top. Never climb the rear of the
ladder and never climb the ladder when placed the
wrong way round (reversed).
STEP 4
Place the square pads of the safety grip wall
bumpers at the top of the ladder against a suitable
support (e.g. a wall). The bumpers provide grip to
give stability. Never support the ladder by the rungs
or stile tubes.
STEP 5
Never attempt to climb the ladder if the sections are in
the wrong position and the distance between all rungs
of the extended ladder are not the same. Ensure that
all sections are opened in sequence and are fully
extended and locked.
CLOSE
6
STEP 6
To close the ladder support the ladder in an upright
position with one hand and depress and then release
both ladder lock release buttons with your other hand.
Using both hands, hold outside of the stile tubes and
pull the sections downward. The lowest extended
section will close rst which will automatically unlock
the next extended section. Continue to pull down the
sections until the ladder is fully closed.
Read these instructions before using the ladder.
Always keep these instructions with the ladder.
Also read and follow the full instructions supplied with the ladder
and the safety labels affixed to the ladder.
1
OPEN
3
4
5
PN115159-01_IM_TelescopicLadder_Rev1018_PRINT.indd 4 10/18/18 5:03 PM

IMPORTANT – READ ALL INSTRUCTIONS CAREFULLY BEFORE ATTEMPTING TO OPERATE OR USE THE
LADDER. THE LADDER SHOULD BE INSPECTED AFTER DELIVERY AND BEFORE EVERY USE TO
CONFIRM CONDITION AND OPERATION OF ALL PARTS.
WARNING – DO NOT OPEN / EXTEND THE LADDER FROM EITHER A MIDDLE OR THE TOP LADDER SECTION.
THE LADDER SECTIONS MAY NOT FULLY LOCK WHICH MAY LEAD TO INJURY.
Operating and Usage Instructions
1
OPEN
Figure 1 Figure 2
Figure 3 Figure 4
Figure 5
2
3
110871-01 Rev B 12/16.indd 5 19/12/2016 13:27
Figure 6
CLOSE
4
CLOSE
PN115159-01_IM_TelescopicLadder_Rev1018_PRINT.indd 5 10/18/18 5:03 PM

5
1. Safety Procedures
1.1 ALWAYS read and follow these and all operating and
safety instructions supplied with and affixed to the
ladder and ensure the ladder is suitable for the task to be
performed.
1.2 ALWAYS transport the ladder fully closed and hand carry
under arm gripping the underside of the ladder lock release
housing on the underside of rung 2 (see figure 1).
1.3 ALWAYS treat this precision built product with care. Open
and close the ladder in a slow and careful manner. If a stile
tube is dented or damaged the
ladder may be difficult to operate or may completely
malfunction.
1.4 ALWAYS ensure that you are fit enough to use a ladder.
Certain medical conditions or medication, alcohol or drug
abuse could make ladder use unsafe.
1.5 ALWAYS deploy the ladder at the correct angle (75 degrees
to the horizontal) and upon a firm and level standing
surface.
1.6 ALWAYS support the top of the ladder via its safety grip wall
bumpers and never the stile tubes or rungs which may be
damaged as a result.
1.7 ALWAYS check that the ladder lock indicators below each
extended section are ‘full green’ and ensure that all related
ladder locks are correctly fully engaged before attempting to
climb the ladder (see figure 2).
1.8 ALWAYS secure / tie the top of the extended ladder
whenever possible. NEVER use the ladder outdoors in
adverse weather conditions (such as strong wind).
1.9 ALWAYS wear suitable footwear when climbing the ladder.
1.10 ALWAYS deploy the ladder forwards and face the front
of the ladder and keep a secure grip on the ladder when
ascending and descending.
1.11 ALWAYS ensure that any equipment carried whilst using the
ladder is lightweight and easy to handle.
1.12 ALWAYS maintain a handhold whilst working from the
ladder or take additional precautions if you cannot do so.
1.13 ALWAYS avoid applying excessive side loading whilst
working from the ladder (e.g. during the drilling into brick or
concrete).
1.14 ALWAYS use the ladder for light work of short duration only.
NEVER spend long periods on the ladder without regular
breaks (tiredness is a risk).
1.15 ALWAYS secure doors (not fire doors) and windows within
the work area whenever possible.
1.16 ALWAYS keep the ladder clean. Wipe the stile tubes
occasionally with a clean, dry cloth. Paint or other ‘foreign’
material will impede the telescoping action and must be
cleaned off immediately.
1.17 ALWAYS store the ladder fully closed and indoors. Damp
conditions could adversely affect the condition and
operation of the product.
1.18 ALWAYS carry out a risk assessment (respecting the
legislation in the country of use) before using the ladder for
Professional work.
1.19 NEVER use a damaged ladder.
1.20 NEVER carry, operate or use the ladder in or near live
electrical environments. This ladder can conduct electricity
(use instead an alternative electrically non-conductive
ladder).
1.21 NEVER use the ladder in dirty / dusty environments. The
ingress of ‘foreign’ material will impede the telescoping
action.
1.22 Ladders shall NEVER be positioned on slippery surfaces
(such as ice, shiny surfaces or significantly contaminated
solid surfaces) unless additional effective measures
are taken to prevent the ladder slipping or ensuring
contaminated surfaces are sufficiently clean.
1.23 NEVER immerse any part of the ladder in water which will
damage the product and impede the telescoping action.
1.24 NEVER use the ladder back to front, upside down or
horizontal (as a bridge or saw horse etc.) which may cause
product damage and / or personal injury.
1.25 NEVER climb above the fourth rung down from the top of
the ladder. Note:
• When the ladder is not being used fully extended, the top
group of rungs of the unextended sections represent the
‘single’ top rung).
• The uppermost bar of this ladder is not classified, nor shall
it be counted, as a rung.
1.26 NEVER apply a load that exceeds the maximum load rating
for the product of 150kg (23.6st).
1.27 NEVER touch or tamper with the ladder lock release
mechanism whilst the ladder is in use.
1.28 NEVER use the extended ladder if there is any doubt that
any of the extended section locks are fully engaged.
1.29 NEVER partly retract / reduce the ladder to a shorter length
ALWAYS retract all sections and fully close the ladder first
and then re-open / extend the ladder to the desired shorter
length.
1.30 NEVER overreach or lean backwards when standing on /
using the ladder. ALWAYS keep belt buckle / navel within
ladder stiles and both feet on the same rung throughout the
task.
1.31 NEVER push / pull the ladder to move its position (descend
the ladder first and then move the ladder to its required
location).
1.32 NEVER step off the ladder at a higher level without
additional security (tying the extended ladder or use of a
suitable stability device).
1.33 NEVER allow children to climb or play on or near to the
ladder.
PN115159-01_IM_TelescopicLadder_Rev1018_PRINT.indd 6 10/18/18 5:03 PM

6
2. Opening / Extending and
Deploying the Ladder
2.1 Before using the ladder it shall be checked that all
locking mechanisms are working properly. If the
mechanism is not working properly, do not use the
ladder.
2.2 Stand and support the closed / retracted product
vertically and upon a firm / level surface and then place
one foot centrally upon the fixed bottom rung (rung 1)
to stabilise the ladder (see figure 3).
2.3 Note that the ladder must be opened /
extended from the lowest extendable section
and not from either a middle or the top section.
2.4 Using both hands, lightly hold the stile tubes
below the black support rings of rung 3 (the
rung of the first / lowest extendable ladder
section) and then pull up and fully extend the
section (see figure 3).
2.5 Repeat step 2.4 and extend each further
ladder section (one at a time) until the desired
ladder length is reached (note that it will eventually
become necessary to lower the extended ladder to
enable higher ladder sections to be extended).
2.6 Check all ladder lock indicators (immediately below
each extended section) are showing ‘full green’ (see
figure 2).
2.7 Note the slope of the ladder feet and the location of the
safety grip wall bumper square pads and then correctly
deploy and support the extended ladder forwards and
at an angle of 75 degrees to the horizontal (see figures
4 and 5).
2.8 Ensure that the deployed ladder is secure by placing
the ladder feet upon a firm and level surface and both
safety grip wall bumper pads against a firm vertical
surface (e.g. a wall). Whenever possible, secure / tie
the top of the extended ladder.
2.9 Take special care in adverse weather conditions (e.g.
strong winds). If in doubt, do not risk your personal
safety and postpone the use of the ladder.
3.
Closing / Retracting the Ladder
3.1 Stand and support the open / extended product upright
by firmly holding one of the stile tubes part way up the
ladder with one hand and then using your
other hand, fully depress and then release both ladder
lock release buttons (see figure 6) to unlock the lowest
extended ladder section (note that the ladder sections
will not descend / self-close when these buttons are
depressed).
3.2 Using both hands, lightly hold the outside stile tubes
of the ladder and carefully / slowly pull down all ladder
sections (note that the lowest extended section will
sequentially fully retract / close first which will then
automatically unlock the next extended section).
3.3 Whenever partly reducing the length of the extended
ladder, always follow steps 3.1 and 3.2 first to fully
retract / close the ladder and then follow steps 2.1
to 2.6 to re-extend the ladder to the desired reduced
length.
4. Handling, Storage and Maintenance
4.1 This ladder is a precision built product and
should be handled with care, stored in suitable
conditions and maintained in full working order to
continue providing safe and reliable service.
4.2 Transport the ladder fully closed and hand carry under
arm. With one hand hold the underside of the ladder
lock release housing on the underside of rung 2 (see
figure 1), support / carry the product with your arm
straight and steady the ladder with your other hand.
4.3 Open and close the ladder in a slow and careful manner.
4.4 Avoid striking the product against another object. If
a stile tube is dented or damaged the ladder may be
difficult to operate or may completely malfunction.
4.5 Store the ladder fully closed and vertical,
stood upon both its feet and leant against a vertical
surface.
4.6 Always store the ladder indoors. Damp conditions
could adversely affect the condition and operation of
the product.
4.7 Keep the ladder clean. Wipe the stile tubes occasionally
with a clean, dry cloth. Wipe
and dry the product immediately following exposure
to wet conditions (e.g. rain). Paint or other ‘foreign’
material will impede the telescoping action and must be
cleaned off immediately.
4.8 If any stiffness in the telescoping action develops,
firstly wipe the stile tubes with a clean, dry cloth, then
apply a small amount of silicone spray and wipe any
excess off with a clean cloth.
4.9 Replace worn (or damaged) ladder feet and safety grip
wall bumpers before they are worn smooth. Only
use genuine original replacement parts to ensure your
safety.
4.10 Except to replace ladder feet and safety grip wall
bumpers, do not attempt to disassemble or repair the
product yourself. All repairs and other maintenance
shall only be carried out by a competent person in
accordance with the manufacturer’s instructions. For
any assistance relating to this product contact the
Customer Helpline on 01621 745 900.
4.11 For Professional users; regular periodic inspection of
the ladder is required.
PN115159-01_IM_TelescopicLadder_Rev1018_PRINT.indd 7 10/18/18 5:03 PM

7
Every month, more than a thousand people need hospital treatment because of accidents at home involving ladders...
...ABOVE ALL BE CAREFUL
Leaning Ladder Guide
1. Before Use
1.1 Read all instructions on and accompanying the ladder
1.2 Ensure that you are fit enough to use a ladder. Certain
medical conditions or medications, alcohol or drug abuse
could make ladder use unsafe
1.3 Ensure the ladder is suitable for the task
1.4 Visually check the ladder is not damaged and is safe to use
at the start of each working day when the ladder is to be
used
1.5 Remove any contamination from the ladder, such as wet
paint, mud, oil, water or snow
1.6 When transporting ladders on roof bars or in a truck,
ensure they are suitably placed to prevent damage
1.7 Inspect the ladder after delivery and before first use to
confirm condition and operation of all parts
1.8 Before using a ladder at work a risk assessment should be
carried out respecting the legislation in the country of use
1.9 For professional users regular periodic inspection is
required
1.10 Do not use a damaged ladder
2. Positioning and Erecting the Ladder
2.1 When positioning the ladder take into account risk
of collision with the ladder e.g. from pedestrians, vehicles
or doors. Secure doors (not fire exits) and windows where
possible in the work area
2.2 Identify any electrical risks in the work area, such as
overhead lines or other exposed electrical equipment
2.3 Ladders shall not be positioned on slippery surfaces
(such as ice, shiny surfaces or significantly contaminated
surfaces) unless additional effective measures are taken
to prevent the ladder slipping or ensuring contaminated
surfaces are sufficiently clean
2.4 Leaning ladders should lean against a flat non-fragile
surface and should be secured before use, e.g. tied or use
of a suitable stability device
2.5 Ladder shall be erected at the correct position, such as
the correct angle for a leaning ladder (angle of inclination
approximately 1:4) with the rungs or treads level
2.6 Locking devices, if fitted, shall be fully secured before use
2.7 Ladder shall be stood on its feet, not the rungs or steps
2.8 Ladder shall never be repositioned from above
2.9 Ladder shall be on an even, level and unmovable base
3. Using the Ladder
3.1 Do not exceed the maximum total load for the type of
ladder
3.2 Do not overreach, users should keep their belt buckle
(navel) inside the stiles and both feet on the same step/rung
throughout the task
3.3 Maintain a handhold whilst working from a ladder or take
additional safety precautions if you cannot
3.4 Avoid excessive side loadings e.g. drilling brick and
concrete
3.5 Keep a secure grip on the ladder when ascending and
descending
3.6 Face the ladder when ascending and descending
3.7 Wear suitable footwear when climbing a ladder
3.8 Do not step off a leaning ladder at a higher level without
additional security, such as tying off or use of a suitable
stability device
3.9 Leaning ladders used for access to a higher level should be
extended at least 1m above the landing point
3.10 The uppermost bar of this ladder is not classified, nor shall
it be counted, as a rung
3.11 Do not stand on the top three steps/rungs of a leaning
ladder
3.12 Ladders should only be used for light work of short
duration
3.13 Use non-conductive ladders for unavoidable live electrical
work
3.14 Do not use the ladder outside in adverse weather
conditions, such as strong wind
3.15 Take precautions against children playing on the ladder
3.16 Secure doors (not fire exits) and windows where possible in
the work area
3.17 Do not use the ladder as a bridge
3.18 Do not spend long periods on a ladder without regular
breaks (tiredness is a risk)
3.19 Equipment carried while using a ladder should be light and
easy to handle
4. Repair, Maintenance and
Storage
4.1 Repairs and maintenance shall be carried out by a
competent person and be in accordance with the producer’s
instructions
4.2 Ladders should be stored in accordance with producer’s
instructions
PN115159-01_IM_TelescopicLadder_Rev1018_PRINT.indd 8 10/18/18 5:03 PM

8
Work the Safe Way
THE RIGHT WAY
Use ladder correct way up
Right height for the job –
no overreaching
Good grip
Correct Flat shoes
Clean rungs
Ladder in good condition
Two non-slip feet
in good condition
Ladder at correct angle
65-75 degrees
Firm, level and
unmovable base
Ensure ground is free
from contaminants
ONE OUT
PURUOF
THE WRONG WAY
Electrical hazard
Do not step o side of ladder
Overhead hazard
Wrong height for the job –
do not overreach
Not holding on-only 2 points
of contact
Overloaded with material
Standing on top 3 rungs
Slippers-incorrect footwear
Mud on rungs
Damaged ladder
Foot missing or damaged
Unstable surface
Base too far from wall
The images show a 2 section leaning ladder. Please note the telescopic ladder is different from the image shown.
PN115159-01_IM_TelescopicLadder_Rev1018_PRINT.indd 9 10/18/18 5:03 PM

9
Ladder Safety Check
(Maintenance, Repair and Storage)
1. Maintenance checks before use
1.1 Check that the stiles (uprights) are not bent, bowed,
twisted, dented, cracked, corroded or rotten
1.2 Check that the stiles around the fixing points for other
components are in good condition
1.3 Check that fixings (usually rivets, screws or bolts) are
not missing, loose, or corroded
1.4 Check that rungs are not missing, loose, excessively
worn, corroded or damaged
1.5 Check that rubber feet / end caps are not missing,
loose, excessively worn, corroded or damaged
1.6 Check that the entire ladder is free from contaminants
(e.g. dirt, mud, paint, oil or grease)
1.7 Check that locking catches are not damaged or
corroded and function correctly
If any of the above checks cannot be fully satisfied you
should NOT use the ladder.
2. Repairs
2.1 Replacement wall bumpers and rubber feet are
available and simple to replace. Visit our online spare
parts shop at www.wernerco.com
2.2 You should not attempt to repair the ladder unless you
are qualified to do so
2.3 You can seek advice from the manufacturer regarding
repair or replacement. Contact the Customer Helpline
on 01621 745 900
3. Storage
3.1 The important considerations when storing a ladder
(not in use) should include the following:
3.2 Is the ladder stored away from areas where its
condition could deteriorate more rapidly (e.g.
dampness, excessive heat, or exposed to the
elements)?
3.3 Is the ladder stored fully closed and vertical (e.g.
standing upon both its feet and leant against a vertical
surface)?
3.4 Is the ladder stored where it cannot be damaged by
vehicles, heavy objects, or contaminants?
3.5 Is the ladder stored where it cannot cause a trip hazard
or an obstruction?
3.6 Is the ladder stored securely where it cannot be easily
used for criminal purposes?
3.7 If the ladder is permanently positioned (e.g. on
scaffolding), is it secured against unauthorised
climbing (e.g. by children)?
Important - Professional users and equipment providers to professional users (e.g. employers) should engage in proper
training such as the Ladder Association Ladder Inspection Course. Please contact the Customer helpline on 01621 745 900
for more information.
Single and Multi-Section Leaning Ladders
PN115159-01_IM_TelescopicLadder_Rev1018_PRINT.indd 10 10/18/18 5:03 PM

10
PN115159-01_IM_TelescopicLadder_Rev1018_PRINT.indd 11 10/18/18 5:03 PM

www.wernerco.com
The Causeway, Maldon, Essex, CM9 4LJ
PN115159-01 ©WernerCo Rev. B 10/18
PN115159-01_IM_TelescopicLadder_Rev1018_PRINT.indd 12 10/18/18 5:03 PM
Table of contents
Other Werner Ladder manuals
Popular Ladder manuals by other brands
Powerfix Profi
Powerfix Profi PBT-TL012 Assembly, operating and safety instructions
GIERRE
GIERRE Fast&Lock 100 quick start guide
Lippert
Lippert On-the-Go 2021097938 Installation and owner's manual

OYPLA DIY
OYPLA DIY 3397 user manual
U-Line
U-Line H-841U-10 manual
Waterman
Waterman 502020009 Assembly instructions
