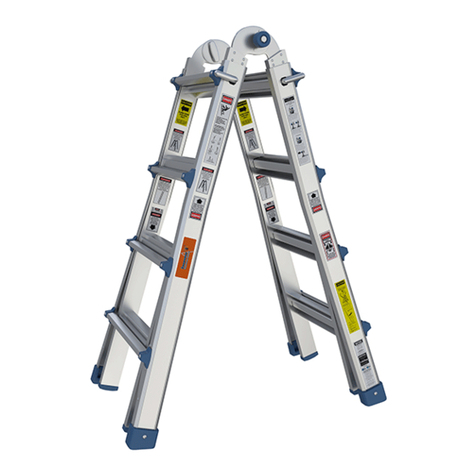
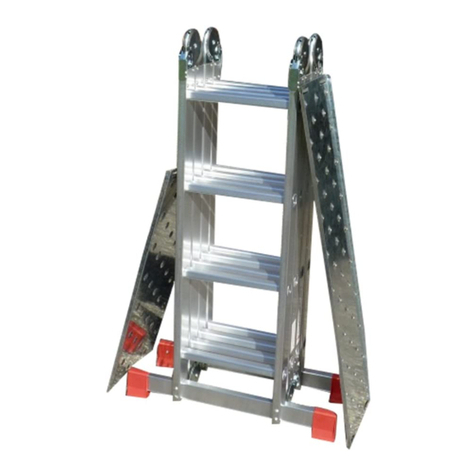
The Renovator Transforma 24 Installation manual

SAFETY AND
OPERATING MANUAL
SAFETY AND
OPERATING MANUAL
FOR THE 24 & 35 CONFIGURATION KITFOR THE 24 & 35 CONFIGURATION KIT

2
OPERATING & SAFETY
INSTRUCTIONS

3
CONGRATULATIONS
You have purchased one of the most versatile ladder systems in the world.
The Transforma Ladder's special design is suited to all types of climbing needs.
The Transforma Ladder is made from durable materials and parts to enable it to
have a long life expectancy. Vast hours of research and intensive testing allow
the Transforma Ladder to withstand prolonged use, whilst giving untroubled
performance.
The Transforma Ladder has been introduced into the market at a competitive price
and provides outstanding versatility that sets a high standard in the marketplace.
• The A-frame, extension, step level, and scaffold positions are all able to
beadjustedtoanumberofdifferentcongurations.
These are just a few of the qualities that make the Transforma Ladder stand out
from the rest. Carefully read the following instructions. They will help you
understand how to operate your ladder safely and to its maximum potential.

4
Ladder System™
OPERATING AND SAFETY INSTRUCTIONS
CONTENTS
Part Page No.
One Description - Transforma Ladder System 5
Two Using the Transforma Ladder 6
A. The Hinge 6
B. The Locking Mechanism 7
C. Using the A-frame Positions 8
D. Using the Extension Positions 8
E. Using the Step Level Positions 9
F. Scaffolding Trestle Instructions 10 - 12
G.WorkPlatformCongurationInstructions 13-15
H. Final Precautions 16
I. Caring for your Transforma Ladder 17
Three Safety Advice 12 - 21
Four Accessories 22 - 23
Five Warranty Registration Process 24
Six Final Inspection 25
Seven Transforma24CongurationExamples 26
Eight Transforma35CongurationExamples 27
Published: April, 2015

5
OPERATING INSTRUCTIONS
FOR THE
TRANSFORMA LADDER SYSTEM
PART ONE
Description - Transforma Ladder System
A. The Transforma ladder is a multi-purpose ladder system combining three core components.
One inner ladder unit with two outer ladder units which slide and lock over the inner ladder
unit.
1. The inner ladder has a central locking hinge that allows the Transforma Ladder to be set up in
a variety of ways, namely:
a. A-frame Position
b. Extension Position
c. Step Level Position
d. Scaffolding Trestle Position
SAFETY PRECAUTION: ONLY USE THE TRANFORMA 24 120KG LADDER IN THE
A-FRAME AND SCAFFOLDING TRESTLE CONFIGURATIONS WITH THE SPREADER
INSTALLED TO BRACE THE LADDER. REFER TO PAGE 15.
2. Locking assemblies on the two outer ladder units allow the telescoping and height adjustment
of the outer ladder sections up and down the inner ladder unit. This mechanism locks into
the rungs of the inner ladder unit, allowing adjustment at both ends of the ladder.
B. A table of the working heights for the Transforma 24 & 35 models is as follows:
C. High grade aluminium is used to make the inner and outer ladder side rails.
1 Both the inner ladder and the outer ladder units use slip-resistant aluminium.
2. Boththeinnerladderandtheouterladderunitsarenishedwithaslip-resistantfooting.
Transforma 24 1.39m
(4ft 6 2/3 inch)
1.38m to 2.30m
(4ft 4 1/4 inch to 7ft 6 1/2 inch)
2.69m to 4.51m
(8ft 10 inch to 14ft 10 inch)
1.70m
(5ft 9 1/4 inch)
1.70m to 2.92m
(5ft 6 3/4 inch to 9ft 6 4/5 inch)
2.04m to 4.62m
(6ft 8 1/3 inch to 15ft 2 inch)
Transforma 35
Conguration A-Frame Extension
Storage
Height

6
SAFETY PRECAUTION:
CHECK THE CONDITION OF THE
LADDER UPON RECEIPT AND
BEFORE EACH USE. NEVER USE
A BROKEN OR DAMAGED LADDER.
PART TWO.
Using the Transforma Ladder System
The Transforma Ladder System has
two mechanical components:
A. The adjustable hinge found at the top of the
ladder when it is in the storage position, allows
youtorotatethelegsandreconguretheladder.
This hinge rotates and locks into these three
positions. (See Figures A-1, A-2, and A-3).
1. Unlock the hinges by pushing both Palm
Buttons straight in until they stay in the open
position. (See Figures A-4 and A-5).
a. NOTE - Any pressure on the hinge
lock pins may make it
difculttounlockthehinge.
Relieve the pressure by
simply jiggling one half of
the ladder back and forth
until the hinge lock pins can
move freely.
b. NOTE - DO NOT USE TOOLS TO
FORCE THE HINGE LOCK in or
out as this will cause permanent
damage to the hinge mechanism.
When the holes are aligned correctly
it should only take light pressure to
unlock the hinges.
Figure A-1
(Storage Position)
Figure A-2
(A-Frame Position)
Figure A-3
(Extended Position)
Figure A-4
Figure A-5
Hinge
Lock
Pins

7
Figure A-8
To reset the ladder to the storage position,
use the above procedure but in reverse. The
hinges lock automatically at the A-frame
position to prevent damage to the ladder
or injury to the user. Take care not to
let the full weight of the ladder collapse
uncontrollably onto the hinge lock as you
change the ladder from the extension to
A-frameconguration.Disengagethehinge
locks in the A-frame position and return the
ladder to its storage position.
SAFETY PRECAUTION:
READ THE IMPRINT ON THE HINGE! "HINGE LOCK PINS MUST BE FULLY IN BEFORE
USE, FAILURE TO DO SO MAY RESULT IN INJURY"
SNAP AND
LOCK THE
LEG LOCK
ASSEMBLY
SECURELY IN
TO THE HOLE
BEFORE USE.
4. Next, change the ladder
into the extension posi-
tion by pushing straight
in on the palm buttons of
both hinges (See Figures
A-4 and A-5). Rotate
the ladder halves until
the hinge locks snap into
their locked position
(See Figure A-8).
HINGE LOCK PINS MUST
BE FULLY IN BEFORE USE
FAILURE TO DO SO MAY
RESULT IN INJURY
Figure B-1
B. Four Leg Lock Assemblies make up the second mechanical component of the ladder.
These allow you to adjust the height of the ladder.
(See Figure B-1).
Figure A-7
SNAP AND
LOCK THE
LEG LOCK
ASSEMBLY
SECURELY IN
TO THE HOLE
BEFORE USE.
Once the hinge lock pins snap into
place, insert the work platform as a
spreader to brace the ladder.
(See Figure A-7)
Refer to page 15 for more information
on how to insert the Work Platform.
(120KG MODEL ONLY)
2. Open the ladder by pulling the two
ladder halves apart until both hinge
lock pins snap and lock into the A-frame
position. (See Figure A-6).
Figure A-6
3. IMPORTANT
Insert Work
Platform

8
C. Using the A-frame Positions
1. Unlock both hinge locks. (See Figures A-4 & A-5)
2. While the ladder is in the storage position, pull out the four Lock Assemblies from the
rung holes and rest them on the outside ladder rail.
(See Figures C-1 and C-2).
3. Raise the inner ladder to the required height.
SAFETY PRECAUTION:
READ THE WARNING STAMPED BELOW
EACH LOCK ASSEMBLY
4. At the required height align the nearest inner and outer rung holes.
5. With the inner and outer ladder aligned hold the ladder in one hand and re-insert the
opposite Lock with the other hand.
6. Change hands and re-insert the other Lock Assemblies.
(See Figure C-3).
7. Pull the ladder halves apart until the hinges lock into place and the ladder stands in the
A-Frame position.
8. Insert the work platform as a spreader to brace the ladder. (120KG MODEL ONLY)
9. To reset the ladder to the storage position, reverse the procedures and position as seen
in Figure A-1.
SAFETY PRECAUTION:
ALWAYS HOLD THE INNER LADDER WHENEVER CHANGING THE LEG
LOCK ASSEMBLIES OTHERWISE IT WILL SLIDE & HIT THE GROUND.
DO NOT USE THE OUTER OR INNER SECTIONS OF THE LADDER AS A
SEPARATE STEPLADDER.
D. Using the Extension Ladder Position
1. From the storage position, unlock the hinges (as shown in Figures A-4 and A-5) and
rotate the legs until both hinges lock into place at the extension position. (See Figure A-7)
2. NOTE:ThehingewillrstlockintotheA-frameposition,unlockthehingesagainand
continue rotating to the extension position.
Figure C-3
Figure C-1 Figure C-2

9
1. Adjust ladder to required height (refer
to adjusting the height of the ladder
for use in the A-frame position).
2.Adjusttheladderlegstotthe
staircase. Open the ladder by pulling
the two ladder halves apart until both
hinge lock pins snap into place.
(See Figure E-1)
3. Unlock the Lock Assemblies on the upper half of the ladder.
Hold the outer ladder then walk backwards allowing the ladder
to extend to the required height. Extend the lower half of the
ladder if more height is required. (See Figure D-1)
Figure D-1
4. To stow the ladder from its extension position, reverse the above
procedure, starting with the ladder base.
5. NOTE: Always hold the inner ladder securely when unlocking
the lock assemblies and adjusting the ladder height.
DO NOT USE THE OUTER OR INNER SECTIONS OF THE
LADDER AS A SEPARATE STEPLADDER.
DO NOT USE THE INNER SECTION WHEN SEPARATED
FROM THE OUTER SECTIONS IN THE EXTENSION
LADDER POSITION.
Figure E-1 Figure E-2
E. Using the Step Level Positions
Once the hinge lock pins snap into
place, insert the work platform as a
spreader to brace the ladder.
(See Figure E-2)
Refer to page 15 for more information
on how to insert the Work Platform.
(120KG MODEL ONLY)
3. IMPORTANT
Insert Work
Platform

10
F. Scaffolding Trestle Instructions
1. Pull the entire inner ladder assembly out
of the outer ladder railings and set them
down side by side (See Figure F-1).
4. Hold the two outer ladder bases so
their rungs face outwards and spread
the footings apart to form an A-frame
position. (See Figure F-4).
3. Gather both of the outer ladder railings
together.
(See Figure F-3).
2. Open the inner ladder assembly until the
hinges lock into the A-frame position.
This is one half of the trestles needed for
the scaffolding facility (See Figure F-2).
Figure F-1
Figure F-2
Figure F-3
Figure F-4
Ladder
Railings

11
Figure F-5
Figure F-6
Figure F-7a
Figure F-7b
6. Make sure each Trestle Joint is
positioned with its plates both inside
and outside the ladder rails, joining
both bases to create an A-frame.
(See Figure F-6).
7. Check that the lock assembly holes of both
bases line up with the Trestle Joint holes,
then insert the lock assemblies.
(See Figure F-7a-7b).
5. Orientate the Trestle Joints so that the
Wide Plate slides over the inside of the
Ladder Rail and the Narrow Plate slides
over the outside of the Ladder Rail.
(See Figure F-5).
Trestle Joint
Narrow Plate
to the Outside
Narrow Trestle
Joint Plate
Wide Trestle
Joint Plate
Ladder Rail
Insert the four
Lock Assemblies
Align the Lock
Assembly Holes

12
SAFETY PRECAUTION:
HEED THE WARNING LABEL PLACED
ON THE OUTER LADDER RAILING
REGARDING THE USE OF THE WORK
PLATFORM AS A SPREADER
ATTACHMENT. (120KG MODEL ONLY)
DO NOT USE THE INNER SECTION
WHEN SEPARATED FROM THE
OUTER SECTIONS IN THE EXTENSION
LADDER POSITION.
10. Set out the two trestles and position a
compatible scaffolding plank on a set of
rungs at the required working height.
(See Figure F-9).
Figure F-9
Figure F-8 8. The stepladder is now set up for use
as a second trestle (See Figure F-8).
Once the hinge lock pins snap into
place, insert the work platform as a
spreader to brace the ladder.
(See Figure A-7)
Refer to page 15 for more information
on how to insert the Work Platform.
(120KG MODEL ONLY)
9. IMPORTANT

13
Figure G-1
1. Adjust the bolt tightness
untilbracketsmovestify.
(See Figure G-1).
Figure G-2
2. Adjusttheplatformtot
the ladder rung.
(See Figure G-2).
Figure G-3
3. Place platform at required
height.
(See Figure G-3).
Figure G-4
4. Slide platform in and
carefully climb up above
the platform.
(See Figure G-4).
Figure G-6
6. Ensure the platform is
securely in place by
applying light pressure with
your foot before putting
your full weight on it.
(See Figure G-6).
Figure G-5
5. Slide the platform back with
the front of your foot
(See Figure G-5) until the
forward end of the platform
rests against the rung.
G. WorkPlatformCongurationInstructions

14
SAFETY PRECAUTION:
Make sure the work platform is locked into position before climbing.
Brand Developers Limited and Brand Developers Australia Pty Limited assumes no liability
for damage or injury which may result from failing to follow all preceding instructions
correctly.
SAFETY PRECAUTION:
HEED THE WARNING LABEL PLACED ON THE WORK PLATFORM!
The Transforma Ladder Work Platform can be purchased separately as an optional extra.
Figure G-7
7.Oncenishedwiththework
platform, step onto the rung above
the work platform and push the
work platform forward with the
front of your foot. Step back down
past the work platform.
(See Figure G-7).
Figure G-8
8. The work platform can also be used as a
utility shelf. (See Figure G-8).
DANGER
1. Inspect upon receipt and before each use,never use on bottom rung or when
damaged, bent, or broken.
2. Make sure nuts and bolts are tight before using.
3. Make sure platform is extended fully before standing on it.
4. Never lay tools on platform when used as a standing platform
5. Never reach down to reach or adjust plaftorm while standing on it.
6. Never use the work platform if standing surface becomes slick from water, ice,
snow, or other substances.
7. This work platform is also used as the spreader attachment for combining
two outer ladder sections to form a separate step-ladder. Do not use this
step-ladder without this spreader attachment. (Refer to operating instructions.)
8. Heed other warnings and instructions found on the ladder and Operating &
Satety Instructions.
TRANSFORMA LADDER
TM
WORK
PLATFORM

15
SAFETY PRECAUTION:
MAKE SURE THAT THE WORK PLATFORM’S FORK BOLTS ARE ALWAYS TIGHT AND
THE FORKS LOCK INTO PLACE WHEN USED AS THE SPREADER ATTACHMENT.
10. Insert the lower forks of the work
platform into the lower channel on
the back of the step.
(See Figure G-10)
11. Insert the horizontal bar of the
work platform into the upper
channel on the back of the step.
(See Figure G-11)
IMPORTANT: When using the spreader on the inner ladder rails
9. Rotate the forks on the
work platform to the angled
position shown right.
(See Figure G-9).
Figure G-9
Figure G-10 Figure G-11
Forks
Fork Bolt
RIGHT WRONG
Figure G-12
12. Press down on the work
platform until it locks into
aatpositionbetweenthe
rungs. (See Figure G-12).

16
H. Final Precautions
1. Keep clothing and body parts away from the hinges and lock assemblies while in the process of
adjusting the ladder. These heavy duty mechanisms will pinch if carelessly adjusted.
2. Whilst extending the inner ladder within the outer ladder railings, never let clothing or body parts
be placed between the moving rungs. Whilst extending the ladder up or down always hold the
ladder with both hands on the vertical upper rails or hinges of the ladder.
3. When working around electricity or when electricity is involved, be very careful and take all
precautions to prevent the ladder from making contact with any electrical circuits.
4. When using ladders be sure to:
a.Setallfourfeetonarmlevelsurface
b. Keep steps dry and clean
c. Wear slip-resistant shoes
d. Keep body centred between both side rails
e. Read additional instructions on ladder
5. When using the ladder in the extension position, use the proper working angle which requires that
the distance from the base of the ladder to the base of the support wall must be 1/4 the height of the
ladder, ie: 1 foot out from the wall for every four foot in height, or approximately at a 75oangle.
6. Dependent on the model ladder you have purchased they are rated to the following load bearing
capacity and AS/NZS 1892.1:1996 standard:
- 180kg load bearing capacity.
- 120kg load bearing capacity.
Do not exceed safe working limits.
7. The Transforma Ladder System has been designed so that the surface of the rungs are parallel to
the surface upon which the ladder stands.
SAFETY PRECAUTION:
NEVER CLIMB FROM THE BACK OF THE LADDER IN THE EXTENSION POSITION.
As indicated on the warning label placed on the inside of the inner ladder assembly.
AVOID INJURY
DO NOT CLIMB FROM THIS SIDE
RIGHT WRONG
DANGER

17
I. Caring for your Transforma Ladder
1. To maintain easy operation, oil the hinge mechanism and lock assemblies with light
machine oil every six months and before long term storage. Lubricate more often as use
dictates, and during extreme weather conditions.
2. When storing the ladder, place in a dry location out of the weather. This will enhance the
life of your ladder.
3. Keep the rails clean and free of debris so that the ladder will extend and move easily.
4. Keep the hinge mechanism clear of dirt, salt spray, or other contaminants that could
obstruct proper operation.
5. To ensure safety, replace the inner and outer feet when required.
6. Check all parts and components of the ladder to make sure they are operating
safely and correctly before each use.

18
Brand
Developers
Limited
Brand
Developers
Limited
TMT# 0010
Name: TMT Transforma Cartoon 10
Tough Man
Tools
Safety Advice:
Ladders can be a
serious safety
hazard if not used
properly.
Portable Ladders
PART THREE

19
Brand
Developers
Limited
Brand
Developers
Limited
TMT# 0006
Name: TMT Transforma Cartoon 06
Tough Man
Tools
Brand
Developers
Limited
Brand
Developers
Limited
TMT# 0008
Name: TMT Transforma Cartoon 08
Tough Man
Tools
Brand
Developers
Limited
Brand
Developers
Limited
TMT# 0009
Name: TMT Transforma Cartoon 09
Tough Man
Tools
Brand
Developers
Limited
Brand
Developers
Limited
TMT# 0007
Name: TMT Transforma Cartoon 07
Tough Man
Tools
• Always set the ladder up on a level surface.
Ladders aren't designed for a side sloping
surface and there's an increased chance that a
ladder set on a slope will tip over sideways.
• Attaching a leg leveller at the base of the
ladder decreases the chance of tipping,
allowing for a safer working area.
• Use a wide board on soft ground, approximately
15-20 cm (6 - 8 inches) width or more to stop
the ladder legs from slipping and sinking into the
ground.
•Ensuresafetyfeetarettedtotheladder
before each use.
•Makesureitisrmandsteadywithno
defective top rungs, braces or side rails.
• Get help in carrying and setting up heavy
extension ladders.
• Always use a ladder that is long enough.
• Never climb or stand on the top two steps of a
stepladder.
• Don't stand on the top two rungs of an
extension ladder.

20
Brand
Developers
Limited
Brand
Developers
Limited
TMT# 0005
Name: TMT Transforma Cartoon 05
Tough Man
Tools
Brand
Developers
Limited
Brand
Developers
Limited
TMT# 0001
Name: TMT Transforma Cartoon 01
Tough Man
Tools
Brand
Developers
Limited
Brand
Developers
Limited
TMT# 0002
Name: TMT Transforma Cartoon 02
Tough Man
Tools
Brand
Developers
Limited
Brand
Developers
Limited
TMT# 0003
Name: TMT Transforma Cartoon 03
Tough Man
Tools
•Do not set the feet of a ladder
so far away that they may slip
out at the bottom.
•A ladder placed too close and
upright may tip backwards.
Use the 4ft to 1ft angle rule or
the 75oangle rule.
• Securingtheladdertoarm
support near the top can help to
prevent slipping or tipping.
Some other safety tips:
•Get a responsible person to hold the base of the ladder.
•Be aware of electrical power lines and try to avoid working
near them at all times.
•Look out for objects around the ladder that could shake or
make the ladder slip - example, a swaying tree.
•Beware of sudden gusts of high wind.
This manual suits for next models
1
Table of contents
Other The Renovator Ladder manuals
