WERTHEIM 7 Series User manual

Wertheim 7 Series
7 Series

3
1. Control Handle
2. Handle On/Off Button
3. Handle Suction Control Buttons
4. Handle On/Off Button (Powerhead)
5. Rod
6. Dust Bag Cover Latch
7. Air Inlet
8. Accessory Cover Release Button
9. Dust Bag Indicator
10. Standby On/Off Button
11. Exhaust Filter Release Button
12. Digital Power Control Display
13. Cable Rewind Button
14. Powerhead
15. Powerhead Belt Window
16. Powerhead LED Lights
17. Rod Quick Release
18. 3-in-1 Cleaning Tool
19. Combination Floor Tool
20. Hard Floor Turbo Tool
1
2
4
5
10
9
8
7
6
11
14
17
15
1612 13
Features 18 19 20

3
Wertheim 7 Series
INTRODUCTION
Congratulations on the purchase of your new Wertheim 7 Series
Vacuum Cleaner. There are many useful features built into your
vacuum cleaner. We recommend that you carefully read this
instruction manual for the best results.
Specications
Max power cleaner: 1300W (1500W with Powerhead)
Dust bag capacity: 2.5L
Weight: 11kg
Hose length: 1.8m
Power cable length: 8m
Rod and hose diameter: 35mm
Telescopic tube: Aluminum

4
BEFORE YOU BEGIN
This cleaner must be operated in accordance with these instructions and
used only for domestic household cleaning to remove DRY dirt and dust
from household carpets, ooring, walls and fabrics. This cleaner is not t to
be used as an industrial cleaner and will void the manufacturer’s warranty
if used inappropriately.
Please read these instructions thoroughly. This will ensure you obtain
full benet from your new cleaner. Keep this Instruction Manual in a
convenient and safe place for future reference.
Important
Always switch the cleaner off and remove the power plug from the
electricity supply before cleaning your appliance, when not in use, or
attempting any maintenance task. The cleaner must only be connected
to an AC power supply at the voltage shown on the rating plate. This
cleaner should only be used for its intended purpose as described in these
instructions.
Precautionary Measures:
1. Do not operate the vacuum cleaner too close to heaters,
radiators, and other hot surfaces.
2. Before inserting the power plug into the power supply, make
sure your hands are dry.
3. Before turning on the vacuum cleaner, remove any large
objects from the oor or cleaning surface in order to prevent
damage to the lter.
4. When unplugging the power plug from the power socket, do
not use the power cable, gently pull the power plug from the
power socket.
5. Do not use the vacuum cleaner to pick up water or liquids.

5
Wertheim 7 Series
SAFETY INSTRUCTIONS
IMPORTANT! Always switch off the cleaner and remove the power plug from
the electricity power supply before cleaning your appliance, when not in use
or attempting any maintenance task. The cleaner must only be connected
to an AC power supply at the voltage shown on the rating label. This cleaner
should only be used for its intended purpose as described in this instruction
manual. Never operate the vacuum cleaner without lters.
When using your vacuum cleaner, basic
precautions should always be observed,
including the following;
1. This appliance is not intended for use
by persons (including children) with
reduced physical, sensory or mental
capabilities or lack of experience and
knowledge, unless they have been given
supervision or instruction concerning use
of the appliance by a person responsible
for their safety.
2. Children should be supervised to ensure
that they do not play with the vacuum
cleaner.
3. Keep ends of the hose, telescopic tube
and other openings away from your face
and body.
4. Do not operate the vacuum cleaner too
close to heaters, radiators or other hot
surfaces.
5. Do not use the appliance to pick
up ammable items or combus tible
liquids (i.e. petrol, hot ashes, cigarettes,
matches, explosive materials or anything
burning) or use in areas where such
substances or items may be present.
6. Do not use the appliance to pick up
toxic materials (i.e. chlorine, bleach,
ammonia).
7. Before vacuuming, remove any large
objects from the oor or cl eaning sur face
in order to prevent damage to the lter.
8. Always check the power cord before
use. The power cord and the power plug
should be in a good condition and must
not be damaged. If the power supply
cord is damaged or defective, it must be
replaced by the manufacturer, its service
agent or similar ly qual ied persons in
order to avoid a hazard.
9. Do not extend the power cable beyond
the yellow mark.
10. Do not pull or carry the appliance by the
power cable, use the power cable as a
handle or pull the power cable around
edges or corners. Avoid running the
appliance over the power cable.
11. Ensure the appliance is switched off
before unplugging.
12. Do not unplug by pulling on the power
cord. To unplug, grasp the power plug not
the power cord and gently pull the power
plug from the power socket. Use only
Australian and New Zealand electrical
safety approved extension cords.
13. Hold the power plug when rewinding the
power cord. To prevent accidental injury
do not allow the power plug to whip
when rewinding.

6
14. Do not handle or operate the appliance
with wet hands. Follow electrical safety
precautions at all times.
15. To prevent electrical shock, do not immerse
the appliance, power cord or power plug into
water or any other liquids.
16. Do not use the machine to vacuum water or
liquids, this vacuum is for dry household use
only.
17. To prevent electrical shock, do not use the
vacuum cleaner outdoors or on wet surfaces.
18. Extreme caution should be exercised when
using the appliance on stairs.
19. Never clean the vacuum cleaner or any of
the electrical parts, especially the electrical
connections with water or liquid cleaners.
20. Do not attempt to change the attachments
while the appliance is plugged into the mains
power supply. First switch off and remove
the power plug from mains power supply.
Use only the manufacturer’s recommended
accessories.
21. Ensure the appliance is disconnected from
the mains power supply before connecting
the hose to the unit.
22. Do not operate or use the appliance without
the dust bag and/or lters in place.
23. If the air inlet, oor head or the telescopic
tube is blocked, switch off the cleaner straight
away and disconnect the power plug from
power supply. First clear the blocked object
before attempting to start the cleaner again.
24. Do not leave the appliance unattended
when it is connected to a mains power supply.
25. Before carrying out any maintenance service
or cleaning the lters, always switch off the
vacuum cleaner and disconnect the power
plug from power supply.
26. Do not use the vacuum cleaner if it is
damaged or breaks down. Check the
electrical components regularly for defects.
If connection cables, electrical hoses,
electrical contacts and electric tubes are
damaged, have them replaced immediately.
27. Never attempt to make any modications to
the vacuum cleaner.
28. Always store the appliance indoors, in a cool,
dry place.
29. Damage caused by improper use or by not
observing the instructions in this manual will
void the warranty.
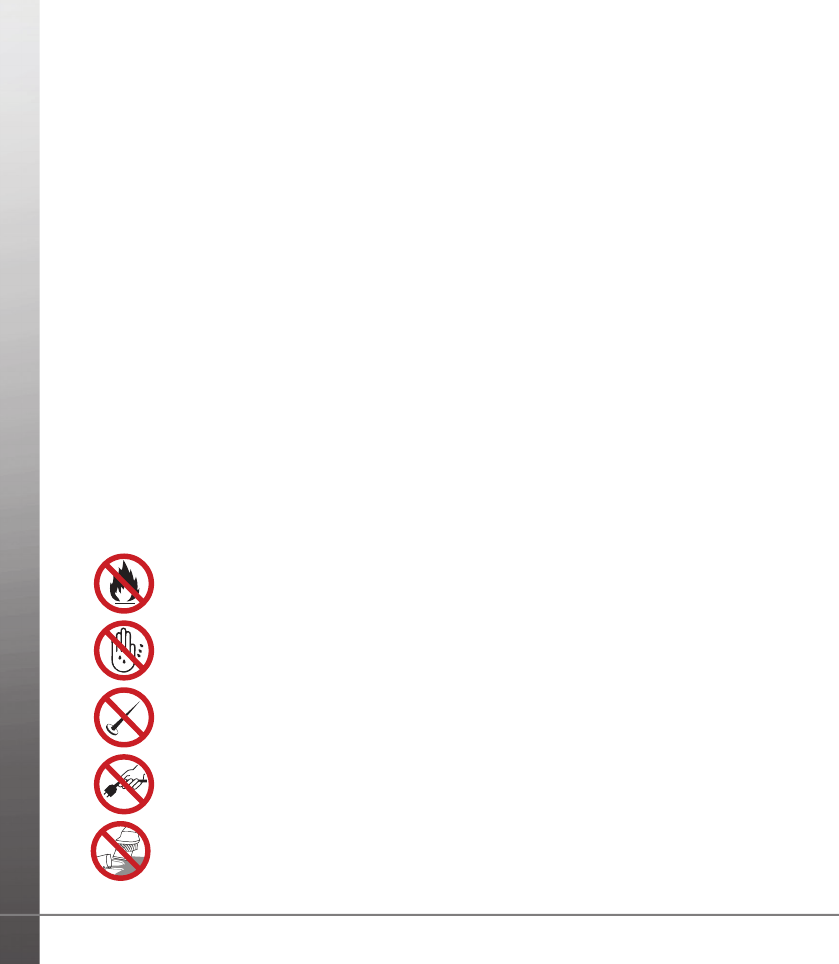
Vacuum Cleaner with Powerhead
1. The electric hose contains electrical
connections;
- Do not immerse in water.
- The hose should be checked regularly and
must not be used if damaged.
- The vacuum cleaner handle contains
electrical connections. The handle is not a
serviceable part.
- The vacuum cleaner rod contains electrical
connections. The rod is not a serviceable
part.
- The vacuum cleaner powerhead contains
electrical connections. The powerhead is
not a serviceable part.
2. Use the powerhead only for vacuuming dust
and dry substances in the home.
3. To avoid damage to the power cable
never run over the power cable with the
powerhead.
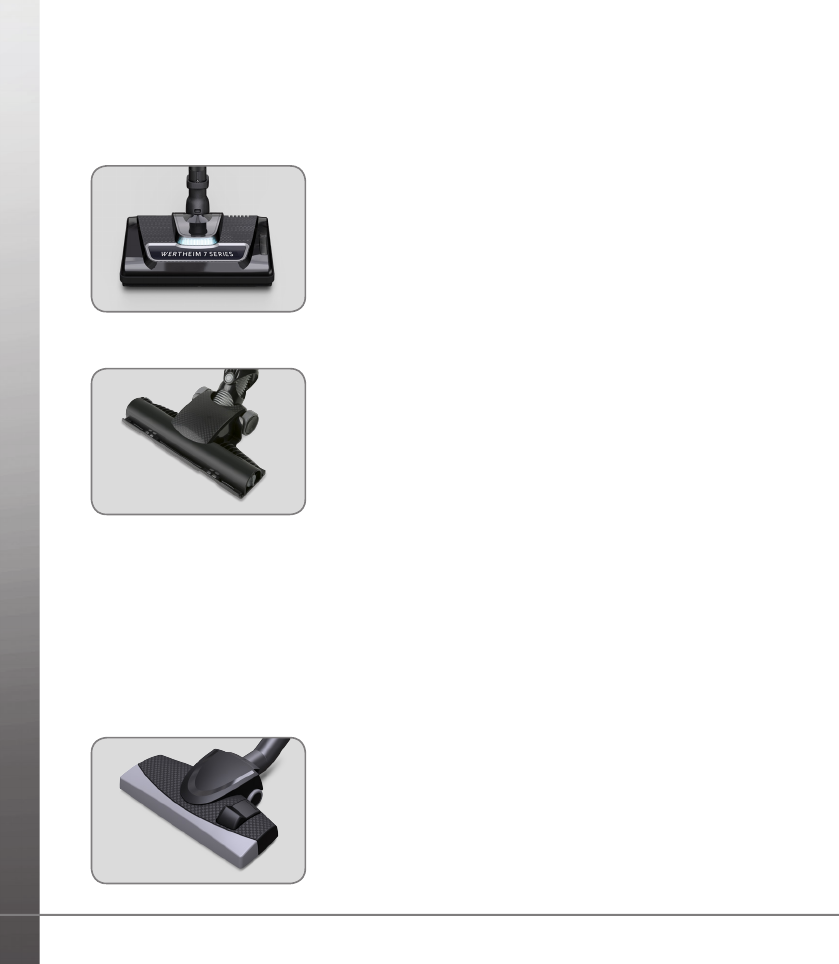
4. Never touch the brush roller while the vacuum
cleaner is connected to the mains power
supply.
5. To prevent unnecessary wear on the
powerhead, keep the powerhead moving
while in operation.
6. Keep hair, hands and feet away from the
rotating brush while the powerhead is
running.

7
Wertheim 7 Series
Rod
Quick
Release
ASSEMBLING THE VACUUM CLEANER
IMPORTANT! Always remove the power plug from the power supply
before tting or removing accessories!
1. Flexible Hose
Fitting:
Insert the exible hose into the air inlet of the
vacuum. Press until it clicks into position.
Removing:
Press the two buttons and gentle pull to
release the exible hose.
2. Place the powerhead onto the oor and
gently insert the telescopic tube into
the powerhead. Push until it clicks into
place.
Note: The powerhead has a quick release
button to remove the rod for easy and
convenient access. Simply press the Rod
Quick Release to remove the rod from the
powerhead.
2. Handle
1.Gently insert the handle into the
telescopic tube and push until it clicks
into place.

8
Powerhead
Whirlwind Power Pulse technology deeply
cleans carpets by effectively lifting and
removing deeply embedded dust and dirt.
Note: Not recommended for use on hard oors.
Tip: The Powerhead Belt Window can be used to
check the health of powerhead belt or whether
the agitator bar is rotating.
Combination Floor Tool
This multi purpose combination oor tool easily
switches from a carpet cleaning tool to a hard
oor tool. The swivel neck and plastic wheels
make this oor tool easy to manoeuvre.
Hard Floor Turbo Tool
Specically designed for removing dirt and
debris from hard oors.
Note: As a safety precaution, the Hard Floor
Turbo Tool must be placed onto the oor for the
roller brush to activate.
When using the Powerhead & Hard Floor Turbo
Tool:
1. Never run over the power cable.
2. Never touch the brush roller while the
vacuum cleaner is connected to the mains
power supply.
3. Keep hair, hands and feet away from the
rotating brush while in operation.
ACCESSORIES

9
Wertheim 7 Series
3-in-1 Cleaning Tool
Combines a crevice tool, upholstery tool
& dusting brush all in the one tool for
convenient cleaning.
To use the 3-in-1 Cleaning Tool as an
upholstery tool or as a dusting brush simply
remove the crevice tool and insert the
crevice tool into the opposite end of the
tool you would like to use.
1. Upholstery Tool
For Vacuuming furniture and upholstery.
2. Crevice Tool
Eliminate dust from hard to reach places.
3. Dusting Brush
Ideal for cleaning blinds, bookshelves and
lampshades.

10
DIGITAL POWER CONTROL
The suction power can be regulated by using the Digital Power Control
to achieve optimal cleaning results. To change the suction power to suit
a particular cleaning task, press the Power Increase Button to increase
the suction power, and to reduce the suction power, press the Power
Decrease Button.
The Dust Bag Indicator will continually ash red to indicate that the dust
bag requires replacement or to indicate that there is a blockage.
Tiles
Hardwood
Floors
Upholstery
Mattresses
Power Decrease
Button
Carpets
Curtains
Power Increase
Button
Dust Bag
Indicator

11
Wertheim 7 Series
INSTRUCTIONS FOR USE
Using the Cable Rewind Button and Standby On/Off Button
Standby On/Off Button
1. Unwind a sufcient length of cable. The
yellow mark on the power cable shows
the ideal cable length.
DO NOT extend the cable beyond the
red mark.
2. Insert the power plug into the power
socket.
3. Press the Standby On/Off button to put
the vacuum into Standby Mode.
4. To switch On the cleaner either:
a. Press the On/Off Button on the
Control Handle.
b. Alternatively, press the Power
Decrease or Power Increase buttons
on the Digital Power Control panel.
Rewind
1. Press the On/Off button to switch off the
vacuum.
2. Unplug the cable from the power
socket.
3. To rewind the power cable, press the
rewind button with one hand and guide
the cable with the other hand to ensure
that the power cable does not whip.
Note: Do not unplug by pulling on the power
cord. To unplug, grasp the power plug not
the power cord and gently pull the power
plug from the power socket.

12
HANDLE
ON/OFF
BUTTON
SUCTION
LEVEL
POWERHEAD
ON/OFF BUTTON
WIRELESS CONTROL HANDLE
1. To switch on or off the vacuum cleaner press
the button.
2. To manually increase or decrease the suction
power level, press the + or – buttons.
3. To switch on the powerhead, slide the On/
Off Button (Powerhead) button forward. To
switch off the powerhead, slide the On/Off
Button (Powerhead) button backwards.

13
Wertheim 7 Series
POWER
INCREASE
BUTTON
SYNCHRONISING THE WIRELESS CONTROL HANDLE
1. Press the Standby On/Off Button. The
cleaner will be in standby mode.
2. Simultaneously press and hold for 20
seconds the Power Decrease and Power
Increase buttons on the Digital Power Control
panel. If preformed correctly, the icons on the
Digital Power Control panel will blink and the
Dust Bag Indicator light will be switched off.
3. Press the “+” button on the Wireless Control
Handle to synchronise the Wireless Control
Handle to the vacuum. If preformed correctly
the Dust Bag Indicator light will blink and
the icons lights on the Digital Power Control
panel will turn off.
IMPORTANT! If the cleaner is unresponsive after placing the cleaner into
standby mode and switching on the cleaner via the Control Handle,
please follow the below steps to synchronise the handle to the vacuum.

14
MAINTENANCE
Vacuum Cleaner Storage
When not in use, ensure that the cleaner is disconnected from the mains
power supply and that the cable is fully retracted. The combination oor
tool can be stored in the oor tool holders. Other oor tools must be stored
separately.
Replacing the Dust Bag
WARNING! Ensure that the cleaner is disconnected from the power supply
when installing or removing the dust bag.
Note: Only use the dust bag supplied or recommend by the manufacturer
to avoid causing damage to the machine and voiding the warranty.
Always operate the cleaner with the dust bag
installed. If you forget to install the dust bag or
the dust bag is installed incorrectly, the dust
bag cover may not close completely.
1. Remove the hose from the air inlet.
2. Open the cover by pulling on the Dust Bag
Cover Latch.
3. Remove the dust bag when it is full and
replace with a new dust bag.
4. Ret a new dust bag by inserting the dust
bag collar into the dust bag bracket. Ensure
that the arrow on the dust bag collar is
facing downwards when being inserted into
the dust bag bracket.
Note: The genuine Wertheim 7 Series dust bag
has been designed with a self closing seal to
prevent dust and debris from escaping when the
dust bag is removed from the cleaner.

15
Wertheim 7 Series
5. Gently close the cover, you will hear a
‘click’ when closed properly.
Note: Please ensure that the dust bag is
fully inserted into the dust bag bracket
before closing the cover to avoid dust
leaking from the dust bag.
Pre-Motor Filter Replacement
WARNING! Ensure the cleaner is disconnected from the power supply
before performing any maintenance procedures.
The pre-motor lter should be replaced
every six months or when it becomes visibly
dirty.
Always operate the cleaner with clean
lters; otherwise, there may be a reduction
in the suction power or motor damage may
result.
Note: Do not use a washing machine to
wash the lter or a hair drier to dr y the lter.
1. Pull out the lter bracket assembly.
2. Replace with a new lter.

16
Exhaust HEPA Filter Replacement
WARNING! Ensure that the cleaner is disconnected from the power supply
before performing any maintenance procedures.
The Exhaust HEPA lter is installed behind the air outlet grill. This lter is
washable.
When dust or dirt is visible on the surface of the HEPA lter, the lter
should be replaced or washed with warm water to maintain optimal
performance.
It is recommended to replace the HEPA lter every 6 months or when
it becomes visibly dirty. This may vary depending on frequency of use.
Please ensure all lters have been correctly installed into the machine
before use.
1. Press the Exhaust Filter Release Button to
access the Exhaust HEPA Filter.
2. Remove the lter by pulling on the lter tabs
as shown.

17
Wertheim 7 Series
Cleaning the Motorised Powerhead
WARNING! Ensure that the cleaner is disconnected from the power
supply and the powerhead is disconnected from the rod before
performing any maintenance procedures.
The powerhead has an overload protection
feature to protect the motor in the
powerhead. The powerhead will turn off
if the powerhead is clogged. To reset the
powerhead once it has automatically
turned off, clean the rotating brush and
then press the Overload Protection button
to reset the powerhead.
The agitator bar must be free of debris
for effective cleaning and for maximum
suction.
1. Disconnect the motorised powerhead
from the vacuum rod and turn it over to
inspect the agitator bar.
2. If a build-up of debris is wound around
the agitator bar, remove by carefully
cutting with scissors. Avoid damaging
or cutting the bristles.

18
DRIVE
SHAFT
END CAP
Replacing the Powerhead Agitator Bar & Drive Belt
WARNING! Ensure that the cleaner is disconnected from the power supply
and the powerhead is disconnected from the rod before performing any
maintenance procedures.
Depending on frequency of use, the powerhead
agitator bar & drive belt will occasionally require
changing.
1. Disconnect the motorised powerhead from
the vacuum rod and turn it over. With a
Phillips head screwdriver unscrew the eight
screws, as shown.
2. Remove the powerhead cover to access the
agitator bar and belt.
3. Lift the side of the agitator bar with the belt
attached and slide the belt off the end cap.
The agitator bar can now be removed for
cleaning or replacement.
4. Slide the belt off the drive shaft to remove
the belt. If the belt is broken, remove all the
broken pieces. To replace the belt, install
the new belt over the drive shaft rst and
then the end cap. Make sure the lettering
on the belt is outward facing.
5. Reinstall the agitator bar securely back into
place. Then install the powerhead cover
and screws.

19
Wertheim 7 Series
LOCKING SWITCH
Cleaning the Hard Floor Turbo Tool
WARNING! Ensure that the cleaner is disconnected from the power
supply before performing any maintenance procedures.
Changing the Remote Control Battery
WARNING! Ensure that the cleaner is disconnected from the power
supply before performing any maintenance procedures.
The rotating brush must be free of debris
for effective cleaning and for maximum
suction.
1. Disconnect the Hard Floor Turbo Tool
from the vacuum rod and turn it over to
inspect the rotating brush.
2. If a build-up of debris is wound around
the rotating brush, remove by carefully
cutting with scissors. Avoid damaging
or cutting the bristles.
To replace or clean the rotating brush, turn
the locking switch. The rotating brush can
now be replaced or cleaned.
1. Unscrew the battery holder with a
screwdriver. The battery holder can now
be pulled out from the handle.
2. Replace the battery and reinsert the battery
into the handle. Ensure the battery holder is
screwed securely with a screwdriver.
WARNING - Keep battery out of reach of children
and ensure the battery holder is secure. If you
suspect your child has swallowed or inserted
a button battery immediately call the 24-hour
Poisons Information Centre on 13 11 26 for fast,
expert advice.

20
TROUBLESHOOTING
Service problems that appear to be major can often be solved easily. You can
be your own troubleshooter by reviewing this guide. All other servicing should
be performed by an authorised service agent or qualied technician.
Contact Wertheim Customer Service for your nearest authorised service agent
on 1800 815 270.
Fault Solutions
The cleaner will
not turn on.
Check that the power cable is inserted securely; remove from
the power supply and then reinsert into the power supply.
Refer to pages 11 & 13 of the manual.
The vacuum
performance
is deteriorating
or the Dust Bag
Indicator is
ashing.
Switch off the machine.
Check the appliance to ensure there are no blockages.
Clear any blockages that may be found.
Check that the pre-motor lter is not dusty; clean rubbish or
replace the pre-motor lter and Exhaust HEPA lter.
Check whether the dust bag is full; replace the dust bag if it
is full.
The cleaner
makes an
abnormal sound
when switched
on.
Turn off the cleaner immediately.
Check the appliance to ensure there are no blockages.
Clear any blockages that may be found.
Check that the powerhead is installed securely.
Table of contents
Other WERTHEIM Vacuum Cleaner manuals

WERTHEIM
WERTHEIM Dog & Cat W2000 User manual

WERTHEIM
WERTHEIM W6030 User manual

WERTHEIM
WERTHEIM Dog & Cat W2000 User manual

WERTHEIM
WERTHEIM Evolution User manual

WERTHEIM
WERTHEIM Evolution User manual

WERTHEIM
WERTHEIM SE2000 User manual

WERTHEIM
WERTHEIM W5030 User manual

WERTHEIM
WERTHEIM Deep Clean W3000 User manual

WERTHEIM
WERTHEIM Power Clean W4000 User manual

WERTHEIM
WERTHEIM Elegance Robot Operator's manual