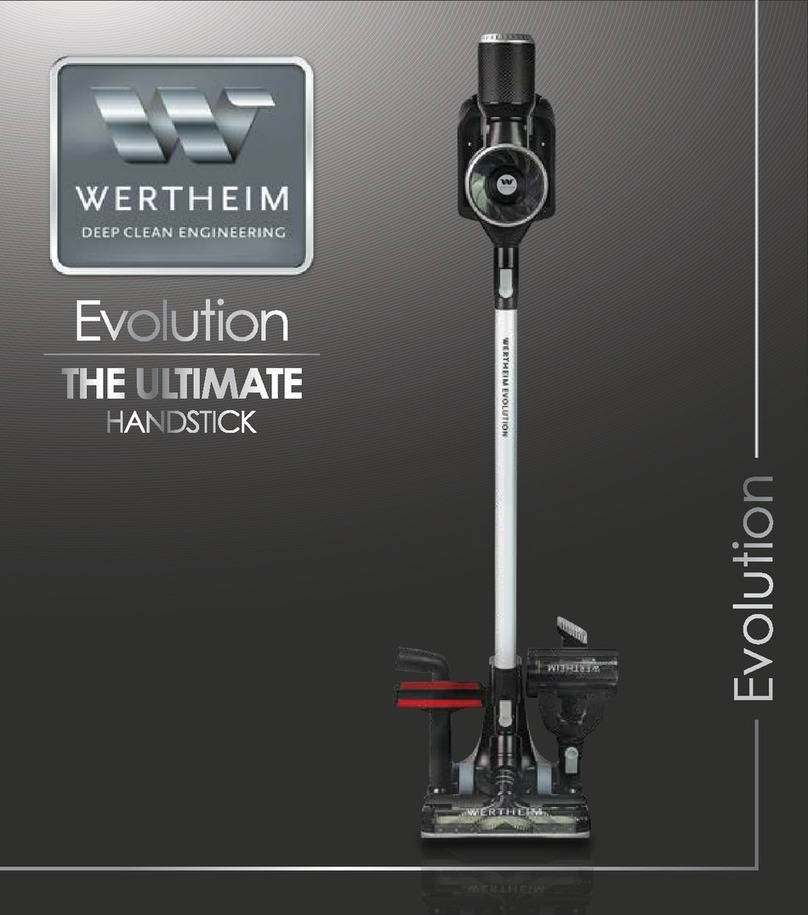
WERTHEIM Evolution User manual

Evolution MAX
THE SUPERIOR
STICK VACUUM
Evolution MAX

2
HEPA 13 exhaust lter
Suction power control
LED display
HEPA cyclone lter
Rod release button
Rod
Floor head release button
Combination power head
Dust bin
Dust release button
On/off button
Battery
Battery indicator
Dust sensor
Features

Evolution MAX
3
Hard oor
power head
Combination
power head
Extension hose Long dusting brush
Charger adaptor
charging dock(not shown)
2 Batteries
Mini
motorised brush
Elbow connector
Crevice tool
2-in-1 brush
What’s in the box

4
INTRODUCTION
Congratulations on the purchase of your new Wertheim Evolution MAX Stick
Vacuum. There are many useful features built into your Stick Vacuum. We
recommend that you carefully read this instruction manual to take the best
advantage of these features.
Specications
Battery Voltage: 25.9V
Battery Type: 2500mAh Lithium-ion
Max Machine Power: 300W
Dust Bin Capacity: 0.5L
Net Weight: 3.1Kg (with 1 battery and main power head)
Runtime: up to 100 minutes*
Charge Time: 4-5 hours
*Applies to low mode using the crevice tool, across two batteries.

Evolution MAX
5
This cleaner must be operated in accordance with these instructions and
used only for domestic household cleaning to remove dry dirt and dust from
household carpets, ooring, walls and fabrics.
This cleaner is not t to be used as an industrial cleaner and will void the
manufacturer’s warranty if used inappropriately.
Please read these instructions thoroughly
This will ensure you obtain full benet from your new cleaner. Keep this
instruction manual in a handy place for future reference.
Important
Always switch off the cleaner before cleaning, when not in use, attempting
any maintenance task, tting or removing accessories. The charger adapter
must only be connected to an ac power supply at the voltage shown on the
rating label. This cleaner should only be charged with the charger provided.
This cleaner should only be used for its intended purpose as described in
these instructions.
BEFORE YOU BEGIN

6
Do not use this vacuum cleaner if the battery pack housing and/or the
charger housing is damaged.
1. Do not operate the vacuum cleaner too close to heaters, radiators
or other hot sur faces.
2. Before inserting the plug into the wall, make sure your hands are
dry.
3. Before turning on the vacuum cleaner, safely remove any large
objects from the oor or cleaning surface in order to prevent
damage to the lter.
4. When you want to remove the plug from the power socket, do not
use the power cable, gently pull the plug from the power socket.
5. Do not use this vacuum cleaner to pick-up water or liquids.
PRECAUTIONARY MEASURES:

Evolution MAX
7
SAFETY INSTRUCTIONS
IMPORTANT! Always switch off the vacuum cleaner before cleaning, when
not in use or attempting any maintenance task. The charger must only
be connected to an AC power supply at the voltage shown on the rating
label. This vacuum cleaner should only be used for its intended purpose as
described in this instruction manual. Never operate the vacuum cleaner
without lters.
When using your vacuum cleaner,
basic precautions should always be
observed, including the following;
1. This vacuum cleaner is not
intended for use by persons
(including children) with
reduced physical, sensory,
mental capabilities or lack of
experience and knowledge,
unless they have been given
supervision or instruction
concerning use of the vacuum
cleaner by a person responsible
for their safety.
2. Children should be supervised to
ensure that they do not play with
the vacuum cleaner.
3. To prevent electrical shock,
do not immerse the vacuum
cleaner, batter y or power plug
into water or other liquids.
4. To prevent electrical shock, do
not use the vacuum cleaner
outdoors or on wet surfaces.
5. Always check the power cable
before use, the power cable and
the power adapter should be
in a good condition and must
not be damaged. If the power
cable or the charger adaptor is
damaged or defective, it must
be replaced.
6. The vacuum cleaner and
charger are intended for
domestic indoors use only.
7. Do not unplug the charger by
pulling on the power cable.
To unplug, grasp the power
adapter, not the power cable
and gently pull the power
adapter from the power socket.
8. Do not handle or operate the
vacuum cleaner with wet
hands. Follow electrical safety
precautions at all times.
9. Do not attempt to change the
attachments while the vacuum
cleaner is switched on. Use only
manufacturer’s recommended
accessories.
10. Do not operate the vacuum
cleaner too close to heaters,
radiators and other hot sur faces.

8
11. Do not use the vacuum cleaner
to pick up ammable items or
combustible liquids (i.e. gasoline,
hot ashes, cigarettes, matches,
explosive materials or anything
burning) or use in areas where
such substances and items may
be present.
12. Do not use the vacuum cleaner
to pick up toxic materials (i.e.
chlorine, bleach, ammonia).
13. Never operate or use the
vacuum cleaner without the
lters in place.
14. Before vacuuming, remove any
large or sharp objects from the
oor or cleaning surface in order
to prevent damage to the lter.
15. If the air inlet or oor head is
blocked, switch off the vacuum
cleaner straight away. Clear
the blocked object before
attempting to star t the vacuum
cleaner again.
16. Before carrying out any
maintenance or cleaning the
lters, always switch off the
vacuum cleaner.
17. Keep openings away from your
face and body.
18. Do not use the vacuum cleaner
if it is damaged or broken.
If connection cables are
damaged, have them replaced
immediately.
19. Never clean the vacuum
cleaner or any of the electrical
parts, especially the electrical
connections with water or liquid
cleaners.
20. Never attempt to make any
modications to the vacuum
cleaner and charger.
21. Always store the vacuum
cleaner, batter y and charger
indoors in a cool and dr y place.
22. Do not use the vacuum to pick
up water or liquids. This vacuum
cleaner is for dr y household use
only.
23. Use the electric power head
only for vacuuming dust and dr y
substances in the home.
24. Never run over the power cable
with the power head, as this may
cause damage to the power
cable.
25. Keep your hands away from the
roller brush while the vacuum
cleaner is switched on.
26. To prevent unnecessary wear on
the power head, keep it moving
while in operation.
27. Damage caused by improper
use or by not obser ving the
instructions in this manual will
void the warranty.

Evolution MAX
9
1. The vacuum cleaner is only to be
used with the charger provided
with the vacuum cleaner.
2. Only charge the battery inside
the cleaner or the charging
dock. Only use the specically
designated charger to charge
the product.
3. When the vacuum cleaner is not
in use, keep it away from other
metal objects, like paper clips,
coins, keys, nails, screws or other
small metal objects that can
make a connection from one
terminal to another. Shorting
the vacuum cleaner terminals
together may cause burns or a
re.
4. Under abusive conditions,
liquid may be ejected from
the batter y; avoid contact. If
contact occurs, ush with water
immediately. If liquid comes into
contact with your eyes, seek
medical help immediately.
5. Do not charge or store the
vacuum cleaner outdoors or
inside the car. Only charge or
store the battery in a dry indoor
area where the temperature
is more than 20 °c but less than
35°C. The charger is for indoor
use only.
6. Never attempt to open the
batter y for any reason. If the
plastic housing of the battery
casing breaks or cracks,
immediately discontinue use
and do not recharge.
7. The charger is not a serviceable
part.
8. Before disposal of your battery,
fully discharge your batter y by
running the product until it stops.
9. The cleaner contains a li-ion
batter y. Do not dispose the
vacuum cleaner with your local
garbage. Contact your local
council for instructions on how to
safely dispose of the battery.
10. Do not use the charger to charge
a non-chargeable battery.
Battery use and care

10
1. Insert the charger stand rod into the charger
base. Ensure that the rod is inserted securely
into the charger base.
2. Place the charging dock onto the top of the
charger stand rod. Push gently to ensure the
dock is secure.
IMPORTANT! The cleaner must be placed in the
charging dock with the rod and power head
connected. Placing just the main unit into the
charging stand will cause the charging dock to
fall over, which may damage the cleaner.
3. Insert the power head into the rod. You will
hear an audible “click” sound when it is
securely in place.
ASSEMBLY
Important! Always remove the power plug from the power supply before assembly.

Evolution MAX
11
Installing and removing the battery
1. Insert the battery into the cleaner until it clicks
into place.
2. To remove the battery, press both battery
release buttons and gently remove.
Important! Always remove the battery from
the vacuum cleaner before tting or removing
accessories.
Store battery on charger base
1. The second battery can be stored and
charged simultaneously in the dock on
the charger base. If both the cleaner and
the second battery are connected to the
charging stand, the battery in the cleaner
will be charged rst, followed by the second
batter y.
Battery indicator light:
1. When all three lights on the battery are off, the
battery requires charging.
2. When all three lights are on, the battery is fully
charged.
3. When the lights are ashing, the battery
is charging. The number of ashing lights
corresponds to the amount of charge in the
battery.
4. Insert the rod into the air inlet of the cleaner.
You will hear an audible “click” sound when it is
securely in place.

12
Charging via the charging dock
1. Ensure that the charger adapter is plugged into
the charging dock.
INSTRUCTIONS FOR USE
On/off button
1. Press the on/off button to turn the cleaner on or
off. Once turned on, the vacuum cleaner will
enter continuous mode and will run without the
button being held down.
Auto mode
1. Press the ‘auto’ button to enter auto mode.
While in auto mode, the cleaner will
automatically adjust the suction power to
match the amount of dust detected.
Suction control buttons (+/-)
1. Press the ‘+’ button to increase suction power
and the ‘-’ button to decrease suction power.
This will disable auto mode.

Evolution MAX
13
2. Insert the cleaner into the charging dock. To
charge the second battery insert the battery
into the charging dock, as shown.
3. While the cleaner is charging, the battery
indicator lights will ash. The number of ashing
lights corresponds to the amount of charge in
the batter y. When the batter y is fully charged,
the indicator will show three solid lights.
CAUTION! If the machine is not connected to
the rod and oor head while charging, it may
fall over and cause damage.
Charging via the stick vacuum
1. Insert the charger adaptor into the charging
port on the cleaner. While the cleaner is
charging, the battery indicator lights will ash.
The number of ashing lights corresponds to
the amount of charge in the battery. When the
battery is fully charged, the indicator will show
three solid lights.
Note: the battery charge time is between 4-5 hours. When the battery
indicator lights are off, the battery requires charging. As a safety precaution,
the vacuum cannot be switched on while the vacuum is charging.
Caution! Do not try to open the battery and repair it yourself.
Warning! The charger has been specially designed to charge the
Wertheim Evolution MAX Stick Vacuum. Do not use any other charger.

14
Roller brush blockage indicator
Motor blockage indicator
Auto mode indicator
Power change indicator
Dust sensor indicator
LED DISPLAY

Evolution MAX
15
TOOLS & ACCESSORIES
Hard oor power head
Ideal for thoroughly cleaning hard oors.
Combination power head
Ideal for daily cleaning on multi surfaces, especially
carpets.
Mini motorised brush
Ideal for picking up pet hair from furniture and
upholstery.
Important! Ensure that the cleaner is switched off before tting or removing
accessories.
Safety precautions:
1. Keep hair, hands and feet away from rotating brushes while any
motorised brush or power head is running.
2. Do not run the motorised brushes or power heads over electric cables and
string.
3. Do not use motorised brushes or power heads on pets.
4. If children are present, make sure to turn the vacuum off when leaving
motorised brushes or power heads unattended.
5. Do not attempt to ser vice or unclog motorised brushes or power heads
while the vacuum is running.

16
Extension hose
Ideal for exible cleaning in hard to reach places.
Elbow connector
Ideal for cleaning at unconventional angles.
Crevice tool
Ideal for cleaning in crevices, corners and hard to
reach places.
Long dusting brush
Ideal for dusting hard to reach places.
2-in-1 brush
Ideal for gentle dusting without scratching surfaces.

Evolution MAX
17
MAINTENANCE
Important! Always remove the battery from the cleaner before performing any
maintenance.
Emptying the dust bin
1. Disconnect the rod from the cleaner.
2. Hold the cleaner over a rubbish bin and press
the dust release button to open and empty the
dust bin.
Replacing the cyclone separator
1. Hold the cleaner over a rubbish bin and twist
the dust bin anti-clock wise to remove it.
2. Following the direction of the arrow, twist the
cyclone separator and remove it from the
cleaner.
3. Replace the cyclone separator with a new
one. Place the dust bin back onto the cleaner
and twist it clockwise until the dots line up and
it clicks into place.

18
Cleaning the HEPA cyclone lter
1. Pull the lter unit from the cleaner.
2. Following the arrow, twist the cyclone lter and
remove it.
3. Place the lter unit back into the cleaner, lining
up the clips on each side with the grooves
inside the cleaner.
It is recommended to replace the lters every 6
months or when the lters are soiled with dirt.
Cleaning the HEPA 13 exhaust lter
1. Twist the lter cap anti-clockwise to remove it
from the cleaner.
2. Following the arrow, twist the exhaust lter and
gently pull it out of the lter cap.
3. Replace with a new one and place the lter
cap back onto the cleaner, twisting clock wise
until it clicks into place.
It is recommended to replace the lters every 6
months or when the lters are soiled with dirt.

Evolution MAX
19
Cleaning combination power head
1. Disconnect the power head from the rod.
2. To release the brush roller from the power head,
press the ‘push’ button and twist the side cap
clockwise. Gently pull the roller from the power
head.
3. If a build-up of debris is wound around the
brush roller, remove by carefully cutting with
scissors. Avoid damaging or cutting the bristles.
4. To replace, carefully slide the brush roller back
into place. Push the side cap down and twist it
anti-clockwise simultaneously until it clicks into
place.
Cleaning hard oor power head
1. Disconnect the power head from the rod.
2. To release the brush roller from the power head,
use a at head screwdriver (not supplied) to
turn the screw and unlock the cover.
3. Lift the small cover to access the brush roller.
4. Lift out the brush roller from the power head.
5. If a build-up of debris is wound around the
brush roller, remove by carefully cutting with
scissors. Avoid damaging or cutting the bristles.
6. To replace, reverse steps 2 - 4. Ensure the brush
roller clicks into position when placed back into
the power head.

20
Cleaning mini turbo brush.
1. Disconnect the mini turbo brush from the
cleaner.
2. To release the roller brush from the mini turbo
brush, use a at head screwdriver or coin (not
supplied) and turn the coin to unlock the cover.
3. Lift the small cover to access the roller brush.
4. Lift the roller brush from the motorised brush.
5. If a build-up of debris is wound around the roller
brush, remove by carefully cutting with scissors.
Avoid damaging or cutting the bristles.
6. To replace, reverse steps 2 - 4. Ensure the roller
brush clicks into position when placed back
into the mini turbo brush.
Other manuals for Evolution
1
This manual suits for next models
1
Table of contents
Other WERTHEIM Vacuum Cleaner manuals

WERTHEIM
WERTHEIM Power Clean W4000 User manual

WERTHEIM
WERTHEIM Deep Clean W3000 User manual

WERTHEIM
WERTHEIM Elegance Robot Operator's manual

WERTHEIM
WERTHEIM Evolution User manual

WERTHEIM
WERTHEIM W5030 User manual

WERTHEIM
WERTHEIM 7 Series User manual

WERTHEIM
WERTHEIM W6030 User manual

WERTHEIM
WERTHEIM Dog & Cat W2000 User manual

WERTHEIM
WERTHEIM Dog & Cat W2000 User manual

WERTHEIM
WERTHEIM 7000 User manual