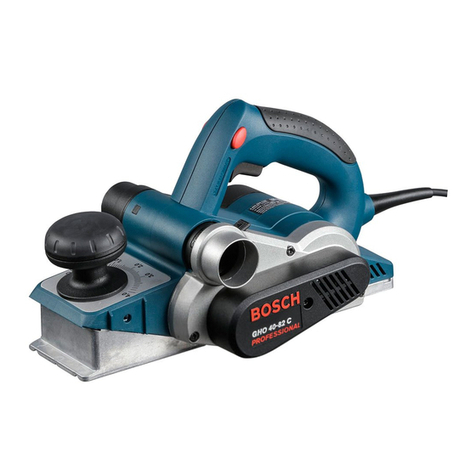
Wesco WS5343 User manual

Plaina 3mm PT P06
3mm Planer EN P12
WS5343
WS5343U

1
2
3
4
5
6
7
8
9
10

a
b
Fig.A Fig.B Fig.C
Fig.F
Fig.EFig.D
Fig.I
Fig.HFig.G
Fig.L
Fig.KFig.J
Fig.O
Fig.NFig.M

6PT
LISTA DE COMPONENTES
1. Empunhadura
2. Botão Trava Do Interruptor
3. Interruptor Liga/Desliga (On/Off)
4. Tampa Para Saída De Pó
5. Capa De Proteção Da Correia
6. Guia Para Cortes Paralelos
7. Placa Base
8. Parafuso Para Guia Paralelo
9. Escala Para Ajuste De Profundidade
10. Botão Para Ajuste De Profundidade De Corte (Giratório)
11. Guia Para Entalhe (Fig.G)
Acessórios ilustrados ou descritos não estão totalmente abrangidos no fornecimento.
DADOS TÉCNICOS
WS5343 WS5343U
Tensão nominal 220V~60Hz 127V~60Hz
Potência nominal 900W
Rotação 16000/min
Profundidade máxima de corte 3mm
Largura máxima de corte 82mm
Profundidade máxima de entalhamento 16mm
Duplo isolamento / II
Peso da máquina 2.8kg
ACESSÓRIOS
Guia paralela 1
Guia de entalhamento 1
Lâminas (na máquina) 2
Chave de Porca 1
Saco de pó 1
Recomendamos-lhe que compre todos os acessórios no fornecedor onde tenha adquirido a ferramenta. Utilize acessórios
de boa qualidade e de marca conhecida. Escolha os acessórios de acordo com o trabalho que tenciona executar. Para mais
pormenores, consulte a embalagem destes. Os comerciais também pode ajudar e aconselhar.

7
PT
AVISOS GERAIS
DE SEGURANÇA
DE FERRAMENTAS
ELÉCTRICAS
ATENÇÃO! Leia atentamente as
seguintes instruções. A não observância
destas instruções pode causar choque eléctrico, incêndio e/
ou lesões graves.
Guarde estas instruções para referência
futura.
Os termos “ferramenta elétrica” utilizados em todos os
avisos constantes destas instruções referem-se à sua
ferramenta elétrica accionada por corrente elétrica (com
cabo de alimentação) ou ferramenta elétrica accionada por
bateria (sem cabo de alimentação).
1. SEGURANÇA DA ÁREA DE TRABALHO
a) Mantenha a área de trabalho limpa e bem
iluminada. Áreas desorganizadas ou escuras são
um convite a acidentes.
b) Não opere ferramentas elétricas em
ambientes explosivos, como na presença
de líquidos, gases ou pós inflamáveis.
Ferramentas elétricas criam faíscas que podem
incendiar o pó ou vapores.
c) Mantenha crianças e espectadores
distantes durante a operação de uma
ferramenta elétrica. Distrações podem causar a
perda de controle.
2. SEGURANÇA ELÉTRICA
a) Os plugues das ferramentas elétricas
deve corresponder à tomada. Nunca
modifique o plugue de forma alguma.
Não use qualquer plugue adaptador com
ferramentas elétricas aterradas. Plugues
não modificados e tomadas correspondentes reduzirão
o risco de choque elétrico.
b) Evite contato corporal com superfícies
aterradas, como tubulações, radiadores,
fogões e refrigeradores. Há maior risco de
choque elétrico se seu corpo estiver aterrado.
c) Não exponha ferramentas elétricas à
chuva ou condições úmidas. A entrada de
água em uma ferramenta elétrica aumentará o rico de
choque elétrico.
d) Não abuse do cabo. Nunca use o cabo
para carregar, puxar ou desconectar a
ferramenta elétrica. Mantenha o cabo
distante de calor, óleo, pontas afiadas ou
peças em movimento. Cabos danificados ou
embaraçados aumentam o risco de choque elétrico.
e) Ao operar uma ferramenta elétrica ao ar
livre, use uma extensão adequada para
uso ao ar livre. O uso de um cabo adequado para
uso ao ar livre reduz o risco de choque elétrico.
f) Se for inevitável operar uma ferramenta
elétrica em um local úmido, use uma
fonte de alimentação protegida por um
dispositivo de corrente residual (DCR). O
uso de um DCR reduz o risco de choque elétrico.
3. SEGURANÇA PESSOAL
a) Mantenha-se alerta, preste atenção ao
que está fazendo e use bom senso ao
operar uma ferramenta elétrica. Não use
uma ferramenta elétrica quando estiver
cansado ou sob o efeito de drogas,
álcool ou medicamentos. Um momento de
distração ao operar ferramentas elétricas pode resultar
em lesão pessoal grave.
b) Use equipamento de proteção pessoal.
Sempre use proteção ocular. O equipamento
de proteção, como máscara contra pó, sapatos de
segurança antiderrapantes, capacete ou proteção
auricular, usado para condições apropriadas reduzirá
lesões pessoais.
c) Evite acionamento acidental. Certifique-
se de que o botão esteja na posição de
desligado antes de conectar à fonte
de alimentação e/ou à bateria, pegar
ou transportar a ferramenta. Transportar
ferramentas elétricas com seu dedo no botão ou
conectar ferramentas elétricas com o botão ligado é
um convite a acidentes.
d) Remova qualquer chave de ajuste
ou chave de porca antes de ligar a
ferramenta elétrica. Uma chave de porca ou
de ajuste deixada acoplada a uma parte giratória da
ferramenta elétrica pode resultar em lesão pessoal.
e) Não se estique muito. Mantenha os pés
nem apoiados e o equilíbrio o tempo
todo. Isso permite um melhor controle da ferramenta
elétrica em situações inesperadas.
f) Use vestuário apropriado. Não use
roupas largas nem joias. Mantenho seu
cabelo, roupas e luvas afastados das
peças móveis. Roupas largas, joias ou cabelos
compridos podem ficar presos nas peças móveis.
g) Se forem fornecidos dispositivos para a
conexão de equipamentos de extração

8PT
e coleta de pó, certifique-se de que
estejam conectados e sejam usados
corretamente. O uso de coleta de pó pode reduzir
riscos relacionados a pó.
4. USO E CUIDADO DE FERRAMENTAS
ELÉTRICAS
a) Não force a ferramenta elétrica. Use a
ferramenta elétrica correta para seu
trabalho. A ferramenta elétrica correta efetuará o
trabalho de forma mais eficiente e segura de acordo
com a capacidade para a qual foi projetada.
b) Não use a ferramenta elétrica se o botão
não a ligar e desligar. Qualquer ferramenta
elétrica que não possa ser controlada pelo botão é
perigosa e deve ser consertada.
c) Desconecte o plugue da tomada e/ou
a bateria da ferramenta elétrica antes
de fazer quaisquer ajustes, trocar
acessórios ou armazenar ferramentas
elétricas. Essas medidas de segurança preventivas
reduzem o rico de acionar a ferramenta elétrica
acidentalmente.
d) Guarde as ferramentas elétricas que não
estiverem sendo usadas fora do alcance
das crianças e não permita que pessoas
não familiarizadas com a ferramenta
elétrica ou com estas instruções operem
a ferramenta elétrica. Ferramentas elétricas
são perigosas nas mãos de usuários sem treinamento.
e) Faça a manutenção das ferramentas
elétricas. Verifique se as peças móveis
estão desalinhadas ou emperradas, se
há peças quebradas e qualquer outra
condição que possa afetar a operação
da ferramenta elétrica. Se danificada,
conserte a ferramenta elétrica antes de
usá-la. Muitos acidentes são causados por
ferramentas elétricas com manutenção inadequada.
f) Mantenha as ferramentas de corte
afiadas e limpas. Ferramentas de corte com
manutenção apropriada com arestas de corte afiadas
têm menor probabilidade de emperrar e são mais
fáceis de controlar.
g) Use a ferramenta elétrica, os acessórios,
as ponteiras de ferramentas, etc. de
acordo com estas instruções, levando
em consideração as condições de
trabalho e o trabalho a ser executado. O
uso da ferramenta elétrica para operações diferentes
das previstas pode resultar em uma situação perigosa.
5. ASSISTÊNCIA
a) Sua ferramenta elétrica deve ser
consertada por um técnico qualificado
usando somente peças originais. Isso irá
assegurar que a segurança da ferramenta elétrica seja
mantida.
AVISOS DE SEGURANÇA
DA PLAINA
1. Espere o cortador (faca da plaina) parar
antes de apoiar a ferramenta. Um cortador
rotativo exposto pode engatar na superfície levando a
uma possível perda de controle e lesão séria.
2. Segure a ferramenta elétrica somente
pelas superfícies isoladas da
empunhadura, pois o cortador pode
entrar em contato com seu próprio cabo.
Cortar um fio energizado pode fazer com que as partes
metálicas expostas da ferramenta metálica fiquem
energizadas, o que poderia provocar um choque
elétrico no operador.
3. Use grampos ou outra forma prática para
fixar e apoiar a peça de trabalho em uma
plataforma estável. Segurar a peça com a mão
ou contra o corpo a deixa instável e pode levar à perda
de controle.

9
PT
SÍMBOLOS
Para reduzir o risco de ferimentos o utilizador
deve ler o manual de instruções
Classe de protecção
Usar protecção para os ouvidos
Usar protecção ocular
Usar máscara contra o pó
INSTRUÇÕES DE
FUNCIONAMIENTO
ATENÇAO: Antes de utilizar a
ferramenta, leia atentamente o livro
de instruções.
USO PREVISTO
A máquina é prevista para plainar materiais de madeira
firmemente apoiados, como vigas e tábuas. Também é
adequada para chanfrar bordas e entalhamento.
1. BOTÃO LIGA/DESLIGA DE SEGURANÇA
(CONSULTE A FIG. A)
O botão é travado para evitar acionamento acidental.
Pressione o botão de travamento e, em seguida, o botão
liga/desliga e libere o botão de travamento. A máquina
agora está funcionando. Para desligar, simplesmente libere
o botão liga/desliga.
AVISO: Perigo de ricochete! Aplique a
máquina à peça de trabalho somente quando ligada.
2. AJUSTE DE PROFUNDIDADE DE CORTE
(Consulte a Fig. B)
A profundidade do aplainamento pode ser ajustada de
0 a 3 mm. Gire o seletor de ajuste de profundidade de
corte (10) para definir a profundidade de corte necessária
com a escala (9). A rotação no sentido horário aumenta a
profundidade de aplainamento; a rotação anti-horária reduz
a profundidade de aplainamento. Sempre trabalhe de um
corte bruto para um corte com acabamento.
Recomenda-se que cortes de teste sejam feitos após
cada ajuste para assegurar que a quantidade de madeira
desejada esteja sendo removida por sua plaina.
OBSERVAÇÃO: Para proteger as lâminas durante
armazenamento, transporte, etc., coloque o seletor de
ajuste de profundidade de lâmina em 0.
3. APLAINAMENTO DE SUPERFÍCIE PADRÃO
(Consulte a Fig. C)
Defina a profundidade de corte desejada. Posicione a parte
frontal da placa base na horizontal sobre a superfície de
trabalho. Certifique-se de que as lâminas não estejam
tocando a peça de trabalho. Ligue a máquina e empurres
sua plaina para frente e ela começará a cortar. Sempre
mantenha toda a placa base na horizontal sobre a superfície
de trabalho para evitar que a lâmina de corte pule. Mova a
plaina uniformemente sobre a superfície de trabalho.
Tome cuidado para evitar bater em pregos durante a
operação. Isso pode cortar, trincar ou danificar as lâminas.
Sugerimos sempre manter um conjunto extra de lâminas à

10 PT
mão para substituição.
4. CHANFRAGEM DE BORDA (Consulte as
Fig. D,E)
CUIDADO: Sempre use ambas as mãos na
ferramenta para qualquer operação. Isso assegura a
manutenção do controle e evita o risco de lesão pessoal
séria. A peça de trabalho deve sempre estar devidamente
apoiada e fixada de forma que ambas as mãos estejam
livres para controlar a plaina.
Usando a ranhura em V (A) na placa base, é possível
chanfrar a borda da peça de trabalho. Guie a plaina ao
longo da borda e mantenha ângulo e força constantes para
produzir um bom acabamento. Você pode controlar o ângulo
de chanfragem com suas mãos. Faça uma chanfragem de
teste em um pedaço de madeira. Mantenha a pressão para
baixo para manter sua plaina horizontal no início e no fim da
superfície de trabalho.
5. USANDO A GUIA PARALELA (Consulte a
Fig. F)
Insira o parafuso fornecido no furo do suporte da guia
paralela (B). Gire o parafuso na porca da carcaça. Fixe a
guia paralela (6) no suporte da guia paralela com o parafuso
e a porca. Certifique-se de que os parafusos estejam
apertados de forma segura.
OBSERVAÇÃO: A guia paralela deve ser
encaixada à esquerda da carcaça.
Para ajustar a largura de corte necessária, solte a porca
e deslize a guia paralela até a posição desejada. Aperte a
porca totalmente novamente.
Use a guia paralela durante o corte. A guia deve ser mantida
firme contra a borda da peça de trabalho.
6. USANDO O ENTALHE (Consulte a Fig. G)
Insira o parafuso fornecido pela fenda do Entalhe. Gire o
parafuso na porca da carcaça.
O ajuste da profundidade do corte pode ser definido de 0
a 16 mm.
Para ajustar a profundidade do corte, posicione a plaina
sobre uma tábua plana, em seguida, solte o parafuso e
deslize a guia de ajuste de profundidade de corte para cima
e para baixo para a profundidade necessária. Aperte o
parafuso manual totalmente.
7. ENTALHE (Consulte a Fig. H)
A largura do corte de entalhamento (C) é ajustável movendo
a guia paralela. A profundidade do corte de entalhamento
(D) é determinada movendo o Entalhe e pelo número de
passagens feitas ao longo da área de trabalho. Certifique-
se de que a plaina seja guiada com uma pressão de suporte
lateral.
8. AJUSTE E TROCA DE LÂMINA (Consulte
as Fig. I-L)
OBSERVAÇÃO: Lâminas sem corte e desgastadas
não podem ser afiadas e devem ser substituídas. Sempre
substitua as lâminas em pares.
AVISO: Remova o cabo de energia da tomada
antes de realizar qualquer ajuste ou troca de
lâminas. Sempre use luvas ao substituir lâminas.
Use a chave de porca fornecida para soltar os três
parafusos de instalação aproximadamente ½ giro anti-
horário.
OBSERVAÇÃO: Não solte muito os parafusos. Se os
parafusos estiverem muito soltos, o alinhamento da nova
lâmina não será preciso.
Antes de remover as lâminas antigas, observe a direção
de corte e como a borda afilada das lâminas antigas estão
orientadas. A borda afilada das novas lâminas devem estar
na mesma orientação que as lâminas originais.
Pressione a tampa de segurança para baixo com seu dedo.
Empurre a lâmina para fora com a ponta de uma chave de
porca (ou de uma chave de fenda) e, em seguida, remova
a mesma.
OBSERVAÇÃO: Não há necessidade de remover o
grampo da lâmina, pois isso irá alterar as configurações de
fábrica para controle de altura da lâmina de corte.
OBSERVAÇÃO: Se uma lâmina não puder ser
empurrada para fora facilmente após soltar os parafusos,
use um pedaço de madeira para soltar a lâmina do grampo
da lâmina com uma batida breve e precisa. Em seguida,
empurre uma chave de fenda e remova as lâminas. Se
necessário, bata o pedaço de madeira precisamente com
um martelo pequeno para soltar as lâminas.
Antes de inserir novamente uma lâmina nova ou reversa,
sempre limpe a lâmina e o apoio da lâmina, se estiverem
sujos. Deslize a lâmina para dentro do grampo com uma
chave de porca (ou uma chave de fenda) na orientação
correta. Verifique se a lâmina está igualada ao grampo.
Aperte novamente os três parafusos da lâmina com a chave
de porca.
Repita o procedimento acima para trocar a outra lâmina.
Após as lâminas serem substituídas, verifique se as lâminas
estão paralelas e na mesma superfície que a placa base
traseira com uma régua. Se não estiverem, você pode
ajustar as lâminas com a chave hexagonal fornecida.
Primeiro, solte os três parafusos no grampo da lâmina. Gire
o parafuso no sentido horário, a lâmina será levantada.
Gire-o no sentido anti-horário, a lâmina será abaixada. Por
fim, aperte novamente os três parafusos totalmente.

11
PT
9. SUBSTITUINDO UMA CORREIA DE
ACIONAMENTO (Fig. G)
AVISO:
1. Remova o plugue da tomada antes de realizar qualquer
ajuste, serviço ou manutenção.
2. As lâminas de corte estarão girando e podem causar
lesão.
3. Sempre use luvas na operação.
Solte os parafusos (E) e remova a tampa da correia.
Remova a correia de acionamento desgastada da polia
grande e do pinhão e limpe-os. Enlace a nova coreia sobre
o pinhão e gire-a manualmente, pressione-a na polia
grande. Certifique-se de que a correia de acionamento
corra exatamente ao logo das ranhuras de comprimento do
pinhão e da polia. Reposicione a tampa da correia. Instale o
parafuso da tampa e aperte totalmente.
inferior (12) e segure-a firmemente com a alavanca da
proteção inferior (16). Coloque a lâmina de serra no flange
interno (19). Monte o flange externo (15) e o parafuso
do disco (14). Use a chave de porca (18) para apertar o
parafuso (14) com 1/4 de giro a mais do que o aperto
manual.
10. CONFIGURAÇÃO CORRETA DA LÂMINA
DA PLAINA (Consulte a Fig. O)
Sua superfície de aplainamento ficará bruta e desnivelada,
a menos que a lâmina esteja definida de forma apropriada
e segura.
A lâmina deve ser montada de forma que a borda cortante
esteja absolutamente nivelada, ou seja, paralela à superfície
da base traseira. A Fig. O mostra alguns exemplos de
configurações apropriadas e inapropriadas.
(A) Base frontal (Calço móvel)
(B) Base traseira (Calço fixo)
1) Configuração correta
Apesar de esta visão lateral não poder mostrar, as bordas
da lâmina operam perfeitamente em paralelo à superfície
da base traseira.
2) Cortes na superfície
Causa: uma ou ambas as lâminas não estão com a borda
paralela à linha de base traseira.
3) Goivagem no início
Causa: uma ou ambas as lâminas não se estende o
suficiente em relação à linha de base traseira.
4) Goivagem no fim
Causa: uma ou ambas as lâminas se estende muito longe
em relação à linha de base traseira.
MANUTENÇÃO
Remova o plugue da tomada antes de
realizar qualquer ajuste, serviço ou
manutenção.
Sua ferramenta elétrica não requer lubrificação nem
manutenção adicional. Não há nenhuma peça que possa
ter manutenção realizada pelo usuário em sua ferramenta
elétrica. Nunca use água ou produtos químicos de limpeza
para limpar sua ferramenta elétrica. Limpe-a com um pano
seco. Sempre guarde sua ferramenta elétrica em local
seco. Mantenha as entradas de ventilação do motor limpas.
Mantenha todos os controles livres de pó. Ocasionalmente,
você poderá ver faíscas através das entradas de ventilação.
Isso é normal e não danificará sua ferramenta elétrica.
Se o cabo de alimentação for danificado, ele deve ser
substituído pelo fabricante, seu agente de assistência
técnica ou pessoa qualificada semelhante para evitar um
risco.

12 EN
COMPONENT LIST
1. Hand Grip Areas
2. Lock-Off Switch
3. On/Off Switch
4. Dust Extraction Cover
5. Belt Cover
6. Parallel Guide
7. Baseplate
8. Parallel Guide Locking Screw
9. Planing Depth Scale
10. Cutting Depth Adjustment Knob
11. Rebate Guide (See Fig.G)
Not all the accessories illustrated or described are included in standard delivery.
TECHNICAL DATA
WS5343 WS5343U
Voltage 220V~60Hz 127V~60Hz
Power input 900W
No load speed 16000/min
Max cutting depth 3mm (1/8’’)
Max cutting width 82mm (3-1/4’’)
Max rebate depth 16mm (5/8’’)
Protection class / II
Machine weight 2.8kg (6.2lbs)
ACCESSORIES
Parallel guide 1
Rebate guide 1
Blades (on machine) 2
Spanner 1
Dust bag 1
We recommend that you purchase your accessories from the same store that sold you the tool. Use good quality accessories
marked with a well-known brand name. Choose the type according to the work you intend to undertake. Refer to the
accessory packaging for further details. Store personnel can assist you and offer advice.

13
EN
GENERAL POWER TOOL
SAFETY WARNINGS
WARNING! Read all safety warnings
and all instructions. Failure to follow the
warnings and instructions may result in electric shock, fire
and/or serious injury.
Save all warnings and instructions for future
reference.
The term “power tool” in the warnings refers to your
mains-operated (corded) power tool or battery-operated
(cordless) power tool.
1. WORK AREA SAFETY
a) Keep work area clean and well lit. Cluttered
or dark areas invite accidents.
b) Do not operate power tools in explosive
atmospheres, such as in the presence of
flammable liquids, gases or dust. Power
tools create sparks which may ignite the dust or fumes.
c) Keep children and bystanders away while
operating a power tool. Distractions can cause
you to lose control.
2. ELECTRICAL SAFETY
a) Power tool plugs must match the outlet.
Never modify the plug in any way. Do
not use any adapter plugs with earthed
(grounded) power tools. Unmodified plugs and
matching outlets will reduce risk of electric shock.
b) Avoid body contact with earthed or
grounded surfaces, such as pipes,
radiators, ranges and refrigerators. There
is an increased risk of electric shock if your body is
earthed or grounded.
c) Do not expose power tools to rain or
wet conditions. Water entering a power tool will
increase the risk of electric shock.
d) Do not abuse the cord. Never use the
cord for carrying, pulling or unplugging
the power tool. Keep cord away from
heat, oil, sharp edges or moving parts.
Damaged or entangled cords increase the risk of
electric shock.
e) When operating a power tool outdoors,
use an extension cord suitable for
outdoor use. Use of a cord suitable for outdoor use
reduces the risk of electric shock.
f) If operating a power tool in a damp
location is unavoidable, use a residual
current device (RCD) protected supply.
Use of an RCD reduces the risk of electric shock.
3. PERSONAL SAFETY
a) Stay alert, watch what you are doing and
use common sense when operating a
power tool. Do not use a power tool while
you are tired or under the influence of
drugs, alcohol or medication. A moment of
inattention while operating power tools may result in
serious personal injury.
b) Use personal protective equipment.
Always wear eye protection. Protective
equipment such as dust mask, non-skid safety shoes,
hard hat, or hearing protection used for appropriate
conditions will reduce personal injuries.
c) Prevent unintentional starting. Ensure
the switch is in the off-position before
connecting to power source and/or
battery pack, picking up or carrying the
tool. Carrying power tools with your finger on the
switch or energising power tools that have the switch
on invites accidents.
d) Remove any adjusting key or wrench
before turning the power tool on. A wrench
or a key left attached to a rotating part of the power
tool may result in personal injury.
e) Do not overreach. Keep proper footing
and balance at all times. This enables better
control of the power tool in unexpected situations.
f) Dress properly. Do not wear loose
clothing or jewellery. Keep your hair,
clothing and gloves away from moving
parts. Loose clothes, jewellery or long hair can be
caught in moving parts.
g) If devices are provided for the connection
of dust extraction and collection
facilities, ensure these are connected
and properly used. Use of dust collection can
reduce dust-related hazards.
4. POWER TOOL USE AND CARE
a) Do not force the power tool. Use the
correct power tool for your application.
The correct power tool will do the job better and safer
at the rate for which it was designed.
b) Do not use the power tool if the switch
does not turn it on and off. Any power tool that
cannot be controlled with the switch is dangerous and
must be repaired.
c) Disconnect the plug from the power
source and/or the battery pack from
the power tool before making any

14 EN
adjustments, changing accessories, or
storing power tools. Such preventive safety
measures reduce the risk of starting the power tool
accidentally.
d) Store idle power tools out of the reach
of children and do not allow persons
unfamiliar with the power tool or these
instructions to operate the power tool.
Power tools are dangerous in the hands of untrained
users.
e) Maintain power tools. Check for
misalignment or binding of moving
parts, breakage of parts and any other
condition that may affect the power tool’s
operation. If damaged, have the power
tool repaired before use. Many accidents are
caused by poorly maintained power tools.
f) Keep cutting tools sharp and clean.
Properly maintained cutting tools with sharp cutting
edges are less likely to bind and are easier to control.
g) Use the power tool, accessories and
tool bits etc. in accordance with these
instructions, taking into account the
working conditions and the work to be
performed. Use of the power tool for operations
different from those intended could result in a
hazardous situation.
5. SERVICE
a) Have your power tool serviced by a
qualified repair person using only
identical replacement parts. This will ensure
that the safety of the power tool is maintained.
PLANER SAFETY
WARNINGS
1. Wait for the cutter to stop before setting
the tool down. An exposed rotating cutter may
engage the surface leading to possible loss of control
and serious injury.
2. Hold the power tool by insulated gripping
surfaces only, because the cutter may
contact its own cord. Cutting a “live” wire may
make exposed metal parts of the power tool “live” and
could give the operator an electric shock.
3. Use clamps or another practical way to
secure and support the workpiece to a
stable platform. Holding the work by your hand
or against the body leaves it unstable and may lead to
loss of control.
SYMBOL
To reduce the risk of injury, user must read
instruction manual
Double insulation
Wear ear protection
Wear eye protection
Wear dust mask

15
EN
OPERATING
INSTRUCTIONS
NOTE: Before using the tool, read the
instruction book carefully.
INTENDED USE
The machine is intended for planing of firmly supported
wooden materials, such as beams and boards. It is also
suitable for beveling edges and rebating.
1. SAFETY ON/OFF SWITCH (See Fig.A)
The switch is locked off to prevent accidental starting.
Depress the lock off button then the on/off switch and
release the lock off button. The machine is working now. To
switch off, just release the on/off switch.
WARNING: Danger of kickback! Apply the
machine to the work piece only when switched on.
2. CUTTING DEPTH ADJUSTMENT (See
Fig.B)
The planing depth can be adjusted from 0 to 3mm. Rotate
the cutting depth adjustment knob (10) to set the required
cutting depth with the scale (9). The clockwise rotation
increases the planing depth; the anticlockwise rotation
reduces the planing depth. Always work from a rough cut
to a finish cut.
It is recommended that test cuts be made in scrap wood
after each adjustment to make sure that desired amount of
wood is being removed by your planer.
NOTE: To protect blades during storage, transporting,
etc., set blade depth adjustment knob to 0.
3. STANDARD SURFACE PLANING (See Fig.C)
Set the desired cutting depth. Position the front part of the
base plate flat onto the work surface. Make sure that the
blades are not touching the workpiece. Switch the machine
on and push your planer forward and it will start cutting.
Always maintain all of the base plate flat on the work
surface to prevent the cutting blade jumping. Move the
planer evenly over the work surface.
Be careful to avoid hitting nails during operation. It could
nick, crack, or damage blades. We suggest that you always
keep an extra set of blades on hand for replacement.
4. EDGE CHAMFERING (See Fig D, E)
CAUTION: Always use both hands on the tool for
any operation. It assures to maintain control and
avoid the risk of serious personal injury. The workpiece
must always be properly supported and clamped so that
both hands will be free to control the planer.
Using the V-groove (A) in the base plate you can make a
chamfer on the work piece edge. Guide the planer along the
edge and maintain a constant angle and force to produce a
good finish. You can control the angle of the chamfer with
your hands. Make a test chamfer on a scrap piece of wood.
Maintain downward pressure to keep your planer flat at the
beginning and the end of the work surface.
5. USING THE PARALLEL GUIDE (See Fig.F)
Insert the screw provided through the hole on the support
of parallel guide (B). Turn the screw into the nut on the
housing. Fix the parallel guide (6) on the support of parallel
guide with the screw and nut. Ensure the screws are
tightened securely.
NOTE: The parallel guide should be fitted on
the left of housing.
To adjust the required width of cut, loosen the nut and slide
the parallel guide to the required position. Retighten the
nut fully.
Use the parallel guide while cutting. The guide should be
held firmly against the edge of the workpiece.
6. USING THE REBATE (See Fig.G)
Insert the screw provided through the slot on the Rebate.
Turn the screw into the nut on the housing.
The cut depth adjustment can be set from 0 to 16mm.
To adjust the depth of cut, place the planer on a flat board,
then loosen the screw and slide the cut depth adjustment
guide up and down for required depth. Tighten the thumb
screw fully.
7. REBATING (See Fig.H)
The width of rebating cut (C) is adjustable by moving the
parallel guide. The depth of rebating cut (D) is determined by
moving the Rebate, and the number of passes made along
the workpiece. Make sure that the planer is guided with a
lateral supporting pressure.
8. BLADE FITTING AND CHANGING (See Fig.I-L)
NOTE: Dull and worn blade cannot be reground and must
be replaced. Always replace blades in pairs.
WARNING: Remove power cord from the socket
before carrying out any adjustments or changing
blades. Always put on gloves when replacing blades.
Using the blade spanner provided to loosen the
three installation screws approximately 1/2 rotation
anticlockwise.
NOTE: Do not over-loosen the screws. If the screws
are too loose, the alignment of the new blade will not be
accurate.
Before removing the old blades, take notice of the direction
of cut as well as how the tapered edge of the old blades are

16 EN
oriented. The tapered edge of the new blades must be in the
same orientation as the original blades.
Press the safety cover down with your finger. Push the
blade out with the tip of a spanner (or a screwdriver) and
then remove.
NOTE: There is no need to remove the blade clamp as
this will change the factory settings for cutting blade height
control.
NOTE: If a blade cannot be pushed out easily after
loosening the screws, use a piece of wood to break the
blade loose from the blade clamp, with a short sharp
blow. Then push with a screwdriver to remove the blades.
If necessary, tap the piece of wood sharply with a small
hammer to break the blades loose.
Before reinserting a new or reverse blade, always clean
both the blade and the blade seat if dirty. Slide the blade
into the clamp with a spanner (or a screwdriver) in the
correct orientation. Check the blade is equal with the clamp.
Retighten the three blade screws with the spanner.
Repeat the above procedure to change the other blade.
After the blades are replaced, check if the blades are
parallel and in the same surface as the rear base plate with
a ruler. If not, you can adjust the blades with the hexagonal
wrench . Firstly loosen the three screws on the blade clamp.
Turn the socket head screw clockwise, the blade will be
risen. Turn it anticlockwise, the blade will be lowered down.
Finally retighten the three screws fully.
9. REPLACING A DRIVE BELT (See Fig. M, N)
WARNING:
1. Remove the plug from the socket before carrying out
any adjustment, servicing or maintenance.
2. The cutting blades will be turning and may cause
injury.
3. Always put on gloves when operation.
Loosen the screws (E) and remove the belt cover. Remove
the worn drive belt from the large pulley and the pinion and
clean them. Lace the new belt on the top of the pinion and
turn it manually, press it on the large pulley. Make sure
that the drive belt runs exactly along the length grooves of
the pinion and the pulley. Replace the belt cover. Install the
cover screw and tighten fully.
10. CORRECT PLANER BLADE SETTING
(See Fig.O)
Your planing surface will end up rough and uneven, unless
the blade is set properly and securely.
The blade must be mounted so that the cutting edge is
absolutely level, that is, parallel to the surface of the rear
base. Fig.O shows some examples of proper and improper
settings.
(A) Front base (Moveable shoe)
(B) Rear base (Stationary shoe)
1) Correct setting
Although this side view cannot show it, the edges of the
blade run perfectly parallel to the rear base surface.
2) Nicks in surface
Cause: one or both blades fails to have edge parallel to rear
base line.
3) Gouging at start
Cause: one or both blade edges fails to protrude enough in
relation to rear base line.
4) Gouging at end
Cause: one or both blade edges protrude too far in relation
to rear base line.
MAINTENANCE
Remove the plug from the socket before
carrying out any adjustment, servicing or
maintenance.
Your power tool requires no additional lubrication or
maintenance. There are no user serviceable parts in your
power tool. Never use water or chemical cleaners to clean
your power tool. Wipe clean with a dry cloth. Always store
your power tool in a dry place. Keep the motor ventilation
slots clean. Keep all working controls free of dust.
Occasionally you may see sparks through the ventilation
slots. This is normal and will not damage your power tool.
If the supply cord is damaged, it must be replaced by
the manufacturer, its service agent or similarly qualified
persons in order to avoid a hazard.

This manual suits for next models
1
Table of contents
Languages: