Westcott 7580 User manual

Flex Cine Wireless DMX Dimmer
User Manual
V1.0001
9/9/2018

Contents
Contents 2
Introduction 4
Choose Between Wireless or Wired DMX 4
Dimmer Control Modes and Presets 4
V-Mount AC and DC Power Options 4
Cutting-Edge Technology 4
Durable Lightweight Enclosure 4
Included Components 5
Overview 5
Warnings 6
Updating Firmware 7
Important Firmware Notes 7
Powering the Wireless DMX Dimmer 8
Connecting Flex Mats 9
Connecting a Flex Cine LED Mat 9
Connecting a Flex LED Legacy Mat 9
Disconnecting a Flex Cine LED Mat 9
Disconnecting a Flex LED Legacy Mat 9
Basic Operation, Switches & Controls 10
Main Menu Screen 11
Selectable Menu Options 11
Main Menu Options Details 11
DMX(001)(Local) 11
Mode 11
Config 11
Stored Preset 11
Mode Menu Screen | Mat Selection 12
Abbreviation Key 12
Selectable Menu Options 12
Mode Menu Options Details 12
Source Matching 12
Gels 13
RGWB+I (5Ch) 13
Bi-Color (2Ch) 14
2

Daylight (1Ch) 14
Source Matching, Gels & User Saved Presets 15
Accessing & Adjusting 15
Source Matching Presets Explained 15
Gel Presets 16
Accessing & Adjusting 16
User Defined Stored Presets 17
Accessing & Adjusting 17
DMX Operation: Addressing and Operation 18
Flex Mat Channel Requirements 18
Important DMX Addressing Information 18
DMX (Hardwired) Connection 18
DMX over ArtNET Connection 18
Example DMX Addressing Scenario: 20
WiFi Host/Client Operation 21
HOST Mode 21
CLIENT Mode 21
WiFi Settings 22
Step-by-Step 22
WiFi Setup Images 25
Image01: WiFi Networks 25
Image02: Mode Selection 26
Image03: AP Interface Setting 27
Image04: STA Interface Setting 28
Image05: Application Setting 29
Image06: Device Management 30
Image07: Restart Module 31
Image08: Rebooting 32
Image09: Apply 33
TE-9 Pin Connector Diagram 34
V-Mount Plate Pin Data 35
V-Mount Plate D-Tap Port 35
Warranty Information 36
Legal Information 37
3

Introduction
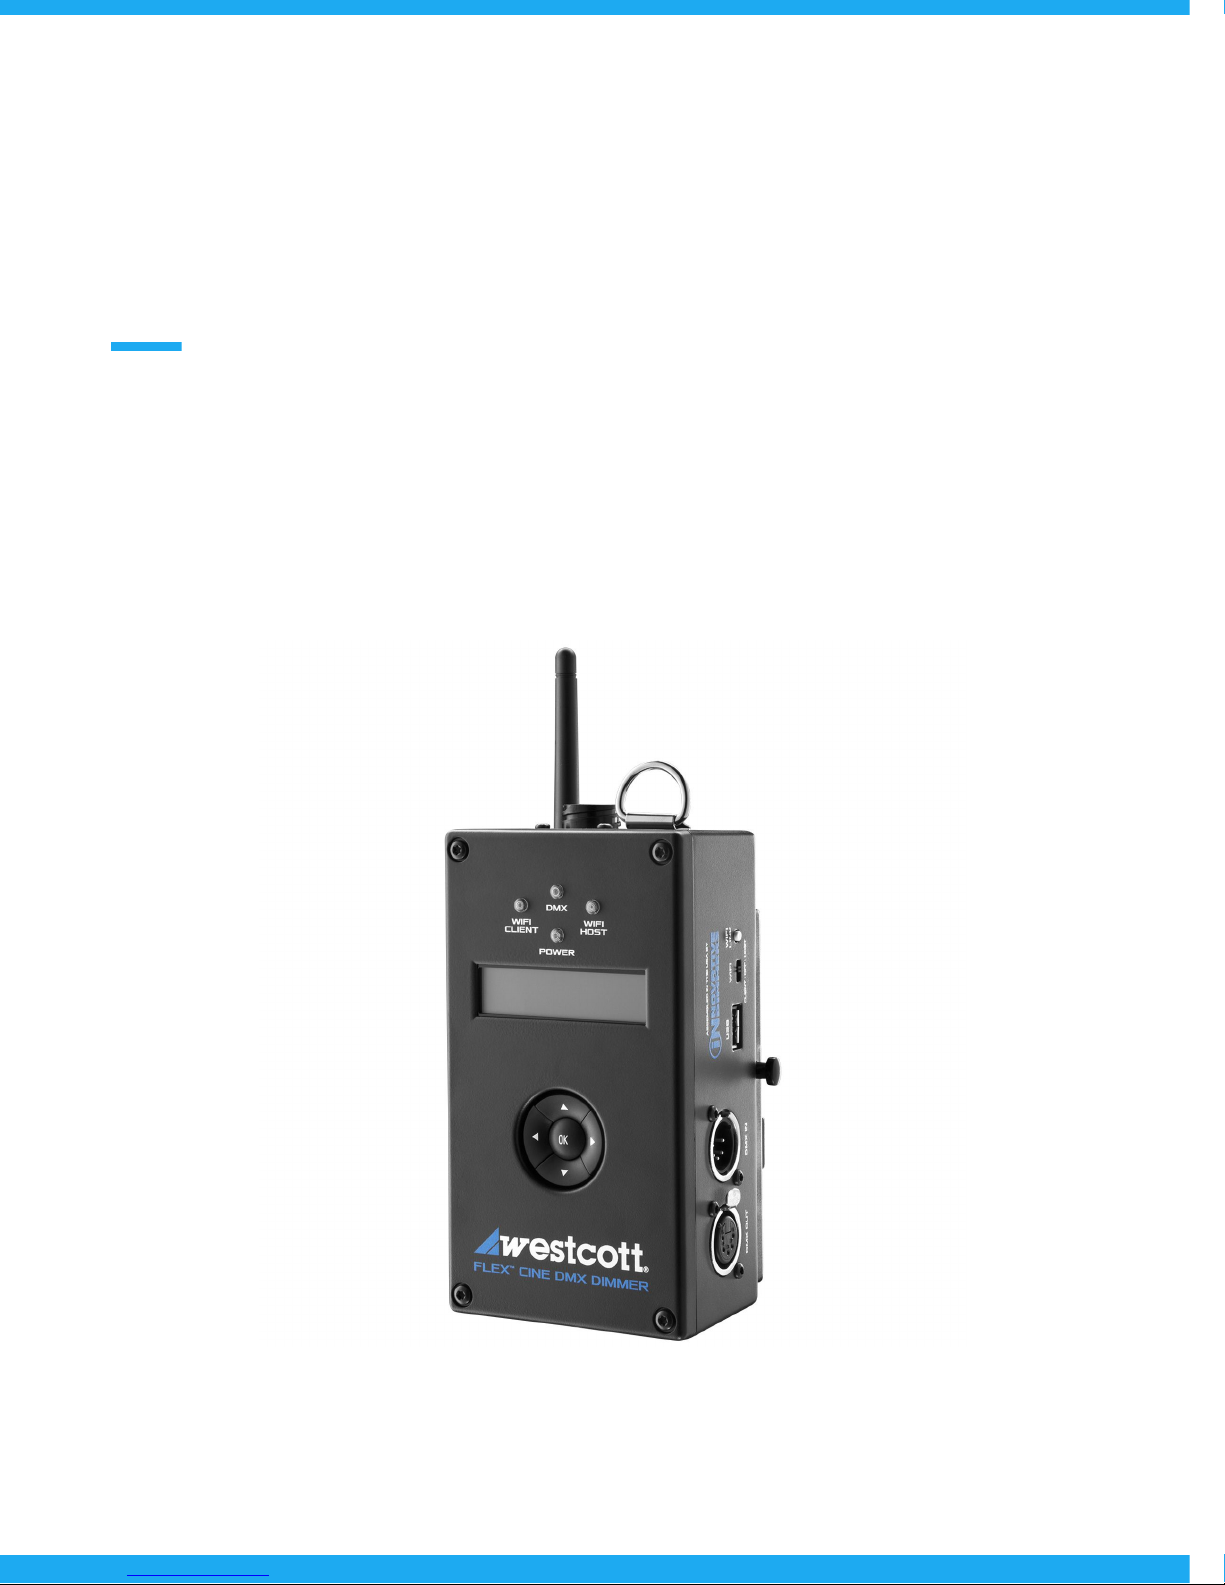
Thank you for purchasing a Westcott Flex Cine Wireless DMX Dimmer. The dimmer is able to
operate all Flex Cine LED mats, including RGBW, bi-color, and daylight sizes 1' x 1' up to 2' x 2'. It’s
also backwards compatible with most original Flex mats with an optional TE-9 pin adapter.
Features
Choose Between Wireless or Wired DMX
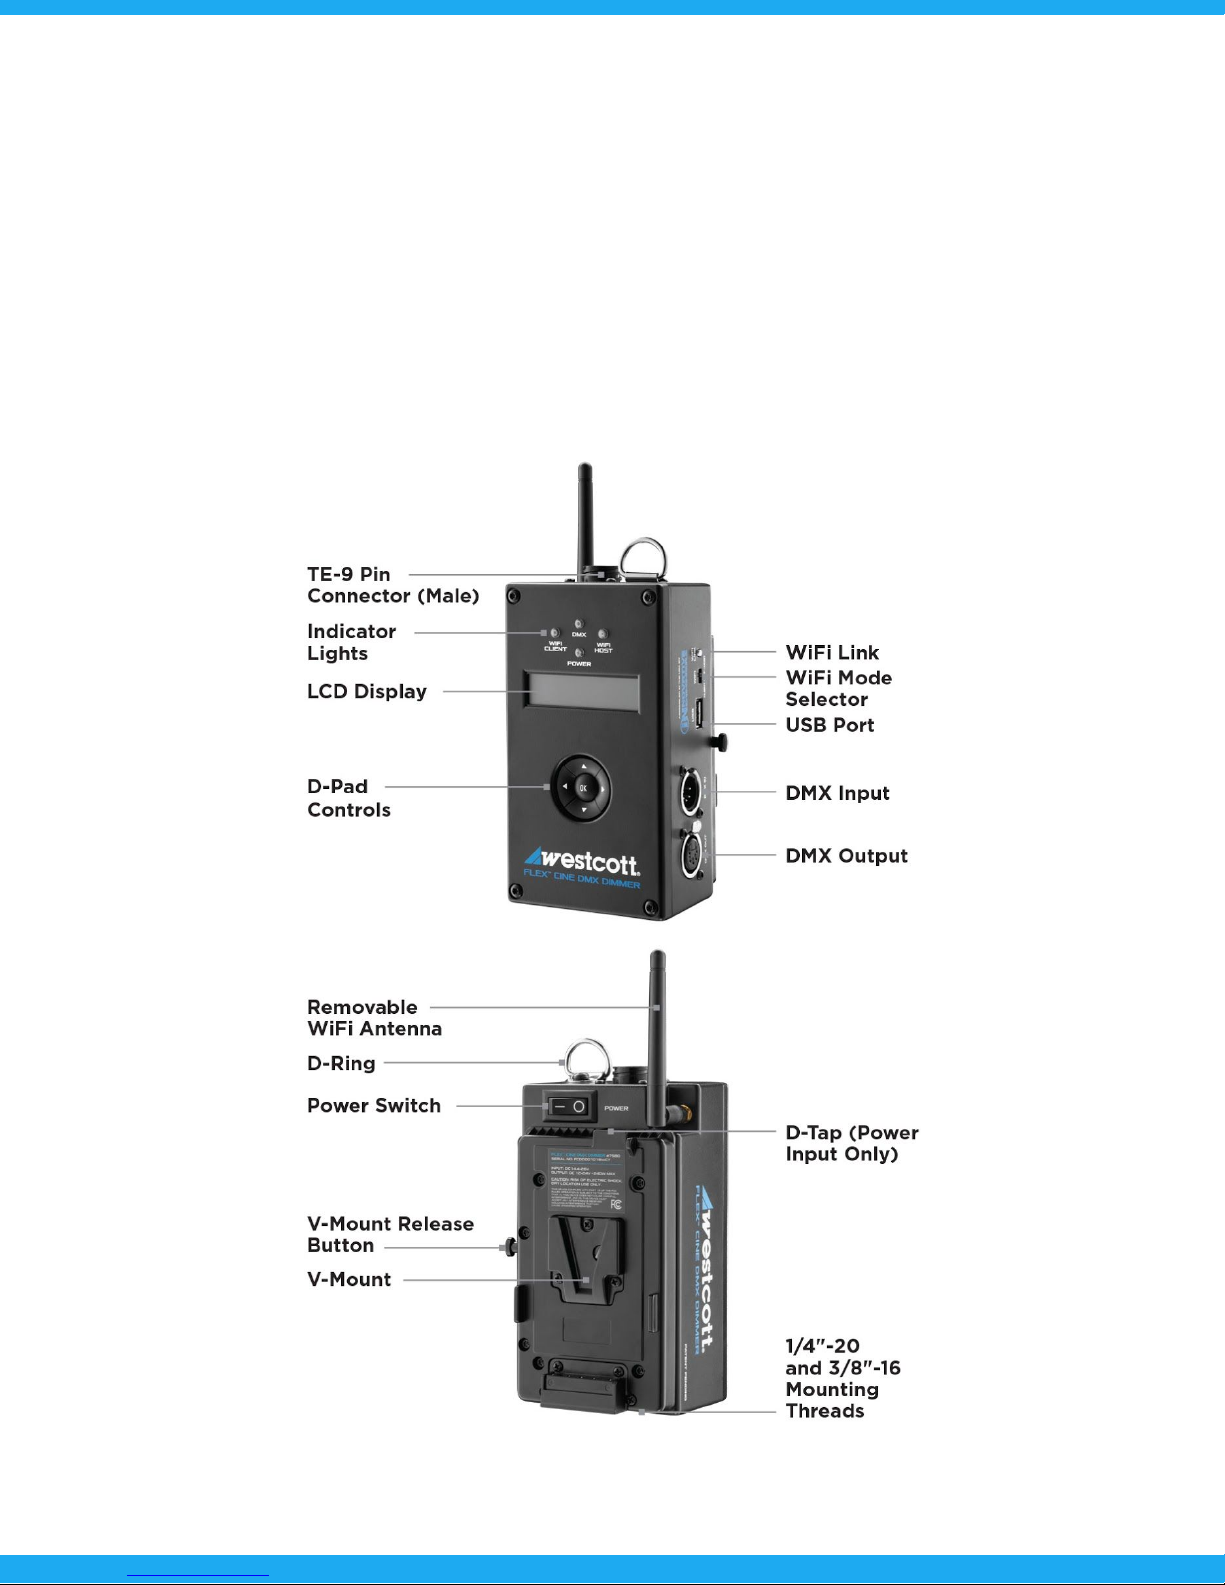
The dimmer is designed with DMX512 Input/Output 5-Pin Male/Female XLR and WiFi capability
for controlling one or multiple dimmers via WiFi Host/Client Mode. When operating DMX over
Art-Net, the dimmer is compatible with mobile apps including Luminair that offer advanced
lighting effects and controls.
Dimmer Control Modes and Presets
When utilizing the dimmer's on-board controls, users have access to a dynamic range of tools
that control color and intensity, including 120+ pre-loaded color gel presets with daylight or
tungsten backing, source-matching presets, user-defined presets, CCT controls, and more.
V-Mount AC and DC Power Options
The Flex Cine Wireless DMX Dimmer is designed with a built-in V-mount to accept AC or DC
power. Pair with either the AC Adapter or 26V Lithium-Ion Battery to operate Flex LEDs easier
than ever before. User's can also power a 1' x 1' Bi-Color or Daylight LED mat via any compatible
14.4-14.8V V-mount battery.
Cutting-Edge Technology
This dimmer is equipped with Hybrid Pulse Width Modulation that allows Flex LED mats to be
dimmed down to 1% while maintaining a flicker-free output up to 960 frames per second. Mat
Sensing Technology detects which Flex LED mat is connected, specifies the required voltage,
and customizes the available dimmer controls. A built-in USB port allows for future firmware
updates.
Durable Lightweight Enclosure
This dimmer is constructed with a heavy-duty, lightweight aluminum enclosure for secure use and
travel. It can be mounted via the built-in ⅜"-16 and ¼"-20 threads or hung from a stand with the
removable d-ring lanyard. The dimmer also includes a user-replaceable WiFi antenna.
4

Included Components
●Flex Cine DMX Dimmer
●Flex Cine DMX Dimmer Case
●Flex Cine DMX Dimmer Lanyard
Overview
5

Warnings
●Use only with the Westcott Flex Cine AC Adapter and compatible batteries
●Keep away from fire and water
●Do not submerge in water
●Do not attempt to open or modify
●Do not short AC Adapter terminals
●Do not alter or change V-Mount plate or pins
●Do not overtighten connections
●Do not overtighten mounting threads
6

Updating Firmware
The Flex Cine Wireless DMX Dimmer is designed with a USB port (5V 1A) to allow for firmware updates.
Future updates may result in modified menu options and layouts.
1. Visit https://www.fjwestcott.com/7580 and scroll to the Support section. Find and download the
latest firmware ZIP file.
2. Unzip the file. Open the extracted folder.
3. Read the Changelog file.
4. Save the .BIN file to the root directory of a USB flash drive that’s been formatted using MS-DOS
(FAT). This does not have to be the only file on the flash drive, but it cannot be in a folder.
5. Move the dimmer’s power switch to the OFF position.
6. Plug the flash drive into the USB port located on the side of the dimmer.
7. Turn the power switch to the ON position.
8. After Westcott logo and version information appears, the unit will display “Updating” and a status
bar will appear.
9. When status bar completes, the new firmware version number will be displayed on the screen
and the dimmer will return to the main Menu.
Important Firmware Notes
●It’s recommended that the firmware update installation process be completed only when the
dimmer is attached to the Flex Cine Wireless DMX Dimmer AC Adapter or a fully-charged battery.
Loss of power during this process could render the dimmer inoperable and require professional
repair.
●The USB flash drive MUST be formatted for MS-DOS (FAT) file system. The dimmer will not
recognize the .BIN file on a USB drive formatted in Mac OS Extended or other file systems. See
your computer’s operating system external device formatting instructions for more details.
●Remove the USB flash drive before the next power cycle or unit will reload the firmware.
7

Powering the Wireless DMX Dimmer
●Flex Cine Mats require a Flex Cine Dimmer and power source for operation.
●Flex Cine RGBW Mats require a Flex Cine Wireless DMX Dimmer.
DMX Dimmer AC Adapter or 26V V-Mount Battery
All Flex Mats
14.4 or 14.8V V-Mount Battery
1' x 1' Daylight and 1' x 1' Bi-Color Mats
Connecting V-Mount Power Source
1. Ensure the dimmer is turned off.
2. Slide the power source toward the bottom of the dimmer until it clicks into the locked position.
Disconnecting V-Mount Power Source
1. Ensure the dimmer is turned off.
2. Push the V-Mount release button inwards and slide the power source towards the top of the dimmer
until it releases.
8

Connecting Flex Mats
Connecting a Flex Cine LED Mat
1. Ensure the dimmer is turned OFF.
2. Plug the Flex Cine mat’s TE-9 Pin connector into the TE-9 Pin receiver located on the top of the
Flex Cine Dimmer. Proper connection may require the connector to be turned until the pins align
and it easily inserts into the dimmer’s receiver.
3. Once connected, rotate the coupling ring ¾ clockwise on the cable connector to secure.
4. Connect the dimmer to a compatible power source. See the Power
section in this guide for compatibility and connecting details.
Connecting a Flex LED Legacy Mat
Original Flex mat owners can operate their original Flex LED mats with the Cine Wireless DMX Dimmer
when paired with a Legacy Adapter (sold separately). IMPORTANT: Legacy Adapters are mat specific. Do
not attempt to use the same legacy adapter for various Flex mat styles.
1. Ensure the dimmer is turned OFF.
2. Connect the adapters TE-9 Pin connector into the TE-9 Pin receiver on the dimmer, rotate the
coupling ring ¾ clockwise on the cable connector to secure.
3. Connect the Flex mat connector to the adapter.
4. Rotate the connector’s coupling ring clockwise to secure the connection.
5. Connect the dimmer to a compatible power source. See the Power section in this guide for
compatibility and connecting details.
Disconnecting a Flex Cine LED Mat
1. Ensure the dimmer is turned OFF.
2. Grasp the coupling ring and rotate counterclockwise ¾ turn.
3. Gently pull the cable connector straight out and away from the dimmer.
Disconnecting a Flex LED Legacy Mat
1. Ensure the dimmer is turned OFF.
2. Rotate the adapter’s coupling ring counterclockwise ¾ turn.
3. Gently pull the adapter straight out and away from the dimmer.
4. Disconnect the mat from the adapter.
Note: Never force entry or removal of the connectors.
9

Basic Operation, Switches & Controls
1. Once the preferred power supply is connected, locate the ON|OFF Power Switch located on the
rear top right of the dimmer. Turn the switch to the ON position.
2. The DMX Dimmer screen will display the Westcott logo and current firmware version before
displaying the dimmer user interface (UI) for controlling the attached Flex mat.
3. Once the main menu is visible on the screen, use the ▲ (Up) and ▼ (Down) buttons on the d-pad
to scroll through all menu options (additional menu options might be located off-screen). Menu
options may vary depending on the type of connected Flex mat and firmware version. Note: The
dimmer will restart to the screen last used
4. Once the desired menu option has the “>” symbol located next to it on the dimmer screen, press
the center OK button on the d-pad to confirm the menu selection, which will move to the next
screen.
5. Repeat Step 4 until the desired control screen is displayed.
6. At any time, return to previous dimmer control screen by holding
the OK button on the d-pad for 2 seconds.
On/Off Switch
Use this switch to power the dimmer on and off. When using the Flex Cine Wireless DMX Dimmer AC
Adapter, switching the dimmer to the OFF position will not turn off the AC adapter.
D-Pad Controls: Menu Screen
●The ▲ (Up) and ▼ (Down) buttons move the “>” symbol to the desired menu selection.
●The ► (Right) and ◄ (Left) buttons currently do not change the menu screen selections.
●The center OK button has 2 functions. Quick pressing the OK button confirms the selection.
Holding the OK button for 2 seconds goes to the previous screen.
D-Pad Controls: Mat Control Screen
●The ▲ (Up) and ▼ (Down) buttons move the “>” symbol to the attribute to change.
●The ► (Right) and ◄ (Left) buttons can be used to adjust the color temperature and/or intensity
(where applicable).
●The center OK button has 2 functions. Quick pressing the OK button confirms the selection.
Holding the OK button for 2 seconds goes to the previous screen.
10

●Press and hold the ▲ (Up) arrow for 3 seconds, or until the screen reads Preset (Saved), to save
the output settings.
Main Menu Screen
Selectable Menu Options
●DMX(001)(Local)
●Mode
●Config
●Stored Preset
Main Menu Options Details
●DMX(001)(Local)
○Manual DMX Channel Selection [See DMX Operation: Addressing and Operation
for
Setup & Operation Detail]
○Range: 001-512
○Factory Default: DMX(001)(Local)
●Mode
○Mat Control Modes [See Mode Menu Screen | Mat Selection
for Operation Detail]
○Factory Default:
■Source Matching
■Gels
■RGWB+I (5Ch)
■Bi-Color (2Ch)
■Daylight (1Ch)
●Config
○Wireless(Off) [See WiFi Host/Client Operation for Operation Detail]
○Screen Brightness
■1-15 (Brightest)
■Press ▲ (Up) and ▼ (Down) to adjust brightness
■Factory Default: 15
○DMX Display
■DMX Display(d): 0-255
■DMX Display(%): 0-100
■Factory Default: DMX Display(d)
○Clear/Set Defaults
■Press OK to clear settings and return to factory default settings
●Stored Preset
○Location of saved user defined presets
○Factory Default: No Presets
11

Note: Menu items, order and functionality may change with future firmware updates.
Mode Menu Screen | Mat Selection
Abbreviation Key
CCT - Correlated Color Temperature
I - Intensity
Ch - Channel
K - Kelvin
B - Blue
R - Red
D - Daylight
T - Tungsten
G - Green
W - White
Selectable Menu Options
●Source Matching
●Gels
●RGWB+I (5Ch)
●Bi-Color (2Ch)
●Daylight (1Ch)
Mode Menu Options Details
●Source Matching
○Display
■Non-selectable information located on the screen:
●Mode Selection: Source Matching
●Color Temperature
●Remaining Battery Status (estimated
)
■Adjustable Tuning Indicator for Intensity
●INT: 0-255
○Menu & Mat Controls
■▲ (Up) and ▼ (Down) Arrows scroll thru Source Matching colors
■▶ (Right) and ◀ (Left) Arrows control intensity (0-255)
■Press and hold the ▼ (Down) arrow for 3 seconds to adjust the preset settings.
12

■Press and hold the ▲ (Up) arrow for 3 seconds to save the desired settings as a
custom preset.
●Gels
○Lee Technicals
■Display
●Non-selectable information located on the screen:
○Mode Selection: Lee Technicals
○Gel Code#
○Gel Name
○Remaining Battery Status (estimated
)
●Adjustable Tuning Indicator for Intensity
○INT: 0-255
■Menu & Mat Controls
●▲ (Up) and ▼ (Down) Arrows scroll thru Lee Technicals
●▶ (Right) and ◀ (Left) Arrows control intensity (0-255)
●Press and hold the ▼ (Down) arrow for 3 seconds to enter the RGBW
screen to adjust the gel settings.
●Press and hold the ▲ (Up) arrow for 3 seconds to save the desired settings
as a Stored Preset.
○Lee Colors
■Display
●Non-selectable information located on the screen:
○Mode Selection: Lee Colors
○Gel Code#
○Gel Name
○Remaining Battery Status (estimated
)
●Adjustable Tuning Indicator for Intensity
○INT: 0-255
■Menu & Mat Controls
●▲ (Up) and ▼ (Down) Arrows scroll thru Lee Colors
●▶ (Right) and ◀ (Left) Arrows control intensity (0-255)
●Press and hold the ▼ (Down) arrow for 3 seconds to adjust the gel settings.
●Press and hold the ▲ (Up) arrow for 3 seconds to save the desired settings
as a custom preset.
●RGWB+I (5Ch)
○Display
■Non-selectable information located on the screen:
●Mode Selection: RGWB+I
●Dimmer DMX Channel
●Flex Mat Size
●Flex Mat Type
13

●Remaining Battery Status (estimated
)
■Adjustable Tuning Indicators for Color & Intensity
●R: 0-255
●G: 0-255
●B: 0-255
●W: 0-255
●I: 0-255
○Menu & Mat Controls
■▲ (Up) and ▼ (Down) Arrows to select R, G, B, W, and I.
■▶ (Right) and ◀ (Left) Arrows control color mixing and intensity
■Press and hold the ▲ (Up) arrow for 3 seconds to save the desired settings as a
custom preset.
●Bi-Color (2Ch)
○Display
■Non-selectable information located on the screen:
●Mode Selection: Bi-Color (I+CCT)
●Dimmer DMX Channel
●Flex Mat Size
●Flex Mat Type
●Remaining Battery Status (estimated
)
■Adjustable Tuning Indicators for Color & Intensity
●I: 0-255
●K: 0-255
■Visual CCT Output Indicator: 2800°-6000°
○Menu & Mat Controls
■▲ (Up) and ▼ (Down) Arrows to select I or K.
■▶ (Right) and ◀ (Left) Arrows control intensity (0-255) and kelvin (0-255)
■Press and hold the ▲ (Up) arrow for 3 seconds to save the desired settings as a
custom preset.
●Daylight (1Ch)
○Display
■Non-selectable information located on the screen:
●Mode Selection: Daylight
●Dimmer DMX Channel
●Flex Mat Size
●Flex Mat Type
●Remaining Battery Status (estimated
)
■Adjustable Tuning Indicators for Intensity
●I: 0-255
○Menu & Mat Controls
■▶ (Right) and ◀ (Left) Arrows control intensity (0-255)
14

■Note: Daylight Mode does not allow users to save defined presets
Note: Menu items, order and functionality may change with future firmware updates.
Source Matching, Gels & User Saved Presets
The Westcott Flex Cine Wireless DMX Dimmer arrives pre-loaded with over 100 predefined gels and
presets that are available when a Flex Cine RGBW mat is connected to the DMX Dimmer. Accessing,
tuning, adjusting and saving these presets is simple and easy.
Source Matching Presets
The Wireless DMX Dimmer has been preloaded with 10 source matching presets* for use when a
compatible Flex Cine RGBW mat is attached. This mode is used to match environmental or non-Westcott
light sources to a designated Kelvin Temperature. These are based upon the most common types of
light sources utilized in architecture, industry and photo/film. These sources are as follows:
Accessing & Adjusting
1. From the main menu select the Mode menu option by pressing the center OK button.
2. Once in the Mode menu, press the ▲ (Up) and ▼ (Down) arrows to locate the Source Matching
option and press OK.
3. Press the ▲ (Up) and ▼ (Down) Arrows to locate the desired preset.
4. Once the desired preset is displayed on the screen use the ▶ (Right) and ◀ (Left) Arrows to control
the intensity.
5. To adjust the preset, press and hold the ▼ (Down) arrow for 3 seconds to adjust the preset
settings.
6. Once the preset is fine-tuned, press and hold the ▲ (Up) arrow for 3 seconds, or until the screen
reads Preset (Saved)
, to save the desired settings as a custom preset.
7. Return to previous menu screens by holding down the OK button.
*Note: The Source Matching
menu option is ONLY selectable when a compatible Flex Cine RGBW mat is
connected to the DMX Dimmer. If a Flex Cine RGBW mat is attached and the option is not selectable,
press the dimmer POWER SWITCH to the OFF position. Power the dimmer back on by pressing the
POWER SWITCH to the ON position.
Source Matching Presets Explained
●2800K – Common household fixtures utilize tungsten bulbs operate at 2800K. Household
fixtures include lamps, floodlights, accent lights, outdoor lights and holiday lights.
15

●3200K – Common color temperature used for photo and film light sources.
●4700K – Very close to a warm fluorescent fixture and used when the green spectrum is not
available in other fixtures besides the RGBW.
●5600K – Commonly referred to as “daylight balanced” in the Kelvin Temperature scale.
●6200K – Various HDMI and other light sources produce this color temperature which is slightly
cooler white than the standard 5600K fixture.
●Cool White Fluorescent – Most common in office buildings and household lighting.
Manufacturer’s exact colors may vary, so this is an average that has become an industry
standard.
●Metal Halide – Commonly used in showrooms, factories and large arenas as a lower cost to
tungsten.
●Mercury Vapor - Commonly used for similar applications to Metal Halide, but Mercury Vapor is
also found in street lamps and factories.
●Sodium Vapor – A very orange/red light commonly used in factories, warehouses and
streetlights.
Note: Menu items, order and functionality may change with future firmware updates.
Gel Presets
The Wireless DMX Dimmer has been preloaded with over 100 presets* for use when a compatible Flex
Cine RGBW mat is attached.
Accessing & Adjusting
1. From the main menu select the Mode menu option by pressing the center OK button.
2. Once in the Mode menu, press the ▲ (Up) and ▼ (Down) arrows to locate the Gels
option and
press OK and the next menu screen will display two selectable options; Lee Technicals and Lee
Colors.
3. Once the desired preset option, Lee Technicals or Lee Colors, has been selected you will be able
to scroll through color gel presets by using the ▲ (Up) and ▼ (Down) Arrows.
4. Use the ▶ (Right) and ◀ (Left) Arrows to control the intensity.
5. Press and hold the ▼ (Down) arrow for 3 seconds to adjust the current gel settings.
6. Press and hold the ▲ (Up) arrow for 3 seconds to save the desired settings as a custom preset.
7. Return to previous menu screens by holding down the OK button.
*Note: The Gels
menu option is ONLY selectable when a compatible Flex Cine RGBW mat is connected
to the DMX Dimmer. If a Flex Cine RGBW mat is attached and the option is not selectable, press the
dimmer POWER SWITCH to the OFF position. Power the dimmer back on by pressing the POWER
16

SWITCH to the ON position.
Note: Menu items, order and functionality may change with future firmware updates.
User Defined Stored Presets
The Wireless DMX Dimmer allows users to save fine-tuned settings as Stored Presets
for future use.
Accessing & Adjusting
1. From the Main Menu select Stored Preset option by pressing the center OK button.
2. Locate the desired preset by pressing the ▲ (Up) and ▼ (Down) Arrows.
3. Control the intensity of the preset by pressing the ▶ (Right) and ◀ (Left) Arrows.
4. Rename the preset by (15 char. limit):
a. Hold down the ▼ (Down) Arrow to enter the renaming screen.
b. Press the ▲ (Up) and ▼ (Down) Arrows to select the desired character.
c. Press the ▶ (Right) and ◀ (Left) Arrows to the desired position in the name.
d. To save the name, quick press the OK button to save the defined name
e. To cancel the renaming process, press and hold the OK button to return to the preset
screen.
5. To delete a user defined preset, scroll to the preset that you would like to delete, press and hold
the ▲ (Up) Arrow and the preset will be deleted from the list.
Note: The Stored Preset
option is ONLY selectable when a compatible Flex Cine RGBW or Bi-Color mat
is connected to the DMX Dimmer. If a Flex Cine RGBW or Bi-Color mat is attached and the option is not
selectable, press the dimmer POWER SWITCH to the OFF position. Power the dimmer back on by
pressing the POWER SWITCH to the ON position.
Note: Menu items, order and functionality may change with future firmware updates.
17

DMX Operation: Addressing and Operation
Flex Mat Channel Requirements
●Daylight Mode – 1 channel
●Gel Mode – 1 channel
●Source Matching – 1 channel
●Bi-Color Mode – 2 channels
●RGBW+I Mode – 5 channels
Important DMX Addressing Information
●If more than one Flex Mat is set to the same DMX address, all Flex Mats addressed will function in
unison from the same signal. Individual light control is not possible.
●Individual Flex mat control can be achieved by assigning each mat to the appropriate number of
address values before adding the next mat.
●Hardline DMX controls will always take precedence over any other dimming control.
DMX (Hardwired) Connection
1. Locate the ON|OFF Power Switch located on the rear of the Cine DMX Dimmer. Turn the switch
to the ON position.
2. From the Main Menu, select DMX(001)(Local).
3. Set Correct DMX Channel from 001-512 (DMX Address default is 001)
4. ▲ (Up) and ▼ (Down) Arrows Change the Numbers (0-5, 0-9, 0-9)
5. ▶ (Right) and ◀ (Left) Arrows Control the Position
6. Connect the DMX512 5-pin cable into the DMX IN connector located on the side of the Cine DMX
Dimmer.
7. Utilize a DMX Control Board (sold separately) to control the Cine DMX Dimmer.
DMX over ArtNET Connection
1. Ensure that the WiFi Antenna, which can be located on the back of the dimmer, has been raised
to the ready position.
2. Once the preferred power supply is connected, locate the ON|OFF Power Switch located on the
rear top right of the DMX Dimmer. Turn the switch to the ON position.
18

3. The DMX Dimmer screen will display the Westcott logo and current firmware version before
displaying the dimmer user interface (UI) for controlling the attached Flex mat.
4. From the Main Menu, select DMX(001)(Local).
5. Set Correct DMX Channel from 001-512 (DMX Address default is 001)
6. ▲ (Up) and ▼ (Down) Arrows Change the Numbers (0-5, 0-9, 0-9)
7. ▶ (Right) and ◀ (Left) Arrows Control the Position
8. Locate the WiFi Selector on side of DMX Dimmer.
9. Slide the WiFi Selector into HOST mode
10. PRESS and HOLD the white WIFI LINK button on the side of the dimmer for 3 seconds and
release
11. The WiFi HOST indicator LED on the front of the DMX Dimmer will illuminate [green]
12. Power cycle the dimmer by turning the unit OFF and ON.
13. Locate the WiFi settings on your mobile device.
14. Look for the name of your Wireless DMX Dimmer in the list of available networks, select the
dimmer’s WiFi network and input the password.
○NOTE: A new dimmer will be named “Westcott Dimmer” and the password is “flexpanel.”
○NOTE: The dimmer name could take up to 1 minute to be visible in the Network Settings.
Should the dimmer not appear, press the white WiFi LINK button for an additional 3
seconds.
15. Once connected, open the DMX over ArtNet control application (i.e. Luminair for iOS) on your
mobile device.
○Note: Instructions on how the setup and control DMX Fixtures via mobile apps (i.e.
Luminair) can be located on the developer’s website.
16. Once the dimmer has been setup in the app, the DMX indicator light on the dimmer will illuminate
(green) once the app has established a connection to the dimmer and receiving data.
Note: The Cine Wireless DMX Dimmer could take up to 1 minute to be visible in the list of selectable WiFi
Networks.
Note: WiFi & DMX over ArtNet for the Flex Cine Dimmer have been tested on various iOS and Android
devices. Older devices and operating systems may have connectivity issues.
19

Example DMX Addressing Scenario:
When connecting two RGBW Flex Cine mats, one Daylight mat and one Bi-Color mat, the following
addresses would be entered into the controller, which would be controlling each Flex mat’s DMX
Dimmer set to the corresponding DMX channel. (Please note that the starting channel, nor order, matter.
For this example, we will start the first mat on DMX channel 001.
)
●RGBW (Mat #1) – DMX:001
○Channel 1: Red
○Channel 2: Green
○Channel 3: Blue
○Channel 4: White
○Channel 5: Intensity
●RGBW (Mat #2) – DMX:006
○Channel 6: Red
○Channel 7: Green
○Channel 8: Blue
○Channel 9: White
○Channel 10: Intensity
●Daylight (Mat #3) – DMX:011
○Channel 11: Intensity
●Bi-Color (Mat #4) – DMX:012
○Channel 12: CCT
○Channel 13: Intensity
20
Table of contents
Popular Dimmer manuals by other brands

Zennio
Zennio inBOX DIM Technical documentation

Lutron Electronics
Lutron Electronics QOTO Q-600P quick start guide

Byron
Byron Home Easy HE-107 installation instructions

Leviton
Leviton 600 Series Features

Hoftronic
Hoftronic 4406554 user manual

CREE LIGHTING
CREE LIGHTING CONNECTED MAX CMACC-SWD-12-WH installation instructions