manuals.online logo
Brands
  1. Home
  2. •
  3. Brands
  4. •
  5. Westin Automotive Products
  6. •
  7. Automobile Accessories
  8. •
  9. Westin Automotive Products 25-0940 User manual

Westin Automotive Products 25-0940 User manual

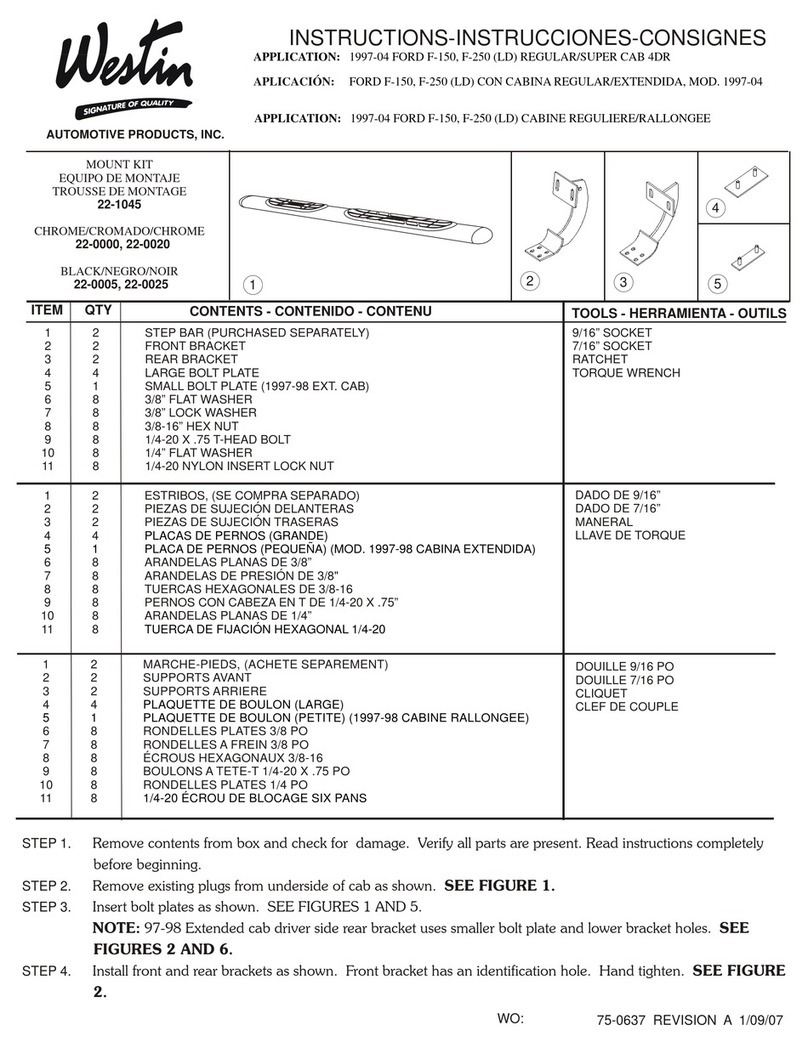
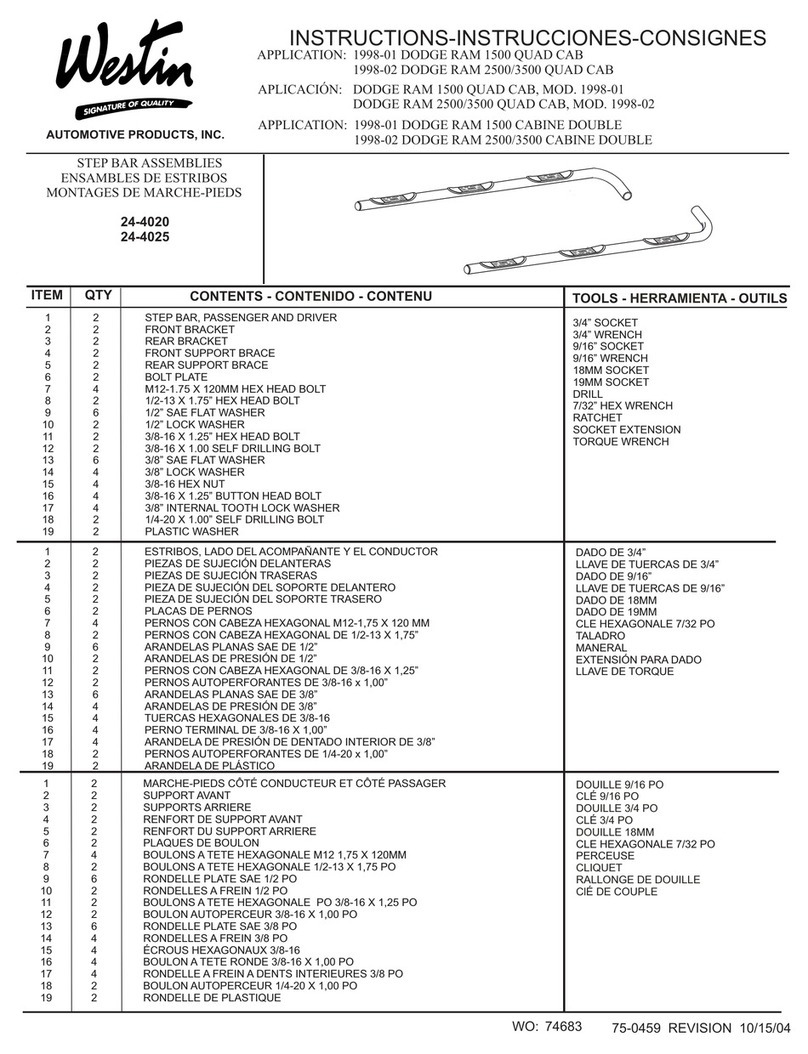
1,2 2 STEP BAR, PASSENGER (1) AND DRIVER (2)
3 2 FRONT BRACKET
4 2 REAR BRACKET
5 2 HANGER BRACKET
6 4 1/2-13 X 1.75” HEX HEAD BOLT
7 4 1/2” FLAT WASHER
8 4 1/2” LOCK WASHER
9 4 3/8” BRIDGE NUT
10 4 3/8-16 X 1.25” HEX HEAD BOLT
11 2 3/8-16 X 1.00" SELF THREADING BOLT
12 2 3/8” FLAT WASHER
13 2 3/8” LOCK WASHER
14 2 3/8-16 HEX NUT
QTY CONTENTS - CONTENIDO - CONTENU
TOOLS - HERRAMIENTA
- OUTILS
3/4” WRENCH
9/16” SOCKET
19MM SOCKET
RATCHET
TORQUE WRENCH
APPLICATION: 1997-04 DODGE DAKOTA REGULAR AND CLUB CAB
ITEM
APLICACIÓN: DODGE DAKOTA CON CABINA REGULAR Y CLUB CAB,
MOD. 1997-2004
APPLICATION: DODGE DAKOTA CABINE REGULIERE ET CLUB1997-04
AUTOMOTIVE PRODUCTS, INC.
STEP BAR ASSEMBLIES
ENSAMBLES DE ESTRIBOS
MONTAGES DE MARCHE-PIEDS
INSTRUCTIONS-INSTRUCCIONES-CONSIGNES
75-0183 REVISION E 3/4/08
STEP 1. Remove the contents from box and check for damage. Verify all parts are present. Read instructions
completely before beginning.
STEP 2. Attach brackets to step bars using 1/2” fasteners as shown. Leave loose. SEE FIGURE 1.
STEP 3.Remove body mount bolts from mounts located under cab of vehicle. Attach step bar to body mounts
1,2 2 ESTRIBOS, ACOMPAÑANTE Y CONDUCTOR
3 2 SOPORTE DELANTERAS
4 2 SOPORTE TRASERA
52
6 4 PERNOS CON CABEZA HEXAGONAL DE 1/2-13 X 1,75”
7 4 ARANDELAS PLANAS DE 1/2”
8 4 ARANDELAS DE PRESIÓN DE 1/2”
9 4 TUERCA DE CONEXIÓN DE 3/8”
10 PERNOS CON CABEZA HEXAGONAL DE 3/8-16 X 1,25”
11 2
12 2 ARANDELAS PLANAS DE 3/8”
13 2 ARANDELAS DE PRESIÓN DE 3/8”
14 2
(1) (2)
SOPORTE DEL SUSPENSOR
4
TORNILLO FRESADO ROSCADO DE 3/8-16 X 1,00”
TUERCAS HEXAGONALES DE 3/8-16
PASSAGER (1) ET CONDUCTEUR (2)
6 4 BOULON A TETE HEXAGONALE DE 1/2-13 X 1,75 PO
RONDELLE PLATE 1/2 PO
RONDELLE A FREIN DE 1/2 PO
BOULON A TETE HEXAGONALE DE 3/8-16 X 1,25 PO
11 2
RONDELLE PLATE 3/8 PO
13 2 RONDELLE A FREIN DE 3/8 PO
14 2
1,2 2 MARCHE-PIEDS,
3 2 SUPPORTS AVANT
4 2 SUPPORTS ARRIERE
52
74
84
9 4 ECROU PONT 3/8 PO
10
12 2
CHAISE PENDANTE
4
VIS A TARAUDER 3/8-16 X 1,00 PO
ÉCROUS HEXAGONAUX 3/8-16
LLAVE DE TUERCAS DE 3/4"
DADO DE 3/4”
DADO DE 19MM
MANERAL
LLAVE DE TORQUE
DOUILLE 3/4 PO
CLE 3/4 PO
DOUILLE 22MM
CLIQUET
CLE DE COUPLE
WO:
REG CAB
CABINA REGULAR
CABINE REGULIERE
CLUB CAB
CABINA CLUB
CABINE CLUB
2
1
2
1
345
25-0940
25-0950
25-0945
25-0955
using factory bolts and fasteners as shown. Leave loose. SEE FIGURE 1.
STEP 4. Pre-assemble mount tabs as shown. SEE FIGURE 3. Remove factory rubber plug on underside of body
that aligns with threaded hole in bottom of step bar. Insert mount tab assembly in hole in rocker panel.
SEE FIGURE 2.
STEP 5. Position hanger bracket against rocker with the long end down. Attach hanger bracket to mount tab and
to step bar using 3/8” fasteners as shown. Leave loose. SEE FIGURE 2. Repeat for opposite side.
STEP 6. Make sure step bar and brackets are properly aligned and tighten fasteners. Recommended torque
values are 64 FT.LBS for 1/2” fasteners, 55 FT. LBS. for factory fasteners and 26 FT.LBS. for 3/8” fasteners.
FINISH PROTECTION
Westin products have a high quality finish that must be cared for like any other exposed finish on the vehicle. Protect the finish with a non-abrasive automotive wax,
(e.g. Pure Carnauba) on a regular basis. The use of any soap, polish or wax that contains an abrasive is detrimental, as the compounds scratch the finish and
open it to corrosion.
PROTECCIÓN DEL ACABADO
Los productos Westin tienen un acabado de alta calidad que requiere del mismo cuidado que cualquier otro acabado expuesto del vehículo. Proteja el
acabado con una cera no abrasiva para automóviles (por ejemplo, Pure Carnauba) regularmente. El uso de cualquier jabón, pulidor o cera que contenga un
abrasivo es nocivo, dado que los componentes rayan el acabado y lo exponen a la corrosión.
PROTECTION DE LA FINISSION
Les produits Westin ont une finission de haute qualité qui requiert des soins, comme toute autre finission du véhicule exposée aux éléments. Protégez la finission à
l’aide d’une cire non-abrasive (par exemple, Pure Carnauba) de façon régulière. L’usage de tout savon, pâte à polir ou cire contenant un abrasif est nuisible,
puisque les composantes strient la finission et la laissent vulnérable à la corrosion.
PASO 1. Retire el contenido de la caja y verifique que ninguna pieza se haya dañado. Verifique que no falte
ninguna
pieza. Lea las instrucciones completamente antes de comenzar.
PASO 2. Instale los soportes en los estribos con los sujetadores de 1/2” como se muestra. No apriete.
VEA LA FIGURA 1.
PASO 3. Retire los pernos de la base de montaje ubicados debajo de la cabina del vehículo. Instale el estribo en
la base
de montaje con los pernos provistos de fábrica y los sujetadores como se muestra. No apriete.
VEA LA FIGURA 1.
PASO 4. Ensamble la saliente de la base de montaje previamente, como se muestra. VEA LA FIGURA 3. Retire el
tapón de goma provisto de fábrica de la parte inferior de la carrocería que está alineado con el
agujero roscado
del estribo. Inserte la saliente de la base de montaje en el agujero del panel bajo la puerta.
VEA LA FIGURA 2.
PASO 5. Ubique el soporte de suspensión contra el panel bajo la puerta con el extremo largo hacia abajo. Instale
el
soporte de suspensión en la saliente de la base de montaje y en el estribo con los sujetadores de 3/8”
como se
ETAPE 1. Enlevez le contenu de la boîte et vérifiez pour tout dommage. Vérifiez que toutes les pièces y sont. Lisez
complètement les instructions avant de commencer.
ETAPE 2. Fixez les chaises pendantes aux marche-pieds à l'aide des attaches 1/2 po tel qu'illustré. Ne pas serrer.
VOIR FIGURE 1.
ETAPE 3. Retirez les boulons de fixation de carosserie des montages situés sous la cabine du véhicule. Fixez le
marche-pieds aux fixations de carosserie à l'aide des boulons d'usine et des attaches po tel qu'illustré.
Ne pas serrer. VOIR FIGURE 1.
ETAPE 4. Pré-assemblez les pattes de montage, tel qu'illustré. VOIR FIGURE 3. Retirez le bouchon de caoutchouc
d'usine dans la face inférieure de la carosserie qui s'enligne avec le trou fileté dans la partie inférieure du
marche-pieds. Insérez l'ensemble de patte de montage dans le trou dans le bas de caisse. VOIR
FIGURE 2.
ETAPE 5. Placez le support de suspension contre le bas de caisse avec le bout long vers le bas. Fixez le support
de suspension à la patte de montage et au marche-pieds à l'aide d'attaches 3/8 po tel qu'illustré. Ne
pas serrer. VOIR FIGURE 2. Répétez ces actions pour l'autre côté.
ETAPE 6.
les attaches
Assurez-vous que le marchepied et les supports sont correctement alignés et ensuite serrez les attaches.
Les valeurs de couple recommandées sont de 64 pieds livres les les attaches 1/2 po,
Thank You for choosing Westin products
For additional installation assistance please call
Customer service (800) 793-7846 or (507) 375-3559
Westin Automotive Products, Inc.
5200 N. Irwindale Ave. Suite 220
Irwindale, Ca. 91706
7
7
12
9
11
10
5
2
8
8
13
3
14
2
9
10
4
6
6
EXISTING BOLT
PERNO EXISTENTE
BOULON EXISTANT
EXISTING BOLT
PERNO EXISTENTE
BOULON EXISTANT
FACTORY LOWER BODY MOUNT
BASE DE MONTAJE INFERIOR PROVISTA DE FÁBRICA
MONTAGE DE CAROSSERIE INFERIEURE
FABRIQUE EN USINE
FIGURE 1
FIGURA 1
FIGURE 1
FIGURE 2
FIGURA 2
FIGURE 2
FIGURE 3
FIGURA 3
FIGURE 3
FACTORY HOLE
(REMOVE RUBBER PLUG)
AGUJERO DE FÁBRICA
(RETIRE EL TAPÓN DE GOMA)
TROU D'USINE
(RETIREZ LE BOUCHON
DE CAOUTCHOUC)
FRAME RAIL
SOPORTE DE
LA CARROCERÍA
RAIL DE CADRE
BOTTOM EDGE OF
BODY
BORDE INFERIOR DE
LA CARROCERÍA
BORD INFÉRIEUR DE LA
CAROSSERIE
FLANGE FACES AWAY
FROM BOLT
LA BRIDA MIRA HACIA EL
OTRO LADO DEL PERNO
LA BRIDE FAIT FACE
À L'EXTÉRIEUR DU BOULON
FRAME
CARROCERÍA
CADRE
INSTALLATION VIEW OF DRIVER SIDE SHOWN, PASSENGER SIDE OPPOSITE
VISTA DE LA INSTALACIÓN DEL LADO DEL CONDUCTOR OPUESTO AL LADO DEL ACOMPAÑANTE
ILLUSTRE: COTE CONDUCTEUR, EN FACE: COTE PASSAGER
TORQUE TO 26 FT.LBS
APLIQUE UN TORQUE
DE 26 LIBRAS-PIES
COUPLEZ LES ATTACHES
RESTANTES À
26 PIEDS-LIVRES.

This manual suits for next models

3

Other Westin Automotive Products Automobile Accessories manuals

Westin Automotive Products 23-0500 User manual

Westin Automotive Products

Westin Automotive Products 23-0500 User manual

Westin Automotive Products 28-21140 User manual

Westin Automotive Products

Westin Automotive Products 28-21140 User manual

Westin Automotive Products 22-1045 User manual

Westin Automotive Products

Westin Automotive Products 22-1045 User manual

Westin Automotive Products 24-4020 User manual

Westin Automotive Products

Westin Automotive Products 24-4020 User manual

Westin Automotive Products 21-3540 User manual

Westin Automotive Products

Westin Automotive Products 21-3540 User manual

Popular Automobile Accessories manuals by other brands

CrimeStopper SafetyPlus SV-9153 user manual

CrimeStopper

CrimeStopper SafetyPlus SV-9153 user manual

Shenzhen Scan-DIY CR-PRO user manual

Shenzhen

Shenzhen Scan-DIY CR-PRO user manual

Metra Electronics 107-HY1 installation instructions

Metra Electronics

Metra Electronics 107-HY1 installation instructions

Accele optix 360 RVMDVR360 quick start guide

Accele

Accele optix 360 RVMDVR360 quick start guide

FILTRON K 1313 Installation instruction

FILTRON

FILTRON K 1313 Installation instruction

J. Strong JST506BT installation instructions

J. Strong

J. Strong JST506BT installation instructions

Thule 61 Mounting & installation

Thule

Thule 61 Mounting & installation

Serrature Meroni UFO+ Fitting instructions

Serrature Meroni

Serrature Meroni UFO+ Fitting instructions

Car Keys Express Simple CDPXA-7020 user guide

Car Keys Express

Car Keys Express Simple CDPXA-7020 user guide

Whispbar S45W Fitting instructions

Whispbar

Whispbar S45W Fitting instructions

Blue Ox BX1120 installation instructions

Blue Ox

Blue Ox BX1120 installation instructions

Falcon 1990 Installation Instructions and Specifications

Falcon

Falcon 1990 Installation Instructions and Specifications

RCT Muirhead 3206 product manual

RCT

RCT Muirhead 3206 product manual

Costway GOPLUS AT5963-18 Fitting instructions

Costway

Costway GOPLUS AT5963-18 Fitting instructions

Brodit ProClip 855113 quick guide

Brodit

Brodit ProClip 855113 quick guide

BabySafe Beagle user manual

BabySafe

BabySafe Beagle user manual

Whispbar K820W Fitting instructions

Whispbar

Whispbar K820W Fitting instructions

Fabtech FTS22107 installation instructions

Fabtech

Fabtech FTS22107 installation instructions

manuals.online logo
manuals.online logoBrands
  • About & Mission
  • Contact us
  • Privacy Policy
  • Terms and Conditions

Copyright 2025 Manuals.Online. All Rights Reserved.