manuals.online logo
Brands
  1. Home
  2. •
  3. Brands
  4. •
  5. Westinghouse
  6. •
  7. Vacuum Cleaner
  8. •
  9. Westinghouse WST1600A - Unplugged Bagless Cord-Free... Use and maintenance manual

Westinghouse WST1600A - Unplugged Bagless Cord-Free... Use and maintenance manual

LIMITED WARRANTY
One Year Vacuum Cleaner Warranty: This Westinghouse Vacuum Cleaner is warranted to be free from defects in
materials and workmanship for a period of (1) year from the original purchase date.
Seven Year Filter Warranty: The H PA Filter in your Westinghouse Vacuum Cleaner is warranted not to become so clogged
that it starts to significantly retard air flow for a period of seven (7) years from the original purchase date.
Original Purchaser: This warranty covers only the original consumer purchaser for as long as he or she owns the
Westinghouse Vacuum Cleaner.
Warranty Coverage: This warranty is valid only if the purchaser uses the Vacuum Cleaner in accordance with Salton’s
Operating Instructions. This warranty is void if the Westinghouse Vacuum Cleaner is used for commercial or rental use. This
warranty does not apply (i) to normal wear parts that require replacement under normal use, including but not limited to: battery
packs, rubber parts, hoses, bumpers and attachments; (ii) to ordinary wear and tear and blockages which occur during use; (iii) if the
machine is used to vacuum excessive amounts of plaster dust, sawdust, or fireplace ash; (iv) to Vacuum Cleaners which have been
subject to abuse, misuse, negligence or accident; or (v) to damage or defects which were caused by unauthorized or improper use,
modification, alteration, service or repair.
This warranty is effective only if the Westinghouse Vacuum Cleaner is purchased and operated in the USA, and does not extend to
any units which have been altered or modified
Implied Warranties: ANY IMPLI D WARRANTI S WHICH TH PURCHAS R MAY HAV WITH R SP CT TO TH W STINGHOUS
VACUUM CL AN R AR LIMIT D IN DURATION TO ON (1) Y AR FROM TH ORIGINAL PURCHAS DAT . ANY IMPLI D WARRANTI S
WHICH TH PURCHAS R MAY HAV WITH R SP CT TO TH H PA FILT R AR LIMIT D IN DURATION TO S V N (7) Y ARS FROM
TH ORIGINAL PURCHAS DAT . Some states do not allow limitations on how long an implied warranty lasts, so the above limitation
may not apply to you.
Vacuum Cleaner Warranty Performance: If the Westinghouse Vacuum Cleaner is found to be defective during the
warranty period, Salton will, at its option, either repair or replace the Vacuum Cleaner with a reconditioned comparable model,
without charge, or refund the purchase price. To get warranty service:
1. Call Salton Consumer Service, toll-free at: 1-800-616-8689 to report the problem.
2. You will be given the name of an Authorized Salton Service Center.
3. Take the Vacuum Cleaner and proof-of-purchase to the designated Authorized Salton Service Center for warranty repairs
deemed appropriate by the designated Service Center.
4. If there is no local Authorized Service Center, you may be requested to ship your Vacuum Cleaner (postage prepaid) to a
designated Authorized Salton Service Center for warranty repairs. Care must be exercised when the Vacuum Cleaner is
shipped, as Salton will not be responsible for warranty repairs to products damaged during transit.
HEPA Filter Warranty Service: If the H PA Filter becomes so clogged during the warranty period that is starts to
significantly retard air flow while you still own the Vacuum Cleaner in which it was installed, Salton will send you a replacement
H PA Filter at no cost. To get warranty service, send the defective Filter postage pre-paid to the Repair Center listed below together
with a proof-of-purchase.
Risk During Shipment: We cannot assume responsibility for loss or damage for products shipped for warranty repair. For
your protection, carefully package the product for shipment and insure it with the carrier. Be sure to enclose the following items
with your appliance: any accessories related to your problem, your full return address and daytime phone number, a note describing
the problem you experienced, a copy of your sales receipt or other proof-of-purchase to determine warranty status. C.O.D.
shipments cannot be accepted.
To return the product, ship to: To contact us, please write to, call, or email:
ATTN: Repair Center Consumer Relations Dept.
Salton, Inc. Salton, Inc.
708 South Missouri Street 1801 North Stadium Blvd.
Macon, MO 63552 Columbia, MO 65202
1-800-616-8689
-mail: [email protected]
Limitation of Remedies: No representative or other person is authorized to assume for Salton any other liability in
connection with the sale of our products. There shall be no claims for defects or failure of performance or product failure under any
theory of tort, contract or commercial law including, but not limited to negligence, gross negligence, strict liability, breach of
warranty and breach of contract. Repair, replacement or refund shall be the sole remedy of the purchaser under this warranty, and in
no event shall Salton be liable for any incidental or consequential damages, losses or expenses. Some states do not allow the
exclusion or limitation of incidental or consequential damages, so the above limitation or exclusion may not apply to you.
Legal Rights: This warranty gives you specific legal rights, and you may also have other rights which vary from state to state.
™ and “You Can Be Sure...If It's Westinghouse" are trademarks
of Westinghouse lectric Corporation and used under license by Salton, Inc.
Unplugged™ is a trademark of Salton, Inc.
For more information on Salton products: visit our website: www.eSalton.com
©2003 Salton, Inc. All rights reserved. P/N 61336
Made in China 5/03
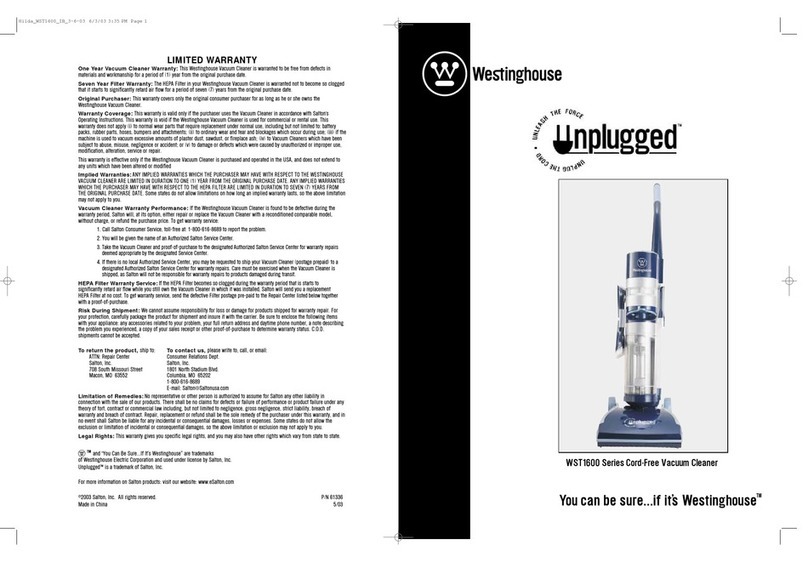
WST1600 Series Cord-Free Vacuum Cleaner
Hilda_WST1600_IB_3-6-03 6/3/03 3:35 PM Page 1
WST1600 Unplugged™
COR -FREE VACUUM CLEANER
ACCESSORY / PARTS LIST
Replacement parts are available, and may be purchased through our Consumer Service
Department by calling 1-800-616-8689, Monday through Friday, 9am - 5pm Central Time,
You can pay for these parts by using either Visa, Mastercard, Discover, or American
xpress. Please be ready to give the part number(s) when you call.
Or log into our website to order at: www.eSalton.com
PART # ESCRIPTION
40111 Crevice Tool
40112 Dusting Brush
40113 Universal Cleaning Tool
40114 Bin Handle/Filter Assembly
40115 Collection Bin
40117 Foam Filter
40109 H PA Filter
C1600 Battery Charger
40120 Battery Charger Cover
40119 Battery Charger Filter Cover
40121 Battery Charger Mesh Pre-Filter
BP1600 Battery Pack
40118 Fuse
IMPORTANT SAFETY INSTRUCTIONS
This electrical appliance must always be used according to the following safety instructions.
Save these instructions as this manual contains important safety and operating information.
When using an electrical appliance, basic precautions should always be followed, including
the following:
REA ALL INSTRUCTIONS CAREFULLY BEFORE USING THIS APPLIANCE
WARNING: To reduce the risk of fire, electric shock or injury:
1. See IMPORTANT SAF TY INSTRUCTIONS FOR TH BATT RY CHARG R on page 2 of this
Owner’s Manual.
2. Do not use the appliance outdoors, or on wet surfaces.
3. Do not use the appliance to pick up water or damp materials such as mud, tile grout, plaster
filler or caulking.
4. Do not use the appliance to pick up flammable or combustible liquids such as gasoline.
Do not use in areas where liquids may be present.
5. Do not use the appliance to pick up burning or smoking materials, such as cigarettes,
matches or hot ashes. Do not pick up dry fireplace ashes.
6. Keep hair, loose clothing, and all parts of the body, especially fingers away from openings
and moving parts.
7. Do not put any objects into appliance openings, Battery Charger openings, Battery Pack
openings, between Battery Pack contacts, or use with any openings blocked or plugged.
8. Do not use this appliance to pick up hard or sharp objects or other large surface litter. Pick
these up by hand before using the appliance.
9. Do not operate without the Collection Bin in place.
10. Use extra care when cleaning stairs. Always vacuum stairs with the appliance below you.
11. Do not let the Vacuum Cleaner, Battery Charger or Battery Packs be used as a toy. Close
attention is necessary when used near children. Do not use the appliance near small children
or infants.
12. Always use the Cleaning Wand/Hose (and attachments) to clean upholstery.
13. Remove the Battery Pack before cleaning or maintenance, such as cleaning the Rotary Brush
or removing a blockage.
14. Use the appliance only for normal household use, as described in this manual. Only use with
manufacturer's recommended attachments and accessories.
15. When cleaning the outside of the appliance, wipe with a damp cloth to reduce the static
electricity on the outer surface.
16. If the appliance is not working, as it should, call 1-800-616-8689 for instructions where to
send for repair. Do not attempt to repair, as it will invalidate your warranty.
17. Do not use Battery Charger outdoors.
SAVE THESE INSTRUCTIONS
FOR HOUSEHOL USE ONLY
1
Hilda_WST1600_IB_3-6-03 6/3/03 3:35 PM Page 3
PLACE
STAMP
HERE
Salton, Inc.
1801 North Stadium Blvd.
Columbia, MO 65202
ATTN: W STINGHOUS VACUUMS
ORD R PROC SSING D PARTM NT
2
THE BATTERY CHARGER (MO EL C1600)
IMPORTANT SAFETY INSTRUCTIONS
Before using the Charger, read all instructions and cautionary markings on the Battery Charger, the Battery Pack
and the Vacuum Cleaner.
ANGER: Do not probe inside the Charger compartment with any conductive material. Danger of electric
shock or electrocution. Do not put any objects into openings. Do not use with any opening
blocked; keep free of dust, lint, hair and anything that may reduce airflow.
WARNING: Do not allow any liquid to get inside the Battery Charger. lectric shock may result.
WARNING: Keep the Battery Charger Cover closed whenever the Battery Pack is not being charged.
CAUTION: To reduce the risk of injury, charge only Westinghouse Rechargeable Battery Packs
(Model BP1600). Other types of batteries may burst, causing personal injury and damage.
1. Do not store or use the Battery Charger in locations where the temperature may reach or exceed
105ºF (40ºC). Sheds and metal buildings can easily reach this temperature during the summer.
2. To facilitate the cooling of the Battery Pack after use, do not place the Battery Charger or Battery Pack in a
warm environment such as in a metal shed, or an uninsulated trailer.
3. Do not expose the Battery Charger to rain or snow. Do not expose Battery Charger to damp or wet conditions.
4. Use of an attachment not recommended or sold by Westinghouse may result in a risk of fire, electric shock,
or injury to persons.
5. This Battery Charger is not intended for any use other than charging Westinghouse Battery Packs (Model
BP1600). Any other use may result in risk of fire, electric shock or electrocution.
6. To reduce risk of damage to the electric plug and cord, pull the plug rather than cord when disconnecting
the Battery Charger.
7. Make sure cord is located so that it will not be stepped on, tripped over, or otherwise subjected to damage
or stress.
8. An extension cord should never be used, as its use could result in risk of fire, electric shock, or
electrocution.
9. The Charger is ventilated through slots in the housing. Do not place any objects so as to block the
ventilation slots and result in excessive internal heat.
10. Place the Charger in a position away from any heat source, including direct sunlight.
11. Do not operate Charger with damaged cord or plug, return it to an Authorized Service Center for inspection
or repair. Do not repair the appliance yourself, as this will invalidate your warranty. Contact Consumer
Service for return authorization, examination, repair or adjustment.
12. Do not operate Charger if it has received a sharp blow, been dropped or otherwise damaged in any way;
return it to an Authorized Service Center for inspection or repair. Do not repair the appliance yourself, as
this will invalidate your warranty. Contact Consumer Service for return authorization, examination, repair
or adjustment.
13. Under no circumstances should you disassemble the Charger as it may result in a fire and shock hazard.
Call our Authorized Service Center for return instructions.
14. The Charger is designed to operate on standard 120V AC household electrical power. Do not attempt to use
it with any other voltage.
15. To reduce risk of electric shock, unplug Battery Charger from outlet before attempting any cleaning.
Removing the Battery Pack will not reduce this risk.
16. N V R attempt to connect 2 Battery Chargers together.
17. Do not immerse Battery Charger in water or any other liquid.
18. Do not attempt to charge wet Battery Packs.
19. Do not handle appliance with wet hands.
20. Do not use Battery Charger outdoors.
SAVE THESE INSTRUCTIONS
Hilda_WST1600_IB_3-6-03 6/3/03 3:35 PM Page 5
WST1600 COR -FREE SERIES
ACCESSORY OR ER FORM
Please contact us tollfree at: 1-800-616-8689 for All Pricing Information.
PART # D SCRIPTION QUANTITY PRIC ACH AMOUNT ($)
40111 Crevice Tool
40112 Dusting Brush
40113 Universal Cleaning Tool
40114 Bin Handle/Filter Assembly
40115 Collection Bin
40117 Foam Filter
40109 H PA Filter
40120 Battery Charger Cover
C1600 Battery Charger
40119 Battery Charger Filter Cover
40121 Battery Charger Mesh Pre-Filter
BP1600 Battery Pack
40118 Fuse
MAILING LABEL: Please Print
Name ____________________________________________________________________________________________
Street: ____________________________________________________________________________________________
City: _______________________________________________ State: ________________________________________
Zip Code ___________________________________________Tel: ( ) _____________________________________
CARDHOLDER ADDRESS (If different from mailing address indicated above): Please Print
Name ____________________________________________________________________________________________
Street: ____________________________________________________________________________________________
City: _______________________________________________ State: ________________________________________
Zip Code ___________________________________________Tel: ( ) _____________________________________
METHO OF PAYMENT:
❏ Check / Money Order
❏ Visa
❏ American xpress
C.I.D.# ❏❏❏❏❏
❏ Master Card
❏ Discover
Credit Card Number:
xpiration Date:
Signature:
Satisfaction guaranteed or full refund price of Accessory within 30 days from date of receipt (less shipping and handling).
Please contact us at: 1-800-616-8689 for RETURN AUTHORIZATION.
Enclose Check or Money Order payable to: Salton, Inc.
*Accessories described are subject to availability. Please allow 2 to 4 weeks for processing and delivery.
™ and “You can be sure...if it's Westinghouse” are trademarks
of Westinghouse lectric Corporation and used under license by Salton, Inc.
Unplugged™ is a trademark of Salton, Inc.
SUBTOTAL
TAX
(if applicable)
TOTAL
To use as a self-
mailer, please fold
order form as shown
on backside, seal
with tape and
add postage.
THE BATTERY PACK (MO EL BP1600)
The batteries in your new Battery Pack are not fully charged! First read the safety instructions,
then follow charging notes and procedures.
IMPORTANT SAFETY INSTRUCTIONS
Before using the Battery Pack, read all instructions and cautionary markings on the Battery
Charger, the Battery Pack and the Vacuum Cleaner.
ANGER: If Battery Pack case is cracked or damaged, do not insert into Battery Charger.
Danger of electric shock or electrocution.
ANGER: Never attempt to open the Battery Pack for any reason. If the plastic housing of
the Battery Pack is cracked or broken, immediately discontinue use. Do not
recharge and return to our Authorized Service Center for recycling.
ANGER: If there is any small leakage from the Battery Pack Cells, ISCONTINUE USE.
IMME IATELY. USE EXTREME CAUTION. US PROT CTIV MITTS to ensure that
you DO NOT get any leakage onto your skin. Use caution that the battery acid
will not get into your eyes. DO NOT R CHARG . Return to the Service Center
for recycling.
WARNING: Do not store or use the Battery Pack in locations where the temperature may
reach or exceed 105ºF (40ºC). Sheds and metal buildings can easily reach this
temperature during the summer.
1. Do not carry extra "charged Battery Packs" in aprons, pockets, or toolboxes along with other
metal objects. Battery Pack could be short-circuited causing damage to the Battery Pack
and possibly causing severe burn or fire.
2. Charge Westinghouse Battery Packs (Model BP1600) with Westinghouse Battery Chargers
(Model C1600) ONLY.
3. Do not incinerate the Battery Pack even if it severely damaged or is completely worn out.
The Battery Pack can explode in a fire.
NOTE: Review and observe all of the "Important Charging Notes" in the CHARGING PROC DUR
section of this Owner’s Manual.
NOTE: The batteries in this Battery Pack are the Nickel-Cadmium type. Cadmium is considered
to be toxic material by the nvironmental Protection Agency. Before disposing of
damaged or worn out Nickel-Cadmium Battery Packs, check with your state nvironmental
Protection Agency to find out about special restrictions on the disposal of these Battery
Packs or return them to the Salton Service Center for recycling.
4. DO NOT probe Battery Pack with conductive objects.
5. DO NOT splash or immerse in water or other liquids.
6. Maintain clean and open Ventilation Slots.
7. Do not put any objects into openings. Do not use with any opening blocked; keep free of
dust, lint, hair and anything that may reduce airflow.
SAVE THESE INSTRUCTIONS
3
WST1600 Cord-Free Series
Hilda_WST1600_IB_3-6-03 6/3/03 3:35 PM Page 7
23 WST1600 Cord-Free Series
My Vacuum Cleaner turned itself OFF!
What should I do?
If the Vacuum Cleaner is left in the upright
position when the Power Button is activated, the
Vacuum Cleaner will place itself in Sleep Mode.
Both the Suction and Brush Motors will turn
OFF and remain on standby for 10 minutes.
When the Vacuum Cleaner is tilted back into the
working position or the above-floor cleaning
wand is activated, power will automatically be
restored. After 10 minutes in the Sleep Mode
with no activity, the Vacuum Cleaner will turn
itself OFF and the 2 flashing green Lights will
turn OFF.
Check to make sure the Telescopic Cleaning
Wand is properly attached. If the Wand is not
properly attached, the Vacuum Cleaner will turn
itself OFF. Push up on the Handle until it snaps
and locks into place in the channel at the back
of the Vacuum Cleaner, under the Wand Release
Button. (See Figure 3b.)
How often will I need to replace the belt?
The Westinghouse WST1600 Vacuum Cleaner
uses a special break-free belt. It rarely breaks or
needs replacing.
How can I order a Hose Extension or other
accessories for my Westinghouse WST1600
Vacuum Cleaner?
Just call our toll free number:
1-800-616-8689 and refer to the
“Accessory/Parts List” in this manual.
What are some of the other accessories
I can order for my Westinghouse WST1600
Vacuum Cleaner?
There is a wide range of replacement
accessories available. Simply refer to the
“Accessory/Parts List” at the back of this manual
for a complete list and ordering instructions.
CALL US AT:
1-800-616-8689
or email us at: [email protected]
How often should I clean the Foam Filter and the
Pleated Filter?
FOR OPTIMUM VACUUMING PERFORMANCE, THE
Foam Filter SHOUL BE WASHE with warm, soapy
water EVERY WEEK.
WASH THE PLEATE FILTER MONTHLY.
A drop in performance signalled by a drop in suction
at the end of the Hose, a drop in cyclonic swirling
in the Collection Bin, or the Vacuum Cleaner’s
inability to pick up debris from the floor are
indicators that these Filters need cleaning.
What should I do if the suction in my Vacuum
Cleaner starts to decrease or shut off altogether?
Check the irt Arrestor. Before doing so, remember
to press the POW R Button to turn the Vacuum
Cleaner OFF. The Dirt Arrestor is located below the
main dirt collection area in the Collection Bin. Look
to see that this area is not full. Tip the Collection
Bin upside down over a trash can. The two hinged
doors of the Dirt Arrestor compartment will swing
open and allow any accumulated particles to empty.
Make sure the Collection is securely locked in place.
If the Collection Bin is not secured, a loss of
suction while vacuuming could result.
Check the status of your Battery. When the battery
is nearly consumed (approximately 2 minutes
remaining) the Power Indicator Light on the Control
Panel will turn amber.
Recondition your Battery Pack. Follow the BATT RY
PACK CHARGING PROC DUR / BATT RY
CONDITIONING CYCL instructions described in
this Owner’s Manual.
What if there is still no suction when I turn on my
Vacuum Cleaner?
Once you have fully examined your Dirt Arrestor,
check the bottom, and the Inner Tube and wipe away
any dirt or lint clinging to the surface. Then open
the Inspection Plate and remove any debris that may
be plugging up the Air Passageway.
Follow the R MOVING A BLOCKAG instructions
described in this Owner’s Manual.
4
The RBRC (Rechargeable Battery Recycling Corporation) Seal on the
nickel-cadmium Battery Pack indicates that the costs to recycle the
Battery Pack at the end of its useful life have already been paid by
Salton, Inc. In some areas, it is illegal to place spent nickel-cadmium
batteries in the trash or municipal solid waste stream and the RBRC
program provides an environmentally conscious alternative. RBRC, in
cooperation with Salton, Inc. and other battery users, has established
programs in the United States to facilitate the collection of spent
nickel-cadmium batteries.
Help protect our environment and conserve natural resources by
returning the spent nickel-cadmium to an Authorized Salton Service
Center. You may also contact your local recycling center for
information on where to drop off the spent Battery Pack.
THE RBRC SEAL
Hilda_WST1600_IB_3-6-03 6/3/03 3:35 PM Page 9
22
Can I charge a Battery Pack even if it is not
entirely used up?
You may charge a partially used Battery Pack
whenever you desire with no adverse effect on
the Battery Pack. If you charge the Battery Pack
for 10 minutes, you should gain 10 minutes of
vacuuming time.
Where is the best place to store my
spare Battery?
Store the fully charged Battery Pack in the
Battery Charger until you are ready to vacuum.
The Charger may be left plugged in.
Can I use the Westinghouse WST1600 Series
Vacuum Cleaner outside?
No. The Westinghouse WST1600 Series Vacuum
Cleaner is designed for indoor use only. Do not
use the Vacuum Cleaner outdoors, or on wet
indoor surfaces. Do not use the Battery Charger
outdoors.
Are there any types of materials that should
NOT be vacuumed up with the Westinghouse
Vacuum Cleaner?
Yes. Do not vacuum up damp materials such as
mud, tile grout, plaster-filler or caulking since
these materials could harden inside the Vacuum
Cleaner and cause damage. Also, do not pick up
large surface litter, fireplace ashes, cellophane,
twine or solid objects such as coins, paper
clips, safety pins, etc. These types of objects
can easily lodge in the Cleaning Head and will
decrease suction and cleaning ability.
The Westinghouse WST1600 Cord-Free Vacuum
Cleaner is easy to use. ven so, you may have some
questions about how it works. Here are answers to
some of the most common questions. If you still
have a a question and can't find the answer here,
please call Consumer Service toll free at:
1-800-616-8689 or e-mail Salton, Inc. at:
[email protected].
What is the Conditioning Cycle?
The Battery Pack Conditioning Cycle will take the
batteries through a series of events to balance the
individual cells and give peak battery capacity and
run time.
When should the Battery Packs be reconditioned?
Battery Packs should be conditioned every 50-
charge/discharge cycles or whenever the fully
charged Battery Pack no longer delivers the proper
run time (approximately 30 minutes when used in
carpet/bare floor mode).
How long does it take to condition a
Battery Pack?
To ensure proper battery performance, please allow
24 hours to condition/charge your Battery Packs.
Once the Conditioning Cycle Button is depressed,
the Cycle may not be interrupted.
How long does it take to “normally” charge a
Battery Pack? After fully charging, how long should
my Battery Pack last?
It takes 30 minutes (without conditioning) to
completely charge a Battery. Fully charged, your
Battery Pack should provide 30 minutes of
vacuuming time when the Vacuum Cleaner is used
in carpet/bare floor mode. Run time is reduced
when the above-floor Cleaning Wand is used.
QUESTIONS AN ANSWERS
5
WST1600 Cord-Free Series
WESTINGHOUSE UNPLUGGE ™ WST1600
COR -FREE VACUUM CLEANER
Product may vary slightly from illustrations
Figure 1a
Additional Rechargeable
Battery Pack
(P/N BP1600)
Vacuum
Handle
Upright
Release Pedal
Control
Panel Battery
Lock/Unlock
Button
HEPA Filter
(not shown)
(P/N 40109)
Battery Charger
Filter Cover
(P/N 40119)
Battery Charger
Mesh Pre-Filter
(not shown)
(P/N 40121)
Battery
Charger
(Model C1600)
Battery
Charger
Cover
(P/N
40120)
Collection Bin
(P/N 40115)
irt Arrestor
usting Brush
(P/N 40112)
Universal
Cleaning Tool
(P/N 40113)
Carry Handle
Crevice Tool
(P/N 40111)
Cleaning Wand
Handle with
Locking Ring
Battery Pack
(P/N BP1600)
Collection Bin
Cover/Handle
(P/N 40114)
Wand
Release
Button
Hilda_WST1600_IB_3-6-03 6/3/03 3:35 PM Page 11
21 WST1600 Cord-Free Series
For Your Safety:
Electronic Brush Break
Your Cord-Free Vacuum Cleaner has a
sophisticated lectronic Brush Break
system that senses when an excessive load
has been applied to the Brush. If the Brush
gets caught in the fringe of a carpet or a
scatter rug, the Brush will turn itself OFF.
The Brush Light will change from green to
red to indicate the stoppage of the Brush.
1. Remove the Battery Pack.
2, Consult the section entitled:
R MOVING A BLOCKAG in this
Owner’s Manual.
For Your Safety:
Automatic Shut-Off
The main suction motor in your Vacuum
Cleaner is thermally protected from
overheating which can occur if there is a
blockage of air. If the main motor shuts
down due to overheating, follow the
instructions in the section entitled
R MOVING A BLOCKAG in this
Owner’s Manual.
Blockage in the Wand/Hose
1. Press the Power Button to turn the Vacuum
Cleaner OFF.
2. Remove the Battery Pack.
3. Detach the Telescopic Wand from the Hose and
look down through the Wand to see if there is a
blockage.
4. If the Wand is free of debris, then remove the
Collection Bin.
5. Once the Collection Bin is removed, you will
have exposed a hole in the Cleaner Base.
6. Look down the hole for any debris. Half way
down the hole you will see an opening coming
from the wand/hose region.
7. If you suspect a blockage there, you will need
to use a metal coat hanger to feed into the hole
and around the bend to the hose area.
8. Once you have cleaned the debris, replace the
Collection Bin and Telescopic Wand.
5. For the first charging of a Battery Pack, insert
the Battery Pack into the Charger and engage
the Conditioning Cycle by depressing the
Conditioning Cycle Button. The Conditioning
Cycle will take approximately 24 hours and will
prepare the Battery Pack for peak performance.
If you have 2 Battery Packs, condition both
of them.
Follow the BATT RY PACK CHARGING
PROC DUR / BATT RY CONDITIONING CYCL
instructions described in this Owner’s Manual.
6. A Battery Pack will slowly lose its charge when
it is not seated in the Battery Charger. Store
1 Battery Pack in the Battery Charger.
The Charger may be left plugged in. The
Battery Rapid Charging Light will glow solid
and the Battery Charger will keep the Battery
Pack fresh and fully charged.
7. Follow the OP RATING INSTRUCTIONS:
INS RTING TH BATT RY PACK INTO TH
VACUUM CL AN R section in this Owner’s
Manual, when you are ready to vacuum.
BEFORE USING FOR THE FIRST TIME
In order to get the most out of your Westinghouse WST1600 Series Cord-Free Vacuum Cleaner, we
suggest you read the easy step-by-step instructions thoroughly before starting to vacuum.
6
1. Attach the Handle to your Vacuum Cleaner
by locking it into the Docking Bay. Follow
the instructions outlined in the section
entitled: ATTACHING TH HANDL in this
Owner’s Manual.
2. Note that the Battery Charger is shipped
with a Battery Pack inserted in it. Remove
the Charger and the Charger Cover from all
packing materials. Snap the Charger Cover
onto the Battery Charger.
3. Fuses are shipped separately and must be
inserted in the Battery Packs before they are
used. The Fuse for each Battery Pack is
packed in a plastic bag and taped to the
Pack. Locate the new Fuse.
4, The Fuse Opening is located in the upper
section of the Battery Pack, near the Vent
Air Slots. Firmly press the Fuse into
position. (See Figure 1b.)
Figure 1b
Fuse Opening
Battery Charger Cover
Lights and
Conditioning
Cycle Button
Battery Charger
Filter Cover
(P/N 40119)
Mesh Pre-Filter
attaches to
back of Cover
(not shown)
Hilda_WST1600_IB_3-6-03 6/3/03 3:35 PM Page 13
Removing A Blockage
The Westinghouse WST1600 Series Vacuum
Cleaner may incur a loss of suction if there is a
blockage in the machine. In most instances, a
blockage will occur in the Cleaning Head, Rotating
Brush, or the Wand/Hose.
Blockage in the Rotating Brush or
Cleaning Head
1. Press the Power Button to turn the Vacuum
Cleaner OFF.
2. Remove the Battery Pack.
3. Turn the Vacuum Cleaner to rest the Base on
its back. (See Figure 17.)
4. Check the Rotating Brush. Remove any lodged
debris or caught objects.
5. Unscrew the 1 Inspection Plate Phillips
screw. Press the 2 Lock Tabs and pull the
Inspection Plate away from the Vacuum
Cleaner.
6. Pull the Tray out of the Vacuum Cleaner which
will give you total access to the Air
Passageway and lodged fluff or debris.
7. Gently remove all debris using a long, straight
tool such as a screwdriver.
8. Once you have cleaned the Air Passageway,
replace the Tray and then snap the Inspection
Plate back into position. Re-insert the
Phillips screw.
9. Return the Vacuum Cleaner to its normal
upright position.
20
Cleaning the HEPA Filter
The H PA Filter will need cleaning once every
3 months to maintain optimal performance.
1. Press the Power Button to turn the Vacuum
Cleaner OFF.
2. Remove the Battery Pack.
3. Locate the round, notched H PA Filter Cover on the
top of the Vacuum Cleaner.
4. Grip and turn counter-clockwise, pulling the Cover
off the top of the Vacuum Cleaner.
5. Use the center knob in the top of the H PA Filter to
pull the H PA Filter out of the Filter Housing. (See
Figure 16.)
6. Tap Filter gently against trash container to free and
eliminate excess dirt and debris.
IMPORTANT!
O NOT ATTEMPT TO WASH THIS FILTER.
THE MATERIAL IS NOT WASHABLE.
O NOT IMMERSE, SOAK, AMPEN, RUN WATER THROUGH,
NEAR OR CLOSE TO THE HEPA FILTER. ANY WATER OR
MOISTURE WILL CAUSE THE HEPA FILTER TO
ISINTEGRATE. WASHING THE HEPA FILTER WILL VOI
YOUR 7 YEAR HEPA FILTER WARRANTY.
TO AVOI AMAGE, WHEN CLEANING THE FILTER,
O NOT PUT ANY OBJECT INSI E THE FILTER
ME IA PLATES.
We recommend that the HEPA Filter be checked and
cleaned every 3 months to maintain performance. Under
normal circumstances, this Filter will last for 7 years.
7. Return the H PA Filter into its Housing. Match the
grooves in the top of the H PA Filter Cover with the
Filter Housing posts and replace into its position on
the top of the Vacuum Cleaner. Turn clockwise to
lock in place.
Figure 17
Inspection
Plate Screw
Inspection Plate
and
Tray (not shown)
Rotating
Brush
Figure 16
Lock
Tabs
HEPA Filter
(P/N 40109)
HEPA Filter
Housing
HEPA Filter
Cover
This Battery Charger is designed to detect certain
problems that can arise with Battery Packs. An
abnormal condition will be indicated by the light
sequence identified above. If the problem persists, try
a different Battery Pack to determine if the Battery
Charger is working properly. If the alternative Battery
Pack charges correctly, then the original Battery Pack
is defective and should be returned to our Authorized
Service Center for recycling. If, on the other hand, the
alternative Battery Pack indicates the same problem
as the first Battery Pack, please have the Charger
tested by our Authorized Service Center.
Charging Light Sequences
ACTION ESCRIPTION RAPI CHARGING LIGHT CON ITIONING LIGHT
30-Minute Charging underway . . . . . . . . . . . . . . . . . . . . . . . . . . . . . . . . . . . . .Off . . . . . . . . . . . . . . . . . . . . . . .Flashing Green
Conditioning Charging underway . . . . . . . . . . . . . . . . . . . . . . . . . . . . . . . . . . . .Flashing Green . . . . . . . . . . . . .Off
Charging Complete . . . . . . . . . . . . . . . . . . . . . . . . . . . . . . . . . . . . . . . . . . . . . .Off . . . . . . . . . . . . . . . . . . . . . . .Green
Ambient Temp. too hot: >113ºF/45 ºC or cold <50ºF/10 ºC . . . . . . . . . . . . .Alt flash 1 slow . . . . . . . . . . . . .Alt flash 1 slow
Battery Temp. too hot: >112 ºF/44ºC or cold <50ºF/10ºC . . . . . . . . . . . . . .Alt flash 2 slow . . . . . . . . . . . . .Alt flash 2 slow
Low Battery Voltage: below 12V . . . . . . . . . . . . . . . . . . . . . . . . . . . . . . . . . . . .Alt flash 3 slow . . . . . . . . . . . . .Alt flash 3 slow
Fuse Blown or Cell Damaged . . . . . . . . . . . . . . . . . . . . . . . . . . . . . . . . . . . . . .Alt flash 4 slow . . . . . . . . . . . . .Alt flash 4 slow
Figure 2b
Battery Conditioning Cycle Button
and Battery Charger Light Panel
7
WST1600 Cord-Free Series
Remove the Battery Pack from the
Vacuum Cleaner
1. Using your thumb, push the Lock Button upwards. The top of
the Battery Pack will fall easily toward you.
2. Lift the Battery Charger Cover. Grasping the Battery Pack
firmly by the Handle, insert the Battery Pack into the Charger
Compartment. (See Figure 1b.)
Normal Charging Procedure
1. Plug the Battery Charger into an appropriate electrical outlet.
2. Place the Battery Pack into the Battery Charger.
3. Charging will begin once contact has been made. It takes
30 minutes (without conditioning) to fully charge a
Battery Pack.
4. Be sure that the Battery Pack is fully seated in the Battery
Charger. Various Light sequences will occur when you seat
the Battery Pack.
5. When the Battery Pack is fully charged, the Green Rapid
Charging Light will glow solid green.
BATTERY PACK CHARGING PROCE URE
IMPORTANT NOTES
• A fully charged Battery Pack will provide
approximately 30 minutes of vacuuming
time when the Vacuum Cleaner is used in
carpet/bare floor mode. Run time is
reduced when the above-floor Cleaning
Wand is used.
•You may charge a partially used Battery
Pack whenever you desire with no adverse
effect on the Battery Pack. If you charge
the Battery Pack for 10 minutes, you
should gain 10 minutes of carpet/bare floor
vacuuming time.
• Your Westinghouse Battery Charger
(Model C1600) is designed to use standard
120V AC, 60Hz power. Do not use DC or
any other voltage.
Conditioning Cycle Button
Conditioning Cycle Light
Rapid Charging Light
Hilda_WST1600_IB_3-6-03 6/3/03 3:35 PM Page 15
19 WST1600 Cord-Free Series
Reassembling the Collection Bin
1. After cleaning, you must reassemble the Bin
Handle/Filter Assembly and the Bin Web and Shaft.
Position the Bin Handle/Filter Assembly onto the
Bin Web and Shaft to create the complete
Collection Bin Cover/Handle. Line up the arrow on
the Bin Web and Shaft with the Bin Handle/Filter
Assembly. Guide the tab from the Handle into the
Shaft. (See Figure 14a.)
2. Turn the Handle clockwise to the LOCK D position,
the LOCK icon will line up with the arrow on the
Shaft. (See Figure 14b.)
3. Insert the assembled Collection Bin
Cover/Handle into the Collection Bin,
placing the bottom cup of the Bin Web
and Shaft over the Collection Bin Dirt
Arrestor. Line up the arrow on the
Collection Bin with the Bin Handle/
Filter Assembly. (See Figure 14c.)
4. Turn the Handle clockwise to the
LOCK D position, the LOCK icon will line
up with the arrow on the Collection Bin.
(See Figure 14d.)
Replacing the Collection Bin into
the Vacuum Cleaner
1. Insert the assembled Collection Bin
(consists of Collection Bin with
Collection Bin Cover/Handle locked into
it) bottom-first into the Collection Bin
Storage Compartment at the front of the
Vacuum Cleaner.
2. Grasp the Collection Bin Cover/Handle
and push into the Vacuum Cleaner,
pulling the Handle slightly down until it
catches; then upwards to lock. You
should hear an audible “click.”
WARNING: If the Collection Bin is not
secured in place, a loss of suction
while vacuuming could result.
Figure 14a
Handle
Tab
The Bin
Handle/Filter
Assembly and the
Bin Web and Shaft
join together to
form the Collection
Bin Cover/Handle
Collection Bin
Figure 14b
Figure 14d
Figure 15
Figure 14c
Cooling Fan
This Battery Charger is equipped with an internal
Fan that provides rapid cooling of the Battery
Pack. Fan operation is automatic and will turn
ON and OFF as required during battery charging.
After discharging a Battery Pack, it is best to
place it in the Battery Charger Compartment
immediately so that the Fan can cool it quickly
and prolong the Battery Pack life.
NOTE: The Cooling Fan is provided with a Mesh
Pre-Filter. To ensure maximum airflow, we
recommend the Mesh Pre-Filter be cleaned
every month. If the Battery Charger is kept
in a dusty environment, you will find it
necessary to clean the Mesh Pre-Filter more
often. A dirty Pre-Filter will reduce the
airflow through the Battery Pack and require
more time to cool the Battery Pack .
WARNING: Never run the Battery Charger without
the Mesh Pre-Filter in place. Without the
Mesh Pre-Filter, the Fan may blow debris
from vent areas into the Battery Pack and
possibly out of the Battery Pack outlet. Keep
your eyes away from vent areas.
Cleaning the Battery Charger
Mesh Pre-Filter
The Mesh Pre-Filter is located on the back of the
Battery Charger Cover. Lift the Lever on the base
of the Filter Cover, then tilt the Filter Cover
upwards until it falls away from the front of the
Battery Charger body. (See Figure 2c.)
Turn the Filter Cover over; the Mesh Pre-Filter
will be attached to the back of the Cover. Peel
the Mesh Pre-Filter away from the Cover and
rinse under running water to clean. ry
thoroughly before re-attaching onto the back of
the Battery Charger Cover.
8
Conditioning Cycle Procedure
The Battery Pack Conditioning Cycle will take the
batteries through a series of events to balance the
individual cells and give peak battery capacity and
run time.
Battery Packs should be conditioned every 50-
charge/discharge cycles or whenever the fully
charge Battery Pack no longer delivers the proper
run time (approximately 30 minutes when used in
carpet/bare floor mode).
IMPORTANT NOTES
Once the Conditioning Cycle Button is depressed,
the Cycle may not be interrupted. To ensure proper
Battery performance, please allow 24 hours to
condition/charge your Battery Pack.
1. To condition your Battery Pack, seat the
Battery Pack into the Battery Charger.
Depress the Conditioning Cycle Button.
2. The Green Conditioning Cycle Light will begin
to flash, indicating that the Conditioning Cycle
has started. After 24 hours, the Rapid Charging
Light will glow solid green and the
Conditioning Cycle Light will shut OFF. YOUR
BATT RY PACK IS NOW CONDITION D, FULLY
CHARG D AND R ADY FOR US .
NOTE: A Battery Pack will slowly lose its charge
when it is not seated in the Battery Charger.
Store 1 Battery Pack in the Battery Charger.
The Charger may be left plugged in. The Battery
Rapid Charging Light will glow solid and the
Battery Charger will keep the Battery Pack fresh
and fully charged.
Figure 2c
Figure 2d
Charger Intake
Battery
Charger
Filter
Cover
Battery Charger
Cover
Peel the Mesh
Pre-Filter away
from the back of
the Battery
Charger Cover
to clean.
Open Lever on bottom of
Filter Cover; tilt Filter Cover
upwards and remove from
Battery Charger
Hilda_WST1600_IB_3-6-03 6/3/03 3:35 PM Page 17
Health Tip
If you suffer from allergies or asthma, take the Collection
Bin outdoors to empty. As you empty the dirt into the trash
can, gently tap the Collection Bin against the side of the
can to remove loose debris.
Cleaning The Collection Bin
The Collection Bin should be washed periodically.
1. Wash the Bin in warm water using a mild soap. Avoid
harsh or abrasive cleaners or sponges. Rinse
thoroughly. TO AVOI AMAGE, O NOT PLACE
COLLECTION BIN IN THE ISHWASHER.
2. Let it air dry. Make sure the Collection Bin is completely
dry before putting it back into the Vacuum Cleaner.
Cleaning The Foam Filter and Pleated
Filter Contained In The Collection Bin
Cover/Handle
To get the best possible performance from your Vacuum
Cleaner, clean the Foam Filter weekly and the Pleated
Filter monthly.
1. Remove the Collection Bin.
2. The Bin Handle/Filter Assembly and the Bin Web and
Shaft join together to form the Collection Bin
Cover/Handle. See Figure 13a. Grasping the Bin
Handle/Filter Assembly in your right hand, and the Bin
Web and Shaft firmly in the other, press the Thumb
Release with your left thumb, Turn the Bin
Handle/Filter Assembly counter-clockwise to the
UNLOCK D position; until the 2 arrows line up.
(See Figure 12c.) Pull the Shaft away from the Bin
Handle/Filter Assembly.
3. Remove the Foam Filter from the bottom of the
Bin Handle/Filter Assembly. (See Figure 13b.)
Note that the Pleated Filter is permanently
affixed to the inside of the Handle. Rinse the
Foam Filter and the Bin Handle/Filter Assembly
with warm water and soap* and then rinse with
water only until water running out the bottom
is clean and there is no remaining soap.
*For best results, immerse in soapy water for
30 minutes.
4. Air-dry both Filters: allow the Pleated Filter to
thoroughly dry for at least 24 hours.
5. Place clean Foam Filter into the bottom of the
Bin Handle/Filter Assembly. Carefully tuck the
edges of the Foam Filter inside the
rim of the Bin Handle/Filter Assembly. (See
Figure 13c.)
IMPORTANT: FOR OPTIMUM VACUUMING
PERFORMANCE, THE FOAM FILTER SHOUL
BE WASHE WITH WARM, SOAPY WATER
EVERY WEEK.
18
Figure 13a
Figure 13b
Figure 13c
Thumb
Release
Bin Web
and Shaft
(P/N 40116)
Foam Filter
(P/N 40117)
Bin Handle/Filter Assembly
(P/N 40114)
(contains
Foam Filter
and Pleated Filter)
Bin Handle/Filter Assembly
(P/N 40116)
9WST1600 Cord-Free Series
7. CAUTION: To reduce the risk of foreign
material entering the Battery Charger cavity,
close the Battery Charger Cover when Battery
Pack is not seated in the Battery Charger.
8. CAUTION: Always unplug the Battery Charger
from the electric outlet when there is no
Battery Pack in the cavity.
9. CAUTION: Unplug Battery Charger before
attempting to clean.
IMPORTANT NOTES
• Other than cleaning the Mesh Pre-Filter as
indicated on page 8, this Battery Charger is
not user serviceable. There are no user
serviceable parts inside the Battery Charger.
Servicing by our Authorized Service Center is
required to avoid damage to static-sensitive
internal components.
• R AD ALL INSTRUCTIONS IN THIS MANUAL
B FOR ATT MPTING TO CHARG TH
BATT RY PACK.
• To ensure product SAF TY and R LIABILITY,
repairs, maintenance and adjustments
must be performed by our authorized
Service Center.
IMPORTANT BATTERY PACK
CHARGING NOTES
1. Charge when the air temperature is between
65-75ºF (18-24ºC) to assure longest
Battery Pack life and best performance.
2. It takes approximately 30 minutes to fully
charge a Battery Pack (other than when the
Conditioning Cycle is engaged). This will
provide approximately 30 minutes of
vacuuming when the Vacuum Cleaner is
used in carpet/bare floor mode. Run time is
reduced when the above-floor Cleaning
Wand is used.
3.The Battery Charger and Battery Pack may
become warm to the touch while charging.
This is a normal condition and does not
indicate a problem.
4. If the Battery Pack does not charge
normally:
• Check power at receptacle by plugging in
a lamp or other appliance.
• Check to see if receptacle is connected to
a light switch, which turns the power OFF
when you turn OFF the lights.
• Move Battery Charger and Battery Pack to
a location where the surrounding air
temperature is approximately 65º-75ºF
(18-24ºC).
• If charging problems persist, call the
Service Center.
5. DO NOT CONTINU use if there is
insufficient power on jobs which were
easily done previously. The Battery Pack
should be recharged; follow the BATT RY
PACK CHARGING PROC DUR described in
this Owner’s Manual. You may charge a
partially used Battery Pack whenever you
desire with no adverse effect on the
Battery Pack.
6. WARNING: To avoid Battery Charger
malfunction, never clean with or allow
exposed charging contacts to touch foreign
materials of a conductive nature, such as:
steel wool or aluminum foil. Metallic
particles should be kept away from Battery
Charger cavities.
Hilda_WST1600_IB_3-6-03 6/3/03 3:36 PM Page 19
6. With your other hand, turn the Collection
Bin Cover/Handle a quarter turn counter-
clockwise to the UNLOCK D position. (See
Figures 12b and 12c.)
7.
Separate the Collection Bin Cover/Handle
from the Collection Bin by pulling the
Handle straight up and out of the Collection
Bin. (See Figure 12b.)
8. Turn the Collection Bin upside down over a
trash can. Make sure you empty all dirt and
debris from above and below the Dirt
Arrestor. To ensure that all the dirt spills
out, tap the side of the Collection Bin
gently against the edge of the trash can.
(See Figure 12d.)
Proper cleaning and maintenance will
ensure the highest operating performance of
your Westinghouse WST1600 Series Cord-Free
Vacuum Cleaner.
Emptying the Collection Bin
Your Westinghouse Vacuum Cleaner's see-
through Collection Bin fits inside its Storage
Compartment. Check to make sure the
Collection Bin is never filled higher than the
MAX markings on the Bin. It will fill up quickly,
so it's a good idea to empty it after every use.
1. Return your Vacuum Cleaner to its
upright position.
2. Press the Power Button to turn the
Vacuum Cleaner OFF before you empty the
Collection Bin.
3. Press down on the Handle at the top of the
Collection Bin. Pull outward until the Bin
releases from its locked-in storage position
inside the Storage Compartment. (See
Figure 12a.)
4. Grasp the Handle firmly and lift the
Collection Bin out and away from the
Vacuum Cleaner.
5. Hold the Grip Area at the bottom of the
Collection Bin with one hand.
17 WST1600 Cord-Free Series
UNLOCKE LOCKE
Position Position
USER MAINTENANCE INSTRUCTIONS
Figure 12a
Figure 12d
Figure 12c
Figure 12b
Collection Bin
Cover/Handle
Collection Bin
10
OPERATING INSTRUCTIONS
Assemble Your Vacuum Cleaner
1. Remove the Westinghouse WST1600 Series
Vacuum Cleaner from its box.
2. Carefully remove all plastic packing materials
from the Vacuum Cleaner. Check to make sure
you remove all the Tools and Accessories
before throwing out the packing materials.
Accessory/Parts List
• Upper Handle
• Vacuum Cleaner Body
• Telescopic Cleaning Wand Assembly
• 2 Battery Packs (Model BP1600)
• 2 Fuses (25A)
• Battery Charger (Model C1600)
Cleaning Tools
• Crevice Tool
• Universal Cleaning Tool
• Dusting Brush
Figure 3a
Attaching the Handle
1. Place the Vacuum Cleaner into the upright
position. You will hear a click as the Vacuum
Cleaner locks into place.
2. Align the Handle over the top of the Docking
Bay and slide it down so it fits inside the
Docking Bay. It will snap-lock into place.
(See Figure 3a.)
3. Once properly assembled, the Handle cannot be
removed from the Docking Bay.
POWER
BRUSH
Wand Release
Button
Handle
ocking
Bay
Upper
Handle
Figure 3b
Bring the
Handle up and
push forward
into the
channel
Attaching the Telescopic Cleaning
Wand and Hose
1. The Cleaning Wand is stored inside the Hose.
2. Grasping the Cleaning Wand Handle, guide it up
into its storage position.
3. Push forward and upwards on the Handle until it
snaps and locks into place in the channel at the
back of the Vacuum Cleaner, under the Wand
Release Button. (See Figure 3b.)
Lock Wand into
position under the
Wand Release
Button
Hilda_WST1600_IB_3-6-03 6/3/03 3:36 PM Page 21
The Westinghouse WST1600 Series Vacuum
Cleaner Hose is made with reinforced steel. Its
coils will stay flexible and in good shape for the
life of your Vacuum Cleaner.
Tools and Tips
If you're having difficulty removing the Cleaning
Wand from the Hose Collar, rotate the Wand as
you pull it out. With continued use, the rubber
Hose Collar will soften and the Cleaning Wand
will pull out more easily.
Returning the Cleaning Wand To It’s
Locked, Storage Position
1. When you are finished vacuuming,
compress the Hose and slide the Cleaning
Wand back into the Hose Collar.
2. Follow the OP RATING INSTRUCTIONS:
ATTACHING TH T L SCOPIC CL ANING
WAND AND HOS section in this Owner’s
Manual, and lock the Wand in place with
a click.
IMPORTANT: If the Wand is not attached
properly, the Vacuum Cleaner will turn itself
OFF while vacuuming. If the Vacuum Cleaner
suddenly shuts OFF, first check to make
sure the Wand is securely locked into
position.
Attaching Cleaning Tools
To The Wand
1. Select the appropriate Cleaning Tool for the
vacuuming job.
2. Release the Cleaning Wand from the back
of the Vacuum Cleaner.
3. Slide the Tool into the top of the
Cleaning Wand.
4. Firmly press the Tool in place. It should
fit snugly.
Attaching Cleaning Tools
To The Hose
You can also attach your Cleaning Tools directly
onto the Hose. This will give you the flexibility
to clean delicate china or fine collectibles that
must be dusted carefully.
1. Remove the Wand from the Hose. xtend
the Cleaning Wand as far as it will reach out
of the Hose.
2. Hold the Hose Collar in one hand and, using
your thumb and forefinger, press in both of
the Hose Collar Latches. (See Figure 11a.)
3. With your other hand, pull the Wand all of
the way out of the Hose Collar. (See
Figure 11a.)
4. Insert any Attachment directly into the Hose
Collar. (See Figure 11b.)
16
Figure 11a
Figure 11b
Hose Collar Latch
Wand Rim
11 WST1600 Cord-Free Series
Cleaning Tools
The Westinghouse WST1600 Series Vacuum Cleaner comes with 3 On-Board Cleaning Tools
and Tool Holders.
Universal Cleaning Tool
The Universal Cleaning Tool lets you remove pet hair, lint and fine dust
particles. Use it to clean drapes, blinds and upholstered furniture.
usting Brush
The Dusting Brush has long, soft bristles. Use it to clean book shelves, table
tops, and other above-floor surfaces.
Crevice Tool
The Crevice Tool is a long narrow tool with a rounded larger end and a flat
tapered end. Use to reach and clean difficult nooks and crannies between
furniture and appliances, along baseboards or under cabinets where
cobwebs, lint and dust like to hide.
Cleaning Tools Storage
ach Tool has its own special storage spot on board the Vacuum Cleaner.
Locate the Tool Storage Holders on either side of the Vacuum Cleaner.
ach Tool snaps easily into its Holder. When properly stored, the Tools
will not fall off or get lost.
Figure 4b
usting Brush
(P/N 40112)
Figure 4c
Crevice Tool
(P/N 40111)
Figure 4a
Universal Cleaning Tool
(P/N 40113)
Figure 4d
Hilda_WST1600_IB_3-6-03 6/3/03 3:36 PM Page 23
5. With the Hose and Cleaning Wand fully
extended, there are 9.5 feet to work with.
6. If the Wand won't pull out easily, twist
the Locking Ring counter-clockwise and
loosen slightly.
7. Once the Wand is at the desired length,
lock the Wand into place by turning the
Locking Ring clockwise. (See Figure 10c.)
8. Notice that the airflow is automatically
redirected from the Power Head to the
Telescopic Cleaning Wand.
9. All On-Board Cleaning Tools will attach
onto the end of the Telescopic Cleaning
Wand. Check to make sure they are
properly locked into place. Vacuum as
usual.
Cleaning Carpets
1. Your Westinghouse WST1600 Series Vacuum Cleaner
will self-adjust to any height of carpet. Steer the
Vacuum Cleaner to the carpet you wish to clean.
NOTE: To avoid tangles in the Brush Roller, it is best to
disengage the Brush Motor when vacuuming near the
tassels at the edge of a carpet, or when vacuuming
smaller throw rugs.
Cleaning Bare Floors
1. Steer the Westinghouse Vacuum Cleaner onto the
bare floor you want to clean. You may leave the
Brush ON. The Rotary Brush bristles are soft and will
not damage your hardwood floors. Vacuum as usual.
Cleaning Above Floors
The 9.5 Foot Telescopic Cleaning Wand, makes easy work
to vacuum hard-to-reach, above-floor areas.
1. Return your Vacuum Cleaner to its upright position.
2. Grab the Hose Handle and press down firmly on the
colored Wand Release Button. (See Figure 10 a.)
3. The Telescopic Cleaning Wand will release easily
from the back of the Vacuum Cleaner.
4. Slide the Telescopic Cleaning Wand out of the Hose
Collar by gripping the Collar in one hand and the
Cleaning Wand Handle in the other. Pull to extend.
(See Figure 10b.)
15 WST1600 Cord-Free Series
Figure 10a
Figure 10c
Lock the Wand into place by turning the
Locking Ring clockwise.
Cleaning Wand
Handle
Figure 10b
Cleaning Wand
fully extended
Cleaning Wand Handle
with Locking Ring
Wand
Rim
Hose Collar
12
Transporting Your Vacuum Cleaner
Use the convenient, easy-to-grip Carry Handle
to transport your Vacuum Cleaner up and down
the stairs.
1. Return the Westinghouse WST1600 Series
Vacuum Cleaner to its upright position.
2. Locate the Carry Handle on the top of the
Battery Pack at the back of the Vacuum
Cleaner. (See Figure 6a.)
3. Secure your hand firmly under the
Carry Handle.
4. Lift the Vacuum Cleaner up or down stairs.
Tools and Tips
Always use the Upper Handle or Carry Handle to
pull your Vacuum Cleaner from room to room.
Never pull your Vacuum Cleaner by the Hose. Doing
so may damage the Vacuum Cleaner Hose.
Safety Tip
Make sure you turn your Vacuum Cleaner OFF
whenever you make any adjustments or lift the
Vacuum Cleaner up or remove any part.
Storing the usting Brush and
Universal Cleaning Tool
1. Locate the Dusting Brush and Universal
Cleaning Tool Holder on the right side of
the Vacuum Cleaner.(See Figure 5a.)
2. Snap the Dusting Brush and Universal
Cleaning Tool into either the top or the
bottom Holder, mounting the curved side
against the Vacuum Cleaner. Make sure
Tools fit snugly so they won’t fall off.
Storing the Crevice Tool
1. Snap the round base of the Crevice Tool
into its Holder on the left side of the
Vacuum Cleaner.
2. Make sure the Tool fits snugly so it won't
fall off.
Figure 5b
Figure 5a
Figure 6a
Hilda_WST1600_IB_3-6-03 6/3/03 3:36 PM Page 25
14
Cord-Free Vacuum Cleaning
Your Westinghouse WST1600 Series Vacuum
Cleaner is designed to clean a variety of
surfaces: carpets, bare floors and above floors.
With the charged Battery Pack locked securely
in position, you are ready to begin vacuuming.
1. The Power Button is located on the Control
Panel. To turn the Vacuum Cleaner ON,
depress the Power Button. The Brush
Status Light and the Power Indicator Light
will alternate flashing green.
2. Locate the Upright Release Pedal on the
bottom back side of your Vacuum Cleaner
between the 2 wheels. (See Figure 9a.)
3. Grip the Upper Handle with 1 hand and
press down on the Pedal with either foot.
4. Tilt the Vacuum Cleaner back into a
comfortable working position. Both the
Suction Motor and the Brush Motor will
begin operating.
CAUTION: Be sure to keep fingers and toes
away from the moving Rotary Brush.
Tools and Tips
To conserve valuable Battery energy and to
prevent carpet damage by the Rotary Brush,
when repositioning the Vacuum Cleaner or
for brief periods of non-use, keep your
Vacuum Cleaner in the upright position,
(Sleep Mode).
Preparing To Vacuum
IMPORTANT: Before you can use the Vacuum
Cleaner, you must prepare the Battery Pack for
use. Place the Battery Pack in the Battery
Charger and follow the CHARGING
PROC DUR S described in the beginning of
this Owner’s Manual.
Inserting the Battery Pack into the
Vacuum Cleaner
1. Holding the Battery Pack firmly, place it
into the bottom section of the Battery
Compartment, inserting it into the 2
silver-colored contacts.
2. Swing the Battery Pack forward, towards the
Vacuum Cleaner. (See Figure 8a.)
3. Lock the Battery Pack in place, making certain
that the upper section of the Battery Pack is
locked. The Lock Button on the Vacuum
Cleaner should be in the down position. An
audible "click" indicates that it has locked. Pull
on the Handle of the Battery Pack to make sure
it is locked securely and will not fall out during
vacuum cleaning.
Figure 8a
Upright
Release
Pedal
Battery
Compartment
Silver Contacts
Battery Unlock
Button
Figure 9a
13 WST1600 Cord-Free Series
Power (ON/OFF) Button
The Power Button activates the system. The Vacuum
Cleaner will begin vacuuming in the carpet/bare floor
mode; both the Suction Motor and Brush Motor will be
in operation.
Brush Button
The Brush Button turns the Brush Motor ON and OFF.
If the Brush is jammed, the Brush Status Light will glow
red and the Brush will stop rotating. Please remove the
Battery Pack and consult the section entitled: R MOVING A
BLOCKAG in this Owner’s Manual.
NOTE: To avoid tangles in the Brush Roller, it is best to
disengage the Brush Motor when vacuuming near the
tassels at the edge of a carpet, or when vacuuming
smaller throw rugs.
NOTE: You may leave the Brush Motor ON during any
vacuuming activity. The Rotary Brush bristles are soft
and will not cause damage to your hardwood floors.
Vacuum as usual.
Power (ON/OFF) Indicator Light
When the Battery Pack is fully, or close to fully, charged,
the Power Indicator Light will remain solid green when the
Vacuum Cleaner is in operation. As the Battery Pack energy
is consumed, the Light will turn from solid green to a
flashing green. When the Battery Pack is nearly consumed
(approximately 2 minutes remaining) the Light will
turn amber.
Brush Status Light
The Brush Status Light will remain solid
green whenever the Brush Motor is running.
If the brush is jammed, this Light will turn
red to indicate that the Brush has stopped.
Sleep Mode
If the Vacuum Cleaner is left in the upright
position when the Power Button is activated,
the Vacuum Cleaner will place itself in
Sleep Mode. Both the Suction and Brush
Motors will turn OFF and remain on standby
for 10 minutes and the Power Indicator Light
and Brush Status Light will alternate flashing
green. When the Vacuum Cleaner is tilted
back into the working position or the above-
floor Cleaning Wand is activated, power will
automatically be restored. After 10 minutes in
Sleep Mode with no activity, the Vacuum
Cleaner will turn itself OFF and the 2 flashing
green Lights will turn OFF.
Control Panel
Brush Status Light
Power
Indicator
Light
Brush Button
Figure 7a
Power Button
Hilda_WST1600_IB_3-6-03 6/3/03 3:36 PM Page 27

This manual suits for next models

1

Other Westinghouse Vacuum Cleaner manuals

Westinghouse WST1600 Series User manual

Westinghouse

Westinghouse WST1600 Series User manual

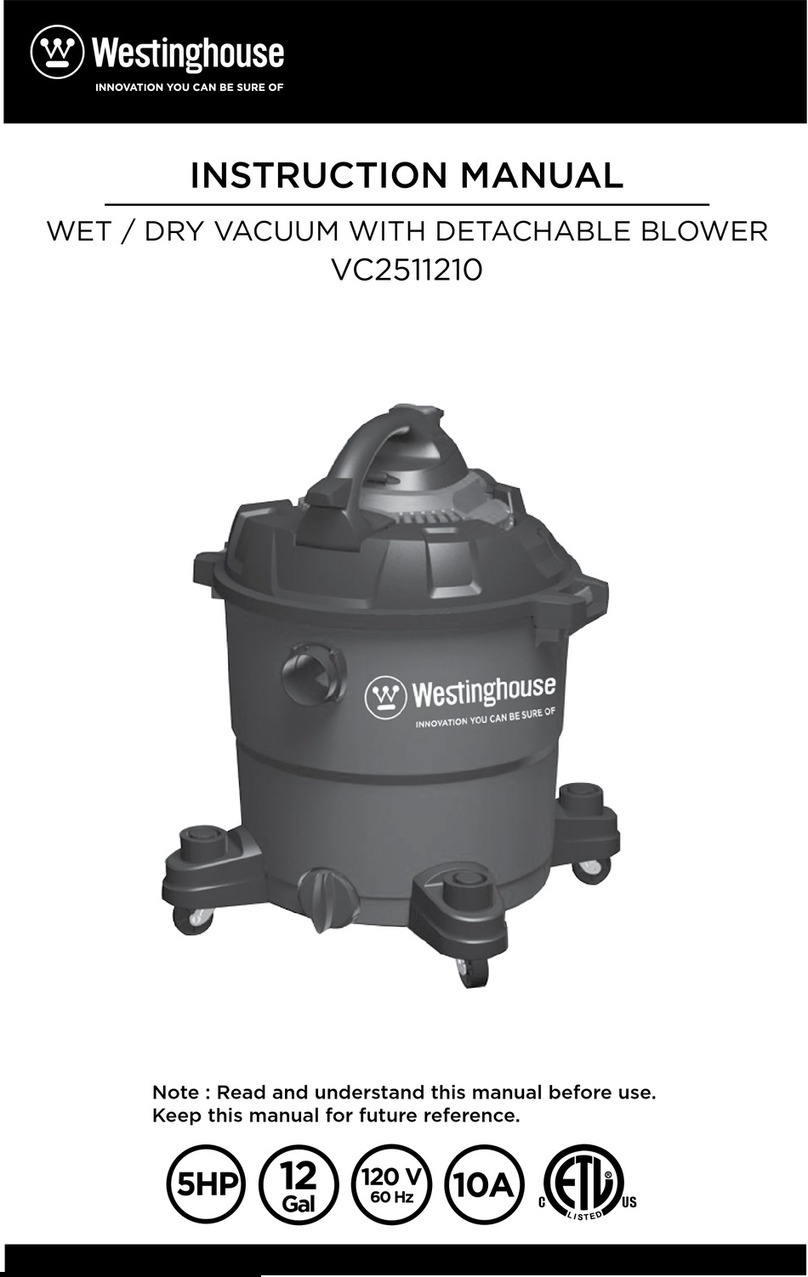
Westinghouse VC2511210 User manual

Westinghouse

Westinghouse VC2511210 User manual

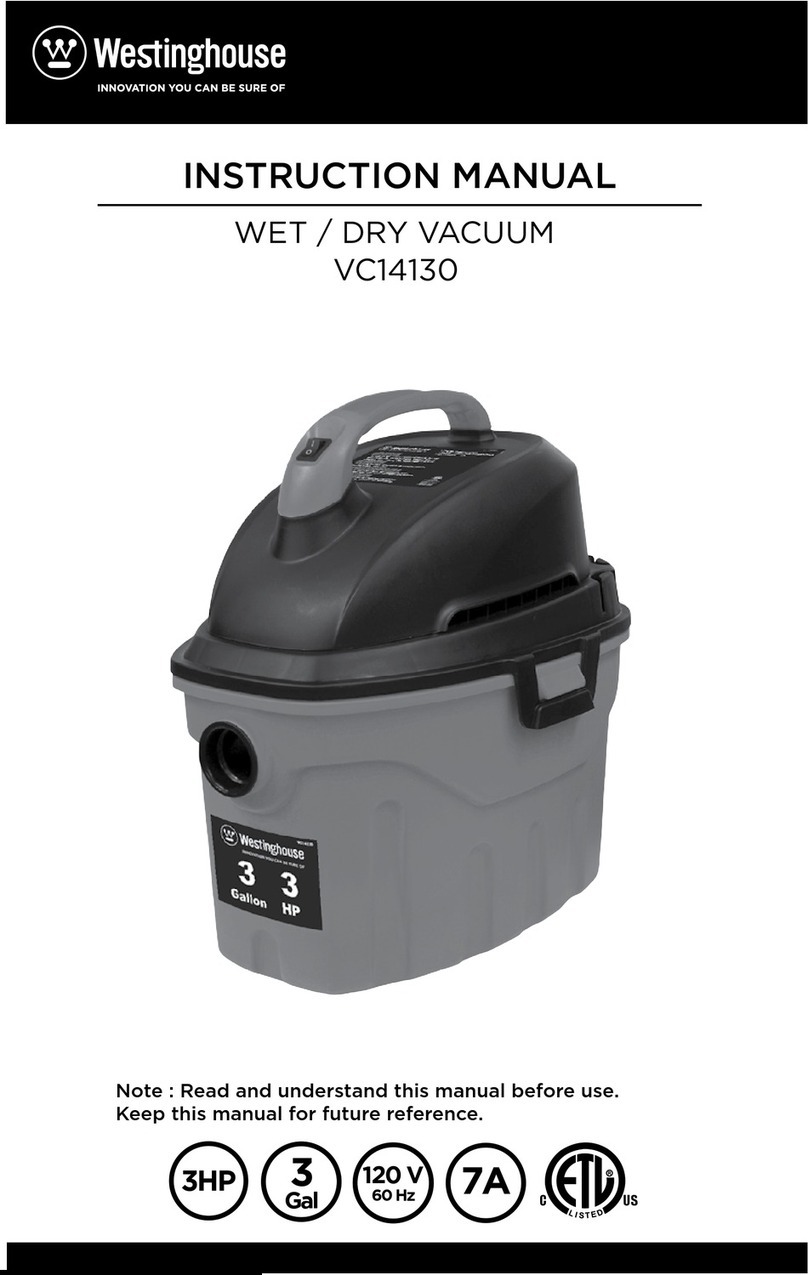
Westinghouse VC14130 User manual

Westinghouse

Westinghouse VC14130 User manual

Westinghouse WHVC01SB User manual

Westinghouse

Westinghouse WHVC01SB User manual

Westinghouse WHVC02SB User manual

Westinghouse

Westinghouse WHVC02SB User manual

Westinghouse WFVCZJX8217 User manual

Westinghouse

Westinghouse WFVCZJX8217 User manual

Westinghouse WHVCSV04SB User manual

Westinghouse

Westinghouse WHVCSV04SB User manual

Westinghouse WFVC001 User manual

Westinghouse

Westinghouse WFVC001 User manual

Westinghouse WHVC03SB User manual

Westinghouse

Westinghouse WHVC03SB User manual

Westinghouse WFVCR310 User manual

Westinghouse

Westinghouse WFVCR310 User manual

Westinghouse WFVCR290BK User manual

Westinghouse

Westinghouse WFVCR290BK User manual

Westinghouse VC14150 User manual

Westinghouse

Westinghouse VC14150 User manual

Westinghouse VC14110 User manual

Westinghouse

Westinghouse VC14110 User manual

Westinghouse WST1500-1509 User manual

Westinghouse

Westinghouse WST1500-1509 User manual

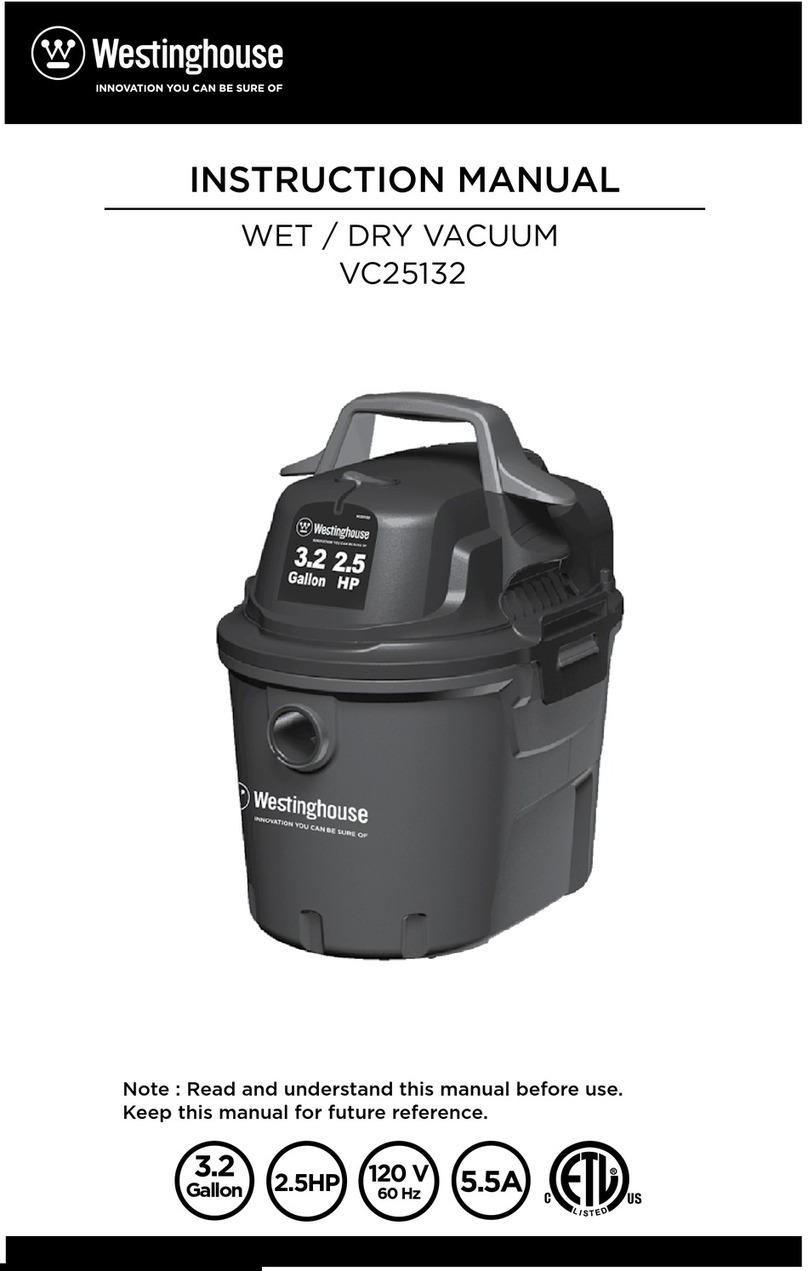
Westinghouse VC25132 User manual

Westinghouse

Westinghouse VC25132 User manual

Westinghouse WFVCZJX8217 User manual

Westinghouse

Westinghouse WFVCZJX8217 User manual

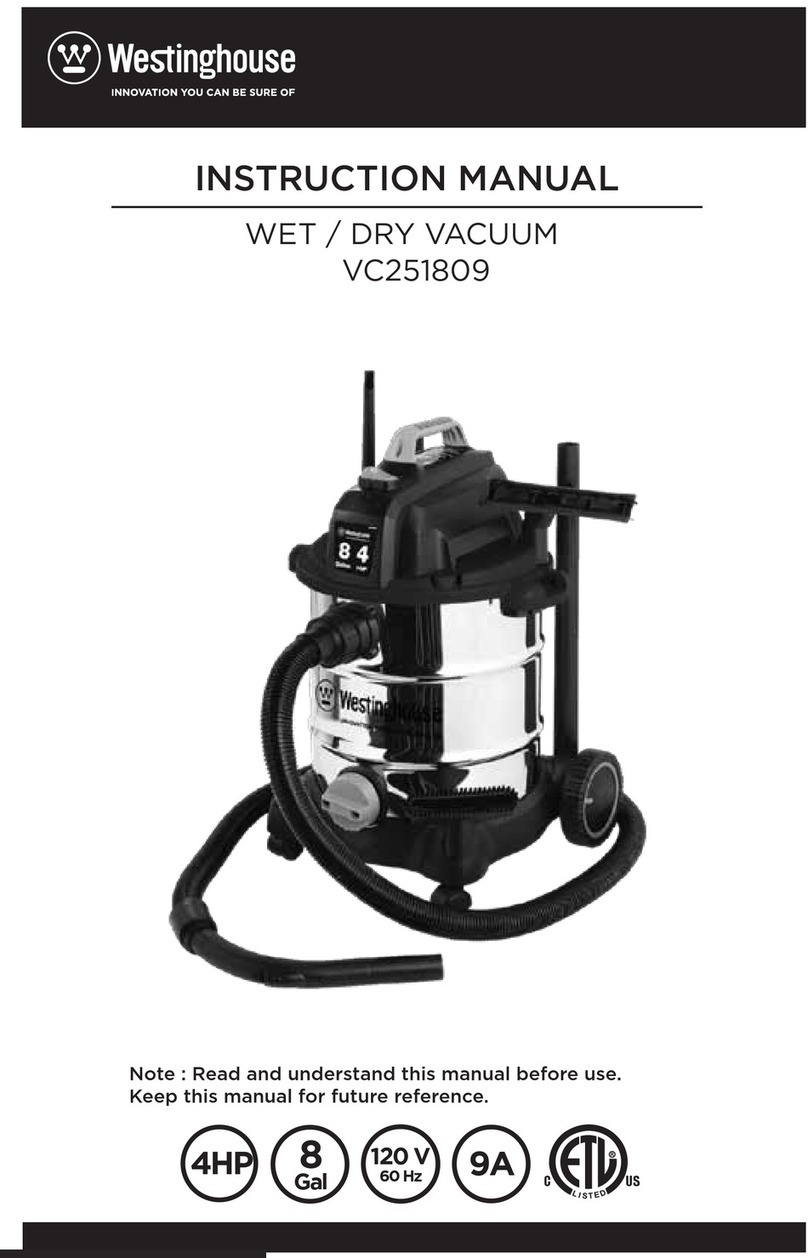
Westinghouse VC251809 User manual

Westinghouse

Westinghouse VC251809 User manual

Westinghouse WFVCHS106 User manual

Westinghouse

Westinghouse WFVCHS106 User manual

Popular Vacuum Cleaner manuals by other brands

Philips FC8148 manual

Philips

Philips FC8148 manual

Renfert Vortex compact 3L instruction manual

Renfert

Renfert Vortex compact 3L instruction manual

Alpina XL-612-60 instruction manual

Alpina

Alpina XL-612-60 instruction manual

Vitek VT-1802 instruction manual

Vitek

Vitek VT-1802 instruction manual

Numatic HAS-750S Owner's instructions

Numatic

Numatic HAS-750S Owner's instructions

MORALLY TOXIC VALKYRIE instruction manual

MORALLY TOXIC

MORALLY TOXIC VALKYRIE instruction manual

SEVERIN 7023 instruction manual

SEVERIN

SEVERIN 7023 instruction manual

US Steam EAGLE PLUS manual

US Steam

US Steam EAGLE PLUS manual

Aiwa AR-1201 user guide

Aiwa

Aiwa AR-1201 user guide

LG VK7320NHAYB owner's manual

LG

LG VK7320NHAYB owner's manual

Miele VACUUM CLEANER S227 LIGHT GRAY S227 KARMINE... manual

Miele

Miele VACUUM CLEANER S227 LIGHT GRAY S227 KARMINE... manual

Kärcher WD 5.2 MP Series manual

Kärcher

Kärcher WD 5.2 MP Series manual

DeWalt DCV501H instruction manual

DeWalt

DeWalt DCV501H instruction manual

Makita CL117FD instruction manual

Makita

Makita CL117FD instruction manual

Electrolux The boss 7106 quick start guide

Electrolux

Electrolux The boss 7106 quick start guide

Kärcher A 2901 instructions

Kärcher

Kärcher A 2901 instructions

Hoover F7458950 owner's manual

Hoover

Hoover F7458950 owner's manual

Electrolux rapido ZB6106WDB manual

Electrolux

Electrolux rapido ZB6106WDB manual

manuals.online logo
manuals.online logoBrands
  • About & Mission
  • Contact us
  • Privacy Policy
  • Terms and Conditions

Copyright 2025 Manuals.Online. All Rights Reserved.