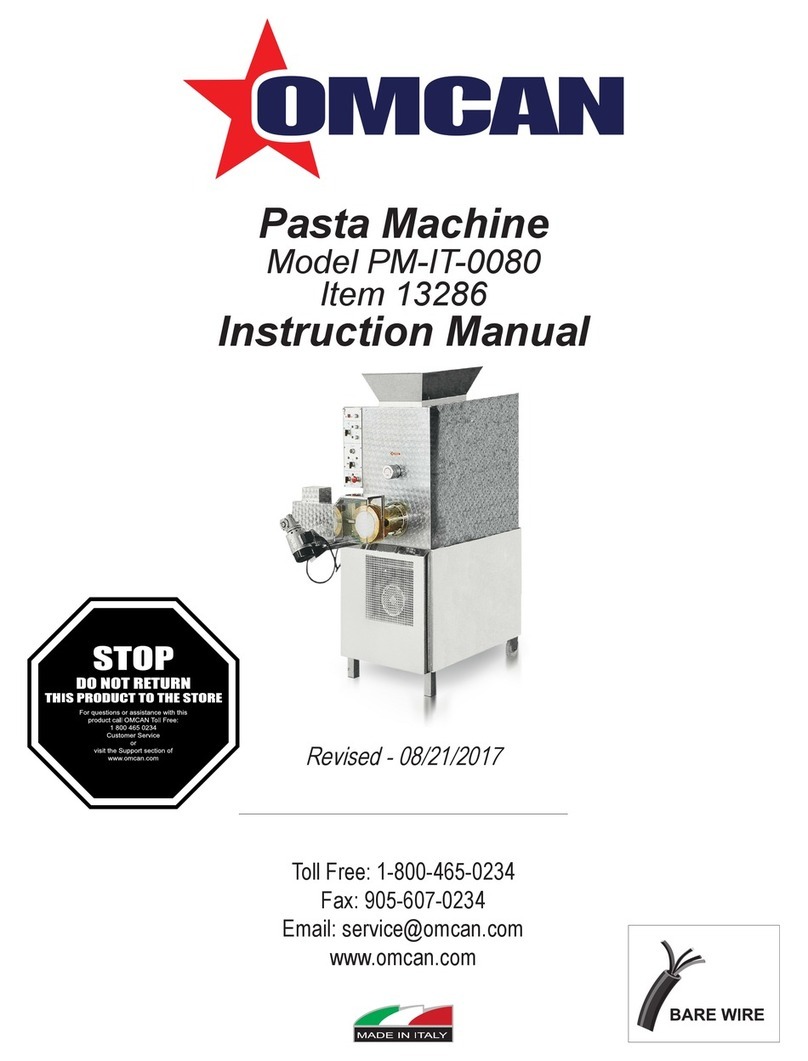
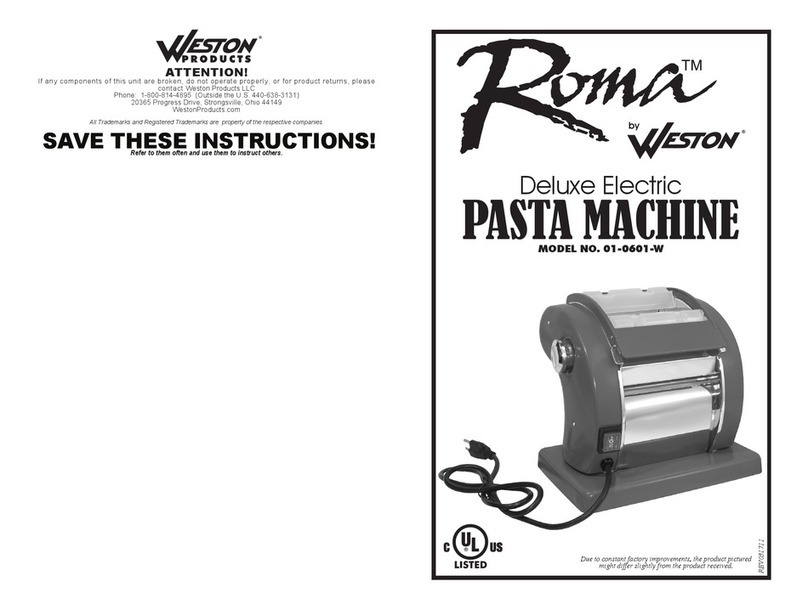
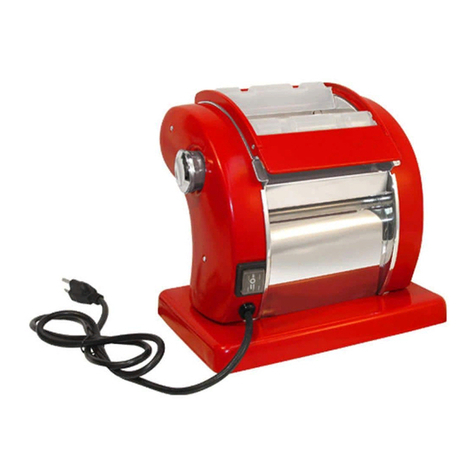
Weston 01-0201 User manual

PASTA MACHINE
DUE TO CONSTANT FACTORY IMPROVEMENTS, THE PRODUCT PICTURED MIGHT DIFFER
SLIGHTLY FROM THE PRODUCT IN THIS BOX.

COMPONENT LIST
PASTA TIPS
CLEANING
ASSEMBLY INSTRUCTIONS
ROLLING DOUGH INSTRUCTIONS
CUTTING DOUGH INSTRUCTIONS
FOOD SAFETY
WARRANTY
LISTA DE COMPONENTES
CONSEJOS PARA PASTA
INSTRUCCIONES DE LIMPIEZA
ARMADO DE LA MÁQUINA DE PASTA
INSTRUCCIONES DE ENROLLADO DE LA MASA
INSTRUCCIONES PARA CORTRAR LA MAS
SEGURIDAD DE LOS ALIMENTOS
INFORMACIÓN DE GARANTÍA WESTON
LISTE DES PIÈCES
SUGGESTIONS POUR LES PÂTES
DIRECTIVES DE NETTOYAGE
ASSEMBLAGE DE LA MACHINE À PÂTE
INSTRUCTIONS POUR ROULER LA PÂTE
INSTRUCTIONS POUR COUPER LA PÂTE
SÉCURITÉ ALIMENTAIRE
INFORMATION SUR LA GARANTIE
3
4
4
5
6-7
7
8
10
12
13
13
14
15-16
16
17
18
20
21
21
22
23-24
24
25
27
TABLE OF CONTENTS / ÍNDICE / TABLE DES MATIÈRES
2

1
Regulator
Knob
Sheet Rollers
2
4
Rubber Foot
(Underneath)
Attachment Clip
3
Fettuccini Rollers Spaghetti Rollers
Base
5
ENGLISH INSTRUCTIONS
COMPONENT LIST
DIAGRAM NUMBER PART DESCRIPTION
1 HANDLE
2 C-CLAMP
3 FETTUCCINI/SPAGHETTI CUTTER
ATTACHMENT
4 RUBBER FEET (4)
If any components of this unit are broken, the unit does not operate properly or you
need a replacement instruction manual, visit us on the web at
WestonBrands.com

ENGLISH INSTRUCTIONS
4
• DOUGH CONSISTENCY You know when you’re nished kneading the dough
when the ball of dough has a soft texture. It should feel moist, but not stick to your
ngers.
• LET IT REST when you have your dough ball, set it aside to rest for 15-30
minutes. While resting, wrap it in cellophane wrap or cover it with a damp towel
(or paper towel) to keep it from drying out. Resting gives the our time to fully
absorb the water.
• WATER If the recipe that you are using calls for water, add it last in portions.
Depending on egg size and accuracy of our measurement, you may not need
the entire amount of water in the recipe.
• FLOUR & WATER RATIO Don’t be afraid to use our. If after resting, the
dough feels too damp add a little our and knead it a little more (don’t worry, if
you add too much you can add more water or olive oil to balance it).
• FLOUR IS YOUR BEST TOOL Before rolling out the dough or cutting the
sheets, sprinkle the rollers with our to keep the dough from sticking. This will
also help the dough separate when you cut the pasta.
• Before cutting the dough and between changing the roller settings, dredge the
dough sheet in some our. This will also help to cut the dough better.
PASTA TIPS
The Pasta Machine and the Cutter Attachment may have some excess oil on it
from the factory. This is to protect the machine during shipping. THIS OIL MUST
BE REMOVED BEFORE USING THE MACHINE!
• Using a clean dry cloth, wipe all the surfaces clean. DO NOT USE WATER!
Never wash the Pasta Machine or the Cutter Attachment with water, place it in
water, or put it into the dishwasher. Simply wipe it clean with a dry cloth.
• To clean the inner surfaces of the Pasta Machine and the Cutter Attachment
pass a piece of dough through the Rollers and Cutters several times, making sure
the dough touches all the surfaces, especially the sides where machine oil can
accumulate. Discard this dough when nished.
• Use a dry pastry brush to remove any our or bits of dough from the hard to
reach places.
• Lightly sprinkle some our on the Rollers and Cutters. Using a dry brush, work
the our into the edges of the Pasta Machine and into the Cutter Attachment.
Brush all the our away and wipe the machine clean again with a clean, dry cloth.
• NEVER INSERT KNIVES BETWEEN THE ROLLERS OR THE CUTTERS!
CLEANING

5
ENGLISH INSTRUCTIONS
CLEANING
PASTA MACHINE ASSEMBLY
1. Position the Pasta Machine Base
on a table or countertop, near the
edge of the work surface.
2. Slide the C-Clamp into the
C-Clamp port in the side of the
Pasta Machine Base. The threaded
screw portion of the C-Clamp will be
underneath the table or countertop.
FIGURE A
3. Tighten the Thumbscrew on
the C-Clamp to secure the Pasta
Machine to the table or countertop.
FIGURE B
4. Align the Clips of the Cutter
Attachment with the Clips on the
Pasta Machine. Slide the Cutter
Attachment onto the Pasta Machine
until fully seated. FIGURE C
5. Align the notches on the Handle
with the notches in the Drive Slot of
choice. Slide the Handle into the
Drive Slot of the Roller or the Cutter
Attachment to be used.
FIGURE D
NOTE: Be sure to notice when the
Handle turns, it passes below the
edge of the work surface and turns
freely, it should not hit the work
surface. If the Handle comes in
contact with the work surface, loosen
the C-Clamp and reposition the
Pasta Machine to allow more space.
FIGURE E
FIGURE A
FIGURE B
Base
C-Clamp
C-Clamp Port
C-Clamp
Thumb-
screw
FIGURE C
Cutter Attachment
Clips
Clips
FIGURE D
Spaghetti Cutter
Drive Slot
Fettuccini
Cutter
Drive
Slot
Roller
Drive Slot Handle
FIGURE E

6
ENGLISH INSTRUCTIONS
RECIPES FOR THE DOUGH
WILL FOLLOW THESE
INSTRUCTIONS. THESE
INSTRUCTIONS START
WITH FULLY MIXED DOUGH,
READY TO BE USED.
1. Follow the “Pasta Machine
Assembly Instructions.” Align
the notches on the Handle with
the notches in the Roller Drive
Slot. Slide the Handle into the
Roller Drive Slot. FIGURE F
2. Locate the Regulator Knob
on the left side of the Pasta
Machine. The Regulator Knob
is numbered 1-7. The number
1 setting is the narrowest
setting for the Sheet Rollers;
the number 7 is the widest
setting for the Sheet Rollers
(Figure G). To adjust the
Regulator Knob, pull out on
the Knob and turn it to the
desired setting. As you turn
the Regulator Knob you will be
able to see the Sheet Rollers
moving closer together or
further apart.
3. Lightly our your work
space. See “Pasta Tips” for
more instruction on making
dough and pasta.
4. With the Regulator Knob
in the “7” position, turn the
Handle clockwise while feeding
a piece of dough into the
Rollers (Figure H). Once the
dough has gone through the
Rollers lightly our it, fold it
in half and run it through the
Rollers again. Repeat this
process several times: lightly
our, fold in half, run through
Rollers.
5. As the dough exits the
Rollers, it will get longer with
each pass. Lay the strip of
dough out at on your work
space.
ROLLING DOUGH INSTRUCTIONS FIGURE F
Roller
Drive Slot Handle
FIGURE G
Regulator
Knob
Sheet Rollers
FIGURE H

7
ENGLISH INSTRUCTIONS
ROLLING DOUGH INSTRUCTIONS
1. Follow the “Pasta Machine
Assembly Instructions.” Align the
notches on the Handle with the
notches in the Cutter Drive Slot of
choice. Slide the Handle into the
Cutter Drive Slot. FIGURE I
2. Cut a piece of rolled out dough, long
enough to be easily handled.
3. Lightly our your work space and
the pasta sheet. See “Pasta Tips”
for more instruction on making dough
and pasta.
4. While slowly turning the Handle
clockwise, carefully start the dough into
the Cutter Attachment.
5. As the cut noodles exit the machine
from underneath, continue to carefully
guide the dough into the Pasta
Machine while slowly turning the
Handle. FIGURE J
6. Lay your freshly cut noodles out
on a lightly oured surface or on a
drying rack (Sold Separately) to dry before
cooking. FIGURE K
6. Now set Regulator Knob to the “6” position. Run the dough through the
Rollers. Repeat this process several times, each time setting the Regulator
Knob to the next setting until the dough reaches the thickness you desire. If the
sheet gets too long to manage, simply cut it with a knife.
7. After reaching the desired thickness, leave the sheet to rest for about 10
minutes so that it will dry slightly and be hard enough for cutting, without sticking
to the Cutting Rollers.
CUTTING DOUGH INSTRUCTIONS FIGURE I
Handle
Spaghetti
Cutter Drive
Slot
Fettuccini
Cutter Drive
Slot
FIGURE J
FIGURE K

8
ENGLISH INSTRUCTIONS
There are basic rules to follow when handling food.
They are COOK, SEPARATE, CLEAN, and CHILL.
COOK
It’s crucial to cook food to a safe internal temperature to destroy bacteria that is present.
The safety of hamburgers and other foods made with ground meat has been receiving a lot
of attention lately, and with good reason. When meat is ground, the bacteria present on the
surface is mixed throughout the ground mixture. If this ground meat is not cooked to at least
160oF to 165oF (71oC to 74oC), bacteria will not be destroyed and there’s a good chance you
will get sick.
Solid pieces of meat like steaks and chops don’t have dangerous bacteria like E. coli on the
inside, so they can be served more rare. Still, any beef cut should be cooked to an internal
temperature of at least 145oF (63oC) (medium rare). The safe temperature for poultry is 165oF
(74oC) and solid cuts of pork should be cooked to 145oF (63oC).
SEPARATE
Foods that will be eaten uncooked and foods that will be cooked before eating MUST
ALWAYS be separated. Cross-contamination occurs when raw meats or eggs come in
contact with foods that will be eaten uncooked. This is a major source of food poisoning.
Always double-wrap raw meats and place them on the lowest shelf in the refrigerator so
there is no way juices can drip onto fresh produce. Then use the raw meats within 1-2 days
of purchase, or freeze for longer storage. Defrost frozen meats in the refrigerator, not on the
counter.
When grilling or cooking raw meats or sh, make sure to place the cooked meat on a clean
platter. Don’t use the same platter you used to carry the food out to the grill. Wash the utensils
used in grilling after the food is turned for the last time on the grill, as well as spatulas and
spoons used for stir-frying or turning meat as it cooks.
Make sure to wash your hands after handling raw meats or raw eggs. Washing hands with
soap and water, or using a pre-moistened antibacterial towelette is absolutely necessary after
you have touched raw meat or raw eggs. Not washing hands and surfaces while cooking is a
major cause of cross-contamination.
CLEAN
Wash your hands and work surfaces frequently when you are cooking. Washing with soap
and warm water for at least 15 seconds, then dry with a paper towel.
CHILL
Chilling food is very important. The danger zone where bacteria multiply is between 40oF and
140oF(4oCand60oC).Your refrigerator shouldbe set to40oF(4oC) orbelow; yourfreezershould
be 0oF (-18oC) or below. Simple rule: serve hot foods hot, cold foods cold. Use chang dishes
or hot plates to keep food hot while serving. Use ice water baths to keep cold foods cold. Never
let any food sit at room temperature for more than 2 hours - 1 hour if the ambient temperature
is 90oF (32oC) or above. When packing for a picnic, make sure the foods are already chilled
when they go into the insulated hamper. The hamper won’t chill food - it just keeps food cold
when properly packed with ice. Hot cooked foods should be placed in shallow containers and
immediately refrigerated so they cool rapidly. Make sure to cover foods after they are cool.
NOTE: Special considerations must be made when using venison or other wild game, since it
can become heavily contaminated during eld dressing. Venison is often held at temperatures
that could potentially allow bacteria to grow, such as when it is being transported. Refer to
the USDA Meat and Poultry Department for further questions or information on meat and
food safety.
FOOD SAFETY


ONE-YEAR LIMITED WARRANTY
This warranty applies to products purchased and used in the U.S. and Canada. This is the only
express warranty for this product and is in lieu of any other warranty or condition.
This product is warranted to be free from defects in material and workmanship for a period of
one (1) year from the date of original purchase. During this period, your exclusive remedy is
repair or replacement of this product or any component found to be defective, at our option. If
the product or component is no longer available, we will replace with a similar one of equal or
greater value.
This warranty does not cover unauthorized repairs or service to products, products sold
“as-is” by retailers, glass, filters, wear from normal use, use not in conformity with the printed
directions, or damage to the product resulting from accident, alteration, abuse, or misuse.
This warranty extends only to the original consumer purchaser or gift recipient and is not
transferable. Keep the original sales receipt, as proof of purchase is required to make a
warranty claim. This warranty is void if the product is subjected to any voltage and waveform
other than as specified on the rating label (e.g., 120V ~ 60 Hz).
We exclude all claims for special, incidental and consequential damages caused by breach of
express or implied warranty. All liability is limited to the amount of the purchase price. Every
implied warranty, including any statutory warranty or condition of merchantability or
fitness for a particular purpose, is disclaimed except to the extent prohibited by law, in
which case such warranty or condition is limited to the duration of this written warranty.
This warranty gives you specific legal rights. You may have other legal rights that vary
depending on where you live. Some states or provinces do not allow limitations on implied
warranties or special, incidental, or consequential damages, so the foregoing limitations may
not apply to you.
To make a warranty claim, do not return this appliance to the store. Please call 1.800.814.4895
(001.216.901.6801 outside the US) or visit WestonBrands.com. For faster service, locate the
model, type, and series numbers on your appliance.
10

MÁQUINA DE PASTA
DEBIDO A CONSTANTES MEJORAS EN LA FÁBRICA, EL PRODUCTO QUE SE MUESTRA PUEDE
SER LIGERAMENTE DIFERENTE DEL PRODUCTO EN ESTA CAJA.

12
INSTRUCCIONES EN ESPAÑOLINSTRUCCIONES EN ESPAÑOL
LISTA DE COMPONENTES
DIAGRAM NUMBER PART DESCRIPTION
1 MANGO
2 ABRAZADERA EN C
3ACCESORIO CORTADOR DE FETTUCCINI/
SPAGHETTI
4 PIE DE GOMA (4)
Perilla
Reguladora
Gancho de unión
Base
1
Rodillos de
Láminas
2
4
Debajo
3
Rodillos de
Fettuccini
Rodillos de
Spaghetti
Si cualquier componente de esta unidad está roto, si no funciona debidamente, o si necesita un
instructivo de repuesto, visítenos en la Web en
WestonBrands.com

13
INSTRUCCIONES EN ESPAÑOL
• CONSISTENCIA DE LA MASA Sabes cuando haya terminado de amasar la
masa cuando la bola de masa tiene una textura suave. Se debe sentir húmeda,
pero no se adhieren a los dedos.
• DEJAR REPOSAR! Cuando usted tiene su bola de masa, déjela a un lado
para descansar durante 15-30 minutos. Mientras descansa, envuélvalo en
papel de celofán o cubrirlo con una toalla húmeda (o una toalla de papel)
para evitar que se reseque. Descansar da el tiempo de harina de absorber
totalmente el agua.
• AGUA Si la receta que está utilizando convocatorias de agua, añadir que
dure en porciones. Dependiendo del tamaño y la precisión de la medición de la
harina de huevo, puede que no necesite toda la cantidad de agua en la receta.
• HARINA Y RELACIÓN DE AGUA No tenga miedo de usar la harina. Si
después de descansar, la masa se siente demasiado húmedo añadir un poco
de harina y amasar un poco más (no te preocupes, si se añade demasiada
puede agregar más agua o aceite de oliva para equilibrarlo).
• HARINA DE ES SU MEJOR HERRAMIENTA Antes de rodar la masa o el
corte de las hojas, espolvorear los rodillos con harina para evitar que la masa
se pegue. Esto también ayudará a que la masa separar cuando se corta la
pasta.
• Antes de cortar la masa y entre el cambio de la conguración de rodillos,
dragar la lámina de masa en un poco de harina. Esto también ayudará a
reducir la masa mejor.
CONSEJOS PARA PASTA
La Máquina de Pasta y el Accesorio Cortador pueden tener exceso de aceite
de fábrica. Este aceite protege la máquina durante el transporte. ¡ELIMÍNELO
ANTES DE USAR LA MÁQUINA!
• Utilice un paño seco y limpio en todas las supercies. ¡NO USE AGUA! No
lave la Máquina de Pasta o el Accesorio Cortador con agua, ni tampoco use el
lavavajillas para lavarlos. Simplemente límpielos con un paño seco.
• Para limpiar las supercies internas de la Máquina de Pasta y del Accesorio
Cortador, pase un trozo de masa por los Rodillos y Cortadores varias veces,
asegurándose que la masa toque todas las supercies, especialmente los lados
donde se acumule el aceite de la máquina. Al terminar, bote la masa.
• Use una brocha de repostería para eliminar toda la harina o restos de masa
de los lugares de difícil acceso.
• Espolvoree un poco de harina en los Rodillos y Cortadores. Usando una
brocha seca, aplique harina en los bordes de la Máquina de Pasta y en el
Accesorio Cortador. Elimine con la brocha toda la harina y limpie la máquina
con un paño limpio y seco.
• ¡NO INSERTE CUCHILLOS ENTRE LOS RODILLOS O CORTADORES!
LIMPIEZA

14
INSTRUCCIONES EN ESPAÑOLINSTRUCCIONES EN ESPAÑOL
ARMADO DE LA MÁQUINA DE PASTA
1. Ubique la Base de la Máquina de
Pasta en una mesa o en la base del
mesón, cerca del borde de la supercie
de trabajo.
2. Inserte la Abrazadera en C en el
Oricio de la Abrazadera del costado
de la Base de la Máquina de Pasta.
La parte del tornillo roscado de la
Abrazadera en C quedará bajo la mesa
o de la supercie del mesón. FIGURA A
3. Apriete el Tornillo de Mariposa en la
Abrazadera en C para jar la Máquina
de Pasta a la mesa o la supercie del
mesón. FIGURA B
4. Alinee las abrazaderas del Accesorio
Cortador en la Máquina de Pasta.
Inserte el Accesorio Cortador en la
Máquina de Pasta hasta que quede
completamente asentado. FIGURA C
5. Alinee las muescas de la manija con
las muescas en la ranura de la unidad
de su elección. Deslice la manija en
la ranura de la unidad del rodillo o la
cubierta de corte a utilizar. FIGURA D
NOTA: Asegúrese de darse cuenta
cuando la manija se gira, que pasa
por debajo del borde de la supercie
de trabajo y gira libremente, no debe
golpear la supercie de trabajo. Si la
manija se pone en contacto con la
supercie de trabajo, aoje el C-Clamp y
la posición de la máquina de pasta para
permitir más espacio. FIGURA E
FIGURA A
FIGURA B
Base
Abrazade-
ra en C
Oricio de la
Abrazadera
en C
Tornillo de
Mariposa de la
Abrazadera en C
FIGURA C
Accesorio
Cortador
Abrazaderas
Abrazaderas
FIGURA D
Ranura de Mando
del Cortador de
Spaghetti
Ranura de
Mando del
Cortador de
Fettuccini
Ranura de
Mando del
Rodillo
Mango
FIGURA E

15
INSTRUCCIONES EN ESPAÑOL
Abrazaderas
LAS RECETAS PARA LA
MASA SEGUIRÁN ESTAS
INSTRUCCIONES. ESTAS
INSTRUCCIONES COMIENZAN
CON LA MASA COMPLETAMENTE
MEZCLADA, LISTA PARA USAR.
1. Siga las “Instrucciones de Armado
de la Máquina de Pasta”. Alinee
las muescas del Mango con las
muescas de la Ranura de Mando
del Rodillo. Inserte el Mango en la
Ranura de Mando del Rodillo.
FIGURA F
2. Locate the Regulator Knob 2.
Ubique la Perilla Reguladora en el
lado izquierdo de la Máquina de
Pasta. La Perilla Reguladora está
regulada de 1 a 7. La regulación
número 1 es la más angosta para
los Rodillos de Láminas; el número 7
es la regulación más ancha para los
Rodillos de Láminas (FIGURA G).
Para ajustar la Perilla Reguladora,
tire la perilla hacia fuera y devuélvala
hasta la regulación deseada. A
medida que vaya girando la Perilla
Reguladora, podrá ver que los
Rodillos de Láminas se acercan
entre sí o se separan.
3. Enharine levemente el espacio
de trabajo. Consulte “Consejos
para cocinar Pasta” para mayores
instrucciones sobre preparar masa
y pasta.
4. Con la Perilla Reguladora en la
posición “7”, gire el Mango hacia la
derecha pasando, a la vez, un trozo
de masa en los Rodillos (FIGURA
H). Una vez que la masa haya
pasado por los Rodillos, enharínela
levemente, dóblela por la mitad y
vuelva a pasarla por los Rodillos.
Repita este proceso varias veces:
enharine levemente, doble por la
mitad, vuelva a pasar la masa por los
Rodillos.
5. A medida que la masa vaya
saliendo de los Rodillos, se irá
alargando. Deje la franja de masa
plana en el espacio de trabajo.
INSTRUCCIONES DE ENROLLADO DE LA MASA FIGURA F
Ranura de
Mando del
Rodillo
Mango
FIGURA G
Perilla
Reguladora
Rodillos de
Láminas
FIGURA H

16
INSTRUCCIONES EN ESPAÑOLINSTRUCCIONES EN ESPAÑOL
1. Siga las “Instrucciones de
Armado de la Máquina de Pasta”.
Alinee las muescas del Mango
con las muescas de la Ranura
de Mando del Cortador de su
elección. Inserte el Mango en la
Ranura de Mando del Cortador”.
FIGURA I
2. Corte un trozo de masa
enrollada, lo sucientemente larga
para manipularla fácilmente.
3. Enharine levemente su espacio
de trabajo y la lámina de pasta.
Consulte “Consejos para Cocinar
Pasta” para mayores instrucciones
sobre cómo preparar la masa y la
pasta.
4. Girando levemente el Mango
hacia la derecha, inserte
cuidadosamente la masa en el
Accesorio Cortador.
5. A medida que los deos
cortados salgan desde debajo de
la máquina, siga cuidadosamente
guiando la masa hacia la Máquina
de Pasta girando levemente el
Mango. FIGURA J
6. Deje los deos recién cortados
en una supercie levemente
enharinada o en un soporte de
secado (Se vende por separado)
para que se sequen antes de
cocerlos. FIGURA K
6. Ahora regule la Perilla Reguladora en la posición “6”. Pase la masa por los
Rodillos. Repita este proceso varias veces, regulando la Perilla Reguladora
cada vez en el ajuste siguiente hasta lograr el espesor deseado. Si la lámina
queda demasiado larga como para manejarla, simplemente córtela con un
cuchillo.
7. Después de lograr el espesor deseado, deje la lamina reposar por
alrededor de 10 minutos de modo que se seque levemente y quede lo
sucientemente dura para cortar, sin pegarse a los Rodillos Cortadores
INSTRUCCIONES PARA CORTAR LA MAS FIGURA I
Mango
Ranura de
Mando del
Cortador de
Spaghetti
FIGURA J
FIGURA K

17
INSTRUCCIONES EN ESPAÑOL
Hay que seguir ciertas reglas básicas al manejar alimentos.
Las reglas son COCINAR, SEPARAR, LIMPIAR y ENFRIAR.
COCINAR
Es muy importante cocinar los alimentos a una temperatura interna que destruya cualquier
bacteria que esté presente. Últimamente se ha puesto mucha atención en la higiene de
las hamburguesas y otros alimentos elaborados con carne molida y con razón. Cuando se
muele la carne, las bacterias presentes en la supercie se revuelven en toda la mezcla de la
carne molida. Si la carne molida no se cuece a por lo menos 71°C a 74°C (160°F - 165°F),
no se destruyen las bacterias y hay una buena posibilidad de enfermarse.
Las piezas de carne sólida, como los letes y las chuletas, no tienen en su interior bacterias
peligrosas como le E. coli, por lo que pueden servirse menos cocidas. Aun así, cualquier
corte de vacuno debe cocinarse a una temperatura interna de por lo menos 63°C (145°F)
(medio cocido). La temperatura recomendable para las aves es de 74°C (165°F) y los cortes
sólidos de carne de puerco deben cocinarse a 71°C (160°F).
SEPARAR
SIEMPRE DEBE separar los alimentos que se comen crudos y los que se vayan a cocer
antes de comerse. La contaminación cruzada se presenta cuando la carne o los huevos
crudos entran en contacto con alimentos que se van a consumir sin cocimiento. Ésta es una
importante causa de intoxicaciones. Siempre use una doble envoltura para la carne cruda
y colóquela en la repisa más baja del refrigerador, para que no haya manera de que su
jugo gotee en las verduras frescas. Use la carne cruda 1 o 2 días después de comprarla, o
congélela para guardarla más tiempo. Descongele la carne congelada en el refrigerador, no
en el mesón de la cocina.
Cuando ase o cocine carne o pescado crudo, coloque la carne ya cocida en un platón
limpio. No use el mismo platón que usó para llevar la carne al asador. Lave los utensilios
usados en el asador después de haber volteado los alimentos por última vez, así como las
cucharas y espátulas usadas para freír o para voltear la carne al estarla cocinando.
No olvide lavarse las manos después de manejar carne o huevos crudos. Es absolutamente
necesario lavarse las manos con agua y jabón o usar una toallita húmeda antibacteriana
después de tocar carne o huevos crudos. No lavarse las manos o las supercies cuando se
cocina es una causa importante de contaminación cruzada.
LIMPIAR
Lávese las manos y las supercies de trabajo con frecuencia mientras esté cocinando.
Lávese con agua tibia y jabón durante por lo menos 15 segundos; después séquese con
una toalla de papel.
ENFRIAR
Es muy importante enfriar los alimentos. La zona de peligro para la multiplicación de
bacterias está entre los 4 °C y 60 °C (40 °F - 140 °F). El refrigerador debe estar a 4 °C (40
°F) o menos; el congelador debe estar a -18 °C (0 °F) o menos. Regla básica: sirva calientes
los alimentos calientes y sirva fríos los alimentos fríos. Use platos calientes para mantener
caliente la comida a la hora de servirla. Use baños de agua con hielo para mantener fría
la comida fría. Nunca deje ningún alimento a temperatura ambiente por más de 2 horas;
o por más de 1 hora si la temperatura ambiente es de 32 °C (90 °F) o superior. Cuando
empaque para un picnic, asegúrese de que la comida ya esté fría cuando la meta en la
canasta aislada. La canasta no enfría la comida; sólo la mantiene fría si está debidamente
empacada con hielo. Los alimentos cocidos calientes deben colocarse en recipientes bajos
y refrigerarse de inmediato para que se enfríen rápidamente. No olvide cubrir los alimentos
una vez que se enfríen..
NOTA: Debe tener especial consideración al usar venado y otra carne de caza, ya que
puede contaminarse durante la preparación de campo. El venado suele mantenerse a
temperaturas que podrían permitir el crecimiento de bacterias, como cuando se transporta.
Consulte con el Departamento de Carnes y Aves de la USDA si tiene más preguntas o
quiere más información sobre higiene de carne y alimentos.
SEGURIDAD DE LOS ALIMENTOS

Grupo HB PS, S.A. de C.V.
Monte Elbruz No. 124 – 401
Col. Polanco V Sección, Miguel Hidalgo
Ciudad de México, C.P. 11560
GARANTÍA PARA PRODUCTOS COMPRADOS EN MÉXICO
PRODUCTO: MARCA: MODELO:
Grupo HB PS, S.A. de C.V. cuenta con Centros de Servicio autorizados. Por favor consulte en la lista anexa el nombre y dirección
de los establecimientos en la República Mexicana en dónde usted podrá hacer efectiva la garantía, obtener partes, componen
consumibles y accesorios; así como también obtener servicio para productos fuera de garantía. Para mayor información llame al:
Centro de Atención al Consumidor: 800 95 30 121
Grupo HB PS, S.A. de C.V. le otorga a partir de la fecha de compra:
GARANTÍA DE 1 AÑO.
COBERTURA
• Esta garantía ampara, todas las piezas y componentes del producto que resulten con defecto de fabricación incluyendo la mano
de obra.
• Grupo HB PS, S.A. de C.V. se obliga a reemplazar, reparar o reponer, cualquier pieza o componente defectuoso; proporcionar la
mano de obra necesaria para su diagnóstico y reparación, todo lo anterior sin costo adicional para el consumidor.
• Esta garantía incluye los gastos de transportación del producto que deriven de su cumplimiento dentro de su red de servicio.
LIMITACIONES
• Esta garantía no ampara el reemplazo de piezas deterioradas por uso o por desgaste normal, como son: cuchillas, vasos, jarras,
filtros, etc.
• Grupo HB PS, S.A. de C.V. no se hace responsable por los accidentes producidos a consecuencia de una instalación eléctrica
defectuosa, ausencia de toma de tierra, clavija o enchufe en mal estado, etc.
EXCEPCIONES
Esta garantía no será efectiva en los siguientes casos:
a) Cuando el producto se hubiese utlizado en condiciones distintas a las normales. (Uso industrial, semi-industrial o comercial.)
b) Cuando el producto no hubiese sido operado de acuerdo con el instructivo de uso.
c) Cuando el producto hubiese sido alterado o reparado por personas no autorizadas por Grupo HB PS, S.A. de C.V. el
fabricante nacional, importador o comercializador responsable respectivo.
El consumidor puede solicitar que se haga efectiva la garantía ante la propia casa comercial donde adquirió su producto, siempre y
cuando Grupo HB PS, S.A. de C.V. no cuente con talleres de servicio.
PROCEDIMIENTO PARA HACER EFECTIVA LA GARANTÍA
• Para hacer efectiva la garantía, lleve su aparato al Centro de Servicio Autorizado más cercano a su domicilio (consulte la lista
anexa).
• Si no existe Centro de Servicio Autorizado en su localidad llame a nuestro Centro de Atención al Consumidor para recibir instruc-
ciones de cómo hacer efectiva su garantía.
FECHA DE
ENTREGA
SELLO DEL
VENDEDOR QUEJAS Y SUGERENCIAS
DÍA___
MES___
AÑO___
• Si desea hacer comentarios o sugerencias con respecto a nuestro servicio o tiene alguna
queja derivada de la atención recibida en alguno de nuestros Centros de Servicio Autoriza-
dos, por favor dirigirse a:
GERENCIA INTERNACIONAL DE SERVICIO - 800 95 30 121
Email: [email protected]
CENTROS DE SERVICIO AUTORIZADOS
Ciudad de México
ELECTRODOMÉSTICOS
Av. Plutarco Elias Calles No. 1499
Zacahuitzco, Benito Juárez, Ciudad de México, C.P. 09490
Tel: 55 5235 2323
CASA GARCÍA
Av. Patriotismo No. 875-B
Mixcoac, Benito Juárez, Ciudad de México, C.P. 03910
Tel: 55 5563 8723
Nuevo León
FERNANDO SEPÚLVEDA REFACCIONES
Ruperto Martínez No. 238 Ote.
Col. Centro, Monterrey, N.L., C.P. 64000
Tel: 81 8343 6700
Jalisco
SERVICIOS DE MANTENIMIENTO CASTILLO
Garibaldi No. 1450
Ladrón de Guevara, Guadalajara, Jalisco, C.P. 44660
Tel: 33 3825 3480
18

MACHINE À PÂTES
PARCE QUE NOS PRODUITS BÉNÈFICIENT DE PERFECTIONNEMENTS CONSTANTS
APPORTÉS EN USINE, LES ILLUSTRATIONS PRÉSENTES PEUVENT ÊTRE LÉGÈREMENT
DIFFÉRENTES DU PRODUIT REÇU.

INSTRUCTIONS EN FRANÇAIS
20
1
Bouton du
réglage
Rouleaux
pour feuille
2
4
En dessous
Clip de xation
3
Rouleaux pour
fettuccini
Rouleaux pour
spaghettis
Base
DESCRIPTION DE LA PIÈCE
NUMÉRO DE SCHÉMA DESCRIPTION DE LA PIÉCE
1 MANIVELLE
2 CLIP EN C
3 ACCESSOIRE DE COUPE POUR
FETTUCCINI/SPAGHETTI
4 PIEDS CAOUTCHOUTÉS (4)
N’hésitez pas à visiter notre site Web WestonBrands.com/support si un composant est cassé, l’outil
fonctionne mal, ou pour commander un nouveau mode d’emploi.
WestonBrands.com
Other manuals for 01-0201
2
Table of contents
Languages:
Other Weston Pasta Maker manuals