BEL 150 V.02 Series of Semi-Automatic Uniform Case Tape Sealers 7
65-43-2 12/20/11
Installing the BEL150
Transportation and Storage
The BEL 150 should not be stored or transported in extreme temperatures. Transport and store
in a covered environment not directly exposed to the natural elements, such as rain, snow or
wind. When transporting the machine it should be safely secured to prevent movement.
Remove the through-bolts that secure the machine to the shipping base. Use wooden dunnage
blocks under the frame when using a forklift to lift the machine off its shipping base and to position it. If
the machine is equipped with casters use the caster brakes when the machine is in the desired
location to prevent movement.
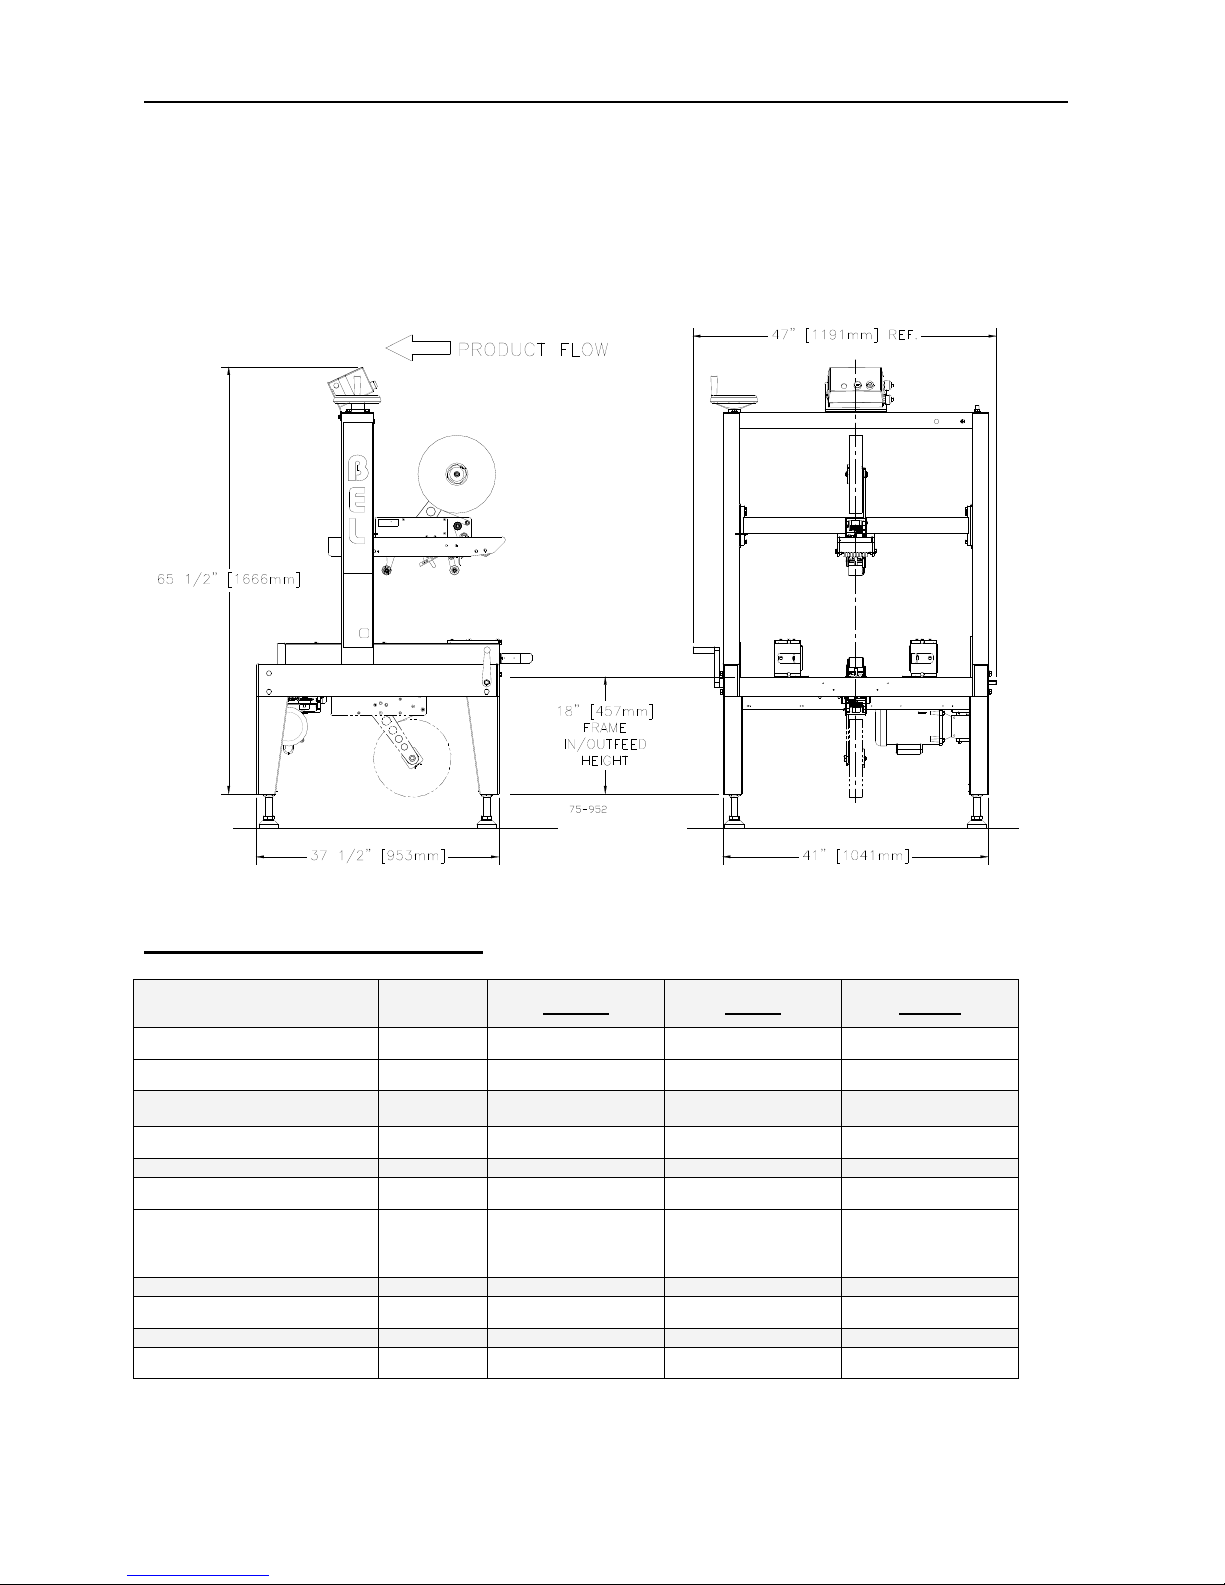
Leveling the Machine
The machine should be installed in a level position to avoid frame stress and ensure optimum
performance. The machine is equipped with adjustable leg-height and leveling pads as standard
equipment and adjustable casters are available as an option. Once the infeed / outfeed height has
been set, use a spirit level both along and across the frame side-rail members to level the
machine.
Power Connection
The BEL 150 is equipped with single-phase 115 VAC / 60 HZ electrics and manufactured to
NEMA 12 specifications. The drive system is powered by a 1/2 horsepower TEFC motor that
draws eight amps. A 14 gauge (AWG) power extension cord with standard three pin connection
must be used to connect the machine to the power source.
A dedicated electrical circuit is recommended for this machine. If any electrical connections are
needed to install the machine, these must be handled by an electrician qualified in your
jurisdiction.