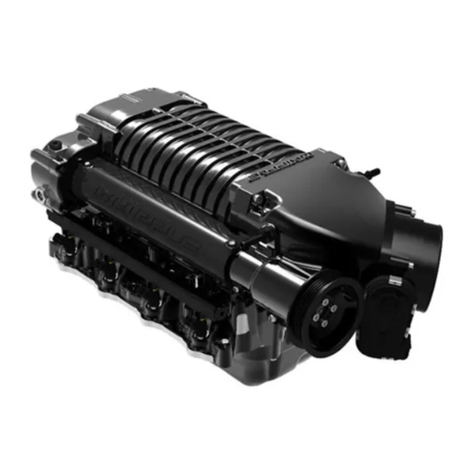
Whipple EB-8185 User manual

Instruction Manual: Bronco_Megacooler_8185_ R1
Last Updated: April 28th , 2022
Page 1 of 16
www.whipplesuperchargers.com
2021 AND UP FORD BRONCO
MEGACOOLER UPGRADE
2.3L/2.7L ECOBOOST
WHIPPLE PART NUMBER #EB-8185
WHIPPLE SUPERCHARGERS
3292 NORTH WEBER AVE
FRESNO, CA 93722
TEL 559.442.1261
FAX 559.442.4153
WWW.WHIPPLESUPERCHARGERS.COM
PREMIUM FUEL ONLY (91 OCTANE OR BETTER ALWAYS) RON+MON/ 2
CALIFORNIA AIR RESCOURCE BOARD EXECUTIVE ORDER #PENDING
COMPETITION BASED PRODUCT MAY BE USED SOLELY ON VEHICLES USED IN SANCTIONED COMPETITION WHICH
MAY NEVER BE USED UPON A PUBLIC ROAD OR HIGHWAY

Instruction Manual: Bronco_Megacooler_8185_ R1
Last Updated: April 28th , 2022
Page 2 of 16
www.whipplesuperchargers.com
INTRODUCTION
Before beginning installation, please read this manual and important notes:
•Please read the installation manual and verify that all items are present. If you are missing hardware or have any
questions, please contact your dealer or Whipple.
COMPETITION BASED PRODUCT MAY BE USED SOLELY ON VEHICLES USED IN SANCTIONED COMPETITION
WHICH MAY NEVER BE USED UPON A PUBLIC ROAD OR HIGHWAY, UNLESS PERMITTED BY SPECIFIC
REGULATORY EXEMPTION (VISIT THE “EMISSIONS” PAGE AT HTTP://WWW.SEMASAN.COM/EMISSIONS
FOR STATE BY STATE DETAILS.
COMPETITION BASED PRODUCT IS LEGAL IN CALIFORNIA ONLY FOR RACING VEHICLES WHICH MAY
NEVER BE USED, OR REGISTERED OR LICENSED FOR USE, UPON A HIGHWAY.
IT IS THE RESPONSIBILITY OF THE INSTALLER AND/OR USER OF THIS PRODUCT TO ENSURE THAT IT IS
USED IN COMPLIANCE WITH ALL APPLICABLE LAWS AND REGULATIONS.
RECOMMENDED TOOLS AND SUPPLIES
The following items are not included in this supercharger kit and it is strongly recommended that they're used for ease of
installation or maximum performance.
Safety glasses, 3/8” torque wrench, 3/8” assorted metric socket set, T40 Torx, trim pad tool (for pushpin removal), floor
jack.
PRE-INSTALLATION CHECKLIST
Before installing your Whipple Kit, complete the following checklist.
1. Verify Condition of Vehicle: Before the upgrade kit is installed, ensure the engine runs smoothly and that the
factory malfunction indicator light (MIL) is off. Only install the supercharger kit if the engine runs smoothly
and
the MIL is off.
2. !! CAUTION !! This product is intended for use only on STOCK, UNMODIFIED, WELL-MAINTAINED
engines. Installation on a worn-out or modified engine is not recommended without factory
computer and fuel system modifications.
3. Assess Cleanliness of Installation Area: Make sure your work area and the under-hood area are free from debris.
This supercharger is a high-quality, close-tolerance compressor and must not be subjected to contamination by
dirt or any type of foreign material. If necessary, vacuum around engine to remove any foreign material.
4. !! CAUTION !! Identify Kit Components: Before beginning installation, identify all the components of your
Whipple Kit and ensure all items are present and undamaged.

Instruction Manual: Bronco_Megacooler_8185_ R1
Last Updated: April 28th , 2022
Page 3 of 16
www.whipplesuperchargers.com
SAFETY PRECAUTIONS
CAREFULLY READ THE IMPORTANT SAFETY PRECAUTIONS AND WARNINGS BEFORE PROCEEDING WITH
THE INSTALLATION!
Appropriate disassembly, assembly methods and procedures are essential to ensure the personal safety of the individual
performing the kit installation. Improper installation due to the failure to correctly follow these instructions could cause
personally injury or death. Read each step of the installation manual carefully before starting the installation.
•Always wear safety glasses for eye protection.
•Place the ignition switch in the off position.
•Always apply the parking brake when working on vehicle.
•Block the front and rear tire surfaces to prevent unexpected vehicle movement.
•Operate the engine only in well-ventilated areas to avoid exposure to carbon monoxide.
•Do not smoke or use flammable items near or around fuel system.
•Use chemicals and cleaners only in well-ventilated areas.
•Batteries can produce explosive hydrogen gas which can cause personal injury. Do not allow flames, sparks or
flammable sources to come near the battery.
•Keep hands and any other objects away from the radiator fan blades.
•Keep yourself and your clothing away from moving parts when the engine is running.
•Do not wear loose clothing or jewelry that can be caught in rotating or moving parts.
**NOTICE: Installation of Whipple products signifies that you have read this document and have agreed to the terms
stated within.
It’s the purchaser’s responsibility to follow all installation instruction guidelines and safety procedures supplied with the
product as it’s received by the purchaser to determine the compatibility of the product with the vehicle or the device the
purchaser intends to install the product on.
Whipple assumes no responsibility for damages occurring from accident, misuse, abuse, improper installation, improper
operation, lack of reasonable care or all previously stated reasons resulting from incompatibility with other manufacturer’s
products.
There are no warranties expressed or implied for engine failure or damage to the vehicle in any way, loss of use or
inconvenience or labor reimbursement. This includes merchantability and fitness.
The information contained in this publication was accurate and in effect at the time the publication was approved for
printing and is subject to change without notice or liability. Whipple reserves the right to revise the information presented
herein or to discontinue the production of parts described at any time.

Instruction Manual: Bronco_Megacooler_8185_ R1
Last Updated: April 28th , 2022
Page 4 of 16
www.whipplesuperchargers.com
INSTALLATION INSTRUCTIONS
It is strongly recommended that you read through this guide before you begin installing the Whipple Kit.
1. Using an air hose, blow off any loose dirt or debris from engine compartment. If really dirty, then steam clean the
engine compartment before proceeding to the next step.
2. Lift the vehicle using a floor hoist, if you do not have access to one, use a hydraulic floor jack and jack stands to
raise the vehicle. NOTE: Jack stands must be used on a level surface and be securely seated. Failure to do so may
result in personal injury or vehicle damage.
3. Remove the fasteners and the engine front under shield using 15mm socket. NOTE: Some models have (4), some
have (6).

Instruction Manual: Bronco_Megacooler_8185_ R1
Last Updated: April 28th , 2022
Page 5 of 16
www.whipplesuperchargers.com
4. Release the CAC inlet pipe by spreading the retainer ends outward. Position the retainer ends in the notches
locking the retainer in the open position and position aside the CAC inlet pipe.
5. Release the CAC outlet pipe by spreading the retainer ends outward. Position the retainer ends in the notches
locking the retainer in the open position and position aside the CAC outlet pipe.
6. Disconnect the front bumper electrical connector (LH front of vehicle).

Instruction Manual: Bronco_Megacooler_8185_ R1
Last Updated: April 28th , 2022
Page 6 of 16
www.whipplesuperchargers.com
7. If equipped, remove the bolts and front bumper bar using a T40 socket.
8. Remove the push pins, release the clips and remove the front bumper trim panel.
9. Remove the bolts and the front bumper using a 15mm socket.

Instruction Manual: Bronco_Megacooler_8185_ R1
Last Updated: April 28th , 2022
Page 7 of 16
www.whipplesuperchargers.com
10. Release the CCM cover top clips and remove cover.
11. Disconnect the lower active grill shutter actuator electrical connector.
12. Remove the (4) bolts and the lower active grille shutter unit using 8mm socket.

Instruction Manual: Bronco_Megacooler_8185_ R1
Last Updated: April 28th , 2022
Page 8 of 16
www.whipplesuperchargers.com
13. If equipped, remove the tow hook shields.
14. Gently release the CCM grommets from the active grille shutter CCM bracket, then remove CCM from bracket.
Disconnect CCM wiring connector from CCM. NOTE: If not equipped with CCM, disregard.
15. With the aid of a 2nd person, remove (4) bolts from the CAC/tow hook brackets to lower CAC out of vehicle.

Instruction Manual: Bronco_Megacooler_8185_ R1
Last Updated: April 28th , 2022
Page 9 of 16
www.whipplesuperchargers.com
16. Remove the CAC isolators from CAC. Transfer to new CAC.
17. (If equipped) Remove the (1) bolt and dislodge the holding clips. Using factory bolt, transfer to new CAC. Torque to
62 in-lbs.
18. Set CAC to stock brackets. With the aid of a 2nd person, install the (4) bolts from the IC/tow hook brackets to install
CAC. Torque to 59 ft-lb.

Instruction Manual: Bronco_Megacooler_8185_ R1
Last Updated: April 28th , 2022
Page 10 of 16
www.whipplesuperchargers.com
19. Remove the CCM bracket from active grill shutter using an 8mm socket. Transfer CCM bracket to supplied CCM
bracket assembly using the (3) 6mm x 10mm HHFCS fasteners. Torque to 96 in-lb using a 10mm socket. Slide CCM
module back on bracket. NOTE: CCM bracket is pre-positioned and should not require adjustment, CCM equipped
vehicles should never modify CCM bracket or fasteners. The CCM bracket can be discarded if vehicle is not
equipped with CCM.
20. Remove the active grille shutter motor from assembly by remove U-shape brace, then removing shutter arms from
motor. Install on new supplied bracket using the (2) supplied zip-ties.

Instruction Manual: Bronco_Megacooler_8185_ R1
Last Updated: April 28th , 2022
Page 11 of 16
www.whipplesuperchargers.com
21. Mount the shutter motor to the bracket assembly using the (2) supplied zip-ties. Secure CCM wiring using same zip
ties for a clean installation.
22. Install the new CCM bracket assembly to vehicle using the (4) factory fasteners. Torque to 62 in-lb using 8mm
socket.

Instruction Manual: Bronco_Megacooler_8185_ R1
Last Updated: April 28th , 2022
Page 12 of 16
www.whipplesuperchargers.com
23. Reconnect CCM wiring connector to CCM. Reinstall plastic cover over CCM bracket, this will NOT fit after bumper
installation.
24. Reconnect the lower active grill shutter actuator electrical connector.
25. Install the stock bolts and the front bumper using a 15mm socket, torque to 81 ft-lb.

Instruction Manual: Bronco_Megacooler_8185_ R1
Last Updated: April 28th , 2022
Page 13 of 16
www.whipplesuperchargers.com
26. Reinstall the push pins and front bumper trim panel.
27. Reinstall the front bumper bar with the factory (8) bolts using a T40 socket. Torque to 25 ft-lb.
28. Reconnect the front bumper electrical connector.

Instruction Manual: Bronco_Megacooler_8185_ R1
Last Updated: April 28th , 2022
Page 14 of 16
www.whipplesuperchargers.com
29. Reinstall the fasteners and the engine front under shield. Torque to 124 in-lbs.
30. Remove the fastener and the air intake duct.
31. Remove the 4 bolts securing airbox lid to airbox. Remove stock filter by lifting up and away.

Instruction Manual: Bronco_Megacooler_8185_ R1
Last Updated: April 28th , 2022
Page 15 of 16
www.whipplesuperchargers.com
32. Install the CARB legal decal next to the OEM emission decal located under the hood.
33. Start the vehicle, check for any leaks or check engine lights.
34. NOTE: If the CCM (cruise control module) needs to be aligned, perform the cruise control radar alignment
procedure before the front bumper is installed. Using a diagnostic scan tool, complete the PMI process for
the CCM following the on-screen instructions.
CCM ALIGNMENT IF REQUIRED
35. Place the vehicle on a wheel alignment bay station. Locate the CCM alignment screw.
36. NOTE: Measurement must be taken from the non-raised side of the CCM. Place a combination square level on the
face of the CCM and check the alignment.

Instruction Manual: Bronco_Megacooler_8185_ R1
Last Updated: April 28th , 2022
Page 16 of 16
www.whipplesuperchargers.com
37. NOTE: Measurement must be taken from the non-raised side of the CCM. Keeping the combination square level on
the face of the CCM, adjust the pitch by turning the adjustment screw until the CCM is vertical and level.
38. NOTE: The horizontal alignment for the CCM (cruise control module) is a software calibration check that is
performed by the scan tool to insure the CCM (cruise control module) radar is pointed straight. No manual
adjustment is needed for this procedure. The scan tool calibrates the CCM (cruise control module) through the
CCM (cruise control module) procedure in programmable parameters. The Alignment Offset specification is +/- 3.0
degrees of offset. NOTICE: The vehicle's engine must be running during the horizontal alignment
procedure. Failure to leave the engine running throughout the entire procedure results in the
cancellation of the alignment procedure and the system remains non-functional.
39. Follow the scan tool on-screen instructions to carry-out the CCM calibration procedure.
Table of contents
Other Whipple Automobile Accessories manuals
Popular Automobile Accessories manuals by other brands

GASLOCK
GASLOCK INDY-CATOR-DASH operating instructions

POOL-LINE
POOL-LINE 110198 Assembly instructions

AEROKLAS
AEROKLAS 1400 Series Installation instruction

iDataLink
iDataLink maestro Rr install guide

Safe Fleet
Safe Fleet Prime Design VBB3 FT21B Assembly instructions

Whispbar
Whispbar K462W Fitting instructions