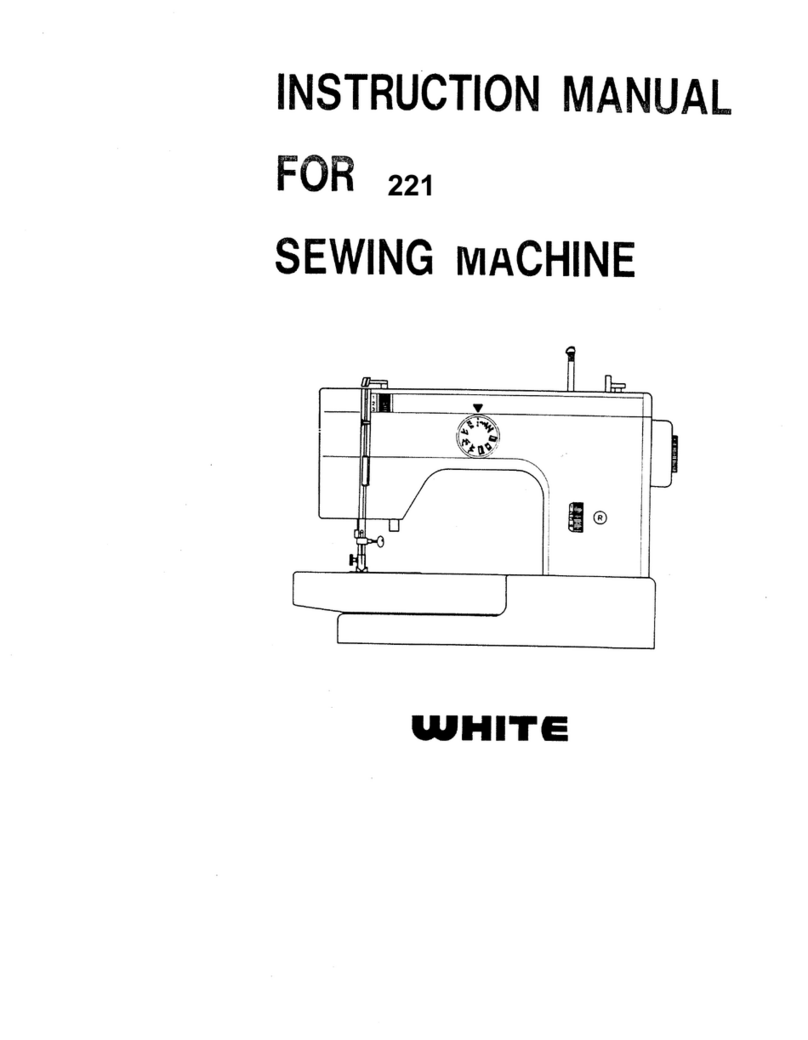
White 762 Owner's manual


i
INDEX
27-28-29
Attachments
31-32-33-34-35-36
Attachment
Foot
32
Edgestitcher
32
Ruffler
35
Binder
33
Hemmers
34
Darning
Spring
34
Cording
&
Zipper
Foot
36
Sewing
on
Zipper
36
•1
I
Page
Features
and
Parts
2—3—4
Needle
and Thread
Chart
5
f
Setting the
Needle
6
:
Winding
the
Bobbin
6
Threading
Bobbin
Case
7
Placing
Bobbin
Case in
Shuttle
8
Upper Threading
9
Straight
Stitching
10
I
Changing
Foot
and
Plate
10
Setting the Stitch
Length
11
Stitch Length
Chart
11
i
Sewing
in
Reverse
11
I
Adjusting
the
Tensions
11
Adjusting Pressure and Feed
12
General
Sewing
12
Light
Weight
Fabrics
13
Darning
and
Monogramming 13
Preparing
to Sew
13
Removing
the
Work
14
Creative Embroidery
14
Satin
Stitch
14
Adjusting Stitch
Width 15
Embroidery Patterns
15
Samples
of
Embroidery
15
Automatic
Embroidery
16
Blind Hems
17
Embroidery
With
a
Hoop 18
Darning
Making Buttonholes
Sewing
on
Buttons
How
to
Use
Accessories
Narrow
Hemmer
Lace
Trimmed
Hem
Lace
Edge
French
Seam
Flat
Felled
Seam
Hand
Rolled
Effect
Quilting
Guide
Seam
Gauge
Care
and Maintenance
Oiling
Cleaning
and
Oiling
Shuttle
Accessories
Trouble
Charts
Page
18
19
20
21-22-23
21
21
22
22
22
22
22
23
23
24
25
26

2
—w
/
/
2O
22
23
24
25
4
//
A
18
j
st*owIen
—,
Lf.
/6
I
Fig.
1

FEATURES
AND
PARTS
(Front
View)
3
Spool
Pins
Stitch
Width
Window
Stitch
Width
Lever
Zigzag
Stop
Knobs
Hand
Wheel
Wheel
Clutch
Bobbin
Winder
Stitch Length
Dial
,‘v-’fr
2D
C
Push
Button
Reverse
Bobbin
Winding
Tension
Drop
Feed
Knob
9o
c
7
Cover
Plate
Needle
Plate
-
Seam
Guide
Presser
Foot
Needle
Clamp
and
Screw
Attachment and
Foot
Thumb
Screw
Needle
Bar
Thread
Guide
Thread
Guides
Tension
Regulator
Light Switch
Take-up Lever
Pressure
Release
-
Darner
Arm
Thread
Guide
Cam
Cover
Chamber
Control
Lever
1.
2.
3.
4.
5.
6.
7.
8.
9.
10.
11.
12.
13.
14.
15.
16.
17.
18.
19.
20.
21.
22.
23.
24.
25.
da
u
,
CL7
•1

4
I
FEATURES
AND PARTS
1
Back
View)
24.
Thread
Cutter
25.
Presser
Bar
Lifter
26.
Feed
27.
Motor
28. Belt
LJ
0
27
Fig.
2

5
NEEDLE
-
THREAD
-
FABRIC
-
STITCHING
GUIDE
Machine
Needle
Stitches
No.
Per
Inch
Cotton
Mercerized
Thread
Thread
Silk
or
Nylon
Extremely
heavy
6
24
tarpaulin,
sacking,
4
to
to
Heavy
Duty
canvas,
duck,
etc.
8
30
Heavy
upholstery
8
30
fabric,
ticking,
3
to
to
Heavy
Duty
denim,
leatherette
10 40
Medium
heavy
drapery
10
40
fabric,
velveteen,
2
to
to
Heavy
Duty
suiting,
felt,
terry,
etc.
12
60
Medium
broadcloth,
12
60
percale
gingham,
linen,
A
1
to to
chintz,
taffeta,
sheer
wool,
shantung,
etc.
14 80
Sheer
voile,
lawn,
14
80
dimity,
crepe,
0
to
to
50
A
handkerchief
linen,
16
100
plastic
film,
etc.
(Plastic
film)
8
to
10
Very
sheer
chiffon,
16
100
batiste,
lace,
organdy,
00
to to
50
A
ninon,
net,
marquisette,
etc.
20
150
Fabric

B
SETTING
THE
NEEDLE
See
Fig.
3.
Raise
the
needle
bar
A
to its
I
I
highest
point,
turning
wheel
toward
you
by
hand.
I
Then
loosen
the
needle
clamp
screw
B
and
the
needle
can
be
inserted
into clamp
C.
Place
needle
(flat
side
to
right)
in
the
needle
clamp
GRO\ED
and
push
it
upward
as
far
as
jt
will
go
into
the
E
C
needle
clamp
hole,
tightening
the
needle
clamp
—j
screw
securely
with
a
screw
driver.
I
After
changing
needle
make
one
complete
revolution
of
balance
wheel
by
hand
to
be
sure
the
needle
is
in
the
----
I
correct
position.
Fig.
3
HOW
TO
WIND
THE
BOBBIN
Turn
the
clutch
in
the
center
of
the
hand
wheel
(Fig.
4)
toward
you to
disengage
the
sewing
mechanism.
Place
a
spool
of
thread
on
the
spool
pin
on
the
bed
of
the
machine
(Fig.
5).
Pass
thread
-
through
tension
disc
A.
Insert
thread
I
through
a
hole
on
edge
of
bobbin
and
place bobbin
on
spindle
(B)
of
winder.
Be
sure
that
the
notch
in
the
bobbin
fits
over
the
small
pin
on
the
spindle.
Place
pulley
(C)
against
hand
wheel
by
pressing
lever
(D)
and
set
machine
in
motion.
When
the
bobbin
is
fully
wound,
the action
of
the
winder
stops
automatically.
Remove
from
spindle
and cut
off
loose
thread end used
to
start
winding.
Before
starting
to
sew
again,
tighten
clutch
by
turning
it away
from
you,
If
the
bobbin
winds
unevenly,
adjust
the
bobbin winding
Fig.
4
tension disc
(A)
to
the
right
or
left
by loosening
the
screwS
When
the
disc
is
in
the
proper
position,
tighten
screw.
Fig.
5

THREADING
THE
BOBBIN
CASE
Step
1
(illustrated
in
Fig.
6).
Hold
bobbin
case
between
thumb
and
forefinger
of
left
hand,
so
that
the
slot in
the
edge
of
the
bobbin
case
is
on
top. Take
the
bobbin
between
thumb
and
forefinger
of
right
hand
so
that
the
thread
on
top
leads
from
left
to
right.
Step
2.
Insert
bobbin
into
bobbin
case,
pull the
thread
into
the
slot
of
the
bobbin
case
as
shown
in
Fig.7,
and
draw
it
under
the
tension
spring
and
into
the
fork-shaped
opening
of
the
spring
as
shown
in
Fig.
8
7
I
—
4
..,
I
Fig. 6
Fig.
7
Fig.
8

‘LI
8
PLACING
BOBBIN
CASE
IN
SHUTTLE
Open
hinged
cover
plate
left
of
the
needle.
(See
12,
Fig.
1)
Hold
the
bobbin
case
latch,
(D),
Fig.
9,
between
the
thumb
and
forefinger
of
the
left
hand, with
at
least
three
inches
of
thread
running
from
the
top
of
the
bobbin
case
to
the
right.
Insert
and
center
the
bobbin
case
on
the
stud
of
the
shuttle
body,
(C).
Be
sure
the
bobbin
case
finger,
(E),
is
will
enter
the
shuttle
race
notch,
(A).
Press
the
bobbin
case
(B)
into
the
shuttle
as
far
as
pos
sible
until
latch
catches
on
the
center
post
of
the
Fig.
9
shuttle.
THEN
release
the
bobbin
case
latch,
(D).
Press
bobbin
case
again
after
latch
has
been
re
leased
to
make sure
the
bobbin
case
is
locked
securely
in
place.
Close
the
cover
plate.
Fig.
10

UPPER
THREADING
Fig.
10)
1,
Place
spool
of
thread
on
upper
spool
pin,
2)
lead
thread
through
arm
thread
guide
A
3)
down
and
around tension
discs
B
from
right
to
left
4)
into the check spring
C
over
threaded
discs
5.
then
pull
thread
under
bar
D
See
insert,
Fig.
10)
6)
up
into
take-up
lever
E
from
right
to left
Fig.
11
7,
down
into
thread
guide
F
on
face
plate
8,
through
the
needle
bar
thread
guide
G
9)
and
into
needle
from
left
to
right.
Pull
three
or
four
inches
of
thread
through
needle
Hold
the
end
of
upper thread
loosely
and
turn
hand
wheel
toward
you
until
the
needle
es
all
the
way down
and
comes
back
up.
A
loop
(Fig.
11)
will
be
formed
over
the
lower
read
which
then
can
be
pulled
out
straight. Place
both
thread
ends under
the
slot
of
the
sser
foot
and
draw
toward
the
back
of
the
machine,
leaving both
threads
three
or
four
;hes
long.
J
9
I

10
STRAIGHT
STITCHING
For
straight
sewing
on
fine
fabric
or
very
soft
mater
ial,
you
may
want
to
use
the
straight
stitch
presser
foot
and the
straight
stitch
needle
plate
which
are
in
cluded
in
your
accessory
box.
Both
have
narrow
needle
slots.
Changing
the
Foot
and
Plate.
To
change
presser
foot
(14,
Fig. 1)
loosen
thumb
screw
(16,
Fig.
1)
and
remove
zigzag
foot.
Replace
with
hinged
narrow
foot
and tighten
screw
securely.
To
change
needle
plate
13,
Fig.
1
remove
it
with
cover
plate
from
machine.
Turn
assembly
wrong
side
up.
Hold
needle
plate
in
left
hand and
cover
plate
in
right.
(Fig.
12-A
1
Slip
upper
pin
on.
cover
plate
out
of
groove
on
needle
plate,
and
pull
upper
portion
of
cover
plate
away.
Then
lower
pin
can
be
separated
from
groove
as
the
tongue
on
cover
plate
slips
out
of
the spring
latch
on
needle
plate.
To
attach
cover plate
to
straight
stitch
plate,
again
hold
assembly
wrong
side
up.
Holding
cover
plate
in
right
hand
at
a
slight upward
angle,
slide
lower
pin
in
to
groove,
then.
li±
cover plate
to
insert
tongue
into
opening
of
spring
latch.
Upper
pin
will
then
slide
easily
into groove.
Put
plates
on
machine and
fasten
securely
with
needle
plate
screws.
Be
sure
to
set
the
stitch
width
at
0
or
the
needle
will
break
in
striking the
loot
or
plate. Adjust stops
E
to
hold
zigzag
lever
D
in 0
position.
Fig. 12-A
__
Fig.
12-B

11
SETTING
THE
STITCH
LENGTH
The
length
of
the
stitch
is
regulated
by
the
dial,
F,
shown in
Fig.
12-B.
Near
0
is
the shortest
stitch
and
9
is
the
longest,
but the
dial
may
be
set
at
any spot
between
markings
for
variety
of
lengths.
Turn
the
dial
to
the
right
to
lengthen
and
to
the
left
to
shorten
the
stitch.
The
number
of
the
stitch
length
you
choose
should
appear
below
the
dot
on
the
control plate.
STITCH
LENGTH
CHART
‘Approximate;
Figures
on
indicator
0
1
2
3
4
567
89
Number
of
stitches
per
inch
No
Feeding
60
40
20 16
12
10
8
7
6
SEWING
IN
REVERSE
When
you
wish
to
sew
in
reverse
to
tie
the
threads
at
the
beginning
or
end
of
a
seam,
press
in
the button
G,
Fig.
12-B,
as
far
as
it
will
go.
The
machine
will
sew
backward
as
long
as
the
button
is
held
in.
Only about
4
or
5
stitches
are
needed
to
tie
a
seam.
ADJUSTING
THE
TENSIONS
Always
adjust
the
upper
tension
with
the
presser
loot
down,
as
the
tension
is
automatically
released
when
it
is
raised.
To
[/f4f
increase
the tension
on
the
upper
thread,
turn
dial
(Fig.
13)
to
the
right,
or
clockwise.
To
decrease,
turn
to
the
left.
The
higher
the
number
on
the
dial
the
tighter
the
tension.
Before
adjusting
wer
tension
be
sure
that
the
machine
is
threaded
properly.
When
necessary
to
change the
bobbin
tension,
turn
small
U1
screw
Fig.
14)
on
side
of
the
bobbin
case
clockwise
to
tighten,
F
13
counterclockwise
to
loosen.
1g.

12
When
the upper
and
under
tensions
are
properly
balanced,
a
perfect
stitch
will
be
formed
with
both
threads
interlocking
in
fabric
Fig.
15,).
When
the
upper
tension
is
too
tight,
the
lower
thread
is
pulled
up
over
the
upper
thread
which
is
lying
flat
on.
the
fabric
‘Fig.
16’).
When
the
upper
tension
is
too
loose
the
upper
thread
forms
loops over
the
lower
thread
lying
flat
on
the
fabric
(Fig.
17,.
ADJUSTING
PRESSURE
AND
FEEDING
OF
FABRIC
Fig.
14
GENERAL SEWING.
Usually
for
straight
sewing
and
zigzag
stitching,
the pressure
bar
ca
or
darner
release,
22,
Fig.
18,
is
at
its
lowest position
and
the
drop
feed
knob
is
turned
t
REG.
position,
Fig. 19.
Fig.
15
_
F
Fig.
16
__
_______
___
___
Fig.
17________
Fig.
18
Fig.
19
*,
‘,
,-,

13
SEWING
THIN
OR
LIGHT
WEIGHT
FABRICS.
When
lighter
pressure
is
required
to
sew
satisfactorily
on
thin
silk
or
filmy
material,
the
pressure
cap
should
be
about
halfway
down.
Release
all
the
way
by
pressing
the
snap
lock,
A,
Fig.
20,
and then
press
cap
B
down
again
to
halfway
spot.
Lower
the feed
slightly
by
turning the
red
arrow
on
the knob
to
‘SILK”
position,
DARNING
AND
MONOGRAMMING.
In
order
to
move
the
fabric
freely
in
any
direction
for
darning,
mending
and
certain
kinds
of
free-hand
embroidery, release the pressure cap
B
com
pletely
by
pressing
down
on
the snap
lock,
A,
Fig.
20.
Turn
the
knob
to
ADARN
position,
which
drops
the
feed
well
below
the
needle
plate.
To
return
feed
to
normal,
return
knob
to
“BEG”.
PREPARING
TO
SEW
I
Fig.
20
Have
take-up
lever
at
highest
point
before
starting
to
sew.
Do
not
try
to
help
the
feeding
by
pulling
the
material
as
this
may
deflect
the
needle
and
cause
it
to
break.
NEVER
run
machine
without
material
under presser
foot.
Place material
and
threads
in
position
under
the
presser
foot
and
lower the
presser
foot.
Turn
the hand
wheel
toward
you until
the
needle
is
at its
highest
point.
You
are
now
ready
to
begin
sewing.
By
having
the
needle
at
its
highest
point,
it
is
not
necessary
to
touch
the
hand
wheel
to
start
the
machine.
You
merely
press
the
control.
The
speed
of
the machine
is
regulated
y
increasing
or
decreasing
the
amount
of
pressure
exerted
on
the
control.

14
REMOVING
THE
WORK
Be
sure
to
stop
the
machine
when
the
thread
take-up
lever
and
needle
bar
are
located
at
the
highest
position.
Now
raise
the
presser
foot
and
draw
the
fabric
back and
o
the
left,
Fig.
21-A
and
B,
and
pass
the
threads
over
the
thread
cutter.
Pull
down slightly,
holding
thread
in
both
hands,
so
as
not
to
bend
the
needle.
Leave
the ends
of
thread
under
the
presser
foot.
CREATIVE
EMBROIDERY
Be
sure
zigzag
presser
foot
and
zigzag
needle
plate
are
in
place
and
control
lever
‘25”
‘Fig.
1’
is
in
the
M
position.
The
satin stitch,
Fig.
22,
which
is
really
just
a
very
short
zigzag stitch,
and
the basis
for Fig.
22
most
embroidery,
is
obtained
by
setting
the
stitch
length
as
near
0
as
possible
without
stopping
the
feeding
action.
The
width
may
be
set
anywhere
from
just
past
0
to
the
widest,
4.
Fig.
21-B

15
Adjusting
the
Stitch
width
To
stitch
continuously
at
one
width
of
zigzag
stitching
lock
stops
E
(Fig.
12B)
so
that
red
pointers
meet
on
width chosen.
Should
you
wish
to
move
freely
between
any
two
widths,
such
as
2
and
4,
in
doing free
hand
embroidery
or
buttonholes,
slide
stops
to
0
and
4,
then
move
zigzag width
lever
to
the
right.
Set left
stop
at
desired
width. Then
move
lever
to
the
left
and
set
the
right
stop
at
width desired.
To
move
stops,
turn knob
to
left
to
loosen
and
to
right
to
tighten.
Embroidery
Patterns
With
the
machine
set
for
a
short
stitch
length,
different
designs
can
be
made
by
swinging
the stitch
width
or
zigzag
lever
back
and
forth
between
0
and
4or
any
other combinaticn
of
widths.
Try
setting
the
locks
at
1
and
4,
2
and
3,
etc. Set
a
rhythm
for
yourself
and
then
proceed.
After
a
while
you
will
become
guite
skillful,
varying
your
designs
by
the
speed
of
the
machine,
stitch
length
and
width
and
the
manipulation
of
the
lever.
SAMPLES
OF
CREATIVE
EMBROIDERY
A.
Sew
a
few
stitches
at 4
width,
then
quickly
move
lever
back
to
0
for
a
short
period.
Count,
if
neces-
A
sary,
to
establish
a
rhythm.
B
B.
Set
stops
at
2
and
4,
then
move
lever
slowly
be
tween
settings,
operating
machine
rather
fast.
c
C.
Set
stops
at
1
and
4.
Gradually
move
lever
from
1
to
4,
then
snap
it
back
quickly
to
1.
D
D.
Set
both
stops
at
4,
stitch
length
at
4. Do
a
few
zigzag
stitches, drop
feed
for
3
or
4
stitches,
then
E
raise
it
again.
By
operating
the
feed
knob
rhyth-
Fig.
23
mically
it
is
not
necessary
to
count
stitches.

16
E.
Drop
feed,
lock
stitch
width
at
4,
take
3
or 4
stitches, leave
needle
in
fabric
left
of
stitches.
Pivot
fabric
on
needle
to
make
next
daisy petal.
Continue
until
flower
design
is
complete.
Lock
threads
by
setting stitch
width
at
0
and
taking
3
or 4
stitches
in
center
of
design.
9
Fig.
24
‘.5
3
7
Fig.
25
AUTOMATIC
EMBROIDERY
Your
machine
will
produce
embroidery patterns
automatically by
inserting
anyone
of
its
cams
(Fig.
24,
in
the
chamber
on
top
of
the
machine.
Be
sure the
zigzag
needle
plate
and
zigzag
presser
foot
are
on.
the machine,
control
lever
5”
‘Fig.
25
is
in
the
“D”
position
and
the
zigzag
stitch
width
stops
“6”
are in
the
off
positions.
With
zigzag
stitch
width
lever
“7” ‘Fig.
25,
in its
extreme
right hand
position,
place
cam
on
spindle,
apply
slight
pressure
while
turning
cam
until
it
slips
down
into
place.

17
Move
zigzag
stitch
width
lever
“7”
to
its
extreme
left
hand
position
and
set
the
stitch
length
where
you
prefer
it,
but
remember
that
most
embroidery designs
require
a
stitch
length
of
1
or
less
for
best
appearance.
To
remove
cam,
open
door
covering
cam
chamber,
move
lever
“7”
to
the
right
as
far
as
it
will
go
and
lift
cam
off
the
spindle.
BLIND
HEMS
Fig.
26
Blind hems
are
one
of
the
most
helpful
things
your
machine
will
make,
they
are
used
on
dresses,
skirts,
mens
trousers,
drapes
and
any
other
item
when
an
inconspicuous
hem
is
required.
Place control
lever
5
(Fig.
25,
in
the
B
position,
the zigzag
lever
to
the
extreme
left
and
set
stitch
length
at
approximately number
5.
Prepare the garment
in
the
same
manner
as for
hand
hemming.
Step
1.
çFig.
26)
If
hem
with
folded
edge
is
used
make
first
fold
3/8”
deep.
Step
2.
Turn
hem
the
depth
desired
and
baste
1
4”
from
upper
edge.
Press
into
place.
Step
3.
Fold
hem
back
toward
right
side
of
garment
leaving
1.
4”
extended.
Step
4.
Place
material
under
presser
foot
and
sew
blind
hem
automatically.
Blind
hem
completed.
N,

18
EMBROIDERING
WITH
A
HOOP
____
It
is
easy
to
follow
a
stamped
design
or
to
work
free
hand when
embroidering
or
monogramming.
(See
Fig.
27).
Release
the
pressure
from
the
foot
by
pressing
down
the
snap
lock
on
the
automatic
darner.
Turn
the drop
feed
knob
to
‘DARN”
posi
tion.
L
Stretch the fabric
in an
embroidery
hoop,
and
Fig.
27
place
under
the
needle
after
removing
the
presser
foot.
Set
the
stitch
width
at
the
size
you
prefer
and
ower
the
presser
bar
lifter.
Then
operate the machine
at
a
rather
high
speed
while
moving
he
hoop
slowly
with both
hands.
Work
carefully
and
be
sure
to
keep
fingers
out
of
the
path
of
the
needle.
DARNING
Release
pressure
from
foot
and drop
feed
as
directed
above.
Place
fabric
to
be
mended under
foot,
and
stitch
around
hole,
moving
the
fabric
firmly
and
slowly
in
any direction.
To
fill
in
the
hole,
stitch
from
center
outward,
completing and
stitching
in
fabric.

MAKING
BUTTONHOLES
First,
mark
the
beginning
and
end
of
the
buttonhole
on
fabric
with
a
basting
line
or
tailor’s chalk.
Make
one
on
scrap
fabric
(following
directions
below)
to
be
sure
machine
adjustments
are
correct.
1.
Replace
presser
foot
with
buttonhole
foot
which
is
grooved
deeply
underneath
to
prevent
piling
up
of
thread.
(See
Fig.
28,.
2.
Lock
the
stitch width
at
2
and
set
the
stitch
length
near
0.
3.
Lower
needle
carefully
into
the
mark
on
fabric
indicating
the
beginning
of
buttonhole.
Stitch
to
the
mark
for
the end
of
the
buttonhole,
step
1,
Fig. 29,
stopping
machine
with
needle
in
fabric
at
right
side
of
stitching.
4.
Lift
the
presser
foot
and using the
needle
as
a
pivot,
turn
the
fabric
end
for
end..
5.
Lower
presser
foot
and
turn
hand
wheel
just
enough
to
raise
needle
out
of
fabric.
6.
Drop
feed
all
the
way
down
and
move
zigzag
lever
to
4.
While
holding the
lever
at
4
width,
take
five
or
six
stitches
to
form
bar
tack,
step
2,
Fig.
29.
7.
Raise
needle
out
of
fabric and
return
feed
to
“REG”
position
and
return
stitch
width
lever
to
2.
8.
Stitch second
side
of
buttonhole,
step
3.
9.
Make
bar
tack
by
repeating
5
and
6
above
4
step
4).
19
Fig.
28
S
SS
S
4’
1I
ii
U
Fig.
29
10.
Return
stitch
width
to
0
and
take
two
or
three
stitches
to
fasten
bar
threads
and
prevent
ravelling.
Cut
the
buttonhole opening
with
a
seam
ripper,
being
careful
not
to
cut
the
stitching.
Table of contents
Other White Sewing Machine manuals

White
White 310 Specifications

White
White 2221 User manual

White
White 1268 Operation manual

White
White XL1760 User manual

White
White 1563 Installation instructions

White
White 951 User manual

White
White De Luxe ZIG-ZAG 625 Installation instructions

White
White W2500 User manual

White
White 1766 User manual

White
White 1632 User manual

White
White 1740 User manual

White
White 816 User manual

White
White 1911 User manual

White
White Quilter's Star 1780 User manual

White
White Style-Maker 3100 User manual
White
White SuperLock User manual

White
White Mighty Mender WW200 User manual

White
White Style-Maker 3100 User manual

White
White ET-6/10 User manual

White
White 77 User manual