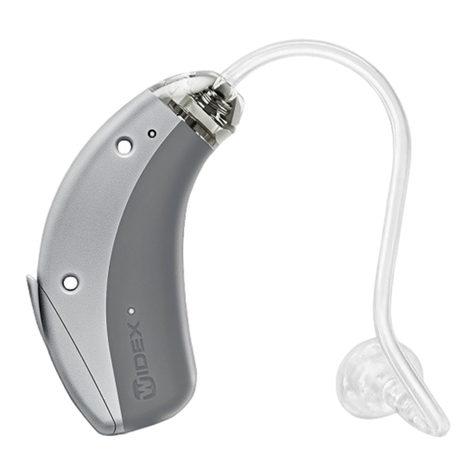
Widex CLEAR 440 SERIES User manual

User instrUctions
The clear™440 SerieS
c4-m/c4-m-cb
beHinD-tHe-eAr

Contents
THANK YOU............................................. 5
THE HEARING AID ...................................... 6
RIGHT/LEFT IDENTIFICATION. . . . . . . . . . . . . . . . . . . . . . . . . . . . 7
ACOUSTIC INDICATORS................................. 7
THE BATTERY .........................................8
INSERTING THE BATTERY............................ 8
REMOVING THE BATTERY............................10
BATTERY DRAWER WITHOUT A NAIL GRIP . . . . . . . . . . . . 11
LOW BATTERY INDICATION . . . . . . . . . . . . . . . . . . . . . . . . . .12
TURNING THE HEARING AID ON AND OFF . . . . . . . . . . . . . . . .13
VOLUME ADJUSTMENT .................................14
LOST PARTNER ALARM.................................15
LISTENING PROGRAMS . . . . . . . . . . . . . . . . . . . . . . . . . . . . . . . . .15
SWITCHING BETWEEN THE LISTENING PROGRAMS . . . . .18
ZEN+ ..............................................19
USING A TELEPHONE..................................20
HEARING AID WITH AN EARMOULD . . . . . . . . . . . . . . . . . . . . . . . 21
POSITIONING THE HEARING AID AND EARMOULD. . . . . . . . 22
REMOVING THE HEARING AID AND EARMOULD . . . . . . . . . . 23
HEARING AID WITH AN INSTANT EAR-TIP . . . . . . . . . . . . . . . . . 24
RIGHT/LEFT IDENTIFICATION. . . . . . . . . . . . . . . . . . . . . . . . . . . 25
POSITIONING THE HEARING AID AND
INSTANT EAR-TIP .....................................26
THE ANCHOR......................................... 27
REMOVING THE HEARING AID AND
INSTANT EAR-TIP ......................................31
2 3
Your widex Cleartm440
hearing aid
(To be filled out by the hearing care professional)
Date: ___________________________
Battery size: ___________________________
Ear-set:
Earmould
Instant ear-tip
Custom ear-tip
Ear-tip size: Left Right
Tubing size: Left Right

HEARING AID WITH A CUSTOM EAR-TIP . . . . . . . . . . . . . . . . . . 32
RIGHT/LEFT IDENTIFICATION . . . . . . . . . . . . . . . . . . . . . . . . . . 33
POSITIONING THE HEARING AID AND CUSTOM EAR-TIP. . . 34
REMOVING THE HEARING AID AND CUSTOM EAR-TIP . . . . . 35
CLEANING............................................ 36
THE HEARING AID .................................... 37
THE MICROPHONE OPENINGS . . . . . . . . . . . . . . . . . . . . . . . 37
THE EAR-SET.........................................38
THE EARMOULD ...................................38
THE INSTANT AND CUSTOM EAR-TIPS . . . . . . . . . . . . . . . . 40
ASSEMBLING THE EAR-SET - INSTANT EAR-TIP. . . . . . . . 42
ASSEMBLING THE EAR-SET - CUSTOM EAR-TIP. . . . . . . . 43
IN CASE OF MALFUNCTION .............................44
CARING FOR YOUR HEARING AID. . . . . . . . . . . . . . . . . . . . . . . . 46
GOOD ADVICE AND WARNINGS . . . . . . . . . . . . . . . . . . . . . . . . . 47
REGULATORY INFORMATION.............................51
4 5
thank You...
...for choosing a Widex hearing aid.
Your hearing aid is designed with high-quality sound,
ease, comfort and freedom of choice in mind.
We hope you will be pleased with your new Widex
hearing aid.
IMPORTANT
This booklet contains important information and instructions.
Please read this booklet carefully before you start using the hear-
ing aid.
Your hearing aid, ear-set and accessories may not look exactly
as illustrated in this booklet. We also reserve the right to make
any changes considered necessary.

6 7
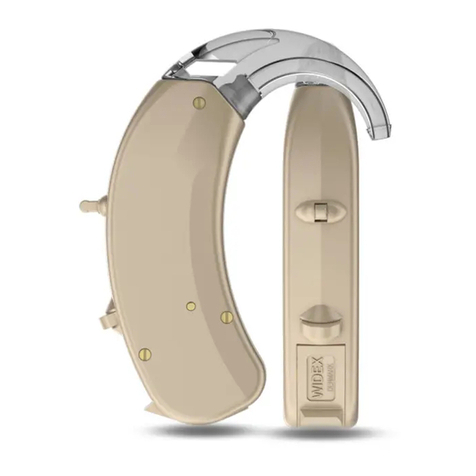
the hearing aid
The illustration below shows the hearing aid without
an ear-set.
Microphoneopenings
Onofffunction
Nailgrip
LEDRLID
Below, your hearing care professional can tick the
ear-set solution chosen for you.
Earmould Instant ear-tip Custom ear-tip
RIGHT/LEFT IDENTIFICATION
The arrow shows the position of the
identification mark (red mark = right
and blue mark = left).
ACOUSTIC INDICATORS
The hearing aid may be set to produce a signal to in-
dicate the use of certain functions. The signal may be
a spoken message or tones adjusted by the hearing
care professional in consultation with you. The signal
can also be deactivated.
Adjusting volume Tone* Off
Confirming RC program
key use
Clicking
sound Off
Changing program Message Tones Off
Starting up the hearing aid Message Tone Off
Warning about low battery Message 4 tones Off
Warning about lost partner Message Off
Service reminder Message Off
* bold indicates standard setting

8 9
THE BATTERY
We recommend zinc-air batteries. Use a size 10 bat-
tery for the hearing aid.
To obtain replacement batteries, please consult your
hearing care professional. It is important to take note
of the expiry date and the recommendations regard-
ing disposal of used batteries on the battery pack.
INSERTING THE BATTERY
Before inserting a new battery into
the hearing aid, remember to re-
move the adhesive tab. Once the tab
has been removed, the battery will
start functioning after a few sec-
onds. Do not use batteries on which
there is a sticky residue from the tab
or other unwanted substance.
Use the nail grip to gently swing the battery drawer
open. Do not press the drawer beyond the open po-
sition.
Place the battery in the drawer as illustrated, so that
the plus (+) sign on the battery is facing towards you
when you hold the hearing aid as shown. You can use
the battery magnet provided to steer the battery
into place.
If the battery drawer does not close easily, the bat-
tery is incorrectly inserted.
When changing battery, it is a good idea to hold the
hearing aid over a table.
+

10 11
REMOVING THE BATTERY
1. Open the battery drawer as previously described.
Place the hearing aid on the provided cloth on a
clean, plane surface and turn it as illustrated.
2. Supporting the drawer with your finger, use the
battery magnet provided to push the battery out
of the battery drawer from the minus side.
1 2
BATTERY DRAWER WITHOUT A NAIL GRIP
The hearing aid may be provided
with a battery drawer without a
nail grip, which means that you
need a tool to open the battery
drawer. This type of drawer can
be a good choice if the hearing
aid is worn by a child. A special
tool for opening the drawer will
be included with this drawer.
The battery drawer is opened as
illustrated.

12 13
IMPORTANT
Your hearing aid may stop functioning, for instance if the battery
is exhausted. You should be aware of this possibility, in particular
when you are in traffic or are otherwise dependent on warning
signals.
LOW BATTERY INDICATION
An acoustic indicator will sound when the battery is
nearly exhausted, unless this function has been disa-
bled (see page 7). We recommend that you always
have a spare battery with you.
Never leave an exhausted battery in the hearing aid.
Exhausted batteries may leak, damaging the hearing
aid.
TURNING THE HEARING AID ON AND OFF
The battery drawer of the hearing aid also functions
as the on/off switch.
Close the battery drawer to turn on
the hearing aid. An acoustic indica-
tor will indicate that the hearing aid
has been switched on unless this
function has been disabled.
Open the battery drawer to turn off
the hearing aid.
Please remember to turn off the
hearing aid when it is not in use. Re-
move the battery if the hearing aid
will not be used for several days.

14 15
VOLUME ADJUSTMENT
The hearing aid volume is adjusted automatically in
accordance with your sound environment.
Ordinarily you cannot fine-tune the volume in your
hearing aid. However, if you have a remote control,
this option becomes available.
In the default setting, any volume adjustment via the
remote control will affect both hearing aids.
For any adjustment of the steps in which volume in-
creases or decreases, consult your hearing care pro-
fessional.
If you have a remote control, please also refer to the
user instructions for this.
IMPORTANT
If the volume in the hearing aid is generally too loud or too weak,
or the reproduced sounds are distorted, or if you would like any
further information, consult your hearing care professional.
LOST PARTNER ALARM
(Note: Only applicable if this feature has been acti-
vated by your hearing care professional).
If one of your hearing aids falls off your ear, and/or
the battery is exhausted, a tone signal and a spoken
message will sound two times in the other hearing
aid, and a diode will flash on both hearing aids.
When the lost hearing aid is repositioned, and/or the
battery is exchanged, the diodes stop flashing.

16 17
LISTENING PROGRAMS
By default, your hearing aid has one listening pro-
gram (Master). If you have a remote control, your
hearing aid may additionally be provided with four of
the following programs, plus the special Zen pro-
gram called Zen+.
Please also refer to the user instructions for your re-
mote control.
Music For listening to music
TV For listening to the TV
Comfort Attenuates background noise
Reverse focus Focus on sounds from behind
Audibility Extender Makes high-frequency sounds
audible
Phone For listening to the telephone
Zen Generates different kinds of
tones. Contains one style
Compound programs
The Master program in one ear
and Zen, Audibility Extender,
Reverse focus or Phone in the
other
Zen+ Special Zen program with up to
three different Zen styles
If your needs change over time, the combination of
listening programs can be altered.
The Zen program may be used with amplification so
that both the surrounding sounds and the Zen tones
are heard together. Or, it may be used alone (without
amplification) in quiet when you are not required to
hear surrounding sounds.
The duration of the Zen play time can be set by your
hearing care professional according to your needs.
IMPORTANT
Use of the different Zen programs may interfere with hearing sur-
rounding sounds including speech. The programs should not be
used when hearing such sounds is important. Switch the hearing
aid to a non-Zen program in those situations.

18 19
THE HEARING AID
SWITCHING BETWEEN THE LISTENING PROGRAMS
Each time you change program via the remote con-
trol, an acoustic indicator will sound unless this func-
tion has been disabled.
Program Messageoroneshortbeep
Program Messageortwoshortbeeps
Program Messageorthreeshortbeeps
Program Messageoronelongandoneshort
beep
Program Messageoronelongandtwoshort
beeps
Zen Messageortone
In the default setting, both your hearing aids will be
affected when you change programs.
USING A TELEPHONE
When using a telephone, we
recommend that you hold
the telephone against your
head at an angle above your
ear, rather than directly
against the ear. If the sound
is not optimal, try moving
the telephone earpiece to a
slightly different position.

20 21
HEARING AID WITH AN EARMOULD
hearing aid with an earmould
The ear-set consists of the following parts:
Earhook
Tubing
Earmould
3a Sound bore
3b Vent
2
1
3
3a
3b
POSITIONING THE HEARING AID AND EARMOULD
Insert the earmould in the
ear canal while holding
the lower part of the tub-
ing. It may help to pull the
outer ear backwards and
upwards with the oppo-
site hand.
Place the hearing aid behind the ear, so that the ear-
hook rests comfortably on the ear, close to your
head.

22 23
HEARING AID WITH AN INSTANT EAR-TIP
REMOVING THE HEARING AID AND EARMOULD
Remove the hearing aid from
its position behind the ear.
Carefully pull the earmould
out of the ear canal, while
holding the lower part of
the tubing.
If it is difficult, you can try to move the earmould
carefully from side to side while pulling it out. It may
also help to pull the outer ear backwards and up-
wards with the opposite hand.
hearing aid with an instant
ear-tiP
The ear-set consists of the following parts:
Tubingwith
1a. hook
1b. anchor
Instantear-tip
1a.
1b.
2.
1.

24 25
HEARING AID WITH AN INSTANT EAR-TIP
RIGHT/LEFT IDENTIFICATION
The ear-set tubing is available in
different lengths for the right and
left ear, respectively. The individu-
al size is printed on the ear-set (see
arrow). Red print indicates that it is
for the right ear, and blue print that
it is for the left ear.
POSITIONING THE HEARING AID AND
INSTANT EAR-TIP
Place the hearing aid behind the
ear, so that the tubing rests
comfortably on the ear, close to
your head.
Insert the ear-tip in the ear canal
while holding the lower part of
the tubing.
Make sure that the anchor is positioned comfortably,
securing the position of the ear-set.
IMPORTANT
We do not recommend wearing the hearing aid without the an-
chor for the instant ear-tip solution. If the hearing aid is not se-
cured by the anchor, it can fall off your ear and be lost.

26 27
HEARING AID WITH AN INSTANT EAR-TIP
THE ANCHOR
The anchor is supplied sepa-
rately from the rest of the ear-
set and can be used in differ-
ent ways. First it is shown how
the anchor can be used with-
out prior trimming:
Pull the pointed end of the
anchor through the upper
hole on the side of the tubing.
The angled grip should be
pointing towards the hearing
aid.
Continue pulling until the an-
chor is stopped by the grip at
the end.
Your ear-set is now ready for use and
is placed so that it rests comfortably
in your ear.
The anchor can also be trimmed to fit your ear. There
are several ways of doing this. Two such examples
are shown here:
EXAMPLE 1
Pull the pointed end of the an-
chor through the upper hole on
the side of the tubing. The angled
grip should be pointing towards
the hearing aid.
Continue pulling until the anchor
is stopped by the grip at the end.
Now turn the ear-set around.
Guide the pointed end of the an-
chor through the lower hole to
form a loop.
When the loop is the correct size
(according to instructions from your
hearing care professional), cut off
any excess, leaving only the loop.

28 29
HEARING AID WITH AN INSTANT EAR-TIP
EXAMPLE 2
Pull the pointed end of the an-
chor through the upper hole on
the side of the tubing. The angled
grip should be pointing towards
the hearing aid.
Continue pulling until the anchor
is stopped by the grip at the end.
Loop the anchor in the direction
indicated by the dotted line and
arrows.
Guide the anchor through the lower
hole on the side of the tubing as il-
lustrated to form a loop.
When the loop is the correct size
(according to instructions from your
hearing care professional), cut off
any excess, leaving only the loop.
GENERAL INFORMATION WHEN TRIMMING:
Take great care to cut off all the
excess so that the end of the an-
chor loop is flush with the small
hole and there are no sharp edg-
es.
Use the tip of your finger to check for sharp edges. If
part of the anchor sticks out through the hole, creat-
ing an uneven surface, this may cause irritation of the
ear.

30 31
HEARING AID WITH A CUSTOM EAR-TIP
REMOVING THE HEARING AID AND
INSTANT EAR-TIP
Remove the hearing aid from
its position behind the ear.
Carefully pull the ear-tip out of
the ear canal, while holding
the lower part of the tubing.
hearing aid with a
Custom ear-tiP
The ear-set consists of the following parts:
Tubingwith
1a. hook
Customear-tipwith
2a. extraction cord
2b. vent (optional)
2.
1a.
2b.
1.
2a.

32 33
HEARING AID WITH A CUSTOM EAR-TIP
RIGHT/LEFT IDENTIFICATION
The ear-set tubing is available in
different lengths for the right and
left ear, respectively. The individual
size is printed on the tubing. Red
print indicates that it is for the right
ear and blue print that it is for the
left ear.
The custom ear-tip has ”Widex” print-
ed on it. Red print indicates that the
ear-tip is for the right ear, and blue
print that it is for the left ear.
POSITIONING THE HEARING AID AND
CUSTOM EAR-TIP
Insert the custom ear-tip in the ear
canal while holding the lower part
of the tubing.
It may help to pull the
outer ear backwards
and upwards with the
opposite hand.
Place the hearing aid behind the ear, so that the tub-
ing rests comfortably on the ear, close to your head.

34 35
CLEANING
REMOVING THE HEARING AID AND
CUSTOM EAR-TIP
Remove the hearing aid from its
position behind the ear.
Take hold of the extraction cord
and carefully pull the custom ear-
tip out of the ear canal.
IMPORTANT
Do not pull the tubing to remove your hearing aid. Use the ex-
traction cord.
Cleaning
The following cleaning accessories are available for
the hearing aid and ear-set.*
Cloth
Waxremovingtool
Cleaningthread
Contact your hearing care professional if you need
additional supplies of cleaning accessories.
* Selection depends on ear-set type

36 37
CLEANING
THE HEARING AID
Clean the hearing aid with the
soft cloth after use. Never use
water or cleaning solutions to
clean the hearing aid.
THE MICROPHONE OPENINGS
Clean the microphone openings
by passing the wax removing
tool straight through the open-
ings.
If you feel resistance, withdraw
the tool and try again. Use only
the wax removing tool provided.
When the hearing aid is not in
use, the battery drawer should
be left open, to ventilate the
hearing aid and allow it to dry.
THE EAR-SET
Make sure that the entire ear-set is always clean and
free of earwax, moisture or the like. Wipe the ear-set
with the cloth at regular intervals. Never use alcohol
or other cleaning solutions to clean the ear-set.
THE EARMOULD
Disconnect the earmould from
the tubing.
Clean the vent with the
wax removing tool.
Clean the sound bore
with the wax removing
tool.

38 39
At least once a week or more of-
ten if required, disconnect the
earmould from the tubing and
rinse the earmould thoroughly in
lukewarm water. Allow it to dry
overnight.
If there is still moisture in
the earmould, use a blower
or similar to blow it dry be-
fore attaching the earmould
to the tubing.
Your earmould tubing should be changed as re-
quired.
For further supplies of tubing, or if the earmould no
longer fits your ear, contact your hearing care pro-
fessional.
THE INSTANT AND CUSTOM EAR-TIPS
Cleaning a blocked tubing:
Grip the hearing aid between
your thumb and index finger.
With your other hand grip the
tubing and pull straight apart
as indicated by the arrow. Al-
ternatively, a small tool is avail-
able for removing the tubing.
Contact your hearing care pro-
fessional if you want more in-
formation.
Pull the instant ear-tip off
the tubing.
If you have a custom ear-tip,
carefully pull it off the tub-
ing, wriggling the tip of the
tubing gently.
Other manuals for CLEAR 440 SERIES
5
Table of contents
Other Widex Hearing Aid manuals

Widex
Widex AIKIA Series User manual

Widex
Widex Inteo User manual

Widex
Widex U-CIC User manual

Widex
Widex CLEAR 440 SERIES Assembly instructions

Widex
Widex Inteo SERIES User manual

Widex
Widex Inteo-m User manual

Widex
Widex Senso System P38 User manual

Widex
Widex Senso Diva SD-19M User manual

Widex
Widex FM+DEX User manual

Widex
Widex S4-VS User manual

Widex
Widex M-DEX User manual
Widex
Widex EVOKE User manual

Widex
Widex M-DEX User manual

Widex
Widex MOMENT Series User manual

Widex
Widex THE SUPER 220 SERIES User manual

Widex
Widex Menu series User manual

Widex
Widex Baby 440 User manual

Widex
Widex B11 User manual

Widex
Widex m4-m User manual

Widex
Widex CROS-FS User manual