manuals.online logo
Brands
  1. Home
  2. •
  3. Brands
  4. •
  5. Widex
  6. •
  7. Hearing Aid
  8. •
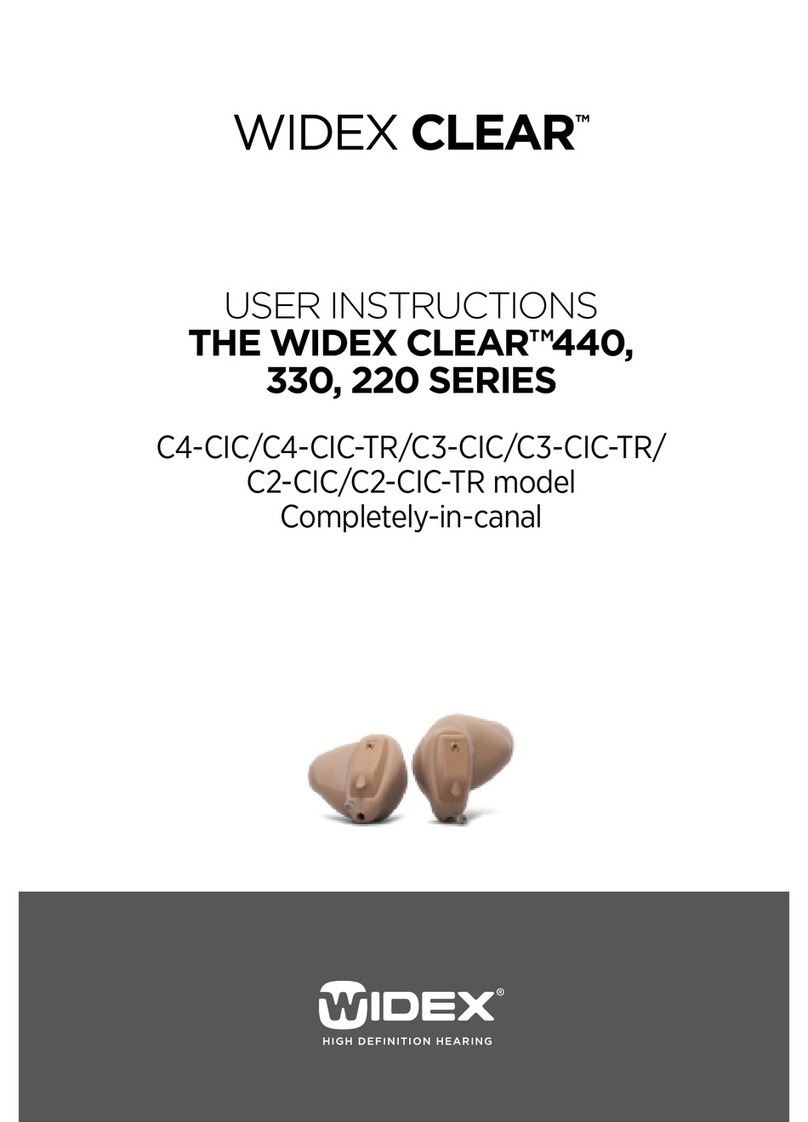
  9. Widex CLEAR 440 SERIES Assembly instructions

Widex CLEAR 440 SERIES Assembly instructions

Fitting CLEAR440
2 IntRoduCtIon www.wIdEx.pRo
introduction to this manual
The WIDEX CLEAR™440 hearing aid is fitted using Compass V5.0 or later versions. In this
manual you will find all relevant information regarding fitting CLEAR440 and DEX and
using the new tools available with Compass 5.0 and later.
The manual is divided into chapters, each describing areas important for fitting
CLEAR440 – wireless options, fine-tuning options, new program options, additional op-
tions and changes in the rationale behind the fitting.
In each chapter dierent functionalities are described with reference to their audiological
and technical background as well as their performance and usage.
Seven supplementary quick guides have also been produced for quick reference to vital
CLEAR440 and DEX fitting procedures.
3
ovERvIEw
www.wIdEx.pRo
thE foLLowIng sECtIon pRovIdEs An overview of
thE various chapters In thIs manual.
In this chapter, the use of wireless fitting without fitting cables is described in detail, introducing the
nEARcom as well as the USB Link option. This chapter also focuses on the audiological background of
the new InterEar features available with CLEAR440, describing the concept of the InterEar Speech En-
hancer, InterEar TruSound Compression and several other InterEar features.
With CLEAR440 a range of DEX accessories is also available, and this chapter describes the function-
ality and fitting procedure for the dierent DEX accessories.
Hearing aid fine tuning is dependent on the hearing aid user’s experience with the hearing aids in vari-
ous listening situations. With CLEAR440, a range of new fine-tuning tools is available for the hearing
care professional. To achieve the optimum opportunities when fine tuning gain, a 15 channel gain set-
tings panel is introduced. New options are also available when working with acclimatisation and the
new audiological features in CLEAR440.
CLEAR440 oers a range of new program options, ensuring a wider choice for the hearing care pro-
fessional when working to secure optimal use of CLEAR440 hearing aids in all listening situations. With
InterEar Zen, new options are available when fine-tuning a Zen program.
To support the hearing care professional in the fine-tuning session, the Solution guide has been refined
with CLEAR440. Fitting CLEAR440 binaurally will oer the client a range of InterEar functionalities,
and two CLEAR440 hearing aids fitted together will automatically include these options. Some clients
are originally only fitted monaurally, but will later want to start using binaurally fitted hearing aids. The
process of establishing a pair of CLEAR440 hearing aids is supported by Compass to make it easy and
intuitive to the hearing care professional.
Other options mentioned in this chapter are the Service Reminder and how to protect the fitting using
a safety code in Compass.
Assessment of in-situ acoustics (AISA) is a concept used in the fitting of Widex hearing aids to ensure
fitting precision. AISA is continuously developed, and the final chapter explains the reasoning behind
AISA III. More information on AISA can be found in WidexPress 24.
Chapter 1: CLEAR440 – wireless options – Page 4
Chapter 2: CLEAR440 – New fine-tuning options – Page 13
Chapter 3: New program options with CLEAR440 – Page 24
Chapter 4: Additional options when fitting CLEAR440 – Page 31
Chapter 5: Rationale changes affecting the fitting – Page 37
4 CLEAR440 – wIRELEss optIons www.wIdEx.pRo
ChAptER 1:
clear440 – wireless options
Wireless fitting
• Hassle-free fitting method for both the hearing care professional and
the client.
• A choice between involving the client in the initial detection procedure
and performing the procedure without involving the client.
• Wireless fitting with industry standard hardware – the nEARcom -
which also supports fitting with cables.
wIRELEss Fitting
Fitting CLEAR440 hearing aids is as simple and
easy as fitting any other Widex hearing aid. The
illustrative and intuitive Compass software will
guide the hearing care professional throughout
the fitting procedure as well as subsequent fine-
tuning sessions and counselling.
Like for all other Widex hearing aids, perform-
ing five basic fitting steps will ensure an opti-
mum fitting for every client:
• Pre-fitting considerations based on client info
and possibly individual data measurements
like in-situ RECD
• Performing the Sensogram
• Performing the feedback test
• Setting hearing aid options according to client
wishes and needs
• Administer post fitting counselling and pos-
sible fine tuning
With CLEAR440 the practical
implications of fitting the cli-
ent have been drastically im-
proved. Introducing Wireless
fitting, the hearing care profes-
sional no longer has to concern themselves with
the physical cable connection between the fit-
ting software and the hearing aids. This connec-
tion is now established wirelessly to the benefit
of both the hearing care professional and the
client.
Without the need for cables and connecting
adaptors, CLEAR440 can be fitted using only a
wireless connection established with the appro-
priate hardware - the nEARcom.
When using the nEARcom hardware, oth-
er hearing aid products from both Widex and
other manufacturers can be fitted using cables
connected directly to the nEARcom.
5
CLEAR440 – wIRELEss optIons
www.wIdEx.pRo
wIRELEss detection
All CLEAR440 and more recent hearing aids
with wireless technology from Widex are always
fitted wirelessly using the WidexLink technol-
ogy to establish the connection to the hearing
aids.
With the fitting software (Compass V5 or a later
version) the hearing care professional is guided
through the important steps of detecting the
hearing aids chosen for the client and establish-
ing the connection for both the right and left
hearing aid.
This can be done by the hearing care profes-
sional before the client’s visit or together with
the client as the first thing in the fitting session.
Each hearing care professional will have their
own preferences as to which method to use,
but may also base the decision on information
about their client.
• Involving the client in the detection procedure
can be an advantage when the client is able to
co-operate. When hearing the sound to iden-
tify the hearing aid, the client must indicate
whether the hearing aid is left or right.
• Performing the detection procedure before
meeting the client can be an advantage when
the client is not able to co-operate, for exam-
ple if they are hard of hearing or the client is
a child.
perForming A wIRELEss
Fitting
Performing a wireless fitting requires Compass
V5, hearing aids with wireless technology from
Widex and the nEARcom with a Widex Tech
Module.
To get it right from the start with wireless fitting
you connect NOAHlink to the nEARcom and
choose the nEARcom as Interface in the Setup
menu in Compass.
It is also recommended that the hearing care
professional colour-mark BTE hearing aids to
identify left and right. You are now ready to
perform the detection procedure in Compass.
Detection procedure
To detect the hearing aids in Compass, the hear-
ing care professional has to place the nEARcom
either on a table or around the client’s neck. The
Detection guide describes both methods.
Fig. 1: The detection procedure with the nEARcom on a
table.
When the hearing aids have been placed in the
middle of the neck loop or on the client’s ear,
the hearing care professional is ready to start
the detection procedure. Please follow the quick
guide and learn how easy this procedure is.
When the hearing aids are detected and identi-
fied, the hearing care professional can proceed
with the fitting process in Compass as usual.
Detect hearing aids as follows:
1. To identify hearing aids, make sure they are
placed in the middle of the nEARcom neck
loop and then use the Play buttons under
Identify HA. When you select a Play button,
the relevant hearing aid plays a sound for 6
seconds and in some models a light-emitting
diode lights up.
2. While this is happening, remove the hearing
aid from the nEARcom and listen to it.
3. In Compass, select whether the hearing aid is
for the left or right ear.
6 CLEAR440 – wIRELEss optIons www.wIdEx.pRo
4. Repeat the procedure if you are fitting two
hearing aids.
5. Click Next to connect the hearing aids.
6. Select a starting point and make sure the
acoustic identity is correct.
7. Position the hearing aids in the client’s ears
and the nEARcom around the neck of the
client.
USB Link
With the new WidexLink wireless technology,
Widex also introduces a new hardware concept
in fitting – the Widex USB Link.
Using the Widex USB Link enables fitting of
CLEAR440 hearing aids using an intuitive and
easy hardware solution without the need for
NOAHlink. The Widex USB Link has a standard
USB plug and connects directly to the fitting
computer.
For those hearing care professionals who are
not familiar with the use of NOAHlink as fitting
interface, the Widex USB Link is an easy alterna-
tive when fitting Widex wireless hearing aids.
Fig. 2: The detection procedure with the Widex USB
Link.
The detection procedure is the same as with the
nEARcom. The hearing care professional just
has to choose the Widex USB Link as interface
in the Setup menu in Compass.
7
CLEAR440 – wIRELEss optIons
www.wIdEx.pRo
CLEAR440 - designed to
coordinate And synchronise
It is well known that one of the major diculties
for people with hearing loss is to determine the
direction of a sound source. Using two hearing
aids fitted in a balanced matter has up till now
been the preferred suggestion on how to elimi-
nate this problem. The C-ISP platform support-
ing the CLEAR440 hearing aids supports the
coordination and synchronisation of important
features relevant for precisely this task.
WidexLink – accurate and frequent data
transmission
Due to the accurate and very frequent data
transmission between two CLEAR440 hear-
ing aids, important cues for preserving a more
natural perception of the environment are sup-
ported. This includes the coordination of com-
pression and speech enhancement, as well as
volume and program synchronisation.
InterEar TruSound compression -
Coordination of compression
By coordinating the compressors of two
CLEAR440 hearing aids the important Inter-
aural Level Dierence (ILD) is preserved. The
ILD is used by the brain to place sound sources
correctly in the horizontal plane. The Interaural
Level Dierence arises because of the shadow
eect of the human ear. For a normal hearing
listener, the level of a sound reaching the right
ear will be higher at the right eardrum than at
the left eardrum because of the head shadow
eect. Coordinating the compressors of two
hearing aids with InterEar TruSound compres-
sion allows the normal ILD to be maintained.
Fig. 3: Displaying the ILD without hearing aids (normal),
with uncoordinated hearing aids and with coordinated
hearing aids.
Level at eardrum
Normal Coordinated
ILD = normal
Uncoordinated
ILD = normal
ILD ≠ normal
Left
Right
Left
Right
Left
Right
8 CLEAR440 – wIRELEss optIons www.wIdEx.pRo
InterEar Speech Enhancer
The Speech Enhancer in CLEAR440 is continu-
ously coordinated to support the hearing im-
paired client’s ability to direct focus to a speak-
er speaking from the side of the listener. This
could be of great importance in a noisy environ-
ment. See Fig. 4.
When working as a coordinated feature, the
Speech Enhancer will have access to knowledge
on the location of the dominant speaker, allow-
ing it to activate a fast acting gain mechanism
that supplies extra gain in speech important fre-
quency areas to support best possible speech
intelligibility.
In a CLEAR440 fitting, the coordination of com-
pression and speech enhancement is a default
feature setting for best possible utilisation of
the wireless possibilities of CLEAR440.
Supporting coordinated sound processing
Maintaining coordinated sound processing be-
tween two hearing aids in real life situations is
one of the main scopes of CLEAR440 hearing
aids. But inappropriate use of the volume con-
trol and program shift can interfere with this
coordination. CLEAR440 therefore introduc-
es Volume Sync and Program Sync to support
the coordination of sound processing. A pair of
CLEAR440 hearing aids fitted with coordinat-
ing features will this way continue to work as
intended, also in daily life. Changing volume on
one hearing aid means same volume change on
the other hearing aid. Changing program on one
hearing aid means also changing program on
the other hearing aid.
Further possibilities with WidexLink
With the accurate and frequent data transmis-
sion obtained with WidexLink, coordination of
other CLEAR440 features is also an option. Us-
ing an extra set of data, a pair of CLEAR440
hearing aids are able to determine the presence
of feedback and take action to actively cancel a
feedback signal. When fitting CLEAR440 hear-
ing aids, this coordination is enabled by default
to manage feedback as eciently as possible.
Fig. 4: The InterEar Speech Enhancer works as a coordinated feature and supports the ability to
direct focus to the dominant speaker.
9
CLEAR440 – wIRELEss optIons
www.wIdEx.pRo
InterEar Zen
For clients using the Zen feature WidexLink
oers a unique possibility of distributing the
Zen tones over two hearing aids. In a pair of
CLEAR440 hearing aids, each Zen style will by
default be chosen to be the same on both hear-
ing aids and the tones in each individual style
will be distributed over the two hearing aids to
create a stereo-like eect.
The InterEar partner monitor
CLEAR440 features the InterEar partner moni-
tor – allowing a lost partner alarm to be acti-
vated whenever the connection between two
CLEAR440 hearing aids is lost. If the user loses
his hearing aid, for instance on the golf course,
the InterEar partner monitor that surveys the
coupling between the two hearing aids will alert
the user by means of the SmartSpeak message
“Partner Check”. Simultaneously a LED in the
two hearing aids will start flashing1.
The lost partner alarm can be activated under
Acoustic indicators in the HA configuration win-
dow under Finalise.
Adjusting InterEar functionalities
The InterEar functionalities are by default ena-
bled in binaural fittings. If needed, the function-
alities can be disabled in the InterEar configura-
tion panel. See Fig. 5.
Some of the InterEar functionalities are linked
to each other. If you disable Program selection,
please be aware that Compression, Noise reduc-
tion, Feedback cancelling, and Zen are disabled
too.
The hearing care professional can activate the
Lost partner function under Acoustic indicators.
Please notice that the InterEar icons in the Fine
tuning window do not indicate whether the
functionalities are activated or not. See Fig. 6
Fig. 5: The InterEar functionalities are found under Finalise and HA configuration.
Fig. 6: The InterEar icons indicate the association between the InterEar functionalities and the feature.
1 In C4-PA, C4-m, C4-m-CB and C4-FS
10 CLEAR440 – wIRELEss optIons www.wIdEx.pRo
deX ACCEssoRIEs
With CLEAR440, a new product concept from
Widex is introduced – the DEX.
RC-DEX: compact remote control
TV-DEX: for TV-viewing
M-DEX: for mobile phone use and
advanced remote control
For people with hearing loss, situations like
watching TV, talking in a mobile phone or lis-
tening to sound from, for instance, the comput-
er can be dicult despite appropriately fitted
hearing aids, and many therefore choose to use
assistive listening devices.
With assistive listening devices like teleloop sys-
tems or other systems able to transmit audio
from an external sound source and into hearing
aids, the importance of sound quality must not
be overlooked. Sound quality will be reflected
not only in the bandwidth of the transmitted
signal but also in whether or not the signal is
transmitted in stereo and if the signal transmis-
sion is delayed compared to a direct signal.
Teleloop systems are bandwidth restricted to
approximately 5 kHz and sound is transmitted
in mono. For other transmitting systems based
on digital wireless transmission, bandwidth var-
ies and the signal is most often transmitted in
mono. Furthermore, many of such systems in-
troduce a delay to the transmitted signal result-
ing in reduced sound quality, for example hol-
low sound or echoes.
With DEX Widex introduces a product concept
targeted at specific situations. An M-DEX for
mobile phone use; with options for receiving
calls, ending calls and controlling volume and
programs, a TV-DEX for the TV situation - trans-
mitting sound EchoFree™ in the bandwidth from
100 Hz to 11 kHz2 and in stereo. Furthermore the
RC-DEX is introduced – a compact dedicated
remote control with access to program toggle
and volume control.
DEX – reflecting user requirements
The DEX products are designed to meet two
fundamental user requirements:
• Ease of use
• High sound quality
The main purpose of the DEX products is to
make the user interface easy and intuitive – by
minimising confusion and time on the learning
curve. An aim is that the DEX devices should re-
act in a manner that is predictable as well as un-
derstandable for the user.
RC-DEX
Due to its compact and small size, the RC-DEX
is easy to carry in a pocket. Young people or
people in active employment may find the RC-
DEX discreet to use.
The RC-DEX is a user-friendly remote control for
adjusting volume or changing programs. The
keys are easy to manipulate, making allowance
for users with reduced dexterity.
2 Model dependent
11
CLEAR440 – wIRELEss optIons
www.wIdEx.pRo
TV-DEX
To oer the user a superb sound quality, the
infra-red light and telecoil are now replaced by
the TV-DEX. The TV-DEX caters for users who
are dependent on assistive listening devices and
‘just’ want to watch TV without any eort. The
high sound quality may appeal to the critical
hearing aid user.
The TV-DEX is built for enjoying TV and audio.
This DEX device aims to answer hearing aid us-
ers’ complaints of not being able to hear the TV
- and their nearest relations’ complaints of the
TV being too loud.
The TV-DEX Controller features a Room O
key, which mutes the hearing aid microphones.
Room O allows the hearing aid user to shut o
any disturbing sounds in the room while enjoy-
ing TV or audio.
When Room O is not activated, the audio sig-
nal is still transmitted directly to the hearing
aids. At the same time the hearing aid micro-
phones are activated allowing the user to fol-
low a conversation while listening to the audio
signal. Widex EchoFree technology makes sure
that the user does not experience delays, distor-
tion or echoes while the audio is being transmit-
ted and the hearing aid microphone is activated.
The M-DEX
For those users who enjoy music, the M-DEX al-
lows input from personal audio devices like MP3
players.
The M-DEX oers users connectivity between
their hearing aids and mobile phones.
This device aims to meet the challenge of talk-
ing in mobile phones with personal hearing
aids by transmitting the signal from the mobile
phone directly to the hearing aids. The Room
O function allows the user to focus on the tel-
ephone conversation without being disturbed
by surrounding sounds picked up by the hearing
aid microphones.
M-DEX also goes a convenient step further for
users of Widex hearing aids with the Free Focus
feature. FreeFocus allows users to hear in se-
lected directions, such as passengers behind
them when driving. M-DEX lets users choose
right/left/front/rear focus to optimise speech
intelligibility in situations where the user is un-
able to turn towards the speaker.
12 CLEAR440 – wIRELEss optIons www.wIdEx.pRo
Matching DEX
In the Matching status window, the hearing care
professional chooses which DEX devices he
wishes to match. It is possible to see an anima-
tion of the matching procedure. The matching
procedure begins when you click Start matching
and you just have to follow the matching wizard.
See Fig. 7.
Changing the volume control step size
It is possible to set the volume control to smaller
or larger increments via the RC-DEX as well as
the M-DEX. This is done in the HA configuration
window in Compass. Please see ‘Definable vol-
ume control’ below.
Fig. 7: The DEX matching tool is found under Finalise in the left menu in Compass.
13
CLEAR440 – nEw fInE-tunIng optIons
www.wIdEx.pRo
ChAptER 2:
clear440 – new Fine-tuning options
15 ChAnnEL gain settings
matriX
Fine tuning CLEAR440 – new tools for the
hearing care professional
A major part of a successful hearing aid fit-
ting is the possibility of meeting client wish-
es in the fine-tuning session. Several genera-
tions of Widex high end products have featured
sound processing in 15 channels and the ability
to measure Sensogram in expanded mode to
reflect the hearing threshold in more discrete
frequencies. This has formed the basis for very
precise hearing aid fittings and client satisfac-
tion. Fine-tuning multi channel hearing aids is
a matter of being able to influence the perfor-
mance of the sound processing with respect to
both input level and frequency while also taking
into account client background in terms of hear-
ing aid usage in the past.
The competent hearing care professional per-
forms fine tuning based on the client’s wishes
but also on their professional knowledge as to
how features such as acclimatisation will influ-
ence client satisfaction, how adaptive features
influence the sound processing of the hearing
aid as well as knowledge on how counselling the
client will aect fine-tuning wishes.
Fine-tuning gain settings in CLEAR440
For the situations where fine tuning is warrant-
ed and necessary, the hearing care profession-
al needs a set of tools that will allow him to fine
tune gain for specific input levels and frequency
regions as well as adjust feature settings, accli-
matisation and other program specific options.
By default, Widex high end hearing aids can be
fine-tuned in four basic channels; 500, 1000,
2000 and 4000 Hz. Fine-tuning gain in these
anchor channels means that gain in neighbour-
ing channels will also be adjusted by interpola-
tion and extrapolation.
Fig. 8: Basic gain settings panel – four channels.
For these basic channels, fine tuning is possible
for soft, normal and loud input levels. Togeth-
er with the parameters of Loudness master and
gain settings for loud sounds and soft sounds,
the default gain settings panel meets the needs
of many fine-tuning situations in the clinic.
Some clients have specific fine-tuning needs not
met by the default gain settings panel. In such
cases performing the expanded Sensogram will
allow Compass detailed information about the
hearing threshold. In the fine-tuning session the
hearing care professional will now have access
to fine-tuning gain discretely in 15 channels.
Compass features a new expanded gain settings
panel for setting gain in 15 discrete channels
and adjusting overall loudness.
Fig. 9: Expanded gain settings panel – 15 channels.
14 CLEAR440 – nEw fInE-tunIng optIons www.wIdEx.pRo
options wIth thE 15 ChAnnEL
gain settings panel
Discrete fine tuning of gain
The expanded Sensogram has long been an op-
tion in Compass ensuring even more precision in
the fitting of Widex hearing aids. In some cases
complaints regarding the initial fitting can be
resolved just by performing an expanded Sen-
sogram and allowing this to be the basis for the
fitting.
With the ability to fine-tune gain discretely in 15
channels, special fine-tuning needs can be met
complementing the performance of the expand-
ed Sensogram.
The expanded Sensogram below shows that
the hearing threshold drops at 6 kHz. Therefore,
more gain is introduced specifically in this chan-
nel as seen in the gain settings panel. The hear-
ing care professional has the option of further
fine-tuning the gain specifically in this channel.
Fig. 10: Hearing threshold drops at 6 kHz and as a result,
the gain for this channel is higher.
When gain is adjusted using the 15 channel gain
settings panel, the adjustment will influence this
channel only, allowing very specific gain adjust-
ments to be made.
Fig. 11: Displays how gain can be adjusted in one single
channel without influencing neighbouring channels.
Using the gain settings panel in Compass:
• The hearing care professional can choose
between a basic gain settings panel with
four channels and an expanded with 15
channels.
• Fine-tuning gain in the basic panel will
allow for interpolation to neighbouring
channels.
• Fine-tuning gain in the expanded panel al-
lows for specific fine tuning in one channel
only.
15
CLEAR440 – nEw fInE-tunIng optIons
www.wIdEx.pRo
Allowing the hearing care professional to see
how basic gain changes affect neighbouring
channels
When using the basic gain settings panel with
four channels, changes in gain in one of the four
channels will influence neighbouring channels
because of interpolation. This is reflected in the
15 channel panel and allows the hearing care
professional to see how the gain changes aect
neighbouring channels. see Fig. 12.
In both the basic and ex-
panded panel it is possible
to adjust one or more chan-
nels and input levels simul-
taneously. A new “Select all”
function is available for ad-
justing the overall loudness. The function substi-
tutes the previous “loudness master” function.
The 15 channel gain settings panel is comple-
mented by the well known gain adjustment for
soft sound and loud sounds.
Other options
Target gain
Target gain for the specific channel can be
viewed using the Target icon. Targets are dis-
played for the specific program.
Fig. 13: Target gain shown in white numbers.
Undo/redo
Compass V5.1 introduces an undo/redo option.
With this option the adjustments made in the
gain settings panel can be undone. With the
first adjustments in the panel the undo button
will be active. And if an adjustment is undone,
the redo button will become active.
Fig. 14: Undo and redo functions in the gain settings
panel.
Fig. 12: Changes in gain made in the 4 channel matrix will be reflected in the 15 channel
matrix because of extrapolation/interpolation.
16 CLEAR440 – nEw fInE-tunIng optIons www.wIdEx.pRo
thE eXpanded gain settings
pAnEL In relation to thE
clearBand handle
With the 15 channel gain settings panel, gain in
the uppermost channels can be adjusted sepa-
rately for both specific frequency regions and
input levels. This gives the hearing care profes-
sional more opportunities when fine-tuning the
very high frequencies in a ClearBand model.
When working with a ClearBand model, the
ClearBand tool is still available, allowing the
hearing care professional direct and quick con-
trol of the ClearBand range in terms of simulta-
neous adjustment of level for input in these high
frequencies.
Fig. 15: The ClearBand tool is available in a ClearBand
model.
The options in the 15 channel gain settings panel
make it possible to adjust gain in discrete chan-
nels as well as for specific inputs.
Fig. 16: Adjusting gain for specific frequency regions and
input levels in the three upper channels in the hearing
aid.
acclimatisation In CLEAR440
The need for specific fine tuning of, for instance,
gain settings is best established after the cli-
ent has gone through an acclimatisation pe-
riod. New hearing aid users often need to have
gain settings for input and frequency levels
that reflect their limited amount of experience
with amplification. However, also experienced
hearing aid users shifting from one hearing aid
brand to another may find it dicult to tolerate
the target gain for their hearing loss. For that
reason, many hearing care professionals work
with acclimatisation options in their fitting –
either establishing an acclimatisation program
or, if this is not an option, fine-tuning a master
program to support the best possible acclima-
tisation. Widex high-end hearing aids have up
till now oered the choice of an acclimatisation
program with reduced gain in regard to fre-
quency as well as input level.
With CLEAR440 the option to work with accli-
matisation is further enhanced. With the intro-
duction of a global acclimatisation strategy, the
hearing care professional can choose to let ac-
climatisation be the basis for all listening pro-
grams. The acclimatisation strategy chosen still
reflects gain adjustments in regard to both fre-
quency and input level.
The Acclimatisation tool
The Acclimatisation tool found in the Gain set-
tings panel in the Fine tuning window will adjust
gain specifically for frequency and input levels
to meet the acclimatisation requirements of, for
instance, new users. The tool is by default ac-
17
CLEAR440 – nEw fInE-tunIng optIons
www.wIdEx.pRo
tive only in the master program, reflecting the
fact that adjustment of acclimatisation level will
influence all programs in the hearing aid. See
Fig. 17.
For specific handling of acclimatisation in a spe-
cific program such as a music program, this
program must first be unlinked from the mas-
ter program. The ability to unlink programs and
work specifically with the acclimatisation level
in a single program also helps the hearing care
professional to create a specific acclimatisation
program; a copy of the master program can be
created and unlinked for specific adjustment of
the acclimatisation level. See Fig. 18.
An acclimatisation level can be active for Master
as well as for Music, TV, Comfort and Reverse
focus. If you are working with compound pro-
grams, an acclimatisation level can be set indi-
vidually for the part of the compound program
with an acclimatisation level option.
Fig. 17: Active acclimatisation handle in the master program.
Fig. 18: Using the unlink function to activate the acclimatisation handle in other pro-
grams than master.
Acclimatisation options in CLEAR440:
• The acclimatisation handle will apply ac-
climatisation globally across all programs.
• The acclimatisation handle can be ac-
cessed in individual programs by using the
unlink function.
• A specific acclimatisation program can be
created in an unlinked master2 program.
18 CLEAR440 – nEw fInE-tunIng optIons www.wIdEx.pRo
Applying acclimatisation
The acclimatisation handle shows that level 4
is the fully acclimatised fitting with prescribed
gain for all input levels and frequencies. Choos-
ing one of the lower acclimatisation levels re-
sults in an adjustment of gain for specific input
levels and frequency areas. Gain is adjusted the
most for the highest frequencies, a little less for
mid frequencies and least for low frequencies.
Soft sounds are the input levels most aected
when choosing acclimatisation, normal sounds
are less aected and loud sounds are only af-
fected to a small degree.
Fig. 19: Gain for the three dierent acclimatisation levels.
Target gain is displayed in white.
new sound pRoCEssIng
Features In CLEAR440
wARRAnt new Fine-tuning
handles
Fine-tuning ISP hearing aids has always in-
cluded the option to work with microphone
as well as speech and noise modes and feed-
back settings. This, of course, reflects the sound
processing features found in ISP hearing aids.
CLEAR440 features new advanced sound
processing features and consequently new fine-
tuning options.
The HD Locator
The HD Locator with Speech tracer found in ISP
hearing aids provides a unique possibility of lo-
cating speech in noisy surroundings while main-
taining audibility for soft sounds in quiet sur-
roundings. The HD Locator works as an adaptive
feature continuously adapting its workings to
the surrounding environment. Maintaining a
good signal-to-noise ratio in noisy surroundings
while preserving audibility in quiet settings is
the main target for the HD Locator.
It is well known that using BTE hearing aids has
a negative eect on the ability to locate sounds
coming directly from the front or back. Hearing
aid users are often reported to confuse these
two sound directions.
19
CLEAR440 – nEw fInE-tunIng optIons
www.wIdEx.pRo
Sitting in a library trying to ascertain from
which direction a sound is coming from can
be dicult for users of BTE style hearing aids.
Although audibility is preserved with the HD
Locator with Speech tracer, the direction of
a sound can still be hard to determine. This
makes it dicult to direct the necessary de-
gree of focus to the sound source. A teach-
er in a quiet classroom trying to deduce from
where a request for help is coming could be
another example. The reason for this diculty
is to be found in the implications of wearing a
BTE hearing aid. The outer ear (pinna) helps a
normal-hearing individual to localise a sound
source in space. The shadowing eect of the
pinna is most pronounced in the area from 2-5
kHz with an attenuation of approximately 3-4
dB for sounds coming from behind.
Fig. 20: The Pinna eect: The average shadow eect of
the pinna. Sounds coming from behind are attenuated
by 3-4 dB relative to sounds from the front.
Utilising the matched microphone system of
CLEAR440, the HD Locator now features a
Digital Pinna mimicking the pinna eect of a
normal-hearing listener. The electronic pinna
characteristic found in the HD Locator secures
optimal front/back localisation opportunities in
quiet surroundings, while still allowing for the
other main task of the HD Locator, namely to
support the best possible signal-to-noise ratio
in noisy surroundings.
Speech and noise modes
The Speech Enhancer has an InterEar function-
ality in a CLEAR440 fitting. With the WidexLink
technology, two CLEAR440 hearing aids can
exchange data. For the InterEar speech Enhanc-
er this means that focus is directed towards the
most dominant speaker in a noisy environment
with more speakers. The InterEar functionality
can be disabled using the InterEar configuration
tool in HA configuration.
15
4k2k1k500
-15
-10
-5
-0
5
10
Front-back diff [dB]
Frequency [Hz]
Average
20 CLEAR440 – nEw fInE-tunIng optIons www.wIdEx.pRo
!
Input
signal
Output
signal
Transient detection Transient handling
Filter bank
Regular
(slow)
compression Fast
compression
Ultra-fast
compression
Fig. 21: Principle of the TruSound Softener.
The TruSound Softener – Impulse noise modes
Sudden sharp noises like the chink of porce-
lain or slamming doors present a specific chal-
lenge in hearing aid sound processing. Because
of the abrupt and short lasting nature of these
sounds, they may disturb and annoy the hear-
ing aid user. Handling short and abrupt sounds
warrants a specific mechanism able to detect
such sounds and take immediate action. With
CLEAR440 sound processing is enhanced with
such a mechanism - The TruSound Softener. See
Fig. 21.
Feedback cancelling modes
The Feedback cancelling mode options are
SuperGain, SuperGain Max and SuperGain Mu-
sic. The InterEar feedback system in CLEAR440
hearing aids enables the transmission of data
on possible feedback between the two hearing
aids. This allows for a more precise decision on
whether or not there is feedback in the hearing
aid in question. The feedback cancelling mode
is still a choice between Super Gain (default),
Super Gain Max and Super Gain Music.
The InterEar functionality of the feedback can-
celling system can be disabled using the Inter-
Ear configuration tool in HA configuration.

Other manuals for CLEAR 440 SERIES

5

Other Widex Hearing Aid manuals

Widex U-FA User manual

Widex

Widex U-FA User manual

Widex mind 220 Series User manual

Widex

Widex mind 220 Series User manual

Widex DREAM440 THE DREAM SERIES User manual

Widex

Widex DREAM440 THE DREAM SERIES User manual

Widex AK-19 User manual

Widex

Widex AK-19 User manual

Widex mind 330 Sereis User manual

Widex

Widex mind 330 Sereis User manual

Widex DREAM D-9 User manual

Widex

Widex DREAM D-9 User manual

Widex DAILY D-PA User manual

Widex

Widex DAILY D-PA User manual

Widex Bravissimo Series User manual

Widex

Widex Bravissimo Series User manual

Widex Bravo B2-CIC User manual

Widex

Widex Bravo B2-CIC User manual

Widex CLEAR 220 SERIES User manual

Widex

Widex CLEAR 220 SERIES User manual

Widex U-XP User manual

Widex

Widex U-XP User manual

Widex Mind 330 Series User manual

Widex

Widex Mind 330 Series User manual

Widex DREAM440 THE DREAM SERIES User manual

Widex

Widex DREAM440 THE DREAM SERIES User manual

Widex Bravo B1 User manual

Widex

Widex Bravo B1 User manual

Widex AK-X User manual

Widex

Widex AK-X User manual

Widex B11 User manual

Widex

Widex B11 User manual

Widex P7 User manual

Widex

Widex P7 User manual

Widex COM-DEX User manual

Widex

Widex COM-DEX User manual

Widex C4-m User manual

Widex

Widex C4-m User manual

Widex Specsavers Advance 52 Series User manual

Widex

Widex Specsavers Advance 52 Series User manual

Widex MOMENT MRR4D User manual

Widex

Widex MOMENT MRR4D User manual

Widex MOMENT MBB3D User manual

Widex

Widex MOMENT MBB3D User manual

Widex U-PA User manual

Widex

Widex U-PA User manual

Widex Senso Diva SD-19M User manual

Widex

Widex Senso Diva SD-19M User manual

Popular Hearing Aid manuals by other brands

Hansaton sound 13 Guide

Hansaton

Hansaton sound 13 Guide

Audina PARAGON 4 instruction manual

Audina

Audina PARAGON 4 instruction manual

hi Health Innavations hi BTE mini user guide

hi Health Innavations

hi Health Innavations hi BTE mini user guide

TV Ears 5.0 user manual

TV Ears

TV Ears 5.0 user manual

Sennheiser All-Day Clear Slim troubleshooting guide

Sennheiser

Sennheiser All-Day Clear Slim troubleshooting guide

Bernafon ZERENA Instructions for use

Bernafon

Bernafon ZERENA Instructions for use

ReSound Alera TS user guide

ReSound

ReSound Alera TS user guide

Hansaton flow 2-312 M Instructions for use

Hansaton

Hansaton flow 2-312 M Instructions for use

oticon miniRITE Alta2 Instructions for use

oticon

oticon miniRITE Alta2 Instructions for use

Audicus The Wave instruction manual

Audicus

Audicus The Wave instruction manual

Siemens Motion 701 BTE manual

Siemens

Siemens Motion 701 BTE manual

Interton ST660-DRW Technical manual

Interton

Interton ST660-DRW Technical manual

Conversor Listenor user guide

Conversor

Conversor Listenor user guide

Starkey Livio AI quick start guide

Starkey

Starkey Livio AI quick start guide

SpyNet BionicEar instruction manual

SpyNet

SpyNet BionicEar instruction manual

oticon Sumo XP Fittings guide

oticon

oticon Sumo XP Fittings guide

TruHearing TH CROS 6 RIC LI Guide

TruHearing

TruHearing TH CROS 6 RIC LI Guide

Jabra ENHANCE SELECT 200 Rx user guide

Jabra

Jabra ENHANCE SELECT 200 Rx user guide

manuals.online logo
manuals.online logoBrands
  • About & Mission
  • Contact us
  • Privacy Policy
  • Terms and Conditions

Copyright 2025 Manuals.Online. All Rights Reserved.