manuals.online logo
Brands
  1. Home
  2. •
  3. Brands
  4. •
  5. Williams-Sonoma
  6. •
  7. Indoor Furnishing
  8. •
  9. Williams-Sonoma CLAYTON OPTION-2 User manual

Williams-Sonoma CLAYTON OPTION-2 User manual

14-Jan-2023 1/11
© 2023 Williams-Sonoma, Inc. UK –A–NS
Williams-Sonoma Inc.
Assembly Instructions
Instructions d’assemblage
Instrucciones de Ensamblaje
Pottery Barn –Pottery Barn Teen –Pottery Barn Kids –Williams Sonoma Home –West Elm –Rejuvenation –Mark and Graham
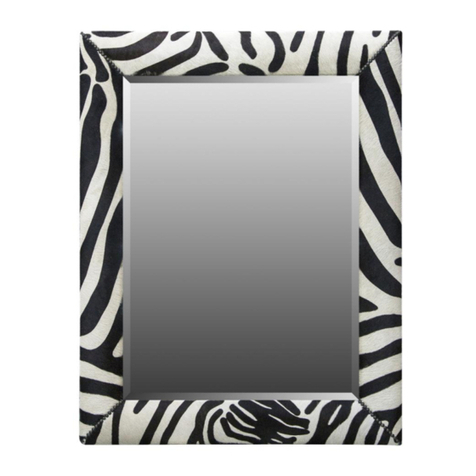
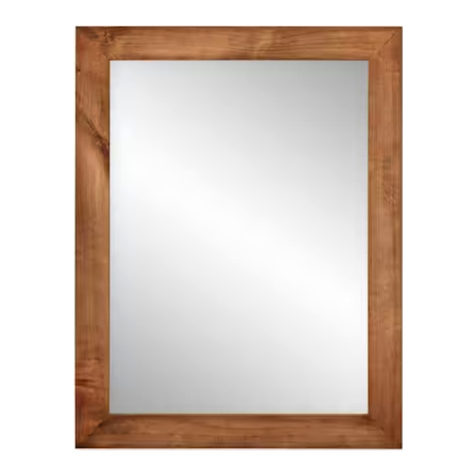
CLAYTON CHUNKY WOOD FRAME MIRROR
2550 N.W. Nicolai Street, Portland Oregon 97210 Customer Service: 888 401-1900 rejuvenation.com
OPTION-1
OPTION 1
OPCIÓN 1
OPTION-2
OPTION 2
OPCIÓN 2
14-Jan-2023 2/11
© 2023 Williams-Sonoma, Inc. UK –A–NS
Williams-Sonoma Inc.
Assembly Instructions
Instructions d’assemblage
Instrucciones de Ensamblaje
Pottery Barn –Pottery Barn Teen –Pottery Barn Kids –Williams Sonoma Home –West Elm –Rejuvenation –Mark and Graham
ENGLISH
•Do not dispose of any packaging or contents of the shipping carton until assembly is completed to avoid accidentally discarding
small parts or hardware.
FRANÇAIS
•Ne jetez rien des produits d’emballage et du contenu de la boîte jusqu’à ce que l’assemblage soit terminé, afin d’éviter de jeter
par mégarde de petites pièces ou des morceaux.
ESPAÑOL
•Para evitar desechar accidentalmente las partes pequeñas o las piezas de ferretería, no tirar el embalaje o contenido de la caja
hasta que el ensamblaje esté completo.
Care Instructions:
•Dust often using a clean, soft, dry and lint-free cloth.
•When blot spills, wipe with a clean, damp cloth immediately.
•We do not recommend the use of chemical cleansers, abrasives or furniture polish on our lacquered finish.
•Hardware may loosen over time. Periodically check to make sure all connections are tight. Re-tighten if necessary.
Instructions d’entretien :
•Épousseter régulièrement avec un chiffon propre, doux et non pelucheux.
•Éponger immédiatement les liquides renversés et essuyer à l’aide d’un chiffon propre et humide.
•L’utilisation de produits nettoyants chimiques, d’abrasifs ou d’encaustiques sur nos finitions laquées n’est pas
recommandée.
•Le matériel de fixation peut se desserrer avec le temps. Vérifiez régulièrement afin de vous assurer que tous les raccords
sont bien serrés. Resserrez-les au besoin.
Instrucciones de cuidado:
•Limpiar el polvo con un trapo limpio, suave, seco y libre de pelusas.
•Secar los derrames de inmediato y limpiar con un trapo limpio y húmedo.
•Recomendamos no usar limpiadores químicos, abrasivos o lustramuebles sobre el acabado barnizado.
•Las piezas de ferretería pueden aflojarse con el tiempo. Controlar periódicamente que estén bien ajustadas.Si es necesario,
volver a ajustarlas.
20’
14-Jan-2023 3/11
© 2023 Williams-Sonoma, Inc. UK –A–NS
Williams-Sonoma Inc.
Assembly Instructions
Instructions d’assemblage
Instrucciones de Ensamblaje
Pottery Barn –Pottery Barn Teen –Pottery Barn Kids –Williams Sonoma Home –West Elm –Rejuvenation –Mark and Graham
X2
NOT INCLUDED / NON INCLUS / NO INCLUIDAS
14-Jan-2023 4/11
© 2023 Williams-Sonoma, Inc. UK –A–NS
Williams-Sonoma Inc.
Assembly Instructions
Instructions d’assemblage
Instrucciones de Ensamblaje
Pottery Barn –Pottery Barn Teen –Pottery Barn Kids –Williams Sonoma Home –West Elm –Rejuvenation –Mark and Graham
B
C
M4x35mm
13x
8x
A
D
⚫Anti-tip kit /
⚫Dispositifanti-bas
culement/
⚫Kit anti-volcada
1x
14-Jan-2023 5/11
© 2023 Williams-Sonoma, Inc. UK –A–NS
Williams-Sonoma Inc.
Assembly Instructions
Instructions d’assemblage
Instrucciones de Ensamblaje
Pottery Barn –Pottery Barn Teen –Pottery Barn Kids –Williams Sonoma Home –West Elm –Rejuvenation –Mark and Graham
1
Place the Z clip in the wall where you want to mount the shelf.
Level the Z clip with the help of water leveler, and then mark Z clip holes in the wall.
Placer l’attache Z sur le mur où monter l’étagère.
S’assurer que l’attache Z est bien droite à l’aide du niveau, puis marquer les trous dans le mur.
Wall
Mur
Pared
Water Leveler
Niveau à eau
Nivelador de agua
Remove the tape and take out the loose second z-clip.
Retirez le ruban adhésif et sortez le deuxième clip en Z desserré.
Retire la cinta y saque el segundo clip en Z suelto.
A
Z clip
Attache Z
Sujetador Z
2
OPTION-1
OPTION 1
OPCIÓN 1
OPTION-2
OPTION 2
OPCIÓN 2
Wall
Mur
Pared
Water Leveler
Niveau à eau
Nivelador de agua
Z clip
Attache Z
Sujetador Z
14-Jan-2023 6/11
© 2023 Williams-Sonoma, Inc. UK –A–NS
Williams-Sonoma Inc.
Assembly Instructions
Instructions d’assemblage
Instrucciones de Ensamblaje
Pottery Barn –Pottery Barn Teen –Pottery Barn Kids –Williams Sonoma Home –West Elm –Rejuvenation –Mark and Graham
Take out the Z clip from the wall then make holes where you have marked, then insert the Shelf Driven
anchor in the hole with the help of drill machine.
Retirer l’attache Z du mur et faire les trous où se trouvent les marques, puis insérer le boulon à ailettes (B)
dans le trou à l’aide de la perceuse.
Quitar el sujetador Z de la pared y luego hacer orificios en las marcas realizadas, luego insertar el perno de
fiador (B) en el orificio con la ayuda del taladro.
6x
B
B
Wall
Mur
Pared
Wall mounting pattern for vertical (large side). OPTION-1
Modèle de montage mural pour vertical (grand côté). OPTION 1
Patrón de montaje en pared para vertical (lado grande). OPCIÓN 1
B
6x
Wall mounting pattern for horizontal (small side). OPTION-2
Modèle de montage mural pour horizontal (petit côté). OPTION 2
Patrón de montaje en pared para horizontal (lado pequeño). OPCIÓN 2
14-Jan-2023 7/11
© 2023 Williams-Sonoma, Inc. UK –A–NS
Williams-Sonoma Inc.
Assembly Instructions
Instructions d’assemblage
Instrucciones de Ensamblaje
Pottery Barn –Pottery Barn Teen –Pottery Barn Kids –Williams Sonoma Home –West Elm –Rejuvenation –Mark and Graham
Now place the Z clip in the wall and align Z clip holes with the wall holes then insert screw (C) and tighten with the
help of drill machine as shown in figure.
Placer ensuite l’attache Z dans le mur et aligner les trous de l’attache Z avec les trous dans le mur, puis insérer une
vis (C) et serrer à l’aide de la perceuse, comme illustré.
Ahora colocar el sujetador Z en la pared y alinear los orificios del sujetador Z con los orificios de la pared, insertar el
tornillo (C) y ajustar con la ayuda de un taladro, como se muestra en la figura.
3
11x
Wall
Mur
Pared
C
Z clip
Attache Z
Sujetador Z
Wall
Mur
Pared
C
C
Wall
Mur
Pared
C
Z clip
Attache Z
Sujetador Z
Wall
Mur
Pared
9x
14-Jan-2023 8/11
© 2023 Williams-Sonoma, Inc. UK –A–NS
Williams-Sonoma Inc.
Assembly Instructions
Instructions d’assemblage
Instrucciones de Ensamblaje
Pottery Barn –Pottery Barn Teen –Pottery Barn Kids –Williams Sonoma Home –West Elm –Rejuvenation –Mark and Graham
Measure the distance of D ring from mid to mid as shown in figure.
Note –you can mount the mirror vertically and horizontally. If you want to mount
it horizontally rotate the mirror and do the same process.
Mesurer la distance de l’anneau en forme de D du centre au centre, comme illustré
Remarque : il est possible de monter le miroir à la verticale ou à l’horizontale.
Tourner le miroir pour le monter à l’horizontale et effectuer le même processus.
Nota: puede montar el espejo vertical y horizontalmente. Si se desea montarlo
horizontalmente rotar el espejo y hacer el mismo proceso.
4
Draw a straight line in the wall where you want to mount the mirror in a same distance which you have
measured, and check the straightness of line with the help of water leveler.
Tracer une ligne droite où monter le miroir utilisant la même distance mesurée, et vérifier la rectitude de la
ligne à l’aide du niveau.
Dibujar una línea recta en la pared donde se quiere montar el espejo en la misma distancia que se midió y
controlar que la línea esté derecha con la ayuda de un nivel de agua.
Wall
Mur
Pared
Water Leveler
Niveau à eau
Nivelador de agua
A
5
Line
Ligne
Línea
14-Jan-2023 9/11
© 2023 Williams-Sonoma, Inc. UK –A–NS
Williams-Sonoma Inc.
Assembly Instructions
Instructions d’assemblage
Instrucciones de Ensamblaje
Pottery Barn –Pottery Barn Teen –Pottery Barn Kids –Williams Sonoma Home –West Elm –Rejuvenation –Mark and Graham
6
Make holes in the end points of the line with the help of drill machine, then insert toggle B in the holes with the
help of drill machine after that place screw C and insert it on toggle B as shown in figure.
Faire des trous aux points d’extrémité de la ligne à l’aide d’une perceuse, puis insérer l’ancrage B dans le trou à l’aide
d’une perceuse, puis insérer la vis C dans l’ancrage B, comme illustré.
Hacer orificios en los puntos de los extremos de la línea con la ayuda de un taladro, luego insertar los tarugos B en
los orificios con la ayuda de un taladro. A continuación colocar el tornillo C e insertarlo en el tarugo B como se
muestra en la figura.
B
C
14-Jan-2023 10/11
© 2023 Williams-Sonoma, Inc. UK –A–NS
Williams-Sonoma Inc.
Assembly Instructions
Instructions d’assemblage
Instrucciones de Ensamblaje
Pottery Barn –Pottery Barn Teen –Pottery Barn Kids –Williams Sonoma Home –West Elm –Rejuvenation –Mark and Graham
7
Place the D ring in the screw, as shown in figure.
Placer l’anneau en forme de D dans la vis, comme illustré.
Colocar el anillo D en el tornillo, como se muestra en la figura.
14-Jan-2023 11/11
© 2023 Williams-Sonoma, Inc. A
Williams-Sonoma Inc.
Assembly Instructions
Instructions d’assemblage
Instrucciones de Ensamblaje
Pottery Barn –Pottery Barn Teen –Pottery Barn Kids –Williams Sonoma Home –West Elm –Rejuvenation –Mark and Graham
8
9
OPTION-1
OPTION 1
OPCIÓN 1
OPTION-2
OPTION 2
OPCIÓN 2

This manual suits for next models

1

Other Williams-Sonoma Indoor Furnishing manuals
Williams-Sonoma RORY User manual

Williams-Sonoma

Williams-Sonoma RORY User manual

Williams-Sonoma HART MODULAR User manual

Williams-Sonoma

Williams-Sonoma HART MODULAR User manual

Williams-Sonoma Arch Medicine Cabinet User manual

Williams-Sonoma

Williams-Sonoma Arch Medicine Cabinet User manual

Williams-Sonoma Mercer Bed Tall King User manual

Williams-Sonoma

Williams-Sonoma Mercer Bed Tall King User manual

Williams-Sonoma TABOR KNOB User manual

Williams-Sonoma

Williams-Sonoma TABOR KNOB User manual

Williams-Sonoma MAISIE User manual

Williams-Sonoma

Williams-Sonoma MAISIE User manual

Williams-Sonoma Somerset Dining Table User manual

Williams-Sonoma

Williams-Sonoma Somerset Dining Table User manual

Williams-Sonoma CRESWELL User manual

Williams-Sonoma

Williams-Sonoma CRESWELL User manual

Williams-Sonoma Verona Mirror Wall User manual

Williams-Sonoma

Williams-Sonoma Verona Mirror Wall User manual

Williams-Sonoma HUGO MODULAR SOFA CORNER ARM User manual

Williams-Sonoma

Williams-Sonoma HUGO MODULAR SOFA CORNER ARM User manual

Williams-Sonoma Mercer Bed King User manual

Williams-Sonoma

Williams-Sonoma Mercer Bed King User manual

Williams-Sonoma LA COUPOLE User manual

Williams-Sonoma

Williams-Sonoma LA COUPOLE User manual

Williams-Sonoma Garbo One User manual

Williams-Sonoma

Williams-Sonoma Garbo One User manual

Williams-Sonoma WILKINS Door Knocker User manual

Williams-Sonoma

Williams-Sonoma WILKINS Door Knocker User manual

Williams-Sonoma Shaw Vanity User manual

Williams-Sonoma

Williams-Sonoma Shaw Vanity User manual

Williams-Sonoma HAMPSTEAD BED QUEEN & KING User manual

Williams-Sonoma

Williams-Sonoma HAMPSTEAD BED QUEEN & KING User manual

Williams-Sonoma Verona Floor Mirror User manual

Williams-Sonoma

Williams-Sonoma Verona Floor Mirror User manual

Williams-Sonoma PIERRE User manual

Williams-Sonoma

Williams-Sonoma PIERRE User manual

Williams-Sonoma JULIETTE User manual

Williams-Sonoma

Williams-Sonoma JULIETTE User manual

Williams-Sonoma MERCER User manual

Williams-Sonoma

Williams-Sonoma MERCER User manual

Williams-Sonoma PRESIDIO User manual

Williams-Sonoma

Williams-Sonoma PRESIDIO User manual

Williams-Sonoma Arch Brackets User manual

Williams-Sonoma

Williams-Sonoma Arch Brackets User manual

Williams-Sonoma Frameless Beveled Pivot Mirror User manual

Williams-Sonoma

Williams-Sonoma Frameless Beveled Pivot Mirror User manual

Williams-Sonoma HAMPSTEAD BAR CABINET WOOD TOP User manual

Williams-Sonoma

Williams-Sonoma HAMPSTEAD BAR CABINET WOOD TOP User manual

Popular Indoor Furnishing manuals by other brands

Resource Oslo Series Assembly instructions

Resource

Resource Oslo Series Assembly instructions

Hulsta ET 1500 Assembly instruction

Hulsta

Hulsta ET 1500 Assembly instruction

Project 2000 ProBedLifting Manual of use and maintenance

Project 2000

Project 2000 ProBedLifting Manual of use and maintenance

Konifera Samar Assembly instructions

Konifera

Konifera Samar Assembly instructions

Furniture of America CM7946 Assembly instructions

Furniture of America

Furniture of America CM7946 Assembly instructions

Cattelan Italia AZIMUT Assembling instructions

Cattelan Italia

Cattelan Italia AZIMUT Assembling instructions

Next 207392 Assembly instructions

Next

Next 207392 Assembly instructions

Forte MAIGA MGAK225 Assembling Instruction

Forte

Forte MAIGA MGAK225 Assembling Instruction

NABBI RTV - MUZA Assembly instructions

NABBI

NABBI RTV - MUZA Assembly instructions

KLOBER Moteo operating instructions

KLOBER

KLOBER Moteo operating instructions

Instant Desks IDA-8404 Assembly instructions

Instant Desks

Instant Desks IDA-8404 Assembly instructions

BARCALOUNGER 8011-GFP Use and care guide

BARCALOUNGER

BARCALOUNGER 8011-GFP Use and care guide

WPG STT1 instructions

WPG

WPG STT1 instructions

Living Spaces 243554 Assembly instructions

Living Spaces

Living Spaces 243554 Assembly instructions

Whalen Bayside CUS3PO-4 manual

Whalen

Whalen Bayside CUS3PO-4 manual

John Lewis 57040191 user guide

John Lewis

John Lewis 57040191 user guide

Manhattan Comfort BOWERY 55.12 Assembly instructions

Manhattan Comfort

Manhattan Comfort BOWERY 55.12 Assembly instructions

Thermador CHMHP36TW installation instructions

Thermador

Thermador CHMHP36TW installation instructions

manuals.online logo
manuals.online logoBrands
  • About & Mission
  • Contact us
  • Privacy Policy
  • Terms and Conditions

Copyright 2025 Manuals.Online. All Rights Reserved.