Williams 3M05T75 Owner's manual

Printed in Taiwan
Model: 3M10T160 & 3M20T160
Model: 3M05T75 & 3M05T150
3M05T75-M0_062017
This is the safety alert symbol. It is used to alert you to potential personal injury hazards.
Obey all safety messages that follow this symbol to avoid possible injury or death.
!
Mini Jacks
J.H. Williams Tool Group
6969 Jamesson Road,
Midland, GA 31820
MODELS: 3M05T75, 3M05T150 - 5 Ton Capacity
3M10T160 - 10 Ton Capacity
3M20T160 - 20 Ton Capacity
OWNER/ OPERATOR MANUAL
CAPACITY: 5 TO 20 TONS
(Max. Operating Pressure 10,000 PSI)

Save these instructions. For your safety, read, understand,
and follow the information provided with and on this jack
before using. The owner and/or operator of this equipment
shall have an understanding of this jack and safe operating
procedures before attempting to use. The owner and/or
operator shall be aware that the use and repair of this product
may require special skills and knowledge. Instructions and
safety information shall be conveyed in the operator's native
language before use of this jack is authorized. If any doubt
exists as to the safe and proper use of this jack, remove from
service immediately.
Inspect before each use. Do not use if broken, bent, cracked,
or damaged parts (including labels) are noted. Any jack that
appears damaged in any way, operates abnormally or is
missing parts, shall be removed from service immediately. If
you suspect that the jack was subjected to a shock load (a
load dropped suddenly, unexpectedly upon it), immediately
discontinue use until the jack has been checked by a Williams
authorized service center (contact distributor or manufacturer
for list of Authorized Service Centers). It is recommended that
an annual inspection be done by qualied personnel. Labels
and owner's manuals are available from manufacturer.
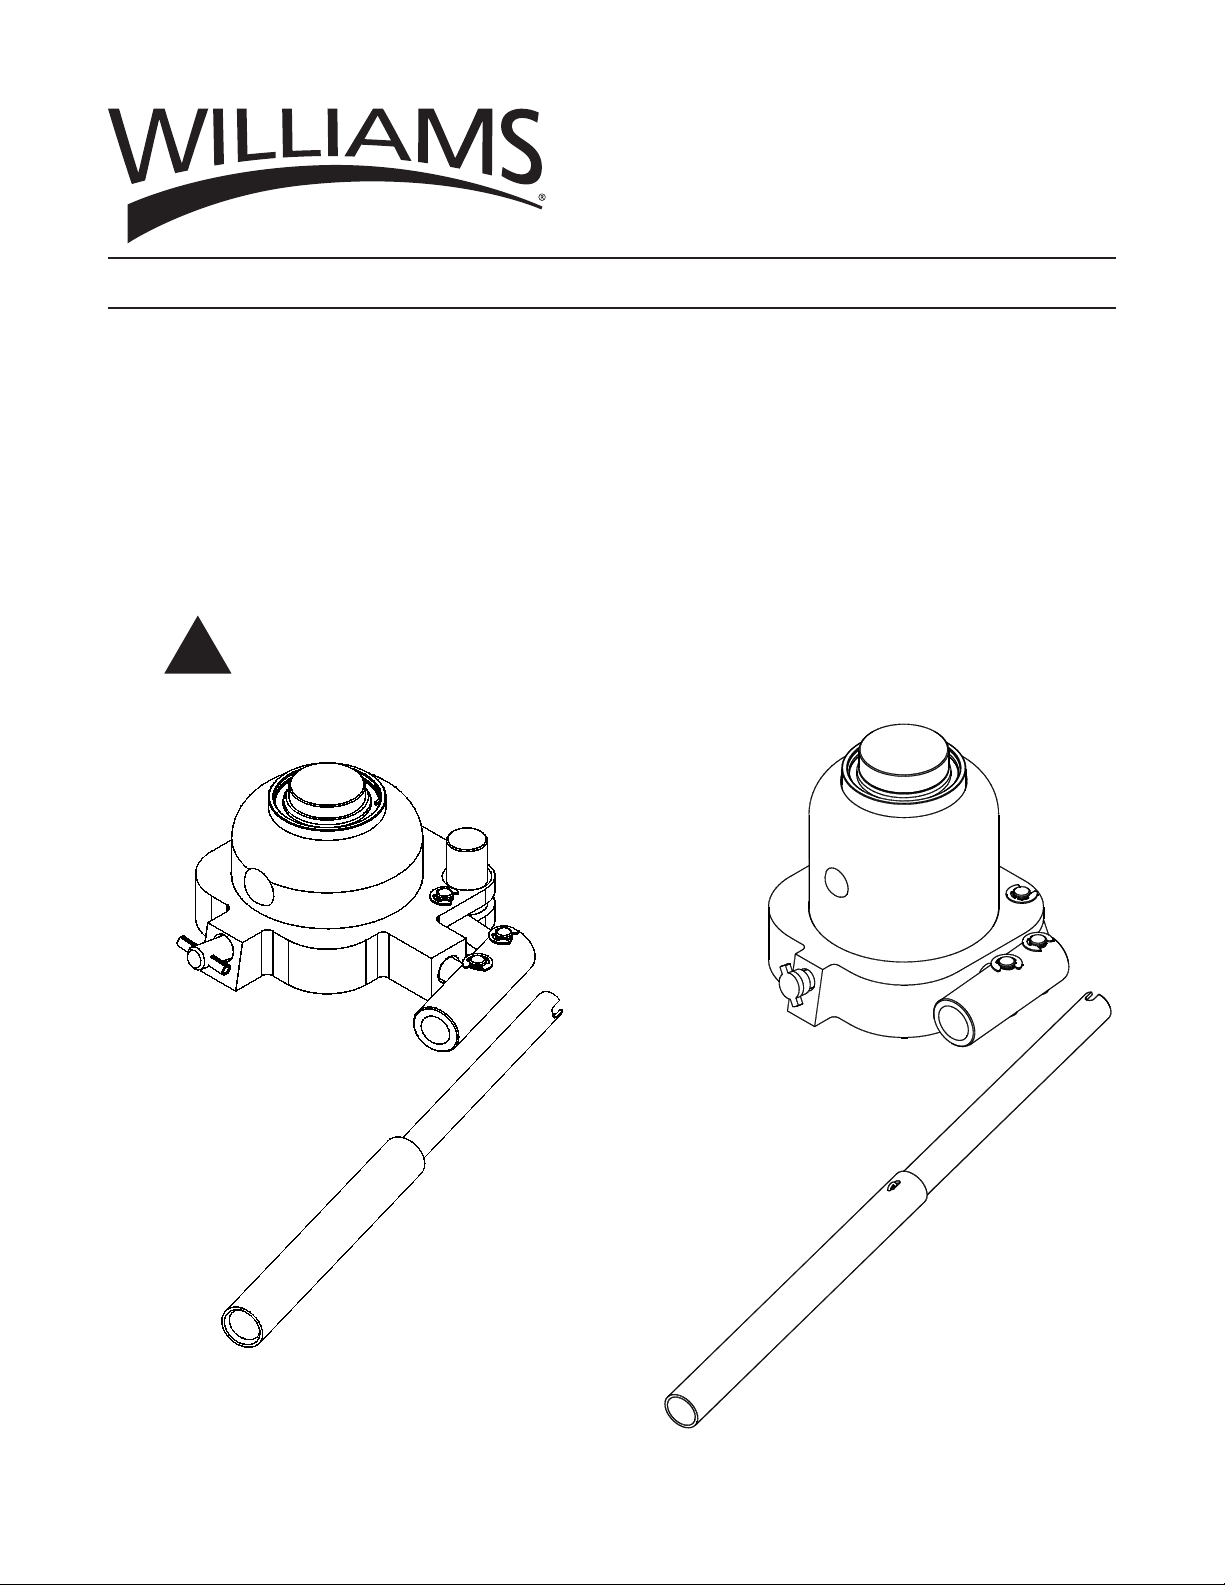
PRODUCT DESCRIPTION
This product is designed to lift, position, or move, but not
sustain, rated capacity loads. It is not designed to be used as
a stand-alone device. Any load lifted, positioned, or otherwise
moved by this device, must immediately be supported by
appropriately rated mechanical means. A wide variety of
applications exist for this category of product. Special skill,
knowledge and training may be required for a specic task and
this product may not be suitable for all jobs listed. Unsuitable
applications include applications that call for a device to
lift, position, move or support persons, animals, hazardous
materials, mobile homes and dwellings in general, mirrors,
plate glass or to connect/secure hatches, components, and
materials between bulkheads. The user ultimately must make
the decision regarding suitability of the product for any given
task and therefore accept responsibility for that decision.
HYDRAULIC JACK TECHNICAL
SPECIFICATIONS
Rated Capacity of 3M05T75, 3M05T150: 10,000 lb.
(5 ton)
Rated Capacity of 3M10T160: 20,000 lb. (10 ton)
Rated Capacity of 3M20T160: 40,000 lb. (20 ton)
Brand name: Williams
Hydraulic Pressure @ Rated Capacity:
3M05T75, 3M05T150: 7,000 psi
3M10T160: 7,850 psi
3M20T160: 10,800 psi
2
BEFORE USE
Before using this jack, ensure that the intended load contact
point is able to withstand the load applied by this jack.
1. Before using this product, read the owner’s manual completely
and familiarize yourself thoroughly with the product, its
components, and recognize the hazards associated with
its use.
2. To familiarize yourself with basic operation, use the operating
handle to engage and turn the release valve:
a. Clockwise until rm resistance is felt to further thread
engagement. This is the ‘CLOSED’ release valve
position used to pressurize the hydraulic uid and
raise the ram plunger.
b. Counter-clockwise, but no more than 1/2 turn from the
closed position. This is the ‘OPEN’ release valve
position
used to lower the ram plunger.
3. Check that the pump operates smoothly before putting into
service. Replace damaged or missing parts with factory
authorized replacement parts only. Repair of this product
may require special skills and knowledge and should only
be attempted by a factory authorized service center. Contact
the manufacturer or distributor of this product for a list of
factory authorized service centers. Lubricate as instructed
in Maintenance Section.
Bleeding/ Venting Trapped Air
With the release valve in the OPEN position (2b above) and with
saddle fully lowered, locate and remove the oil ller plug. Insert
the handle into the handle sleeve; then pump 6 to 8 full strokes.
This will help release any pressurized air which may be trapped
within the reservoir. Oil level should be even with the bottom of
the oil ller plug hole. Reinstall the oil ller plug.
Use of this device may require special skills and
knowledge. Read, understand, and follow all printed materials
provided with and on this device before use.
!
!
To avoid personal injury and/or property damage:
•Read, understand and follow all printed materials provided
with and on this jack.
•This is a lifting device only! Never work on, under, or
around a load supported only by a hydraulic jack.
•Immediately support the lifted load with appropriately
rated mechanical means.
•Use only on hard, level surfaces capable of sustaining
rated capacity loads.
•Center load on saddle.
• No alteration shall be made to this device. Use only
attachments, adapters and accessories provided by
the manufacturer.
•Be alert and sober when using this product! Never
operate this equipment when under the inuence of
drugs or alcohol.
•Use only high grade hydraulic jack oil in this product.
•Always use a calibrated means of determining how
much force is being applied by this product. Never
exceed the rated capacity of the jack.
WARNING
!

3
SPECIFICATIONS
MAINTENANCE
Important: Use only good grade hydraulic jack oil. Avoid
mixing different types of uid and NEVER use brake uid,
turbine oil, transmission uid, motor oil or glycerin. Improper
uid can cause premature failure of the jack and the potential
for sudden and immediate loss of load. We recommend
Williams 8H1G or equivalent.
Adding
1. With saddle fully lowered set jack in its upright, level
position. Locate and remove oil ller plug.
2. Fill with oil even with the bottom of the oil ller hole. Reinstall
the oil ller plug.
Changing oil
For best performance and longest life, replace the complete
uid supply at least once per year.
1. With saddle fully lowered set jack in its upright, level
position. Locate and remove oil ller plug.
2. Lay the jack on its side and drain the uid into a suitable
container.
Note: Dispose of hydraulic uid in accordance with local
regulations.
3. Fill with oil even with the bottom of the oil ller hole. Reinstall
the oil ller plug.
Lubrication
A periodic coating of light lubricating oil to pivot points will
help to ensure that pump piston linkages move freely.
Note: Never apply oil to saddle.
Cleaning
Periodically check the pump piston and ram plunger, and
saddle for signs of rust or corrosion. Clean as needed and
wipe with a clean, oil soaked rag.
Note: Never use sandpaper or abrasive material on these
surfaces !
Storage
Store the jack with pump piston, ram plunger/saddle
fully
lowered and release valve open, but never more than 1/2
turn. This will help prevent rust and corrosion to those critical
surfaces.
Figure 1 - Typical Mini Jack Components (3M05T75 shown)
OPERATION
Use of this device may require special skills and
knowledge. Read, understand, and follow all printed materials
provided with and on this device before use.
Raising the Ram Plunger
1. Locate and close release valve by turning handle
clockwise until rm resistance is felt to further thread
engagement.
2. Pump until load reaches desired height. Immediately
secure with appropriately rated mechanical devices. It
is recommended you follow the load with cribbing and
blocking where practical.
Never allow personnel to work or pass under a load
until the load is secured by cribbing, blocking, or other
mechanical means.
Lowering
Make certain that all personnel are clear of the load
before lowering. Control the rate of descent of the load at
all times. The more you open the release valve, the faster
the load descends.
1. Use the manufacturer's provided operating handle
to engage and slowly turn the release valve counter-
clockwise, but no more than 1/2 turn.
If the operating handle is damaged, operates abnormally,
or will not positively engage the release valve, immediately
discontinue use of the jack until a manufacturer's replacement
handle assembly can be acquired.
2. Push ram down and handle sleeve in to reduce exposure
to rust and contamination after removing jack from under
load.
!
!
!
!
Handle Assembly
Handle Sleeve
Saddle
Oil Filler Plug
Release Valve
Saddle Adapter
(for 3M05T75 &
3M05T150 only)
Ram Plunger
Model Capacity
(ton)
Min. Height
(in)
Max. Height
(in)
Base Size
(LxW)
Weight
(lb.)
3M05T75 5 2 3/8 3 1/8 4 1/8" x 4" 4.6
3M05T150 5 3 3/8 4 7/8 4 1/8" x 4" 5.3
3M10T160 10 4 3/4 6 1/4 4 7/8" x 4 3/8" 12.6
3M20T160 20 5 1/8 6 3/4 5 3/8" x 4 3/4" 16.7

4
(refer to page 5 for parts list)
Note: To insure safe and reliable performance, replace worn or damaged parts with Williams
authorized replacement parts only.
Note: Not all components of the cylinder are replacement items, but are illustrated as a convenient reference of location and
position in the assembly sequence. To ensure safe and reliable performance, replace worn or damaged parts with Williams
authorized repair parts only.
J.H. Williams Tool Group
6969 Jamesson Road,
Midland, GA 31820
1-866-460-7995
PARTS ILLUSTRATION
MODEL: 3M05T75 & 3M05T150

Item Model 3M05T75 Model 3M05T150 Description Qty.
1 115-6-1103-104 115-6-1103-104 Saddle 1
2 115-6-1110-101 115-6-1110-101 Retaining Ring 2
3 115-6-1810-109 115-6-1810-109 Upper Bearing 1
4 580-7-0270-101 581-7-0268-000 Dust Seal 1
5 N/A N/A Ram Plunger 1
6 * * Back-up Ring 1
7 * * U-cup 1
8 599-7-0360-002 599-7-0360-002 Special Washer 1
9 N/A N/A Base Assy. 1
10 505-9-0092-207 505-9-0092-207 Oil Filler Plug 1
11 115-3-1700-104 115-3-1700-104 Release Valve 1
12 * * Oil Seal 1
13 601-7-0006-005 601-7-0008-009 Steel Ball 2
14 511-2-0052-001 512-2-0061-009 Spring 1
15 115-6-1603-104 115-6-1603-104 Screw 1
16 * * O-ring 1
17 * * Back-up Ring 1
18 115-6-1306-108 115-6-1306-108 Pump Piston 1
19 115-4-2100-101 115-4-2100-101 Handle 1
20 518-4-0060-102 518-4-0060-102 Pin 2
21 115-4-1300-104 115-4-1300-104 Handle Sleeve 1
22 677-5-0050-105 677-5-0050-105 “E” Clip 2
23 414-6-1216-107 414-6-1216-107 Needle 1
24 512-2-0067-010 512-2-0067-010 Safety Spring 1
25 * * O-ring 1
26 414-6-1215-307 414-6-1215-307 Safety Valve Screw 1
27 509-9-0145-109 509-9-0145-109 Safety Valve Cap 2
28 649-1-0080-027 649-1-0080-027 Socket Head Bolt 1
29 * * Gasket 1
30 511-2-0048-000 511-2-0048-000 Spring 1
31 115-6-1104-106 115-6-1104-106 Saddle Adapter 1
(*) 115-3-9901-104 115-3-9901-104 Repair Kit -
5
(*) - Indicates items included in, and available only as part of Repair Kit.
N/A - Part is not available as replacement.
Note: Not all components of the cylinder are replacement items, but are illustrated as a convenient reference of location and
position in the assembly sequence. To ensure safe and reliable performance, replace worn or damaged parts with Williams
authorized repair parts only.
J.H. Williams Tool Group
6969 Jamesson Road,
Midland, GA 31820
1-866-460-7995
REPAIR PARTS SHEET
MODEL: 3M05T75 & 3M05T150
This manual suits for next models
3
Table of contents
Other Williams Jack manuals
Popular Jack manuals by other brands

Pittsburgh
Pittsburgh 62590 Owner's manual & safety instructions

Powerbuilt
Powerbuilt 640405 Operating and maintenance instruction manual

Clarke
Clarke STRONG-ARM CTJ3000G quick start guide

Clarke
Clarke CTJ2500QLG Operating & maintenance instructions

Omega Lift Equipment
Omega Lift Equipment 18122C Operating instructions & parts manual

Pittsburgh
Pittsburgh 58816 Owner's manual & safety instructions