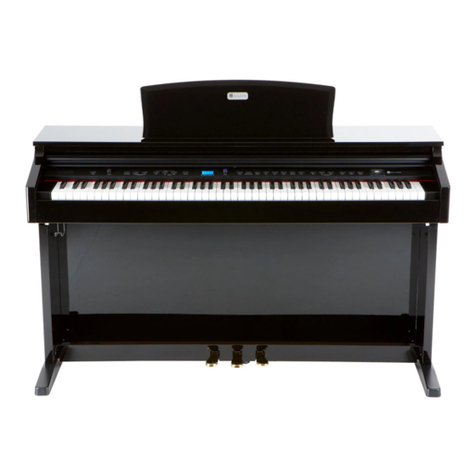
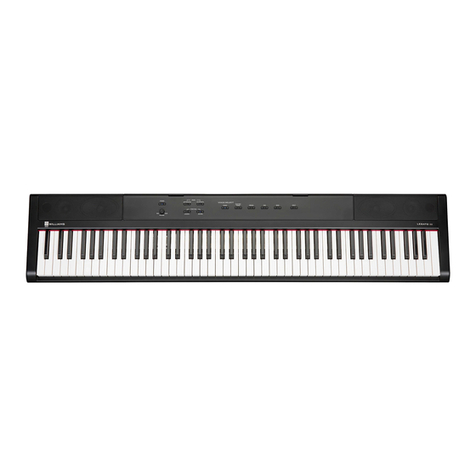
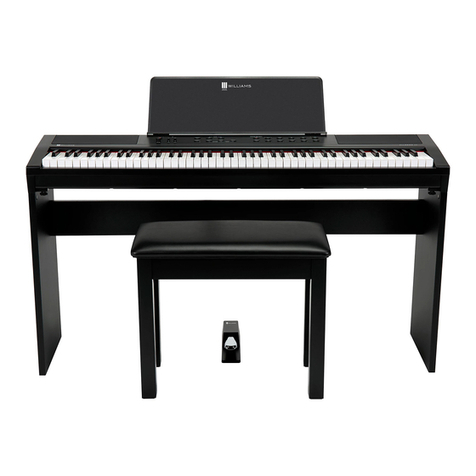
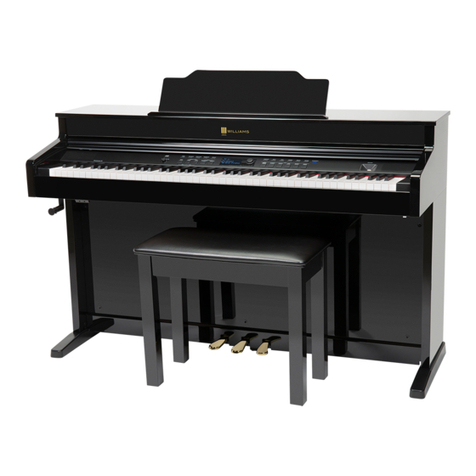
Williams RHAPSODY III User manual

RHAPSODY III
owner's manual
digital piano with bluetooth® audio

OWNER'S MANUAL
2
IMPORTANT SAFETY INSTRUCTIONS
• Donotusenearwater.
• Cleanonlywithasoft,drycloth.
• Donotblockanyventilationopenings.
• Donotplacenearanyheatsourcessuchasradiators,heatregisters,
stoves,oranyotherapparatus(includingampliers)thatproducesheat.
• Donotremovethepolarizedorgrounding-typeplug.
• Protectthepowercordfrombeingwalkedonorpinched.
• Onlyusetheincludedattachments/accessories.
• Unplugthisapparatusduringlightningstormsorwhenunusedforalongperiodoftime.
• Referallservicingtoqualiedservicepersonnel.Servicingisrequiredwhentheapparatushasbeen
damagedinanyway,suchaspower-supplycordorplugisdamaged,liquidhasbeenspilledorobjects
havefallenintotheapparatus,theapparatushasbeenexposedtorainormoisture,doesnotoperate
normally,orhasbeendropped.
FCC STATEMENTS
1.Caution:Changesormodicationstothisunitnotexpresslyapprovedbythepartyresponsibleforcompliancecould
voidtheuser’sauthoritytooperatetheequipment.
2.NOTE:ThisequipmenthasbeentestedandfoundtocomplywithaClassBdigitaldevice,pursuanttoPart15oftheFCC
Rules.Theselimitsaredesignedtoprovidereasonableprotectionagainstharmfulinterferenceinaresidentialinstallation.
Thisequipmentgenerates,uses,andcanradiateradiofrequencyenergyand,ifnotinstalledandusedinaccordancewith
theinstructions,maycauseharmfulinterferencetoradiocommunications.However,thereisnoguaranteethatinterference
willnotoccurinaparticularinstallation.Ifthisequipmentdoescauseharmfulinterferencetoradioortelevisionreception,
whichcanbedeterminedbyturningtheequipmentoandon,theuserisencouragedtotrytocorrecttheinterference
byoneormoreofthefollowingmeasures:
• Reorientorrelocatethereceivingantenna.
• Increasetheseparationbetweentheequipmentandreceiver.
• Connecttheequipmentintoanoutletonacircuitdierentfromthattowhichthereceiverisconnected.
• Consultthedealeroranexperiencedradio/TVtechnicianforhelp.

RHAPSODY III DIGITAL PIANO
WILLIAMSPIANOS.COM
3
ASSEMBLY INSTRUCTIONS
STEP 1-PlacethefourCylindricalNutsA(M6 Nut)intotheholesintheStand
Legs,withthescrewdriverslotfacingout.Useascrewdrivertoalign
thethreadsinthenutswiththeopeningsonthebottomofthe
StandLegs.
ASSEMBLY PARTS LIST
STEP 2-Placethedowelsinthefeetintotheappropriateholesinthebottom
oftheStandLegs.Makesurethatthefeetarefacingawayfrom
thebackpanelbracketasshownbelow.ThreadtwoFootBoltsB
(M6X55)throughthefootandintothecylindricalwashers,rotating
thewashertoalignifneeded.Firmlytighten&repeatfortheother
side.

OWNER'S MANUAL
4
STEP 3-Attachthepianobaseto
theleftandrightlegs,and
secureusingfour
C(M6X16)screws.
STEP 4-Screwthefourbrackets
D(ST4X12)intothepiano
basebyfollowingthe
pre-drilledholes.
Thebracketshouldbe
facingthefrontofthe
piano,withthescrews
facingthebackofthe
piano.

RHAPSODY III DIGITAL PIANO
WILLIAMSPIANOS.COM
5
STEP 5-Screwthemodestlypanel
intothebracketsandlegs
usingthepre-drilledholes
andincludedscrewswith
washersE(M4X10).
Thevanityboardshould
beonthefrontsideof
thebrackets,andscrews
shouldenterthroughthe
frontsideofthepiano.
STEP 6 -Placethemainpiano
sectionontopofthelegs.
Locatethetwolarge
screwsF (M6X20) on
thebottomofthepiano
console,locatedtoward
therear.Slipthese
protrudingscrewsintothe
U-shapedbracketstoward
therearofthestand.Use
oneF (M6X20)screwto
secureeachfrontbracket.
Tightenall4screws.

OWNER'S MANUAL
6
STEP 6 - Attachtheheadphone
hooktotheundersideof
thepiano,justtotheleft
oftheheadphoneoutput
jacksbyusingthefourpre-
drilledholesandincluded
G (M4X12) screws.
FINAL STEP - Plugthepedalarray
cableintothe"Pedal"jack,
andthepoweradapterinto
the"Power"jackonthe
backofthepiano.

RHAPSODY III DIGITAL PIANO
WILLIAMSPIANOS.COM
7
TABLE OF CONTENTS
INTRODUCTION
Congratulations!Youhavejustpurchasedastateoftheartdigitalpianothatprovidesremarkableacoustic
soundandfeel.Werecommendthatyoureadthroughthisowner'smanualcarefully,soyoucangetthemost
enjoymentfromyournewpiano.
Features include:
• 88graded,weighted,velocity-sensitivekeys
• 12pianoandkeyboardsounds,includingunloopedpianosamples
• Metronomefeaturewithvariabletempotofacilitatepracticeorrecording
• WirelessBluetoothMIDIandAudioforconnectingtotablets,smartphones,andapps
BEFORE YOU GET STARTED
Yourpianowascarefullypackedatthefactory,andthepackagingwasdesignedtoprotecttheunitfrom
roughhandling.
• Iftheunitisdamaged,callWilliams Product Support: (888) 241-1582
• Usetheoriginalpackingcartonwhenstoringortransporting
• Makesurechildrenaresupervisedwhennearthepianooritspackaging
INITIAL OPERATION / QUICK START
• Plugthepowercordintoa110Vsupply
• Pressthepowerbutton.TheLEDwilllight
• PresstheVoiceSelectbuttonforthedesiredvoice
• Adjustthevolumecontrol
IMPORTANTSAFETYINSTRUCTIONS..........2
ASSEMBLYINSTRUCTIONS....................... 3-6
INTRODUCTION.............................................7
BEFOREYOUGETSTARTED........................7
INITIALOPERATION/QUICKSTART...............7
TAKINGCAREOFYOURDIGITALPIANO.....8
FRONTPANEL......................................... 9-10
BACKPANEL...............................................11
TOPPANEL..................................................11
OPERATIONS...............................................12
SELECTINGVOICES....................................12
LAYERMODE...............................................12
SPLITMODE................................................13
DEMOSONGS.............................................13
RECORDING................................................14
TUNING........................................................14
EFFECTS......................................................14
MODFX.........................................................15
ADVANCEDFUNCTIONS.............................16
MIDI..............................................................17
SPECIFICATIONS..........................................18
KEYBOARDSHORTCUTS............................18
MIDIIMPLEMENTATIONCHART..................19
WARRANTY...................................BACKPAGE

OWNER'S MANUAL
8
TAKING CARE OF YOUR DIGITAL PIANO
ThisWilliamsRhapsodyIIIdigitalpianowillprovideyearsofmusicalenjoymentifyoufollowthesuggestions
listedbelow.
PRODUCT SERVICING
Thisproductshouldbeservicedbyqualiedservicepersonnelwhen:
• Thepowersupplycordortheplughasbeendamaged
• Liquidhasbeenspilledintotheunitorithasbeenexposedtorain
• Theinstrumentdoesnotappeartooperatenormallyorexhibitsamarkedchangeinperformance
• Theinstrumenthasbeendroppedorthecabinethasbeendamaged
• Pleasecontact[email protected]forpartsandserviceinformation
HANDLING AND TRANSPORT
• Neverapplyexcessiveforcetothecontrols,connectorsorotherpartsoftheinstrument
• Alwaysunplugcablesbygrippingtheplugrmly,notbypullingonthecable
• Disconnectallcablesbeforemovingtheinstrument
• Physicalshockscausedbydropping,bumping,orplacingheavyobjectsontheinstrumentcan
resultinsupercialoroperationaldamage
• Carefullycheckthevolumecontrolbeforeplaying.Excessivevolumecancausepermanenthearingloss.
CLEANING
• Cleanthecabinetandpanelwithasoft,drycloth.Donotusepaintthinnerorpetrochemicalbasedpolishes
• Tomaintainthelusterofthekeysandbuttons,wipewithaclean,lightlydampenedcloth,andthen
polishwithasoft,drycloth
LOCATION
• Toavoiddeformation,discoloration,ormoreseriousdamage,donotexposetheinstrumentto
thefollowingconditions:Directsunlight,hightemperatures,excessivehumidity,excessivedust,
strongvibration
• Leaveenoughspacearoundthepianoforproperventilation
• Thisinstrumentcontainsdigitalcircuitryandmaycauseorbesusceptibletointerferenceifplaced
tooclosetoradio,televisionreceivers,ormobilephones.Ifinterferenceoccurs,movetheinstrument
furtherawayfromtheaectedequipment
• Avoidplacingvinylobjectsontopoftheinstrument,vinylcansticktoanddiscolorthesurface.
POWER
• Turnthepowerowhentheinstrumentisnotinuse
• Toavoiddamagetotheinstrumentandotherdevicestowhichitisconnected,turnthepowerofall
relateddevicesopriortoconnectionordisconnectionofMIDIcables
• Turnthepoweroifthemaincableisdamaged,ortheinstrumenthasbeenexposedtoliquid
• Donotswitchtheunitonandoinquicksuccession,asthisplacesanundueloadonthe
electroniccomponents
• UnplugtheACpoweradapterduringanelectricalstorm
• AvoidpluggingtheACpoweradapterintothesameACoutletasapplianceswithhighpower
consumption,suchaselectricheatersorovens

RHAPSODY III DIGITAL PIANO
WILLIAMSPIANOS.COM
9
Power On/O
Master Volume Knob
Controlstheoutputvolumeofthepiano.
EQ Low / High Knobs
AdjuststheEQtoaddorsubtractbass
andtreble.
Demo Button
PressingtheDemobuttonwillstartplayinga
demosongonyourcurrentlyselectedvoice.
PressingtheVoicebuttonswhileademosong
isactivewillplayasongonthenewlyselected
voice.
Play Button
PressingPlaywillplayorstopthesongyou
recorded.
Track Button
PressingtheTrackbuttonalternateswhich
recordingtrackiscurrentlyactive.When
pressed,theLEDwilllightuptoindicatetrack
2isactive,orturnotoindicatethattrack1is
active.Holdingdownthebuttonwilldeletethe
currentlyselectedtrack,andconrmbyplaying
aC3note3times.
Record Function
PressingthePlayandTrackbuttons
simultaneouslywillstarttherecordingfunction.
Metronome Button
TurnsonandotheMetronome.Youcanadjust
thevolume,tempo,andmeterofthemetronome
byfollowingtheinstructionsonpage12.
Octave Button
Transposestherangeofthepianokeys1octave
higherorlower.
Transpose Button
Transposesthekeyofthepiano.
Piano Reset
PressingtheOctaveandTransposebuttons
simultaneouslywillresetthesoundtofactory
settings.Holdingthesewhilepoweringupthe
pianowillreturnallsettingstotheirdefaults.
Function Button
SelectsvariousfunctionsinthePiano.
FRONT PANEL
(LEFT SIDE)

OWNER'S MANUAL
10
FRONT PANEL
(RIGHT SIDE)
Voice Select Buttons
(GRANDPIANO/BRIGHTPIANO,ELECTRIC
PIANO1/ELECTRICPIANO2,ROCKORGAN/
CHURCHORGAN,STRINGS/SYNTH,VIBES/
NYLONGUITAR,ACOUSTICBASS/
ELECTRICBASS)
Pressingthesebuttonsoncewillswitchtothe
soundthatisassociatedwiththenameprinted
abovethebutton,andpressingthesamebutton
againwillswitchtothesoundthatisassociated
withthenameprintedbelowthebutton.The
whiteLEDstotheleftoftheVoiceSelect
buttonswillindicatewhetherthetoporbottom
soundisactivated.Quicklydoubletappingone
ofthesebuttonswilllayerboththetopand
bottomsound.
SPLIT Button
Splitsthekeyboardbetweenrightandleftside.
Chorus Button
TurnsonandotheChoruseectassignedto
thevoice.
ModFX Button
TurnsonandotheModulationeectassigned
tothevoice.
Reverb Button
TurnsonandotheReverbeectassignedto
thevoice.
Value + / - Buttons
Adjuststhesettingsofvariousfunctions.
Bluetooth Button
Turnsonandotheabilitytopairwith
Bluetoothdevices.
10-Key Function
Notethatthebuttonsontherightsideofthe
pianoforma10-keypad.GrandPianois1,
ElectricPiano1is2,etc.Thesebuttonscan
beusedtoentervaluesonthepiano,suchas
metronometempo.

RHAPSODY III DIGITAL PIANO
WILLIAMSPIANOS.COM
11
Pedal Input
Connectsthebuilt-inSustainandSostenuto
pedalslocatedatthebottomofthepiano.
Outputs-Stereo/ Mono Line Out ¼” Jacks
Theoutputjackssupplyaline-levelsignalfor
externalamplication.Usebothjacksforstereo
orjusttheLeftjackformono.
AC Adapter Input
ConnectionfortheACpoweradapter.
Headphones (x2)
Theheadphonejacksallowplayinginsilence.
Whenheadphonesarepluggedin,thespeakers
aremute.Thisjackislocatedonthebottom
panelofthepiano.
USB Input
TheUSBconnectionsupportsClassCompliant
MIDIDriverstousewithMIDISequencer
applications.
Aux In Jack
The1/8”TRSJackonthetoppanelallowsthe
usertopluginanmp3oraudiodevicetoplay
musicthroughthepianospeaker.
BACK PANEL
TOP PANEL

OWNER'S MANUAL
12
OPERATIONS
Mostofthefrontpanelbuttonsareverystraight
forwardandeasytoselectforgeneralfunctions.
Incaseswhereyouwanttoeditsettingsin
moredepthyouwillneedtousethefrontpanel
buttonsaswellastheFunctionbuttonandValue
buttonstochangeparameters.
Powering on Rhapsody III
PressthePOWERbuttonintheupperlefthand
cornerofthefrontpanel.TheLEDlightinthe
buttonwillstayonwhenthepianoison.This
producthasapowerstandbymode.Ifthepiano
turnsowhileyouarenotplayingit,thisislikely
duetothePowermodebeingsettoAutoPower
o.Toturnothisfunction,holdtheFunction
buttonandpressF#2onthekeyboard(below
middleC).Thepianowillautomaticallyplay
middleCtwicetoconrmyourselection.
SELECTING VOICES
TheRhapsodyIIIpianohas12built-invoices.
Eachvoicemaybeselectedoneatatime.They
canbelayeredtoproducetwovoicesatonce,
orassignedtotheleftorrighthandsinthesplit
mode.
Toselectavoice,presstheVoiceSelectbutton
thatrelatestothesoundlistedabovethebutton.
ThebuttonwilllightandtheLEDindicatortothe
leftofthevoicelistwillindicatewhetherthetop
orbottomvoiceisselected
Simplypressthecorrespondingbuttonagainto
switchbackandforthbetweentheoriginalvoice
andvariationvoice.
# ORIGINAL VOICE VARIATION VOICE
1GrandPiano BrightPiano
2ElecPiano1(Tine) ElecPiano2(Reed)
3RockOrgan ChurchOrgan
4 StringPad SynthPad
5 Vibes NylonGuitar
6 AcousticBass ElectricBass
LAYER MODE
Tolayertwosounds,pressthecorresponding
voicessimultaneously.Forexample,hold
GRANDPIANOandpressSTRINGStohear
pianoandstringslayeredtogether.Bothvoice
LEDswilllightuptoindicatethattheyarelayers.
To layer a sound with a variation:
1. Pressandholdtherstsoundbuttone.g.
GRANDPIANO)
2. Pressthelayersoundbutton(e.g.STRINGS)
3. Stillholdingtherstbutton(GRANDPIANO),
pressthelayersoundbuttonagaintoswitch
tothevariation(SYNTH).Toreturntonormal,
singlevoicemode,pressasingleVoice
button.
To layer a sound with it's own variation (e.g.
Tine E Piano and Reed E Piano):
1. PresstheVoiceSelectbuttontwice.The
buttonwillashtoindicatethelayer.
To change the Voice or Layer Volume Level:
1. Pressandhold#1onthenumberpad(Grand
Piano)toadjustthemainvoice,or#2onthe
numberpad(ElectricPiano)toadjustthe
layeredvoice.
2. Pressthe+and-Valuebuttonstoadjustthe
layervolume.

RHAPSODY III DIGITAL PIANO
WILLIAMSPIANOS.COM
13
SPLIT MODE
SplitModeallowsthekeyboardtobedivided
intotwosectionssothatdierentvoicesmaybe
playedwiththeleftandrighthands.Thevolume
maybeindependentlyadjustedforeachvoice,
theSplitPoint(thehighestnoteplayedwiththe
lefthand)maybeadjustedandtheSplitVoice
maybechangedasdesired.
To Enter Split Mode
Pressthe[SPLIT]button.TheSplit(lefthand)
voicewillbethelastSplitVoiceusedandthe
SplitPointwillbeB2(justbelowmiddleC.)
To Change the Lower Split Volume
Toadjustthelowersplitvolume,pressandhold
theSplitbuttonandpresstheValue+andValue
–buttons.
Change the Split (Left Hand) Voice
PressandholdtheSplitbuttonwhiledepressing
thedesiredVoiceSelectbutton.
Change the Main (Right Hand) Voice
SimplypressanotherVoiceSelectbutton.
Change the Split Point
HoldtheSplitbuttonandthenpressakeyon
thekeyboardtodeterminethesplitpoint.This
keywillbethetopkeyofthelowersplit.
To Change the Split (Left Hand) Octave
WhenSplitmodeison,changingtheoctave
adjuststhelowersplit.Pressandholdthe
OctavebuttonthenpresstheValue+orValue–
button.
To Turn O Split Mode
PresstheSplitbutton.TheSplitButtonLEDwill
switchotoshowthatitisdisabled.
DEMO SONGS
TheRhapsodyIIIcomeswith12demosongs
aswellastheabilityforyoutoplayandrecord
yourownsong.Whenyourecordyourown
songtherecordingwillberetaineduntilyou
eitherrecordanewsongorifyouresetthe
RhapsodyIIIbacktofactorysettings.
To Play A Demo Song
SimplypresstheDemobuttontohavethe
Rhapsodyplayasongonyourcurrently
selectedvoice.PressingtheVoicebuttonswhile
ademosongisactivewillplayasongonthe
newlyselectedvoice.
Metronome Function
PresstheMetronomebuttontoturnonthe
metronome.TheLEDwilllight.Youwillhear
theclickinheadphonesorspeakers.Pressthe
Metronomebuttonagaintoexitmetronome
function.TheLEDwillturno.
To Change Metronome Time Signature
1. PressandholdtheMetronomebutton,then
pressandholdoneofthe10-keybuttonson
therightsideofthepanel.Forexample,for
3/4meterholdtheMetronomeand3(Organ)
buttonsfortwoseconds.Seethechartbelow
fordetails.
PRESS AND HOLD RESULT
1None
22/4or2/8
33/4or3/8
4 4/4or4/8
5 5/4or5/8
6 6/4or6/8
7 7/4or7/8
8Quarter(x/4)or
Eighth(x/8)meter
9 9/4or9/8
10 None

OWNER'S MANUAL
14
2. Foraneighthmeter(6/8,7/8,etc),pressand
holdthemetronomeand8(ModFX)buttons.
Toswitchbacktoquartermeters,holdthe
Metronomebuttonandpressandhold8again.
Thedefaultmeteris4/4.Thefollowingoptions
areavailable:2/4,3/4,4/4(default),5/4,6/4,7/4,
9/4,2/8,3/8,4/8,5/8,6/8,7/8,9/8.
To Change the Metronome Volume
Toadjustthevolumeofthemetronomein
balancewiththepianosound,pressandhold
MetronomeandpresstheValue+orValue–
button.
Metronome Tempo Setting
Whilethemetronomeison,pressingtheValue+
and–buttonschangesthetempo.
Tospecifyatempo,pressandholdthe
Metronomebuttonandenterthethreedigit
tempousingthe10-keypad.Forexample,hold
Metronomeandpress0-9-2for92bpm.
Transpose Function
Totransposethepianokeyboardby+12or-12
semitones,pressandholdtheTransposebutton
andplayakeyaroundmiddleCofthekeyboard.
Transpose+middleCisnotransposition.
Transpose+EbabovemiddleCtransposesthe
pianosharpby3semitones.
Thebuttonwilllightuptoshowthatthefeature
isactive.Todisabletransposition,pressthe
Transposebutton.
Octave
Totransposethepianoupordownbyone
octave,pressandholdtheOctavebuttonthen
presstheValue+orValue–button.Thebutton
willlightuptoshowthatthefeatureisactive.To
disabletransposition,presstheOctavebutton.
Piano Reset
Ifyouwanttoquicklyresetthekeyboardto
factorysettings,youcandothisbyholding
downtheOctaveandTransposebuttonwhile
poweringonthepiano.Waitforthelightsto
ashoncebeforereleasingtheOctaveand
Transposebuttons.
RECORDING
Recording Your Own Song
1. PressthePlayandTrackbuttons
simultaneously.
2. Onceyoustartplaying,thePlayandTrack
LEDswillashtoindicatethattherecording
hasstarted.
3. Whenyounishplaying,presstheTRACK
andPLAYbuttonsagaintostoptherecorder,
oryoucanpressPLAYonlytostopthe
recorderandhearyoursong.
Changing Recording Tracks
TheRhapsodyIIIincludestwoseparatetracks
forrecording.Inordertochangetracks,simply
presstheTrackbutton.TheTrackbutton’sLED
willbeunlittoindicatethattrack1isselected,
andwilllightuptoindicatethattrack2is
selected.HoldingdowntheTrackbuttonwill
deleteyourcurrentlyselectedtrack,andwill
conrmbyplayingaC3notethreetimes.
TUNING
To Change Piano Tuning
Youmayneedtoadjustthetuningofthepiano
byafewcentstomatchanacousticinstrument
orrecording.Todothis,holdtheTranspose
buttonandpresstheValue+orValue–buttons.
EFFECTS
TheReverb,ChorusandModFXeectsmaybe
appliedtoeachvoiceindividuallyandwillbe
retainedevenwhenthepoweristurnedo.
Toapplytheseeects,presstheassociated
button.Thebuttonwilllightandtheeectwillbe
heardwhenthepianoisplayed.
Toturnotheeectpressthebuttonofthe
desiredeectagainandtheLEDlightwillgoo.
Reverb,Chorus,andModFXsettingsaresetper
Instrumentandretainedoverpowercycling.

RHAPSODY III DIGITAL PIANO
WILLIAMSPIANOS.COM
15
Reverb
Thereverbeectmakesthepianosoundlike
itisinalargeroom.Tochangethereverbmix
amount,holdtheReverbbuttonandpressthe
Value+orValue–buttons.
Chorus
Choruseectsaddshimmeringmovementto
avoice.Thesettingcanbesubtletoextreme.
TochangetheChorusdepth,holdtheChorus
buttonthenpresstheValue+orValue–buttons.
MODFX
Modulationeectsaredesignedtoaddunique
playablesoundeectstovoices.
Inadditiontothesounds,theRhapsodyIIIhasa
neweectssectionthatwillallowuserstohave
morecontrolovertheirsoundscalledModFX.
Theseneweectswillbeinsertedintotheaudio
pathwayofthesoundtothemixerandwillbe
presetintothePatch.Whenyouswitchonthe
specicpatchapreseteectwillbeassociated
withthesound.Youcanthenselectwhetherthe
eectshouldbeturnedoormodied.
TheModFXAre:
# VOICE MODFX
1GrandPiano MonoTremolo
1BrightPiano MonoTremolo
2ElectricPiano1 StereoTremolo
2ElectricPiano2 StereoTremolo
3RockOrgan
RotaryFast/Slow
–Changewith
SustainPedal
3ChurchOrgan MonoTremolo
4 Strings MonoTremolo
4 Synth StereoTremolo
# VOICE MODFX
5 Vibes MonoTremolo
5 NylonGuitar MonoTremolo
6 AcousticBass MonoTremolo
6 ElectricBass MonoTremolo
ToturnontheModFXfunctionforaninstrument
presstheModFXbutton.Theeectwillbecome
activeandtheModFXLEDwilllight.
ToturnotheModFX,pressthebuttonagain.
TheLEDonthebuttonwillturno.
Rotary
Thereisarotaryeect,whichisdesignedforthe
RockOrganvoice.Toselectthespeedofthe
rotary,pressthesustainpedalwithyourfoot.
Holdingdownthepedalwillspeeduptherotary
voicetoatremolo.Whenthepedalisreleased,
thespeedofthetremolowillslowdowntoa
choralesetting.
Tremolo
WhentheModFXeectisactive,theElectric
Pianovoicesandsynthvoicewillreceivea
stereotremoloeect.Allothervoices(aside
fromRockOrgan)haveamonotremoloeect.
To Change The Tremolo Depth:
Toadjustthetremolodepth,holdtheModFX
buttonandpresstheValue+orValue–buttons.
EQ Level Setting
UsetheEQLowandHighknobstochangethe
EQforthepiano.
Note on Eects
Therearemoresettingsavailableforchanging
eectssettingsintheWilliamsPianoappfor
iOS.ItisavailableontheAppleAppStore.

OWNER'S MANUAL
16
ADVANCED
FUNCTIONS
BLUETOOTH
Audio
TheRhapsodyIIIiscapableofwireless
connectiontopersonaldevicesviaBluetooth.
Whenadeviceispaired,musiccanbeplayed
throughthepiano’sspeakers.Toconnectthe
pianotoyourtablet,smartphone,orcomputer:
1. PresstheBluetoothbutton.Ifyouhavenot
yetpairedadevice,theLEDwillashquickly.
2. FromtheBluetoothmenuonyoursource
device,selecttheRhapsodyIII.
3. TheBluetoothbuttonLEDshouldstop
ashingonceitispairedwithadevice.
MIDI
TheRhapsodyIIIincludesBluetoothwireless
MIDIforconnectiontoappsliketheWilliams
AppforiOS.Toconnectthepianotoyourtablet,
smartphone,orcomputer:
1. PresstheBluetoothbutton.Ifyouhavenot
yetpairedadevice,theLEDwillashquickly.
2. OpentheBluetoothMIDIsettingsinyourapp
andselecttheRhapsodyIII.
Note: Bluetooth MIDI is not congured in the
Settings of your device like Bluetooth Audio. If
your app supports Bluetooth MIDI, there should
be a method to set this up in the app.
3. TheBluetoothbuttonLEDshouldstop
ashingonceitispairedwithadevice.
TodisableBluetooth,pressthebuttonagainso
thattheLEDswitcheso.BluetoothMIDIallows
youtoconnectwithpianolearningappsona
varietyofdevices.
NOTE: Bluetooth Audio and MIDI can NOT be
used simultaneously.
Auto Power Save
TheRhapsodyIIIhasaPowersavingfunction
thatwillshutothePianoafter30minutesof
non-use.ThedefaultsettingisO,howeverif
youndyouwantthisfunctiontoworkusethe
stepsbelow.
1. PressandholdtheFunctionbutton.
2. PresstheF#2key(F#belowmiddleC)
Factory Reset
PerformingaFactoryResetwillclearallbattery
backedmemoryandrestoreallfunctionsto
factorydefaults.
1. TurnthePowerO.
2. Pressandholdtheoctaveandtranspose
buttons.
3. TurnthePoweron.AlloftheLEDswilllight
uptoshowthatthepianohasbeenreset.
Touch Sensitivity
Youcanchangethewaythekeyboardreacts
toyourplayingbyadjustingtheVelocitycurve
settings.
1. PressandholdtheFunctionbutton.
2. PressF#1,G#1,A#1,orC#2toselect
betweenLow,Normal,High,orFixedvelocity
curves.Refertothechartbelow.
F#1 LowVelocity
G#1 NormalVelocity
A#1 HighVelocity
C#2 FixedVelocity
Thedefaultxedvelocityis100.PressFunction
and+or-tochangeitfrom1to127.

RHAPSODY III DIGITAL PIANO
WILLIAMSPIANOS.COM
17
MIDI
TheMusicalInstrumentDigitalInterface
(MIDI)isanindustry-standardprotocolthat
enableselectronicmusicalinstrumentssuch
askeyboards,computers,drummachines,etc.
tocommunicate,control,andsynchronize
witheachother.MIDItransmissionsconsistof
electroniccodesthatcommunicatenotestobe
played,theinstrument,pitchorintensitythat
notesaretobeplayedwith,andcontrolling
codessuchasvolume,vibrato,cuesandclock
signals.TheRhapsodyIIIhasseveralfunctions
thatfacilitateitsuseasaMIDIdeviceor
controller.
MIDI Channels
TheRhapsodyIIIhas16channelsnumbered
from1-16.Eachofthechannelsisresponsible
foravoice.WhentheinstrumentreceivesMIDI
informationfromanexternaldevice,theactive
channelisdeterminedbythecontrolmessage.
Thetransmissionchannelsarexedasfollows:
Channel1-Mastervoice(keyboard)
Channel2-Splitvoice(keyboard)
Channel3-Layervoice(keyboard)
Local On/O
TurningtheLocalOn/Ofunctionto“O”will
disconnectthekeyboardfromtheinternalsound
engineofthepiano.TheRhapsodyIIImaythen
beusedasaMIDIcontrollertocontrolotherMIDI
devicesorvirtualinstrumentsoftwarerunningon
acomputer,withoutplayingthesoundsonthe
piano.Additionally,itmaybedesirabletoturn
localplayingoforotherrequirementssuchas
whenusingMIDIsequencingsoftwareonyour
computer.
Local On/O Setting
1. PressandholdtheFunctionbutton.
2. PresstheD#1key.WhenD#1isrstpressed
thecurrentsettingisconrmedbythepiano
playingaC3noteonceforonandtwice
foro.PressingD#1againwillchangethe
settingplayingaC3notetheamountoftimes
equivalenttothenewsetting.
Multitimbral Mode
TheRhapsodyIIIisabletoreceive
MIDIinformationonupto16channels
simultaneously.Ifyouplantouseyourpiano
withamultitrackMIDIrecordingsystem,you
canrecordupto16dierentpartsusingthe
WilliamsRhapsodyvoices,eachplayedback
individuallyondierentMIDIchannels.To
ensureyourrecordedpartisplayedbackwith
thecorrectvoicemakesuretopressthevoice
buttonrstandplayyourpartsecond.
NOTE: Because the Rhapsody is receiving
playback information via MIDI, the currently
selected voice on the piano may not correspond
to the voice being played back.
MIDI Channel Modes
1. PressandholdtheFunctionbutton.
2. PressingA#0allowsyoutochangetheMIDI
channel.Themainpianosoundwillplay
Piano1C3theamountoftimesequivalent
tothecurrentvalue.So,ifMIDIchannel5is
selecteditwillplay5times.Youthenpress
A#0vetimestoselectchannel10.Piano1
C3willplaytheamountoftimesequivalent
tothecurrentsetting,after2secondsof
inactivity.Once16isreached,pressingone
moretimewillselect1.
MIDI Panic Reset
1. PressandholdtheFunctionbutton.
2. PressingC#1triggers“MIDIPanic”which
sendsoutgeneralMIDIresetmessagessuch
asallnoteo,etc.OncePanicresethas
beencompleted,thepianowillautomatically
exitEditmode.
Memory Autosave
WhenmodifyingthesettingsoftheWilliams
RhapsodyIIIthefollowingsettingswillbesaved
afteryouturnothekeyboard:Reverb,Chorus,
ModFX(foreachvoice),MainVolume,Layer
Volume,SplitPoint,SplitVolume,MIDIChannel,
VelocityCurve,SplitOctave,andAutoPowerO.

OWNER'S MANUAL
18
SPECIFICATIONS
Keyboard 88graded,weighted,velocity-sensitivekeys
Voices 12
Polyphony 96
VoiceControl Layer,Touch,Split,Metronome
Pedals SustainandSostenutoPedals
DemoSongs 12
MIDITransmission USB,Bluetooth
Connectors USB,DINconnectioncable,AuxIn,LineOut(L/R),Phones
Dimensions (WxDxH)54.1"x16.3"x31.1"
Weight 94.8lbs.
Supplied ACPowerAdapter,OwnersManual,
KEYBOARD SHORTCUTS
FUNCTION MODE:
PressandholdFunction,thenPressoneofthekeysbelow.

RHAPSODY III DIGITAL PIANO
WILLIAMSPIANOS.COM
19
MIDI IMPLEMENTATION CHART
Function Transmitted Recognized Remarks
Basic Default
Channel Changed
1–16CH
X
1–16CH
1–16CH
Mode Default
Messages
Altered
Mode3
X
**********
Mode3
X
X
Note
Number TrueVoice
0~127
**********
0~127
0~127
Velocity NoteON
NoteOFF
O9nH,v=1~127
O8nH,v=0
O9nH,v=1~127
O9nH,v=0or8nh
AfterKey's X X
PitchBender X O
ControlChange: 0,32
1
6
7
10
11
64
66
67
80,81
84
91,93
98,99
100,101
121
X
X
X
O
X
X
O
X
O
X
X
X
X
X
O
O
O
O
O
O
O
O
O
O
O
O
O
O(*2)
O(*1)
O
Function
Modulation
DataEntry
Volume
Pan
Expression
Sustain
Sostenuto
SoftPedal
DSPType
Portamento
DSPDepth
NRPNLSB,MSB
RPNLSB,MSB
ResetAllControllers
Program
Change: True
O0–127
0–127
O0–127
0–127
SystemExclusive X O
System :SongPosition
:SongSelect
Common :Tune
X
X
O
X
X
X
Aux :LocalON/OFF
:AllNotesOFF
Messages :ActiveSense
Reset
O
O
X
O
O
O
X
O
Mode1:OMNION,POLY Mode2:OMNION,MONO O:Yes
Mode3:OMNIOFF,POLY Mode4:OMNIOFF,MONO X:NO
*1:Registeredparameternumber:
#0:Pitchsensitivity
#1:Finetuningincents
#2:Coarsetuninginhalf-tones
*2:NRPN1220hselectIFXtype
0:o
1:slowrotary
2:fastrotary
3:auto_pan
4:auto_tremelo
NRPN1230hEnableIFXforcurrenttrack
NRPN1237hsetglobalreverbsendlevelifIFXhavebeenenableonthistrack
NRPN1238hsetglobalchorussendlevelifIFXhavebeenenableonthistrack

WARRANTY
Williamsprovidesthefollowinglimitedwarranty,totheoriginalpurchaser:thispianoiswarrantedtobefreefromelectronicand/orstructuraldefectsinmaterialsandworkmanship
foraperiodofone(1)yearfromthedateoforiginalpurchase.IfthisWilliamspianoisdefective,atitsoptionduringthewarrantyperiod,subjecttothetermsofthislimited
warrantyanduponproofofpurchase,Williamswilleitherrepairorreplacethelistedpianowithasameorsimilarmodelofequalageornewer.Anyrepairsormodicationsmust
becompletedbyWilliamsand/oranauthorizedagentofWilliams.Thewarrantyobligationsassetforthhereinshallbeperformedfreeofchargewiththeexceptionofalldelivery
andshippingexpenses.Thislimitedwarrantywillnotapplytothisproductinthecaseofmisuse,abuse,neglect,alterations,normalwearandtearorothercircumstancenot
directlyattributedtoelectronicand/orstructuraldefectsinmaterialsorworkmanship.Withoutlimitingtheforegoing,thislimitedwarrantywillalsobeinapplicabletoproductsthat
havenotbeenmaintainedorreplacedinaccordancewiththemanufacturer’sinstruction,ortoproductsfromwhichtheserialnumberhasbeenremovedoraltered.Ifcovered
defectsarefound,contactyourauthorizedWilliamsdealerwithregardtotheallegeddefectwithinten(10)daysofdiscoveryoftheproblem.
Theforegoingrepairorreplacementobligationfordefectiveproductsshallbethesoleandexclusiveremedyofthislimitedwarranty.Allwarrantiesincluding,butnotlimited
to,theexpresswarrantyandtheimpliedwarrantiesofmerchantabilityandtnessforaparticularpurposearelimitedtotheone(1)yearwarrantyperiod.Somestatesdonot
allowlimitationonhowlonganimpliedwarrantylasts,sotheabovelimitationmaynotapplytoyou.Therearenoexpresswarrantiesbeyondthosestatedhere.Intheevent
thatapplicablelawdoesnotallowthelimitationofthedurationoftheimpliedwarrantiestothewarrantyperiod,thenthedurationoftheimpliedwarrantiesshallbelimitedto
aslongasisprovidedbyapplicablelaw.Nowarrantiesapplyafterthatperiod.
Retailerandmanufacturershallnotbeliablefordamagesbaseduponinconvenience,lossofuseofproduct,lossoftime,interruptedoperationorcommerciallossoranyother
incidentalorconsequentialdamagesincludingbutnotlimitedtolostprots,downtime,goodwill,damagetoorreplacementofequipmentand/orproperty.
Table of contents
Other Williams Musical Instrument manuals

Williams
Williams Sonata 88 User manual

Williams
Williams Legato III User manual

Williams
Williams Rhapsody User manual

Williams
Williams ALLEGRO III IN-HOME PACK User manual

Williams
Williams RHAPSODY 2 User manual

Williams
Williams LEGATO IV User manual

Williams
Williams LEGATO User manual

Williams
Williams SYMPHONY GRAND II User manual

Williams
Williams ALLEGRO 2 User manual

Williams
Williams Allegro III User manual