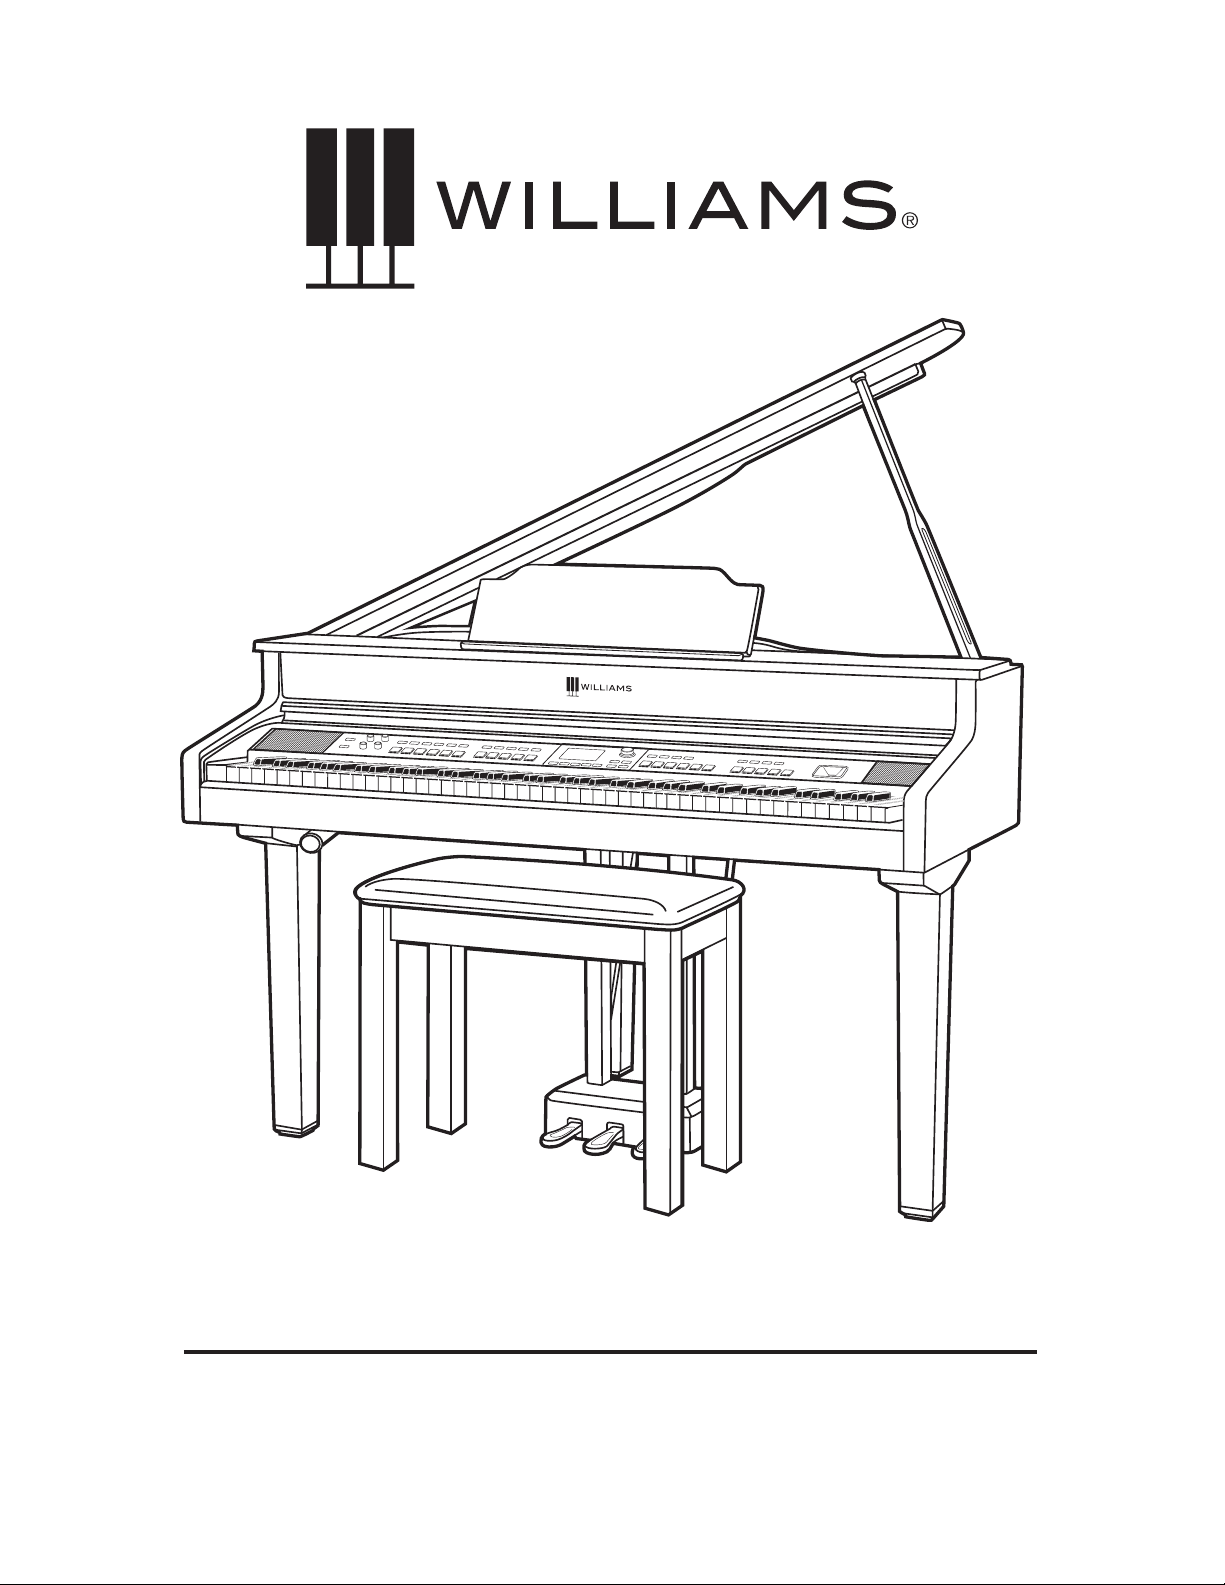
Williams SYMPHONY GRAND II User manual

SYMPHONY GRAND II
digital piano
owner's manual

2
OWNER'S MANUAL
IMPORTANT SAFETY
INSTRUCTIONS
• Do not use near water.
• Clean only with a soft, dry cloth.
• Do not block any ventilation openings.
• Do not place near any heat sources such as radiators,
heat registers, stoves, or any other apparatus (including
ampliers) that produces heat.
• Do not remove the polarized or grounding-type plug.
• Protect the power cord from being walked on or pinched.
• Only use the included attachments/accessories.
• Unplug this apparatus during lightning storms or
when unused for a long period of time.
• Refer all servicing to qualied service personnel. Servicing
is required when the apparatus has been damaged in any
way, such as power-supply cord or plug is damaged, liquid
has been spilled or objects have fallen into the apparatus,
the apparatus has been exposed to rain or moisture, does
not operate normally, or has been dropped.
FCC STATEMENTS
1. Caution: Changes or modications to this unit not
expressly approved by the party responsible for
compliance could void the user’s authority to operate
the equipment.
2. NOTE: This equipment has been tested and found
to comply with a Class B digital device, pursuant to
Part 15 of the FCC Rules. These limits are designed
to provide reasonable protection against harmful
interference in a residential installation. This equipment
generates, uses, and can radiate radio frequency energy
and, if not installed and used in accordance with the
instructions, may cause harmful interference to radio
communications. However, there is no guarantee that
interference will not occur in a particular installation. If
this equipment does cause harmful interference to radio
or television reception, which can be determined by
turning the equipment o and on, the user is encouraged
to try to correct the interference by one or more of the
following measures:
• Reorient or relocate the receiving antenna.
• Increase the separation between the equipment and
receiver.
• Connect the equipment into an outlet on a circuit
dierent from that to which the receiver is connected.
• Consult the dealer or an experienced radio/TV technician
for help.
WARRANTY
Williams provides the following limited warranty, to the original purchaser: this piano is warranted to be free from electronic and/or structural defects in materials and workmanship
for a period of one (1) year from the date of original purchase. If this Williams piano is defective, at its option during the warranty period, subject to the terms of this limited
warranty and upon proof of purchase, Williams will either repair or replace the listed piano with a same or similar model of equal age or newer. Any repairs or modications must
be completed by Williams and/or an authorized agent of Williams. The warranty obligations as set forth herein shall be performed free of charge with the exception of all delivery
and shipping expenses. This limited warranty will not apply to this product in the case of misuse, abuse, neglect, alterations, normal wear and tear or other circumstances not
directly attributed to electronic and/or structural defects in materials or workmanship. Without limiting the foregoing, this limited warranty will also be inapplicable to products
that have not been maintained or replaced in accordance with the manufacturer’s instruction, or to products from which the serial number has been removed or altered. If
covered defects are found, contact your authorized Williams dealer with regard to the alleged defect within ten (10) days of discovery of the problem.
The foregoing repair or replacement obligation for defective products shall be the sole and exclusive remedy of this limited warranty. All warranties including, but not limited
to, the express warranty and the implied warranties of merchantability and tness for a particular purpose are limited to the one (1) year warranty period. Some states do not
allow limitation on how long an implied warranty lasts, so the above limitation may not apply to you. There are no express warranties beyond those stated here. In the event
that applicable law does not allow the limitation of the duration of the implied warranties to the warranty period, then the duration of the implied warranties shall be limited to as
long as is provided by applicable law. No warranties apply after that period. Retailer and manufacturer shall not be liable for damages based upon inconvenience, loss of use
of product, loss of time, interrupted operation or commercial loss or any other incidental or consequential damages including but not limited to lost prots, downtime, goodwill,
damage to or replacement of equipment and/or property.
1 Year Parts & Labor Warranty
Register online at www.williamspianos.com

3
SYMPHONY GRAND II DIGITAL PIANO
WILLIAMSPIANOS.COM
IMPORTANT SAFETY INSTRUCTIONS ......................... 2
INTRODUCTION ............................................................ 3
ASSEMBLY INSTRUCTIONS .......................................... 4
TAKING CARE OF YOUR DIGITAL PIANO ..................... 8
FRONT PANEL ................................................................ 9
I/O PANEL AND JACKS ............................................... 11
OPERATIONS ................................................................ 12
DEMO SONGS ............................................................. 12
KEY LIGHTS .................................................................. 12
VOICE MODE ............................................................... 12
SPLITS ......................................................................... 14
LAYERS ........................................................................ 14
STYLE MODE ............................................................... 14
SONG MODE ............................................................... 15
REGISTRATIONS .......................................................... 17
SONG TUTOR .............................................................. 18
FUNCTIONS ................................................................. 18
RESETTING TO FACTORY DEFAULT ........................... 21
MIDI FUNCTIONS ........................................................ 21
BLUETOOTH FUNCTIONALITY .................................. 22
SPECIFICATIONS .......................................................... 23
VOICE LIST ................................................................... 23
DEMO SONG LIST ....................................................... 27
STYLE LISTS ................................................................ 28
DRUM SOUND LISTS .................................................. 29
PLAYING CHORDS IN STYLE MODE ......................... 36
FINGERED MODE CHART ............................................ 38
MIDI IMPLEMENTATION CHART .................................. 39
SONG TUTOR LIST ....................................................... 40
TABLE OF CONTENTS
INTRODUCTION
Congratulations! You have just purchased a state of the art digital piano that provides remarkable acoustic sound and feel.
We recommend that you read through this owner's manual carefully, so you can get the most enjoyment from your new piano.
Features include:
• Full Color Graphic LCD display
• 256-voice polyphony
• Realistic Grand Piano recorded without loops, with unique piano eects- sustain layer, sustain pedal and key
release sounds
• 172 Voices from the Williams Sound library, including a General MIDI soundset
• 180 Customized accompaniment styles from various music genres such as Rock, Funk, Jazz,
Traditional, Country and more
• Lights above the keys interact with educational software to teach you piano
• Bluetooth functionality for audio and MIDI
• 4 Track Song Recorder
• USB/MIDI connections and stereo/mono line out jacks, stereo line input jacks
• USB host device jack for saving songs and loading/playing MIDI les
BEFORE YOU GET STARTED
Your piano was carefully packed at the factory, and the packaging was designed to protect the unit from rough handling.
• If the unit is damaged, call Williams Product Support: (888) 241-1582.
• Use the original packing carton when storing or transporting.
• Make sure children are supervised when near the piano or its packaging.
INITIAL OPERATION / QUICK START
• Plug the power cord into a 120V supply.
• Press the power button. The LED will light.
• Press the Voice Select button for the desired voice.
• Adjust the volume control.

4
OWNER'S MANUAL
ASSEMBLY INSTRUCTIONS
Piano Assembly
1. Begin assembly by placing the main piano unit on
its side, on a padded or carpeted surface. Be sure
to place the hinged side of the lid up, as shown.
What's Included
Leg and Pedal Board
Bolts x(8)
Pedal Board Support
and Screws x(8)
Adjustable
Wrench Washers x(8)
Legs x(3)
Pedal Board
Support Rods x(2)
Pedal BoardPiano Body
1
2. Leaving piano on its side, attach the top leg
and the rear leg as shown.
2
X
PLEASE NOTE:
DO NOT ATTACH
BOTTOM LEG
AT THIS POINT.
Not pictured:
Power cord, Headphone hook and screws,
and Owner's Manual.
PLEASE NOTE:
Two or more people
are needed to
complete the
assembly.
DO NOT CONTINUE
WITHOUT HELP.

5
SYMPHONY GRAND II DIGITAL PIANO
WILLIAMSPIANOS.COM
3
5
4. Attach pedal board supports to the pedal board
and piano body as shown. Use two pedal board
support screws to attach to the pedals rst, then
attach to the piano bottom second.
4
5. Position a pillow or thick blanket so that the
pedal board assembly will rest upon it when
the piano is turned upright.
6. With the pedal board, top leg, and rear leg rmly
secured, lift and rotate the piano in a tipping
motion to the upright position.
Take care not to drag the rear leg or pedal board
against the ground.
6
3. Attach both the pedal board and the legs using
the eight leg/pedalboard bolts.
PLEASE NOTE:
Two or more people
are needed to complete the assembly.
DO NOT CONTINUE WITHOUT HELP.

6
OWNER'S MANUAL
7
7. With 1-2 people holding the piano upright, attach
the nal leg as shown.
With someone lifting the front of the piano,
remove the blanket or towel you used in step 4.
8. Attach the headphone holder to the bottom left of
the piano with four machine screws.
9. With the blanket or pillow removed, connect the
power cable to the bottom of the piano, plug the
other end into a power source.
Also locate the pedal cable attached to the pedal
board. Connect it to the bottom of the piano.
10
8
10. With your piano in its nal position, locate the
two pedal feet on the bottom of the pedal
support. Turn them counter clockwise until they
both make rm contact with the oor surface.
(If the pedals creak, this is not screwed down far
enough.
If you relocate the piano in the future, be sure to
raise the feet back up rst.
PLEASE NOTE:
Two or more people are needed to
complete the assembly. DO NOT
CONTINUE WITHOUT HELP.
9

7
SYMPHONY GRAND II DIGITAL PIANO
WILLIAMSPIANOS.COM
11. Assemble the piano bench, located in its own
box. Push insert A into the leg. Push wooden
dowel C into the top of the leg. Add the nuts
and washers in B to attach the leg, and use the
supplied wrench D to tighten.
11
ABD
C
A:
B:
C:
D:
(x4)
(x4)
(x4)
(x4)

8
OWNER'S MANUAL
TAKING CARE OF YOUR DIGITAL PIANO
This Williams Symphony Grand II digital piano will provide years of musical enjoyment if you follow the suggestions
listed below.
PRODUCT SERVICING
This product should be serviced by qualied service personnel when:
• The power supply cord or the plug has been damaged.
• Liquid has been spilled into the unit or it has been exposed to rain.
• The instrument does not appear to operate normally or exhibits a marked change in performance.
• The instrument has been dropped or the cabinet has been damaged.
• Please contact Williams support at 888-241-1582 for parts and service information.
HANDLING AND TRANSPORT
• Never apply excessive force to the controls, connectors or other parts of the instrument.
• Always unplug cables by gripping the plug rmly, not by pulling on the cable.
• Disconnect all cables before moving the instrument.
• Physical shocks caused by dropping, bumping, or placing heavy objects on the instrument can
result in supercial or operational damage.
• Carefully check the volume control before playing. Excessive volume can cause permanent hearing loss.
CLEANING
• Clean the cabinet and panel with a soft, dry cloth. Do not use paint thinner or petrochemical
based polishes.
• To maintain the luster of the keys and buttons, wipe with a clean, lightly dampened cloth, and then polish with a
soft, dry cloth.
LOCATION
• To avoid deformation, discoloration, or more serious damage, do not expose the instrument to the following conditions:
Direct sunlight, high temperatures, excessive humidity, excessive dust, strong vibration.
• Leave enough space around the piano for proper ventilation.
• This instrument contains digital circuitry and may cause or be susceptible to interference if placed too close to
radio, television receivers, or mobile phones. If interference occurs, move the instrument further away from the
aected equipment.
• Avoid placing vinyl objects on top of the instrument, vinyl can stick to and discolor the surface.
POWER
• Turn the power o when the instrument is not in use.
• To avoid damage to the instrument and other devices to which it is connected, turn the power of all related devices
o prior to connection or disconnection of MIDI cables.
• Turn the power o if the main cable is damaged, or the instrument has been exposed to liquid.
• Do not switch the unit on and o in quick succession, as this places an undue load on the
electronic components.
• Unplug the AC power during an electrical storm.
• Avoid plugging the AC power into the same AC outlet as appliances with high power consumption, such as electric
heaters or ovens.

9
SYMPHONY GRAND II DIGITAL PIANO
WILLIAMSPIANOS.COM
Power On/O
This product has a power standby mode to switch
o power automatically when not being used. To
disable, see the Function settings.
Demo
Plays the factory demos
Master Volume
The overall output volume of the piano
Accompaniment Volume
Controls the output volume for Styles
Headphones
Controls the headphone volume
Input Volume
Controls the volume of the Aux Input
Song
Puts the piano in Song Mode
Tempo
Shows the tempo, editable with the data wheel
Metronome
Press the Metronome button to turn on the
metronome. The LED will ash in tempo and click
in headphones or speakers. Press it again to stop.
Metronome settings are found in the Function menu
page 1 (Tune/Click.)
Key Lights
Turns the lights above the keys on or o
Transpose
Transposes the key of the piano
Octave
Transposes the range of the piano keys 1
octave higher or lower.
Piano Reset
Pressing the Transpose and Octave buttons
simultaneously will reset the piano.
Song Recorder/MIDI File Buttons
Play, Record, USB, Delete
Song Tutor Buttons
Song Teaching Mode for the 50 built-in songs
with right and left hand part mutes. Press both
Left and Right Hand buttons to turn on the
Song Tutor Mode.
Style
Puts the piano in Style mode
Style Function buttons
These buttons control the functionality of the
accompaniment styles.
• Start/Stop
• Sync
• Intro/End
• Fill1
• Fill2/Variation
• Harmony
• OTS
• Chord
• Fade
FRONT PANEL
LEFT SIDE

10
OWNER'S MANUAL
FRONT PANEL
RIGHT SIDE
LCD Display
The display shows the current functionality of the
mode you are in along with the parameters that can
be adjusted in the mode
Display Function Buttons
The F1-F5 buttons work with the on-screen
functions of the LCD display.
Value Dial
Changes values on screen
Category Buttons
Used to change between the Voice and
Style categories
Page Buttons
Used to move the cursor on the screen between
parameters
Voice Button
Activates the Voice mode
Chorus, ModFX, Reverb Buttons
Turns on and o the Chorus, ModFX, or Reverb
eect assigned to the voice
Voice Select Buttons
(Piano, Keys, Organ, Strings/Winds, Bass/Guitar,
and Drums) Pressing these buttons will switch on
the sound group that is associated with the names
printed above them. For categories with a slash
in the name (like Guitar/Bass), press the button a
second time to get to the other category.
Function
Opens the Function screen allowing you to change
global settings for the piano
Layer
Used to allow you to layer two voices together on
the keyboard
Split
Splits the keyboard voices between right and left
side
Duet
Sets the keyboard to allow two players to play notes
in the same octaves
Bluetooth
This light shows when a device is paired with the
piano
Registration Buttons
1-4 and Bank to recall keyboard settings
USB Host Slot
Plug in a USB thumb drives to record and play
Audio and MIDI les on the drive

11
SYMPHONY GRAND II DIGITAL PIANO
WILLIAMSPIANOS.COM
I/O PANEL AND JACKS
UNDERNEATH THE KEYBOARD
Headphones 1 and 2
The speakers will continue to play when Headphone
jack 2 is connected. Headphone jack 1 will
disconnect the speakers when headphones are
connected. Both can be used together for music
lessons.
BEHIND THE MUSIC REST
USB to Computer Connector
The USB connection is to connect the Symphony
Grand to a computer, or tablet device that is MIDI
Class Compliant. The USB connection is Class
Compliant so no special USB drivers are needed on
your computer.
Aux Input
This stereo 1/8" jack accepts an audio input from an
external audio source such as a computer or mobile
device. The audio input will be mixed with the audio
output of the piano.
Bottom of Piano
AC Power Socket
Connection for the AC power.
MIDI Output Jack
For connection to external MIDI device such as
sound module.
Line Outputs
These two 1/4" jacks take the audio output directly
out of the piano to a line level source such as an
amplier.
Sostenuto, Sustain and Soft Pedal Input
Connects the built-in pedals located at the bottom
of the piano.

12
OWNER'S MANUAL
OPERATIONS
Powering on the Symphony Grand II
Press and hold the POWER button on the left of the
front panel.
DEMO SONGS
To Play a Demo Song
Press the Demo button and use the value dial to
select the demo song. To exit the demo mode press
the Demo button again.
Main Playing Modes
The Symphony Grand II has three main modes for
playing operations, Voice, Styles and Song. See
below explanations for the modes.
KEY LIGHTS
The Symphony Grand II has lights above each key.
These light up to show which key you’re playing,
show split points, and other functions. To disable
these keyboard lights, press the Key Lights button
on the front panel. The Key Lights with great with
educational software like the included Skoove app.
See the yer that was included with your piano to
get your free copy.
VOICE MODE
The Voice mode is for selecting the sound you
want to play on the keyboard. When the Symphony
Grand II rst starts up the rst Voice is the Grand
Piano.
Selecting Voices
To change voices you can simply turn the Value
dial to play any of the sounds when using the
main screen. To look at the sounds available in the
Symphony Grand II, press the Voice button. The
screen will show a list of sounds and you can scroll
with the value dial as you play the keyboard to
audition them.
If you are looking for a specic group of sounds
there are Function buttons below the display (F1-F5)
that you can press to take you to that group. For
instance if you are looking for Organs you can press
the F2 button. The display will change and only
show the organs. You can use the F-keys under the
display, the Voice category buttons (Piano, Keys,
etc.) or the Category buttons next to the display to
change voice categories.

13
SYMPHONY GRAND II DIGITAL PIANO
WILLIAMSPIANOS.COM
Editing Voices
Each Voice can be edited to your taste when you
are in the Voice mode. Parameters such as reverb
type and amount can be adjusted. When you make
changes these will be kept in the memory of the
Symphony Grand II until you change them or if you
reset the Piano back to factory settings.
To enter the Edit Mode:
1. Press the VOICE button.
2. Select the Voice you want to edit
3. Select the Edit tab with the F5 button
4. Depending on the type of voice you will see up
to 4 tabs at the bottom of the screen, which
are accessed by the Function buttons below
the screen. See the list below to review the edit
parameters.
5. To Exit the Edit mode, press the F5 Exit button.
Voice Eect types and parameters:
F1 – Chorus
• Chorus Type: Presets
• Chorus Level: Amount of eect
• Chorus Depth: Intensity of eect
F2 – ModFX
There are two types of eects. Most have
these parameters:
• ModFX Type: Presets
• ModFX Depth: Amount of modulation
• ModFX Rate: Rate of modulation
• Overdrive: Distortion
When the ModFX type is set to "Rotary," the
Depth and Rate parameters are changed to:
• Rotary Speed: This selects the speed of the
rotating speaker eect. the default is "Pedal,"
where the speed is controlled by the sustain
pedal. Pressing the pedal down accelerates
to fast speed. This parameter can also be set
to "Slow" or "Fast."
F3 – Reverb
• Reverb Type: Presets and room types
• Reverb Level: Mix amount
• Decay Time: Length of reverb
F4 – Volume and Piano FX (on Pianos Only)
• Voice Volume: Master volume for that voice
• Sustain Pedal Noise: Volume of noise when
you press down the sustain pedal
• Sustain Layer FX: When you press down the
sustain pedal to lift the damper, this is how
much of the open strings you will hear
• Key Release Noise: The volume of the sound
when you release a key

14
OWNER'S MANUAL
SPLITS
Split Mode allows the keyboard to be divided
into two sections so that dierent voices may be
played with the left and right hands. The volume
may be independently adjusted for each voice, the
Split Point (the highest note played with the left
hand) may be adjusted and the Split Voice may be
changed as desired.
To Enter Split Mode
Press the [SPLIT] button. The Split (left hand) voice
will be the Acoustic Bass and the last Split Point
used. The lower split point will be shown with the
key lights turning green.
To Change the Split Mode Settings
The quickest way to change split settings is to press
and hold the Split button. Hold the Split button and
press a key to make a new split point. Hold the
Split button and turn the data wheel to select a new
lower split sound.
Alternately, press the FUNCTION button. On the
Trans/Split page you can change parameters for the
Split mode by selecting the setting you want with
the page buttons to adjust and turning the Value dial
to change the parameters.
Split Point - B1: 47 (MIDI Notes). This determines
the split point on the keyboard when the Split Mode
is enabled. The key label and MIDI note number are
both shown.
Split Volume - Default is 100
Split Octave - Default is 0
L AY E R S
The Layer Mode allows you to layer up to 2 dierent
sounds on top of each other.
To Enter Layer Mode and Select Sounds
1. Select the primary sound you want to use.
For this example use the Grand Piano.
2. Press the Layer Button. You should be hearing
both the Grand Piano and a String section
sound together.
3. To change the 2nd layer (Strings) press and hold
the Layer button. You will see the Strings sound
on the display.
4. While holding down the Layer button turn the
dial to select another sound and then release the
Layer button.
5. The Layer button will go o. Press it again. You
should now hear the new sound that you selected
play when you play on the keyboard.
To Change the Layer Mode Settings
Press the FUNCTION button. Press F1, press the
right Page button, then adjust the Layer Volume by
turning the Value dial.
STYLE MODE
The Style Arranger Mode is a feature that allows
you to play pre-programmed arrangements (drums,
bass, keys, guitar, etc) with your left hand and play
the lead melody on your
right hand.
Selecting Styles
1. Press the STYLE button.
2. The Display will show a list of Styles that you can
select from to play. Use the F-keys to select a
style type (Rock, Jazz, etc.)
3. Turn the Value Dial to highlight the Style that you
want to play.

15
SYMPHONY GRAND II DIGITAL PIANO
WILLIAMSPIANOS.COM
Controlling the Styles
1. Press the Start/Stop button on the Transport
controls (in the Styles section). You should hear
a drumbeat playing.
2. Press the CHORD button. The lower section of
the keyboard should have green lights.
3. Press a key on the left side of the keyboard
(try the C below middle C). You should start
hearing a musical arrangement playing along
with the drumbeat.
4. As you play individual notes on the keyboard
you can hear the arrangement transpose to a
new key.
Musically Controlling the Styles
1. Press the SYNC button. The LED will light.
2. Press the Intro/End button. It’s LED will light.
3. Make sure the CHORD buttons is on, then play a
C key on the left side of the keyboard. The Style
will start playing the intro and then automatically
a regular accompaniment in the key of C.
4. Play G key. At this point the accompaniment will
change to the key of G.
5. Press the Fill1 button. The accompaniment will
now play a ll and continue to play.
6. Press the Fill2/Variation button. There will be
another ll and there will be a variation of the
arrangement.
7. Press the Intro/End button. The arrangement will
now play to the end and then stop.
Other Style Functions
Harmony - When Chord mode is enabled the right
hand part will automatically create a harmony based
on the note you are playing.
OTS - (One Touch Sound) - When this is enabled
the right hand part sound will be automatically
selected to compliment the arrangement that is
selected. You can change this assignment if desired
by selecting a dierent voice.
Chord - When enabled the key of the rhythmic
arrangement will be based on the root note of what
is played by the left hand. For instance if you play
the C note octave below middle C, the chords will
be C. To play harmonies other than major chords
you will need to play the interval that will change the
chord from a major to a minor. For instance if you
play a C, Eb and G the C chord will become minor.
If you play C and Bb the Chord will become C7. See
the appendix, pages 36 and 37, for examples of
playing harmonies.
Fade - When you press this button the arrangement
volume can be faded in or faded out.
For Fade ins, press the SYNC button then press the
Fade button. When you play a note on the left side
of the keyboard you will hear the arrangement
fade in.
For Fade outs, simply press the Fade button. You
will hear the arrangement fade out.
SONG MODE
There are two dierent functions in the Song Mode
of the Symphony Grand II, Internal and USB Song
modes.
If you have a USB ash drive inserted into the HOST
USB drive slot on the front panel you can switch
between these two modes. If you don’t have a USB
drive inserted you will only be in Internal Mode.
USB Song Mode
The Symphony Grand II can play standard MIDI
les directly from a USB ash drive (formatted in a
standard Windows FAT 32 format).

16
OWNER'S MANUAL
Insert the drive into the HOST USB drive slot. The
display will show a list of Songs (MIDI les) on the
drive that can be played.
To Play MIDI les from the USB device
1. Press the Song button. If the USB device is
inserted in the USB Host port but the screen
shows the Internal song mode, press the USB
button to change the screen to the USB song
mode to view the les.*
2. From the list of Song les (MIDI les) listed on
the screen, highlight the song name with the
Value Dial.
3. Press the Play Button in the Song Recorder
Section of the front panel.
4. While the USB song is playing, press the F5 key
to change the volume.
5. To Stop the Song press the Play button again.
To load a Song from the USB Device to the
internal memory.
1. Insert a USB drive into the USB drive port
2. Press the Song Mode Button. The display will
show a list of Songs (midi les) on the drive.
3. Use the Value dial to select the song to play.
4. Press the F1 button which shows "save to
internal”. It will then show a message "saving".
The selected USB song/midi le will be stored
to internal memory and the original internal
recording song will be call "localsong.mid"
Any existing song will be replaced with the
Song/MIDI le.
To switch between the Internal and USB modes
press the USB button. You will see the display
change from “Internal” or “USB”.
*All songs should be on the main directory of the drive. Be
sure not to put the MIDI les inside of folders otherwise the
Symphony Grand II will not be able to view the les.
Recording a Song using the Internal
Song Mode
The Symphony Grand II can record your
performance on several tracks and can be stored on
a USB thumb drive.
There are 4 tracks with the Song Recorder.
Track 1- Can record the Grand Piano with eects
or any other Voice instrument sound. There can be
layers or splits on the Voices on track 1.
Tracks 2-3 - Can record any of the Voices, however
it will not support any splits or layers.
Track 4 – For recording a Style. For instance if you
select a Style you can record the Intro, Variations,
Fills and the Ending as you perform them.
Recording an Internal Song
1. Select a Voice you want to record such as the
Grand Piano
2. Press the Record button on the front panel in
the Song Recorder section. The LCD will display
the current song. The Record light will ash,
then begin recording as soon as you play the
keyboard.
3. Press the Record button to stop recording. The
rst tab will change from “Track 1 Null” to “Track
1.”
4. Press the Play button in the Song Record section
to hear your performance played back.
5. Select another voice to record.

17
SYMPHONY GRAND II DIGITAL PIANO
WILLIAMSPIANOS.COM
6. Press the Record button then press the Function
button 2 under the display to select Track 2 to
record on. Start playing your voice along with the
one that is already recorded.
7. Press Record to stop the recording and press
Play to hear both tracks play together.
8. Repeat the process for the 3rd track.
If you want to record a Style for your song you can
do that directly on Track 4. It’s recommended that
you start with recording the Style on Track 4 rst
and then record the other parts.
1. To record a Style into the Song Recorder select
a preset style that you want to record and then
return to the Song Record.
2. Press the Sync button on the Style transport
buttons to prepare the Style to be ready to
record.
3. Press the Record button. Then press the keys for
the Style to record your performance of the Style
accompaniment.
To Delete a Song
1. Press the Delete button on the front panel Song
Recorder section. The name of the song will ash
on the display.
2. Press the Delete button again and then the
display will show “No Recording”.
To save your song to a USB drive
3. Once the recording of the tracks are completed
you can save the Song onto a USB drive
4. Insert a USB drive in the USB device port
5. Press the F2 button which shows "Save to Drive",
it will show a message "loading", and then the
internal recording song "localsong.mid" will be
store to the USB drive and named "songxx.mid"
Recording an Audio File using the USB
Song Mode
1. Insert a USB drive into the USB drive port
2. Press the Song Mode Button. The display will
show a list of Songs (WAV and MIDI les) on the
drive. If the USB device is inserted in the USB
Host port but the screen shows the Internal
song mode, press the USB button to change the
screen to the USB song mode to view the les.
3. Press the Record button on the front panel in the
Song Recorder section. The USB le list will show
"Rec:WAV_0001.WAV" and begin recording.
3. Press the Record button to stop.
4. Press the Play button in the Song Record section
to hear your performance played back.
To record a MIDI le to the USB drive, rst record it
to Internal, press USB to switch to the USB list, then
press "Save To Drive."
REGISTRATIONS
Registrations store setup information that can be
recalled. Each Registration will save your current
setup information of multiple parameters (see the
list below). There are 4 Registrations per bank with
up to 4 banks that can be stored in the internal
memory of the Symphony Grand II.
What is stored in a Registration
• Voice
• Style
• Tempo
• Transposition
• Split Voice settings - Svoice
• Layer Voice settings - Lvoice
• Split On or O - Split On/O
• Layer On or O - Layer On/O
• Main Voice Octave - M.Oct
• Split Voice Octave - S.Oct
• Main Tuning - Tune
To select a Registration press a Registration button
you want and the current settings (default) will apply.

18
OWNER'S MANUAL
To View a Registration
Press and hold down a specic Registration button
for 3 sec. The Registration screen will appear on the
LCD.
To Edit a Registration
1. Use the page buttons to select a parameter on
the screen to edit (Voice, Style, Tempo, Trans).
2. Use the Value knob to change the parameter
setting.
3. Press the F5 button to save your settings.
4. To back up your registration settings to a USB
drive, press the F4 button.
SONG TUTOR
The Symphony Grand II has 50 built-in songs that
are designed to help you learn the left and right
hand parts separately.
1. To Play a Song and mute the parts use the steps
below.
2. Press both Right and Left buttons to activate the
Song Tutor mode. The rst song will show up on
the display and you will hear a count o measure
then the song will play.
3. To change the song turn the Value dial you will
see the dierent names show on the display.
4. To mute the Left or Right hand part press button
for the hand you want to mute. The LED on the
button will turn o.
5. To unmute the part press the button again.
6. To turn o Song Tutor mode press both buttons
again.
You can start and stop a Song when it selected by
pressing the F1 button on the LCD display. There
are start and stop icons above the F1 button to
indicate the play status.
To get the sheet music to these songs go to
www.williamspianos.com and download
the PDFs.
FUNCTIONS
The Functions settings in the Symphony Grand II
are the Main System settings that change the entire
piano. Press the Function button to enter this mode,
select one of the F-keys, use the page buttons to
select a setting, then use the value dial to change it.
Main Settings Page 1: Tune/Click
Tune
Master tuning for the piano. The default is 440.
Time Signature
Used for the metronome. The default is 4/4 and the
following options are available to toggle through:
1/4, 2/4, 3/4, 4/4, 5/4, 6/4, 3/8, 6/8, 7/8, 9/8, and
12/8.
Tempo
Tempo for the metronome and styles. The default
is 118bpm, but styles can have their own tempo as

19
SYMPHONY GRAND II DIGITAL PIANO
WILLIAMSPIANOS.COM
well. Press and hold Tempo from the main screen
for a faster method to set the tempo.
Metronome Volume
Volume of the click. The default is 100.
Main Volume
Normally the Volume for the piano is controlled by
the Volume knob on the front panel. There is also an
overall main volume control in the Function Mode.
Setting this higher than 120 may cause distortion in
the speakers.
Main Octave
Transposes the keyboard by an octave. The
"Octave" button is a shortcut to this setting.
Layer Volume
Changes the volume of the secondary sound when
in Layer mode.
Main Settings Page 2: Transpose/Split
Transpose
Transposes the keyboard by a xed amount. The
Transpose button is a shortcut to this setting.
Split Volume
Split Volume - (Default is 100) This determines the
volume of the left hand split sound.
Split Octave
(Default is 0) This determines the Octave setting of
the split left hand sound.
Split Point
(Default is B1:47). This determines the MIDI note
where the split is set on the keyboard when in Split
Mode. For a quicker method to change the split
point, hold the Split button and hit a key on the
keyboard.
Chord Point
This determines the MIDI note where the chord split
point is set on the keyboard when in Chord Mode.
The default is F#2:54.
Main Settings Page 3: MIDI/Touch
MIDI Local
The default is On. Switch this o if you are looping
MIDI to and from a computer DAW.
MIDI Channel
This is the MIDI channel for the main sound when
used with a computer or tablet DAW. The default is
1. You can connect to MIDI using the USB Device
jack behind the music rest or with Bluetooth MIDI (if
supported by your app.)
Touch Curve
The feel of the keyboard can be adjusted to the
players touch by using the Touch Sensitivity
controls. The default is Normal. You can adjust to
your playing (Low, High, and Fixed)

20
OWNER'S MANUAL
Panic
Use this function to stop stuck notes if you
encounter this with MIDI devices.
Auto Power O
This function will switch your piano o when not
used for a period of time. The range is o or from
20-60 minutes.
Bluetooth
Switch Bluetooth on to pair the piano with a device
like a smartphone or laptop. You can send either
Audio or MIDI from your device, but not both
at once. See page 22 for more information on
Bluetooth.
Main Settings Page 4: EQ/Input Level
EQ Settings
You can change the Overall EQ settings for the
piano to increase or decrease the high and low
frequencies. Normally the piano is set at a at EQ.
However certain types of rooms may aect the
sound quality of your piano. By adjusting the EQ
settings you can make the piano t the room’s
sound better.
You can change parameters for the EQ by selecting
the setting you want to adjust with the page buttons
and turning the Value dial to change the parameters.
The range is +/- 12dB and the default is 0.
USB Audio Input Level
When you plug a tablet or computer into the USB
Device jack, the piano acts as a 2-channel audio
interface. This is great for playing the sounds from
educational apps while controlling them with MIDI.
(You may need a USB adapter for your tablet or
laptop.) This setting controls the volume coming
from your computer or app.
Bluetooth Audio Input Level
This controls the volume level coming out of your
Bluetooth device over audio and then playing
through the speakers. For example, you may want
to turn an app's audio level down so that you can
play along.
Main Settings Page 5: Pedal/Other
Left Pedal Assign
The default setting is Soft, where this pedal works
like the soft pedal on a Grand Piano. It can also be
switched to Start/Stop to start a Style playing.
Mid Pedal Assign
The middle pedal is normally a Sostenuto pedal
like a grand piano. It sustains the notes you were
holding when you pressed it, but new notes don't
have the pedal-down eect. It can also be set to
trigger the Fill1 button when using Styles.
Song Play Mode
The default is Sequence, where all songs on a USB
drive will play one after the other like a jukebox. You
can also set it to Repeat to repeat a MIDI le over
and over.
Table of contents
Other Williams Musical Instrument manuals

Williams
Williams LEGATO IV User manual

Williams
Williams ALLEGRO III IN-HOME PACK User manual

Williams
Williams OVERTURE 2 User manual

Williams
Williams RHAPSODY III User manual

Williams
Williams ALLEGRO 2 User manual

Williams
Williams RHAPSODY 2 User manual

Williams
Williams OVERTURE III User manual

Williams
Williams Serenade User manual

Williams
Williams Sonata 88 User manual

Williams
Williams Legato III User manual