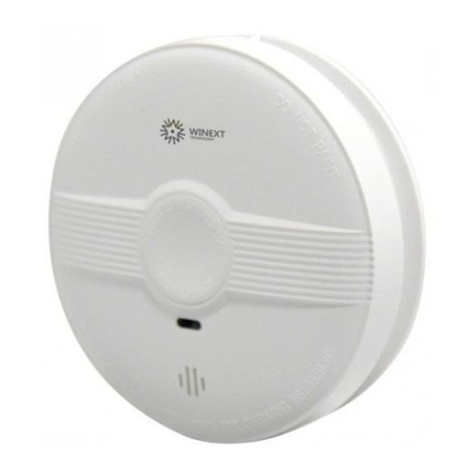
Winext AN-102D User manual

Contents
1. Introduction 2
1.1 Profile 2
1.2 Feature 2
1.3 Dimension 2
1.4 Specification 4
2.How to work 4
2.1 Working flow 4
2.2 Other warnings 5
2.3 Led indicator 5
2.4 Speaker 6
3. Installation 6
4.Configuration 7
4.1 Tools 7
4.2 Install CP210x driver for wireless configuration tool 7
4.3 Configuration process 10
5. Communication format 12

5.1 Data report 12
5.1.1 Smoke alarm event 12
5.1.2 Device abnormal event 12
5.1.4 Heartbeat 13
6. Trouble-shooting 14
6.1 FAQ 14
6.2 Cautions 14
1. Introduction
1.1 Profile
AN-102D LoRaWAN Smoke Detector support standard LoRaWAN™ protocol. With high-precision, the device
emit red light when it detects a fire alarm. The device sends alarm data to the platform to remind relevant
personnel on the site to deal solve it. Test mode and low battery warning functions available.
Application scenarios
Residential buildings, schools, nursing homes, hotels, restaurants, factories and etc
1.2 Feature
◊ Support standard LoRaWANTM protocol
◊ High precision
◊ Red/Yellow Led indicator
◊ Detection mode
◊ Easy wireless installation
1.3 Dimension
1

Dimension: Dia119 x 48.3mm
Figure: Exploded view
No.
Description
①
Smoke Box Cover
②
Smoke Box
③
Smoke Box Steel Net
④
Speaker
⑤
Upper Shell
⑥
PCBA
⑦
Lower Shell
⑧
Battery
⑨
Battery Compartment Cover
⑩
Base
⑪
On/off Button
2

1.4 Specification
Description
Parameter
Protocol
LoRaWANTM 1.0.2/ 1.0.3
Alarm way
Led indicator, voice message, beep sound
Alarm
>80dB (at 3m )
Smoke detecting
Red and blue light electrical detecting
Temperature detecting
detecting ambient Temperature
Frequency
CN470MHz~510MHz
EU863MHz~870MHz
US902MHz~928MHz
AU915MHz~928MHz
AS923MHz; RU864-870MHz; IN865-867MHz
Data transmission rate
300bps~5.4Kbps
Max Tx power
19dBm
Rx sensitivity
-140dBm(SF=12)
Antenna
Built-in antenna
Working temperature
-40℃~+80℃
Working Humidity
<95% (non-condesation)
Battery volume
3V/ 5600mAh
Battery type
Built-in Li-SOCL2 battery
Closure material
ABS+PC
Color
White
Weight
187.2g
Dimension
Dia119x 48.3mm
3

2.How to work
2.1 Working flow
Turn on
After the device is powered on, press the button on the front, and the led indicator lights in red. If releasing the
hand, the led indicator will go off. Press and hold the button for 5 seconds, it sounds the voice message “Turn on”.
Then it goes to initialization with the led indicator in yellow.
After the end of initialization, with the led indicator lights off, it comes to normal working.
Detection mode
After device turned on, it goes into initialization and calibration. Then it works normally, with the led indicator
lights in red and flashes every 50 seconds.
Press and hold for one second, it goes into self-checking with voice message "Detection mode" . In detection
mode, the led indicator lights on in red and flashes every 10 msec, with a voice message "Please pay attention to
fire alert" .
Press the button to end the alarm. Or await for 10 seconds to end the alarm automatically.
Then it comes to work properly.
If it happens a fire alarm when it is working, here is how the device works:
Fire alarm
When the smoke concentration up to the threshold, the device will report the fire alarm within 5 seconds with light
and sounds. The led indicator will light in red and flash every 10 msec, with a voice message “Please pay attention
to fire alert”.
Alarm silencing
With he device sending fire alarm, you can press the button for alarm silencing. During the silencing cycle as long
as 90 seconds, the device will not send alarm again. When the cycle is over, the device will work normally. If there
is residual smoke in the device and the its concentration reaches the threshold, it will cause the device send alarms
again.
Turn off
During device is working, press and hold the button on the front for 5 seconds to turn off. It sounds the voice
message “Turn off”.
2.2 Other warnings
Low battery voltage warning
When the battery voltage is lower than 2.85V around, the device will sound “beep” as a warning sound every 50
seconds.
Malfunction
If the led indicator lights in red and flashes every 1 second, it indicates the device goes to malfunction. Please
check if the device is damage first.
2.3 Led indicator
Device
Status
Led Indicator
Performance
①Turn on
Lights on in red and
lasts for 5 seconds
Press and hold the button for 5 seconds, led
indicator lights on in red and lasts for 5 seconds. When it
turn on successfully, the led indicator light goes off.
②Starting
initialization
Lights on in yellow
/
③End of
initialization
Lights off
/
④
Calibration
Lights on in yellow
Flash every second
⑤End of
Lights off
Stop flash
4

calibration
⑥Detection
mode/ Fire alarm
Lights on in red
Flash every 10msec
⑦ Working
Lights on in red
Flash every 50 seconds
⑧
Malfunction
Lights on in red
Flash every second
2.4 Speaker
Status
Voice message/ Sound
Remark
Device turn on
Turn on
Press and hold the button for 5 seconds to
turn on.
Device detection mode
Detection mode/ Please pay attention
to fire alert
/
Device turn off
Turn off
Press and hold the button for 5 seconds
when device working.
Fire alarm
Please pay attention to fire alert
Device on operation
Low battery voltage
Beep
It beeps every 50 seconds.
3. Installation
Quick guide
Choose a proper position for installation and make marks on the wall or
desk. Install the base to the ceiling with screws and expanding plugs. Remove the bolt from the base.
Here is a installation drawing for reference.
Notes
1.Please arrange professional technician for installation.
2.Before installation, please turn off the device. After installation, please turn it on.
3.Select the appropriate installation location according to the scenario. The installation drawing in this paper is for
reference only.
4.Configuration
4.1 Tools
Item
Description
Laptop
Installation
Wireless Configuration tool
The laptop communicates with device via wireless configuration
tool wireless configuration tool, you should install CP210x
driver for this tool
5

Configuration software
Winext manage App
Figure: Tool List
a) Install the CP210x driver for wireless configuration tool, file as below:
b) Install Winext manage App, file as below:
4.2 Install CP210x driver for wireless configuration tool
(1) Open CP210x driver for wireless configuration tool
(2) Select the driver program to install depending to the system type.
32-bit operating system selects “CP210xVCPInstaller_x86.exe”.
64-bit operating system selects "cp210xvcpinstaller_x64.exe".
(3) Install Wireless configuration tool driver
Here we take an example to use the 64-bit operating system to install the wireless configuration tool driver
Click and select Next to the driver file "cp210xvcpinstaller_x64.exe".
As below:
6

Select Accept the License Agreement and click on Next, as below:
Wait for a while and click on Finish, as below:
7

Check the driver program after installation finished. Click on Computer-Attribute-Device manager, as below:
4.3 Configuration process
(1) Insert the wireless serial port tool into the USB port of the laptop.
(2) Open the web-based configuration tool folder, “serialport-win32-x64” folder, double-click
“serialport.exe” to open the web-based configuration tool software.
Note: The serial port number may different on different laptop.
(3) Process
a. Choose serial port
Click on Computer-Attribute- Device manager icon to check serial port number, select bluetooth“Silicon Labs
Dual CP2105 USB to UART Bridge: Enhanced COM Port”. Here is an example to type in COM5.
8

b. Open the web-based configuration tool software- Winext Manage App. Click LoRaWAN icon. Please follow
step 1,2,3, 4, 5.
1.Open Winext Manage App-LoRaWAN
2. Reboot device and its DevEUI will be shown in the dropdown list.
3. Select the target device,
4.Click on Device Locked
5. Select the parameters to query or set. If it returns OK on the data receiving box, it indicates configuration done.
Note: In wireless configuration mode, if there is no operation within 15s it will exit automatically.
9

5. Communication format
Fport=210, it is in hexadecimal.
5.1 Data report
5.1.1 Smoke alarm event
Item
Type
Byte number
Description
Reserved field
Data
1
0X00
Device type
Data type
1
0X01
Data
1
0X05
Device status
Data type
1
0X31
Data
1
0X00, normal; 0X01, alarm
5.1.2 Device abnormal event
Item
Type
Byte number
Description
Reserved field
Data
1
0X00
Device type
Data type
1
0X01
Data
1
0X05
Device status
Data type
1
0X1B
Data
1
0X00, normal; 0X01, abnormal
5.1.3 Low battery voltage event
Item
Type
Byte number
Description
Reserved field
Data
1
0X00
Device type
Data type
1
0X01
Data
1
0X05
Battery voltage
Data type
1
0X04
Data 1
1
Uint16, to divide 1000 for the real value, with unit in V.
Data 2
1
Battery voltage
status
Data type
1
0X05
Data
1
Uint8
0X00, battery voltage normal;
0X01, low battery voltage
5.1.4 Heartbeat
Item
Type
Byte number
Description
Reserved field
Data
1
0X00
Device type
Data type
1
0X01
Data
1
0X05
Battery voltage
Data type
1
0X04
Data 1
1
Uint16, to divide 1000 for the real value, with unit in V.
Data 2
1
Device status
Data type
1
0X1B
10

Data
1
0x00: normal; 0x01: abnormal
Smoke
transmitter
status
Data type
1
0X31
Data
1
0x00: normal; 0x01: alarm
6. Trouble-shooting
6.1 FAQ
Failure
Reason
Solution
Send alarm after power on
Inside circuit board
damaged
Return factory for repair
Device is in abnormal
status
Reboot
Red light on and it flashes
every 1 second
Sensor damage
Return factory for repair
Speaker not sound in alarm or
detection mode
Speaker damage
Return factory for repair
Plug loose
Remove the closure. Have a check if the interface
is plugged well and re-plug it in.
6.2 Cautions
1.Please pay attention to the applicable scope and condition. Please read this manual carefully and keep it for
future reference.
2.Before installation, please take measures to protect the device from high dust, moisture and corrosion
environments.
3.As the device is installed and put into use, check its working status regularly. If there is any fault such as n
o sound or no led indicator on/off, please check in time or return it to factory for repair.
4. When it shows a battery voltage level warning, please replace the battery in time.
5. Please do not disassemble and repair yourself when the device fails to work.
6. Regarding repair, if there is the local distributor please contact them or technicians to repair.
7. It is suggested that you contact the manufacturer to change the battery after fire in which devices consumes
battery quickly for sending alarm report and sounding constantly.
8. It is suggested that the device should be returned to the manufacturer for maintenance for over 2 years use.
11

Version
Description
Editor
Date
V1.0
Initial version
Zijun Liang
27th-Oct-2020
Shenzhen Winext Technology Co., Ltd.
Address: 5th Floor, Building B50, Zhongchuang Industrial Park, Liuxian Rd, Taoyuan
Street, Nanshan District, Shenzhen 518055, China
Tel:(+86) 0755-23990916
Web: www.winext.cn
http://winext.en.alibaba.com
------------------------------------------------------------------------------------------------------------------------------------------
This is a product manual as an installation, operation and use file. Specifications subject to change are without
notice. For more information, please call us or contact the sales staff.
12
Table of contents
Other Winext Smoke Alarm manuals
Popular Smoke Alarm manuals by other brands

elsner elektronik
elsner elektronik KNX AQS/TH Installation and adjustment

Ei Electronics
Ei Electronics Ei650 Series operating instructions

ELRO
ELRO Sensus7M instruction manual

Ei Electronics
Ei Electronics EI129 instruction manual

DSC
DSC Meridian WLS906-433 Instructions for installation and use

Fireray
Fireray 3000 user guide