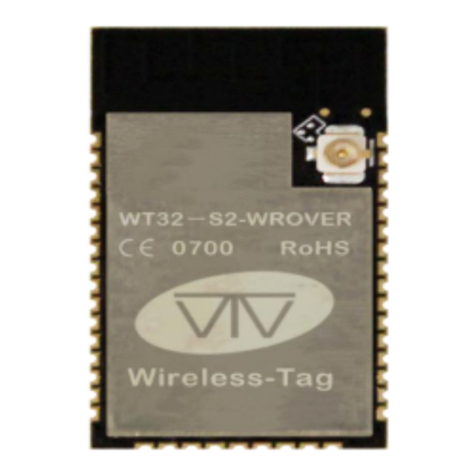
Wireless-tag WT51 Series User manual

WT5105-M1-DK
WT5105-M1-DK
QUICK START
Version 1.1.0
Jun.17, 2020
Wireless-Tag Technology Co., Ltd.

WT5105-M1-DK
1 / 11
Wireless-Tag Technology Co., Limited http://www.wireless-tag.com
Disclaimer and Copyright Notice
Information in this paper, including URL references, is subject to change without prior
notice.
This document is provided “as is” with no warranties whatsoever, including any warranty of
merchantability, non-infringement, fitness for any particular purpose, or any warranty
otherwise arising out of any proposal, and specification or sample. All liability, including
liability for infringement of any patent rights,relating to use of information in this
document is disclaimed. No licenses, either express or implied, by estoppel or otherwise,
to any intellectual property rights are granted herein.
All trade names, trademarks and registered trademarks mentioned in this document are
property of their respective owners, and hereby acknowledged.

WT5105-M1-DK
2 / 11
Wireless-Tag Technology Co., Limited http://www.wireless-tag.com
Revision History
Version
Author
Reviewer
Date
Notes
1.0.0
Brussin
Mar.25, 2020
First release
1.1.0
LIYAN
Jun.17, 2020
Hardware version updating

WT5105-M1-DK
3 / 11
Wireless-Tag Technology Co., Limited http://www.wireless-tag.com
Contents
1. Environmental preparation.........................................................................................................................4
2. Hardware description ....................................................................................................................................5
3. Hardware connection........................................................................................................................................6
4. Software Burning preparation.......................................................................................................................8
5. Burning ...................................................................................................................................................................9
6. DK Schematic diagram.................................................................................................................................. 11

WT5105-M1-DK
4 / 11
Wireless-Tag Technology Co., Limited http://www.wireless-tag.com
1. Environmental preparation
⚫Software environment
Platform: Windows10
SDK: WT51XX_SDK_2.1.0
Compilation tool: keil5
Burning tool: WT51-RFtools.exe
(Download URL: http://doc.8ms.xyz/docs/wt5105/wt5105-1bv84c2qhb0pe)
⚫Hardware environment
WT5105-M1 module
WT5105-M1-DK
Type-c cable
As shown below:

WT5105-M1-DK
5 / 11
Wireless-Tag Technology Co., Limited http://www.wireless-tag.com
2. Hardware description
The front view and back view of wt5105-m1-dk are shown in the figures below. The self-locking switch
SW1 is used to switch the power supply of the module: when SW1 is pressed, the module is powered by
the USB interface; when SW1 is released, the module is powered by the button battery on the back of the
development board. The touch buttons S1 and S2 are used to control the level status of the TM pin and
RST pin of the module: RST is connected to GND when S1 is pressed (RST is high level by default); TM is
connected to VCC when S2 is pressed (low level by default). The J5 pin header is connected to RST and
TM respectively.
The front view of WT5105-M1-DK

WT5105-M1-DK
6 / 11
Wireless-Tag Technology Co., Limited http://www.wireless-tag.com
The back view of WT5105-M1-DK
3. Hardware connection
Connect the computer and the development board with the type-C data cable. If the red power indicator
D1 is on, it indicates the power supply is normal. Then press the power switch SW1 to complete the power
supply of the development board.
As shown below:

WT5105-M1-DK
7 / 11
Wireless-Tag Technology Co., Limited http://www.wireless-tag.com
⚫Check the PC port. If a new port appears, it indicates the serial port connection is normal.
As shown below:

WT5105-M1-DK
8 / 11
Wireless-Tag Technology Co., Limited http://www.wireless-tag.com
4. Software Burning preparation
⚫Open the sample project in the SDK, select “build” and wait for the compilation to complete.
⚫The compiled hex file is saved in the bin directory of the current directory.

WT5105-M1-DK
9 / 11
Wireless-Tag Technology Co., Limited http://www.wireless-tag.com
5. Burning
⚫Open the burning tool WT51- RFtools.exe. Check the “UART setting” option. Select the correct
port and the appropriate baud rate, 115200 by default. Then select “connect” to connect to the
DK.
⚫After pressing the TM button on the DK and then pressing the RST button, the module will enter
the burning mode. Before burning, erase the chip by “Erase”.

WT5105-M1-DK
10 / 11
Wireless-Tag Technology Co., Limited http://www.wireless-tag.com
⚫After erasing, select “HEX Merge”, and double-click the blank space behind the APP to load the
hex file to be burned.
⚫After loading, select “Write” and wait for the burning to complete.
⚫After the burning is completed, press the RST button on the DK again. The chip will enter the
normal working mode.

WT5105-M1-DK
11 / 11
Wireless-Tag Technology Co., Limited http://www.wireless-tag.com
6. DK Schematic diagram
This manual suits for next models
1
Table of contents
Other Wireless-tag Control Unit manuals
Popular Control Unit manuals by other brands

Samson
Samson EB LTR 43 Mounting and operating instructions

Rockwell Automation
Rockwell Automation Bulletin 193 E1 PLUS Application and Installation

Rohl
Rohl R1041R instruction manual

Symmons
Symmons LaundryMate LM600 Operation & maintenance manual

Videx
Videx 4000 Series manual

Emerson
Emerson Fisher 92B instruction manual