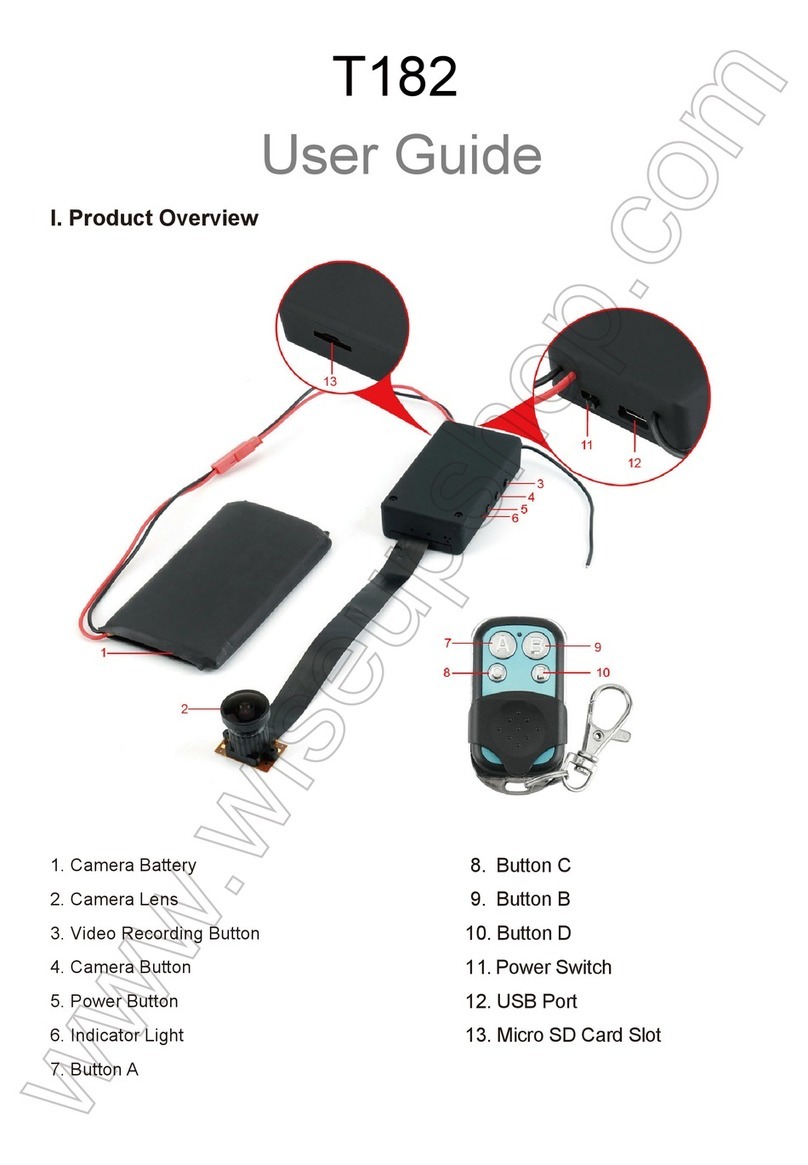
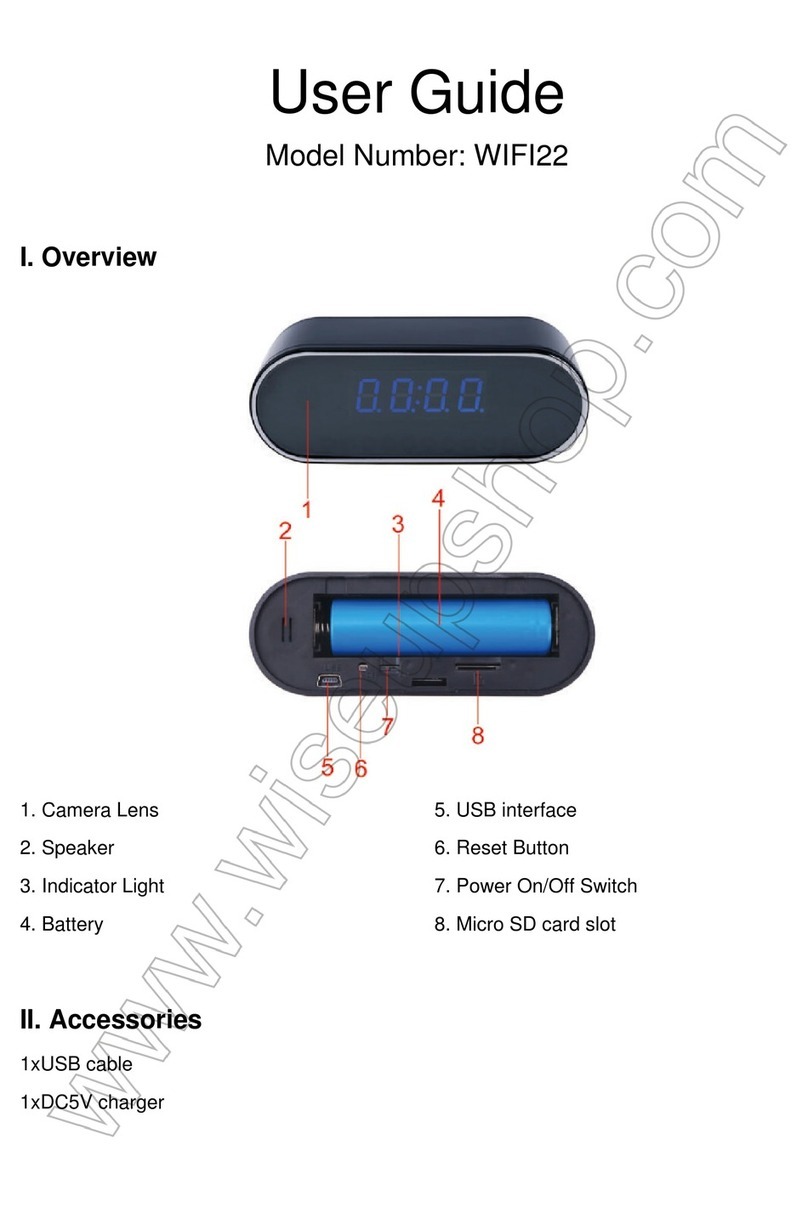
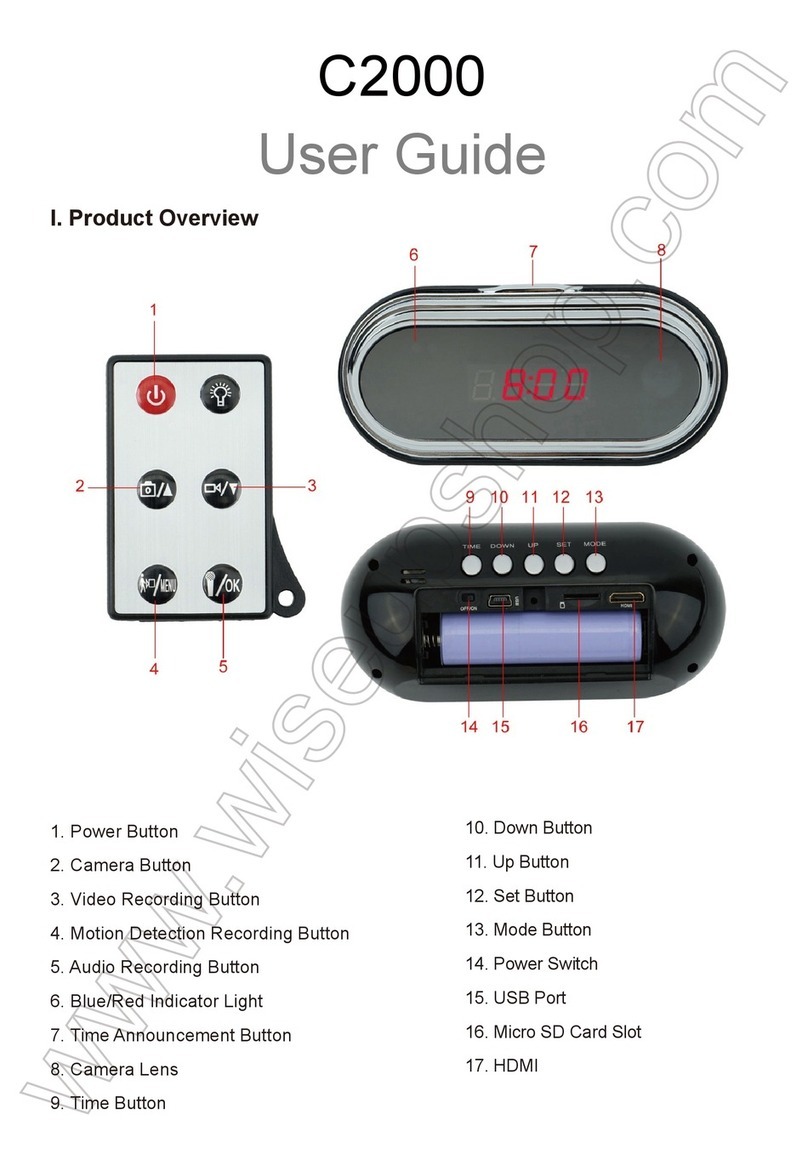
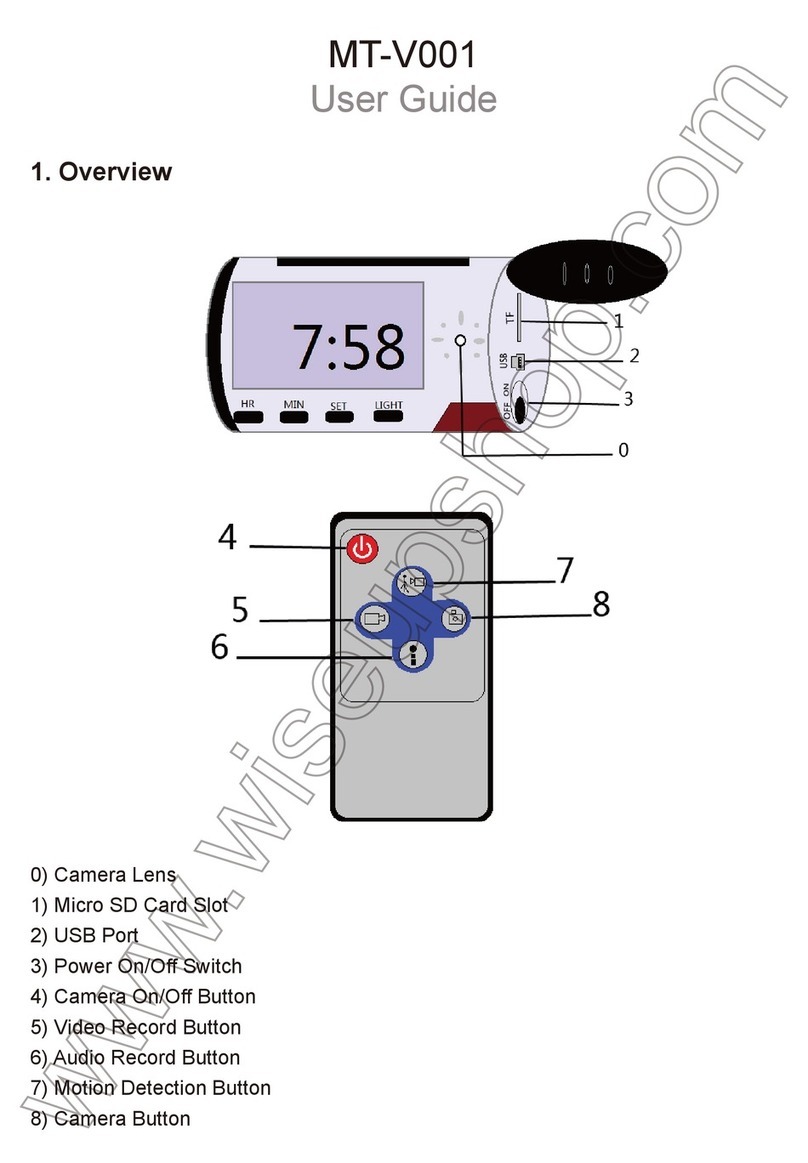
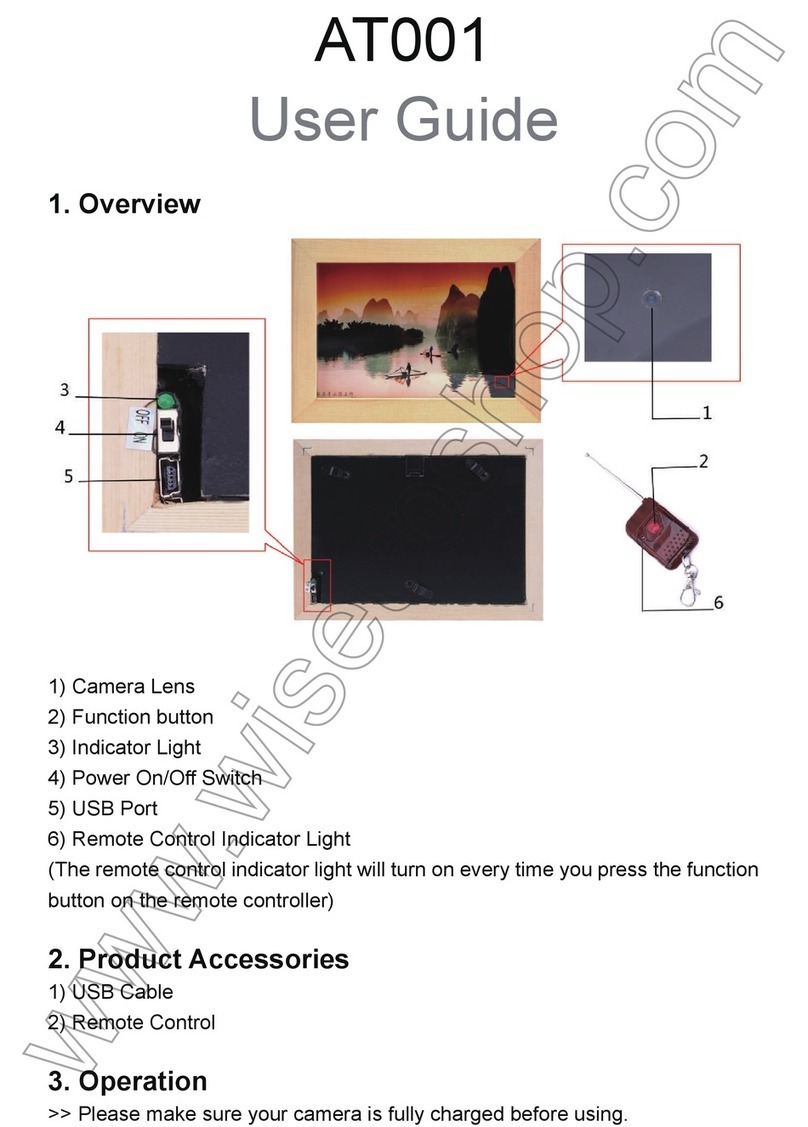
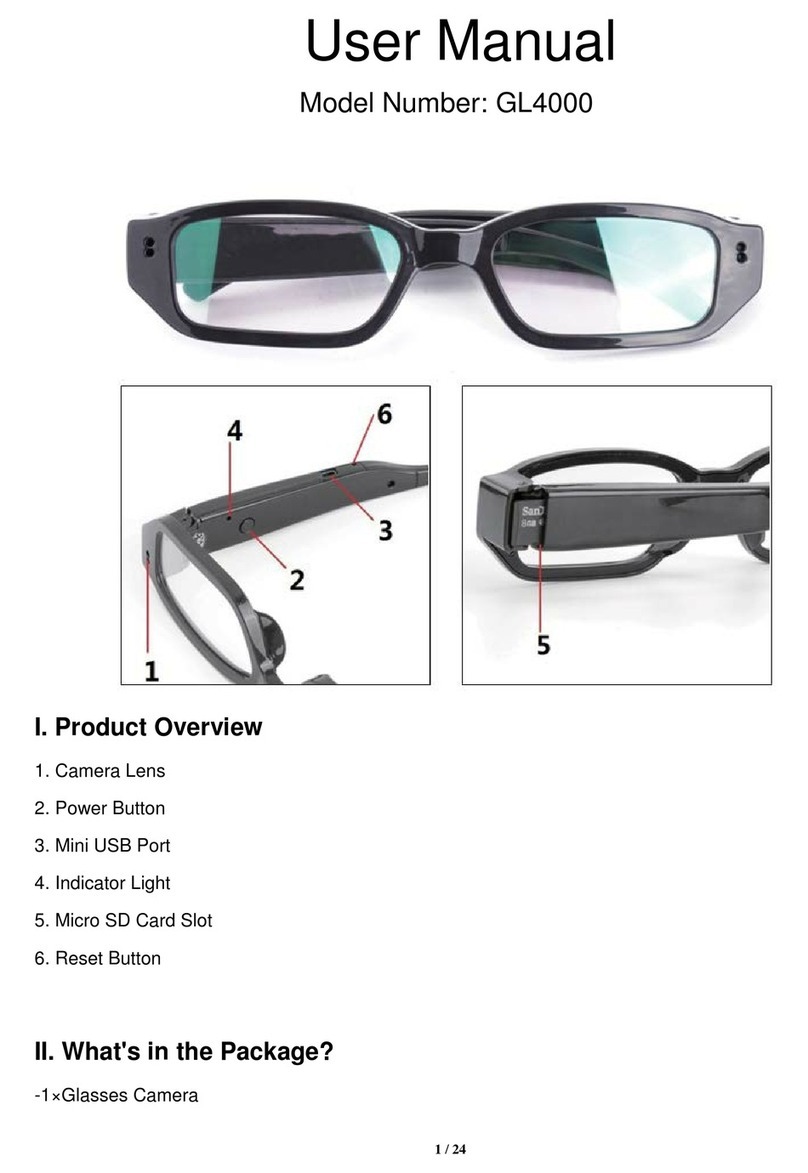
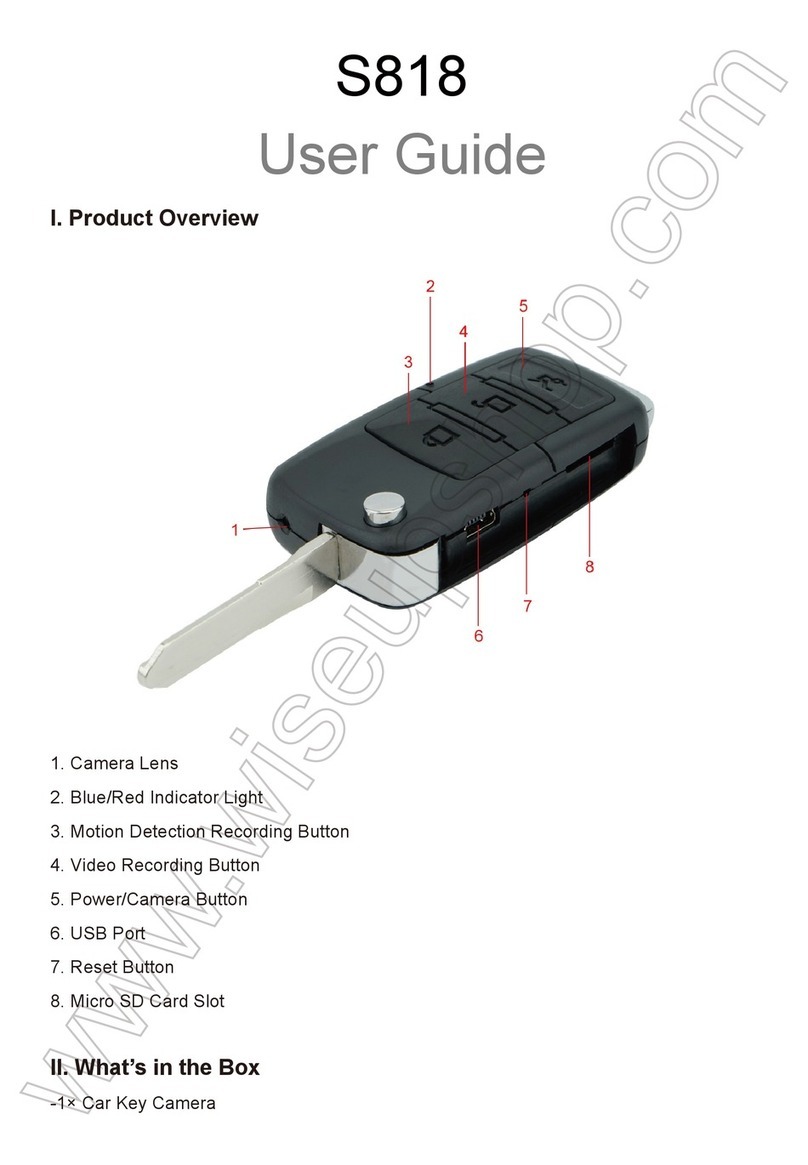
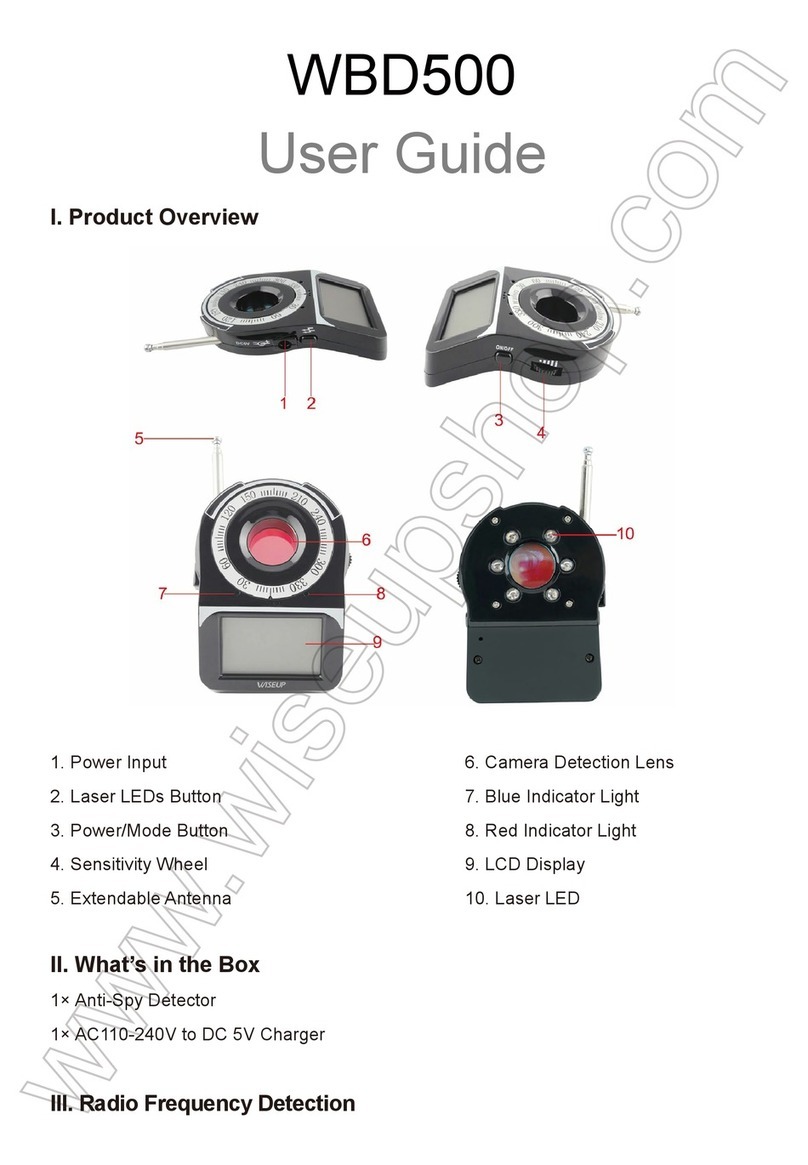
Wiseup DVR-0022C User manual

DVR-0022C
User Guide
I. Product Overview
1. USB Port
2. Headphone Jack/Video Output Port
3. Lock Screen Button
4. Mode Switch
5. DC5V In Jack
6. SD Card Slot
7. Video Recording/Cancel Button
8. Camera Button
9. Up Button
10. Play/Pause/Enter Button
11. Down Button
12. Camera In Port
II. What’s in the Box
1. DVR Pouch
2. Camera Lens
3. USB Cable & DC5V Charger
4. Handheld DVR
5. DIY Buttons
6. AV Cable
7. IR Remote Controller
8. SD Card Adapter fitted with a 16GB Micro SD card
9. Earphones
III. Installing & Removing Battery
3.1. Remove the adhesive tape on the electrodes; otherwise the battery will not work with
the DVR.
3.2. To remove the battery, gently unlock by switching LOCK switch to the right side and
push battery in red arrow pointed direction.
3.3. To install the battery, attach the battery to the DVR and gently push the battery in red
arrow pointed direction. Lastly, don’t forget to slide LOCK switch to the left to ensure it is
locked properly.
IV. Connecting Camera Lens to DVR
4.1. Power off the DVR by pressing the Power Button for 2 seconds.
4.2. To connect the camera, plug the camera’s Micro USB end into Camera in Port on the DVR.
4.3. The DVR will not work unless it is fitted with a valid memory card and connected to
the camera lens.
V. Operation
>> To make the memory card recognizable, please be sure to format the memory card before
using for the first time. Please note that formatting on your PC computer is not recommended,
for it might result in the failure for the computer to recognize the memory card.
>> Make sure that the DVR is fully charged. If you need the DVR to work 24/7, use the
included DC5V charger to plug the DVR into an outlet AC power supply.
>> Make sure that the DVR is fitted with a memory card and connected to the camera lens
properly.
5.1. USING REMOTE CONTROLLER & EDITING SETTINGS
5.1.1. Power on the DVR by pressing the Power Button for 2 seconds before using the
remote controller.
5.1.2. Press the DVR Pairing Button once to pair the DVR with the IR remote controller.
5.1.3. Aim the remote controller at the DVR to control the DVR remotely.
5.1.4. Once the pairing is done, you are free to operate the DVR using the remote controller.
5.1.5. See the table below for an explanation of system settings.
5.2. CONTINUOUS VIDEO RECORDING
5.2.1. After the DVR is powered on, press the Menu Button once, locate “Pre-capture”
and then choose “Manual”.
5.2.2. Press the Cancel Button to exit system settings and press the Video Recording Button
once to start recording video continuously. Press it once again to stop recording video.
5.2.3. A video clip will be generated and saved every 10 minutes automatically.
5.2.4. The DVR is able to record video continuously for 3 hours straight on a full charge.
5.2.5. A 16GB SD card is able to store up to 3 hours of video footage.
[Note]: Video Format: AVI
5.3. MOTION DETECTION VIDEO RECORDING
5.3.1. After the DVR is powered on, press the Menu Button once, locate “Pre-capture” and
then choose “Motion detect”.
5.3.2. The DVR is now in motion detection recording mode. The DVR will start recording
a one-minute video when motion is detected.
5.3.3. If no motion is detected, the DVR will be back to motion detection standby mode
automatically until it detects motion again.
5.3.4. The DVR can run up to 4 hours when no motion is detected all the time.
5.4. CONNECTING DVR TO MONITOR
5.4.1. Make sure the DVR is powered on and the camera lens is inserted into the DVR
properly.
5.4.2. Press the Menu Button once, locate “TV Standard” then select “PAL” or “NTSC”.
5.4.3. Plug one end of the AV cable into the AV port, then the other 3 AV connectors into
your monitor.
5.4.4. It will take a few seconds for the live video to appear on the monitor.
VI. CHARGING
6.1. Power off the DVR and then plug the DC5V charger into DVR first, then plug the
charger into an outlet AC power supply.
6.2. It will take 10 hours to obtain a full charge.
6.3. The Blue LED-Charge will be remain solid during the charging process.
6.4. When the DVR is fully charged, the Blue LED-Charge will turn off automatically.
13. Red LED-Power
14. Blue LED-Charge
15. Power/Menu/Cancel Button
16. Red LED-Camera Status
17. Blue LED-Record
18. Backup Battery
19. DVR Pairing Button
20. Video Recording Button
21. Play/Pause/Enter Button
22. Down Button
23. Camera Button
24. Menu Button
25. Up Button

I. Product Overview
1. USB Port
2. Headphone Jack/Video Output Port
3. Lock Screen Button
4. Mode Switch
5. DC5V In Jack
6. SD Card Slot
7. Video Recording/Cancel Button
8. Camera Button
9. Up Button
10. Play/Pause/Enter Button
11. Down Button
12. Camera In Port
II. What’s in the Box
1. DVR Pouch
2. Camera Lens
3. USB Cable & DC5V Charger
4. Handheld DVR
5. DIY Buttons
6. AV Cable
7. IR Remote Controller
8. SD Card Adapter fitted with a 16GB Micro SD card
9. Earphones
III. Installing & Removing Battery
3.1. Remove the adhesive tape on the electrodes; otherwise the battery will not work with
the DVR.
3.2. To remove the battery, gently unlock by switching LOCK switch to the right side and
push battery in red arrow pointed direction.
3.3. To install the battery, attach the battery to the DVR and gently push the battery in red
arrow pointed direction. Lastly, don’t forget to slide LOCK switch to the left to ensure it is
locked properly.
IV. Connecting Camera Lens to DVR
4.1. Power off the DVR by pressing the Power Button for 2 seconds.
4.2. To connect the camera, plug the camera’s Micro USB end into Camera in Port on the DVR.
4.3. The DVR will not work unless it is fitted with a valid memory card and connected to
the camera lens.
V. Operation
>> To make the memory card recognizable, please be sure to format the memory card before
using for the first time. Please note that formatting on your PC computer is not recommended,
for it might result in the failure for the computer to recognize the memory card.
>> Make sure that the DVR is fully charged. If you need the DVR to work 24/7, use the
included DC5V charger to plug the DVR into an outlet AC power supply.
>> Make sure that the DVR is fitted with a memory card and connected to the camera lens
properly.
5.1. USING REMOTE CONTROLLER & EDITING SETTINGS
5.1.1. Power on the DVR by pressing the Power Button for 2 seconds before using the
remote controller.
5.1.2. Press the DVR Pairing Button once to pair the DVR with the IR remote controller.
5.1.3. Aim the remote controller at the DVR to control the DVR remotely.
5.1.4. Once the pairing is done, you are free to operate the DVR using the remote controller.
5.1.5. See the table below for an explanation of system settings.
5.2. CONTINUOUS VIDEO RECORDING
5.2.1. After the DVR is powered on, press the Menu Button once, locate “Pre-capture”
and then choose “Manual”.
5.2.2. Press the Cancel Button to exit system settings and press the Video Recording Button
once to start recording video continuously. Press it once again to stop recording video.
5.2.3. A video clip will be generated and saved every 10 minutes automatically.
5.2.4. The DVR is able to record video continuously for 3 hours straight on a full charge.
5.2.5. A 16GB SD card is able to store up to 3 hours of video footage.
[Note]: Video Format: AVI
5.3. MOTION DETECTION VIDEO RECORDING
5.3.1. After the DVR is powered on, press the Menu Button once, locate “Pre-capture” and
then choose “Motion detect”.
5.3.2. The DVR is now in motion detection recording mode. The DVR will start recording
a one-minute video when motion is detected.
5.3.3. If no motion is detected, the DVR will be back to motion detection standby mode
automatically until it detects motion again.
5.3.4. The DVR can run up to 4 hours when no motion is detected all the time.
5.4. CONNECTING DVR TO MONITOR
5.4.1. Make sure the DVR is powered on and the camera lens is inserted into the DVR
properly.
5.4.2. Press the Menu Button once, locate “TV Standard” then select “PAL” or “NTSC”.
5.4.3. Plug one end of the AV cable into the AV port, then the other 3 AV connectors into
your monitor.
5.4.4. It will take a few seconds for the live video to appear on the monitor.
VI. CHARGING
6.1. Power off the DVR and then plug the DC5V charger into DVR first, then plug the
charger into an outlet AC power supply.
6.2. It will take 10 hours to obtain a full charge.
6.3. The Blue LED-Charge will be remain solid during the charging process.
6.4. When the DVR is fully charged, the Blue LED-Charge will turn off automatically.
Function
Photo Resolution
Video Resolution
Continue Shot
Pre-Capture
Over-Write
Vibration Motor
Language
Auto LCD Off
Auto Sleep
Auto Power off
Frequency
TV Standard
2.4G Remoter
Default
Format
Date/Time
Date Stamp
User Number
Memory Info
Version
Choose the size of each image file
1080P 30 fps, 720P 60 fps, 720P 30fps, 480P 30 fps Selectable
Turn on or off continuous shot
Recording options: motion detection recording and manual recording
Loop recording allows the DVR to automatically delete its first video
files to save the latest one when the memory card is full
Allow the DVR to vibrate once every time you press a button
Choose a duration time to power off the LCD screen automatically
Enable or disable automatic sleep function
50/60Hz
NTSC/PAL
To pair the IR remote controller with the DVR
Reset all settings to factory default
Format the memory card you insert into the DVR
Set date and time
Turn on/off date and time stamp on the video footage or images
Edit user number or turn off user number
Detailed information about the memory card space
DVR Version
Description
OSD Languages: English, Simplified Chinese, Traditional Chinese,
Japanese, Korean and Russian
Choose a duration time to power off the DVR automatically when the
DVR is in standby mode without any operation

I. Product Overview
1. USB Port
2. Headphone Jack/Video Output Port
3. Lock Screen Button
4. Mode Switch
5. DC5V In Jack
6. SD Card Slot
7. Video Recording/Cancel Button
8. Camera Button
9. Up Button
10. Play/Pause/Enter Button
11. Down Button
12. Camera In Port
II. What’s in the Box
1. DVR Pouch
2. Camera Lens
3. USB Cable & DC5V Charger
4. Handheld DVR
5. DIY Buttons
6. AV Cable
7. IR Remote Controller
8. SD Card Adapter fitted with a 16GB Micro SD card
9. Earphones
III. Installing & Removing Battery
3.1. Remove the adhesive tape on the electrodes; otherwise the battery will not work with
the DVR.
3.2. To remove the battery, gently unlock by switching LOCK switch to the right side and
push battery in red arrow pointed direction.
3.3. To install the battery, attach the battery to the DVR and gently push the battery in red
arrow pointed direction. Lastly, don’t forget to slide LOCK switch to the left to ensure it is
locked properly.
IV. Connecting Camera Lens to DVR
4.1. Power off the DVR by pressing the Power Button for 2 seconds.
4.2. To connect the camera, plug the camera’s Micro USB end into Camera in Port on the DVR.
4.3. The DVR will not work unless it is fitted with a valid memory card and connected to
the camera lens.
V. Operation
>> To make the memory card recognizable, please be sure to format the memory card before
using for the first time. Please note that formatting on your PC computer is not recommended,
for it might result in the failure for the computer to recognize the memory card.
>> Make sure that the DVR is fully charged. If you need the DVR to work 24/7, use the
included DC5V charger to plug the DVR into an outlet AC power supply.
>> Make sure that the DVR is fitted with a memory card and connected to the camera lens
properly.
5.1. USING REMOTE CONTROLLER & EDITING SETTINGS
5.1.1. Power on the DVR by pressing the Power Button for 2 seconds before using the
remote controller.
5.1.2. Press the DVR Pairing Button once to pair the DVR with the IR remote controller.
5.1.3. Aim the remote controller at the DVR to control the DVR remotely.
5.1.4. Once the pairing is done, you are free to operate the DVR using the remote controller.
5.1.5. See the table below for an explanation of system settings.
5.2. CONTINUOUS VIDEO RECORDING
5.2.1. After the DVR is powered on, press the Menu Button once, locate “Pre-capture”
and then choose “Manual”.
5.2.2. Press the Cancel Button to exit system settings and press the Video Recording Button
once to start recording video continuously. Press it once again to stop recording video.
5.2.3. A video clip will be generated and saved every 10 minutes automatically.
5.2.4. The DVR is able to record video continuously for 3 hours straight on a full charge.
5.2.5. A 16GB SD card is able to store up to 3 hours of video footage.
[Note]: Video Format: AVI
5.3. MOTION DETECTION VIDEO RECORDING
5.3.1. After the DVR is powered on, press the Menu Button once, locate “Pre-capture” and
then choose “Motion detect”.
5.3.2. The DVR is now in motion detection recording mode. The DVR will start recording
a one-minute video when motion is detected.
5.3.3. If no motion is detected, the DVR will be back to motion detection standby mode
automatically until it detects motion again.
5.3.4. The DVR can run up to 4 hours when no motion is detected all the time.
5.4. CONNECTING DVR TO MONITOR
5.4.1. Make sure the DVR is powered on and the camera lens is inserted into the DVR
properly.
5.4.2. Press the Menu Button once, locate “TV Standard” then select “PAL” or “NTSC”.
5.4.3. Plug one end of the AV cable into the AV port, then the other 3 AV connectors into
your monitor.
5.4.4. It will take a few seconds for the live video to appear on the monitor.
VI. CHARGING
6.1. Power off the DVR and then plug the DC5V charger into DVR first, then plug the
charger into an outlet AC power supply.
6.2. It will take 10 hours to obtain a full charge.
6.3. The Blue LED-Charge will be remain solid during the charging process.
6.4. When the DVR is fully charged, the Blue LED-Charge will turn off automatically.

DVR-0022C
Benutzerhandbuch
I. Produktübersicht
1. USB-Anschluss
2. Kopfhöreranschluss /Videoausgang
3. Verriegelungsschaltfläche
4. Modusschalter
5. DC5V In Jack
6. SD-Kartensteckplatz
7. Videoaufnahme / Abbrechen-Taste
8. Kamerataste
9. Auf Knopf
10. Play /Pause/Enter-Taste
11. Abwärtstaste
12. Kamera im Port
II. Was ist in der Box
1. DVR Beutel
2. Kameraobjektiv
3. USB-Kabel u. DC5V Aufladeeinheit
4. Handheld DVR
5. DIY Knöpfe
6. AV-Kabel
7. IR-Fernbedienung
8. SD-Karten-Adapter mit einer 16GB Micro SD-Karte ausgestattet
9. Kopfhörer
III. Akku installieren und Entfernen
3.1.Entfernen Sie das Klebeband auf den Elektroden. Andernfalls funktioniert die Batterie
nicht mit dem DVR.
3.2. Um die Batterie zu entfernen, entriegeln Sie sie vorsichtig, indem Sie den LOCK-Schalter
auf die rechte Seite schalten und die Batterie in die rote Pfeilspitze drücken.
3.3. Um den Akku zu installieren, befestigen Sie den Akku am DVR und schieben Sie den
Akku vorsichtig in die rote Pfeilspitze. Schließlich vergessen Sie nicht, den LOCK-Schalter
nach links zu schieben, um sicherzustellen, dass er ordnungsgemäß verriegelt ist.
IV. Kameraobjektiv an DVR anschließen
4.1. Schalten Sie den DVR aus, indem Sie den Netzschalter 2 Sekunden lang drücken.
4.2. Um die Kamera anzuschließen, stecken Sie das Mikro-USB-Ende der Kamera in die
Kamera im Port des DVR.
4.3 Der DVR funktioniert nicht, wenn er nicht mit einer gültigen Speicherkarte ausgestattet ist
und an das Kameraobjektiv angeschlossen ist.
V. Betrieb
>> Um die Speicherkarte erkennbar zu machen, bitte unbedingt die Speicherkarte formatieren,
bevor sie zum ersten Mal benutzt wird. Bitte beachten Sie, dass die Formatierung auf Ihrem
PC-Computer nicht empfohlen wird, da dies zum Ausfall des Computers führen kann, um die
Speicherkarte zu erkennen.
>> Stellen Sie sicher, dass der DVR vollständig aufgeladen ist. Wenn Sie den DVR
benötigen, um 24/7 zu arbeiten, verwenden Sie das mitgelieferte DC5V Ladegerät, um
den DVR in eine Steckdose Netzspannung zu stecken.
>> Vergewissern Sie sich, dass der DVR mit einer Speicherkarte ausgestattet und korrekt
am Kameraobjektiv angeschlossen ist.
5.1. VERWENDUNG VON FERNBEDIENUNGS-UND BEARBEITUNGSINSTELLUNGEN
5.1.1. Schalten Sie den DVR ein, indem Sie den Netzschalter 2 Sekunden lang drücken, bevor
Sie die Fernbedienung benutzen.
5.1.2. Drücken Sie die DVR-Pairing-Taste einmal, um den DVR mit der IR-Fernbedienung zu
koppeln.
5.1.3. Richten Sie die Fernbedienung auf den DVR, um den DVR fernzusteuern.
5.1.4. Sobald die Kopplung erfolgt ist, können Sie den DVR mit der Fernbedienung bedienen.
5.1.5. In der folgenden Tabelle finden Sie eine Erläuterung der Systemeinstellungen.
5.2. KONTINUIERLICHE VIDEOAUFNAHME
5.2.1. Nachdem der DVR eingeschaltet ist, drücken Sie einmal die Menütaste, suchen Sie
"Pre-capture" und wählen Sie dann "Manual".
5.2.2. Drücken Sie die Taste Abbrechen, um die Systemeinstellungen zu beenden, und
drücken Sie die Taste Video Recording einmal, um die Aufnahme von Video kontinuierlich
zu starten. Drücken Sie noch einmal, um die Aufnahme von Videos zu beenden.
5.2.3. Ein Videoclip wird alle 10 Minuten automatisch generiert und gespeichert.
5.2.4. Der DVR ist in der Lage, Video kontinuierlich für 3 Stunden direkt auf eine volle
Ladung aufzunehmen.
5.2.5. Eine 16GB SD-Karte kann bis zu 3 Stunden Videomaterial speichern.
[Anmerkung]: Videoformat: AVI
5.3. MOTION DETECTION VIDEO AUFNAHME
5.3.1. Nachdem der DVR eingeschaltet ist, drücken Sie einmal die Menütaste, suchen Sie
"Pre-capture" und wählen Sie dann "Motion detect".
5.3.2. Der DVR befindet sich nun im Bewegungserkennungsmodus. Der DVR startet die
Aufnahme eines einminütigen Videos, wenn eine Bewegung erkannt wird.
5.3.3. Wenn keine Bewegung erkannt wird, kehrt der DVR automatisch in den
Bewegungsmelde-Standby-Modus zurück, bis er die Bewegung wieder erkennt.
5.3.4. Der DVR kann bis zu 4 Stunden laufen, wenn überhaupt keine Bewegung erkannt wird.
5.4. ANSCHLIESSEN VON DVR ZUM MONITOR
5.4.1. Vergewissern Sie sich, dass der DVR eingeschaltet ist und das Kameraobjektiv
richtig in den DVR eingesteckt ist.
5.4.2. Drücken Sie einmal die Menütaste, suchen Sie "TV Standard" und wählen Sie dann
"PAL" oder "NTSC".
5.4.3. Stecken Sie ein Ende des AV-Kabels in den AV-Port, dann die anderen 3 AV-Anschlüsse
in den Monitor.
5.4.4. Es dauert ein paar Sekunden, bis das Live-Video auf dem Monitor erscheint.
VI. Aufzutragen
6.1. Schalten Sie den DVR aus und stecken Sie den DC5V Ladegerät zuerst in den DVR
ein und stecken Sie das Ladegerät in eine Steckdose.
6.2. Es dauert 10 Stunden, um eine volle Ladung zu erhalten.
6.3. Die blaue LED-Ladung bleibt während des Ladevorgangs solide.
6.4 Wenn der DVR vollständig aufgeladen ist, schaltet sich die blaue LED-Ladung automatisch
aus.
13. Rote LED-Power
14. Blaue LED-Ladung
15. Power /Menü /Abbrechen-Taste
16. Roter LED-Kamera-Status
17. Blaue LED-Aufnahme
18. Ersatzbatterie
19. DVR Pairing Button
20. Videoaufnahme-Taste
21. Play/Pause/Enter-Taste
22. Abwärtstaste
23. Kamerataste
24. Menü-Taste
25. Auf Knopf

I. Produktübersicht
1. USB-Anschluss
2. Kopfhöreranschluss /Videoausgang
3. Verriegelungsschaltfläche
4. Modusschalter
5. DC5V In Jack
6. SD-Kartensteckplatz
7. Videoaufnahme / Abbrechen-Taste
8. Kamerataste
9. Auf Knopf
10. Play /Pause/Enter-Taste
11. Abwärtstaste
12. Kamera im Port
II. Was ist in der Box
1. DVR Beutel
2. Kameraobjektiv
3. USB-Kabel u. DC5V Aufladeeinheit
4. Handheld DVR
5. DIY Knöpfe
6. AV-Kabel
7. IR-Fernbedienung
8. SD-Karten-Adapter mit einer 16GB Micro SD-Karte ausgestattet
9. Kopfhörer
III. Akku installieren und Entfernen
3.1.Entfernen Sie das Klebeband auf den Elektroden. Andernfalls funktioniert die Batterie
nicht mit dem DVR.
3.2. Um die Batterie zu entfernen, entriegeln Sie sie vorsichtig, indem Sie den LOCK-Schalter
auf die rechte Seite schalten und die Batterie in die rote Pfeilspitze drücken.
3.3. Um den Akku zu installieren, befestigen Sie den Akku am DVR und schieben Sie den
Akku vorsichtig in die rote Pfeilspitze. Schließlich vergessen Sie nicht, den LOCK-Schalter
nach links zu schieben, um sicherzustellen, dass er ordnungsgemäß verriegelt ist.
IV. Kameraobjektiv an DVR anschließen
4.1. Schalten Sie den DVR aus, indem Sie den Netzschalter 2 Sekunden lang drücken.
4.2. Um die Kamera anzuschließen, stecken Sie das Mikro-USB-Ende der Kamera in die
Kamera im Port des DVR.
4.3 Der DVR funktioniert nicht, wenn er nicht mit einer gültigen Speicherkarte ausgestattet ist
und an das Kameraobjektiv angeschlossen ist.
V. Betrieb
>> Um die Speicherkarte erkennbar zu machen, bitte unbedingt die Speicherkarte formatieren,
bevor sie zum ersten Mal benutzt wird. Bitte beachten Sie, dass die Formatierung auf Ihrem
PC-Computer nicht empfohlen wird, da dies zum Ausfall des Computers führen kann, um die
Speicherkarte zu erkennen.
>> Stellen Sie sicher, dass der DVR vollständig aufgeladen ist. Wenn Sie den DVR
benötigen, um 24/7 zu arbeiten, verwenden Sie das mitgelieferte DC5V Ladegerät, um
den DVR in eine Steckdose Netzspannung zu stecken.
>> Vergewissern Sie sich, dass der DVR mit einer Speicherkarte ausgestattet und korrekt
am Kameraobjektiv angeschlossen ist.
5.1. VERWENDUNG VON FERNBEDIENUNGS-UND BEARBEITUNGSINSTELLUNGEN
5.1.1. Schalten Sie den DVR ein, indem Sie den Netzschalter 2 Sekunden lang drücken, bevor
Sie die Fernbedienung benutzen.
5.1.2. Drücken Sie die DVR-Pairing-Taste einmal, um den DVR mit der IR-Fernbedienung zu
koppeln.
5.1.3. Richten Sie die Fernbedienung auf den DVR, um den DVR fernzusteuern.
5.1.4. Sobald die Kopplung erfolgt ist, können Sie den DVR mit der Fernbedienung bedienen.
5.1.5. In der folgenden Tabelle finden Sie eine Erläuterung der Systemeinstellungen.
5.2. KONTINUIERLICHE VIDEOAUFNAHME
5.2.1. Nachdem der DVR eingeschaltet ist, drücken Sie einmal die Menütaste, suchen Sie
"Pre-capture" und wählen Sie dann "Manual".
5.2.2. Drücken Sie die Taste Abbrechen, um die Systemeinstellungen zu beenden, und
drücken Sie die Taste Video Recording einmal, um die Aufnahme von Video kontinuierlich
zu starten. Drücken Sie noch einmal, um die Aufnahme von Videos zu beenden.
5.2.3. Ein Videoclip wird alle 10 Minuten automatisch generiert und gespeichert.
5.2.4. Der DVR ist in der Lage, Video kontinuierlich für 3 Stunden direkt auf eine volle
Ladung aufzunehmen.
5.2.5. Eine 16GB SD-Karte kann bis zu 3 Stunden Videomaterial speichern.
[Anmerkung]: Videoformat: AVI
5.3. MOTION DETECTION VIDEO AUFNAHME
5.3.1. Nachdem der DVR eingeschaltet ist, drücken Sie einmal die Menütaste, suchen Sie
"Pre-capture" und wählen Sie dann "Motion detect".
5.3.2. Der DVR befindet sich nun im Bewegungserkennungsmodus. Der DVR startet die
Aufnahme eines einminütigen Videos, wenn eine Bewegung erkannt wird.
5.3.3. Wenn keine Bewegung erkannt wird, kehrt der DVR automatisch in den
Bewegungsmelde-Standby-Modus zurück, bis er die Bewegung wieder erkennt.
5.3.4. Der DVR kann bis zu 4 Stunden laufen, wenn überhaupt keine Bewegung erkannt wird.
5.4. ANSCHLIESSEN VON DVR ZUM MONITOR
5.4.1. Vergewissern Sie sich, dass der DVR eingeschaltet ist und das Kameraobjektiv
richtig in den DVR eingesteckt ist.
5.4.2. Drücken Sie einmal die Menütaste, suchen Sie "TV Standard" und wählen Sie dann
"PAL" oder "NTSC".
5.4.3. Stecken Sie ein Ende des AV-Kabels in den AV-Port, dann die anderen 3 AV-Anschlüsse
in den Monitor.
5.4.4. Es dauert ein paar Sekunden, bis das Live-Video auf dem Monitor erscheint.
VI. Aufzutragen
6.1. Schalten Sie den DVR aus und stecken Sie den DC5V Ladegerät zuerst in den DVR
ein und stecken Sie das Ladegerät in eine Steckdose.
6.2. Es dauert 10 Stunden, um eine volle Ladung zu erhalten.
6.3. Die blaue LED-Ladung bleibt während des Ladevorgangs solide.
6.4 Wenn der DVR vollständig aufgeladen ist, schaltet sich die blaue LED-Ladung automatisch
aus.
Funktion
Fotoauflösung
Video Auflösung
Weiter Schuss
Pre-Capture
Over-Write
Vibrationsmotor
Sprache
Auto LCD Aus
Auto Sleep
Automatische Abschaltung
Frequenz
TV-Standard
2.4G Remoter
Voreinstellung
Format
Datum / Uhrzeit
Wählen Sie die Größe jeder Bilddatei.
1080P 30 fps, 720P 60 fps, 720P 30fps, 480P 30 fps wählbar
Aktivieren oder deaktivieren Sie den kontinuierlichen Schuss.
Aufnahmemöglichkeiten: Bewegungserkennung und manuelle Aufnahme
Die Loop-Aufnahme ermöglicht es dem DVR, seine ersten
Videodateien automatisch zu löschen,
um das letzte zu speichern, wenn die Speicherkarte voll ist.
Lassen Sie den DVR einmal vibrieren, sobald Sie eine Taste drücken.
Wählen Sie eine Zeitdauer, um den LCD-Bildschirm
automatisch auszuschalten.
Aktivieren oder Deaktivieren der automatischen Schlaffunktion
Wählen Sie eine Zeitdauer, um den DVR automatisch auszuschalten,
wenn sich der DVR im Standby-Modus ohne Betrieb befindet.
50/60Hz
NTSC/PAL
Um die IR-Fernbedienung mit dem DVR zu koppeln.
Alle Einstellungen auf die Werkseinstellungen zurücksetzen.
Formatieren Sie die Speicherkarte, die Sie in den DVR einfügen
Datum und Uhrzeit einstellen
Beschreibung
OSD Sprachen: Englisch, vereinfachtes Chinesisch, traditionelles
Chinesisch, Japanisch, Koreanisch und Russisch
I. Produktübersicht
1. USB-Anschluss
2. Kopfhöreranschluss /Videoausgang
3. Verriegelungsschaltfläche
4. Modusschalter
5. DC5V In Jack
6. SD-Kartensteckplatz
7. Videoaufnahme / Abbrechen-Taste
8. Kamerataste
9. Auf Knopf
10. Play /Pause/Enter-Taste
11. Abwärtstaste
12. Kamera im Port
II. Was ist in der Box
1. DVR Beutel
2. Kameraobjektiv
3. USB-Kabel u. DC5V Aufladeeinheit
4. Handheld DVR
5. DIY Knöpfe
6. AV-Kabel
7. IR-Fernbedienung
8. SD-Karten-Adapter mit einer 16GB Micro SD-Karte ausgestattet
9. Kopfhörer
III. Akku installieren und Entfernen
3.1.Entfernen Sie das Klebeband auf den Elektroden. Andernfalls funktioniert die Batterie
nicht mit dem DVR.
3.2. Um die Batterie zu entfernen, entriegeln Sie sie vorsichtig, indem Sie den LOCK-Schalter
auf die rechte Seite schalten und die Batterie in die rote Pfeilspitze drücken.
3.3. Um den Akku zu installieren, befestigen Sie den Akku am DVR und schieben Sie den
Akku vorsichtig in die rote Pfeilspitze. Schließlich vergessen Sie nicht, den LOCK-Schalter
nach links zu schieben, um sicherzustellen, dass er ordnungsgemäß verriegelt ist.
IV. Kameraobjektiv an DVR anschließen
4.1. Schalten Sie den DVR aus, indem Sie den Netzschalter 2 Sekunden lang drücken.
4.2. Um die Kamera anzuschließen, stecken Sie das Mikro-USB-Ende der Kamera in die
Kamera im Port des DVR.
4.3 Der DVR funktioniert nicht, wenn er nicht mit einer gültigen Speicherkarte ausgestattet ist
und an das Kameraobjektiv angeschlossen ist.
V. Betrieb
>> Um die Speicherkarte erkennbar zu machen, bitte unbedingt die Speicherkarte formatieren,
bevor sie zum ersten Mal benutzt wird. Bitte beachten Sie, dass die Formatierung auf Ihrem
PC-Computer nicht empfohlen wird, da dies zum Ausfall des Computers führen kann, um die
Speicherkarte zu erkennen.
>> Stellen Sie sicher, dass der DVR vollständig aufgeladen ist. Wenn Sie den DVR
benötigen, um 24/7 zu arbeiten, verwenden Sie das mitgelieferte DC5V Ladegerät, um
den DVR in eine Steckdose Netzspannung zu stecken.
>> Vergewissern Sie sich, dass der DVR mit einer Speicherkarte ausgestattet und korrekt
am Kameraobjektiv angeschlossen ist.
5.1. VERWENDUNG VON FERNBEDIENUNGS-UND BEARBEITUNGSINSTELLUNGEN
5.1.1. Schalten Sie den DVR ein, indem Sie den Netzschalter 2 Sekunden lang drücken, bevor
Sie die Fernbedienung benutzen.
5.1.2. Drücken Sie die DVR-Pairing-Taste einmal, um den DVR mit der IR-Fernbedienung zu
koppeln.
5.1.3. Richten Sie die Fernbedienung auf den DVR, um den DVR fernzusteuern.
5.1.4. Sobald die Kopplung erfolgt ist, können Sie den DVR mit der Fernbedienung bedienen.
5.1.5. In der folgenden Tabelle finden Sie eine Erläuterung der Systemeinstellungen.
5.2. KONTINUIERLICHE VIDEOAUFNAHME
5.2.1. Nachdem der DVR eingeschaltet ist, drücken Sie einmal die Menütaste, suchen Sie
"Pre-capture" und wählen Sie dann "Manual".
5.2.2. Drücken Sie die Taste Abbrechen, um die Systemeinstellungen zu beenden, und
drücken Sie die Taste Video Recording einmal, um die Aufnahme von Video kontinuierlich
zu starten. Drücken Sie noch einmal, um die Aufnahme von Videos zu beenden.
5.2.3. Ein Videoclip wird alle 10 Minuten automatisch generiert und gespeichert.
5.2.4. Der DVR ist in der Lage, Video kontinuierlich für 3 Stunden direkt auf eine volle
Ladung aufzunehmen.
5.2.5. Eine 16GB SD-Karte kann bis zu 3 Stunden Videomaterial speichern.
[Anmerkung]: Videoformat: AVI
5.3. MOTION DETECTION VIDEO AUFNAHME
5.3.1. Nachdem der DVR eingeschaltet ist, drücken Sie einmal die Menütaste, suchen Sie
"Pre-capture" und wählen Sie dann "Motion detect".
5.3.2. Der DVR befindet sich nun im Bewegungserkennungsmodus. Der DVR startet die
Aufnahme eines einminütigen Videos, wenn eine Bewegung erkannt wird.
5.3.3. Wenn keine Bewegung erkannt wird, kehrt der DVR automatisch in den
Bewegungsmelde-Standby-Modus zurück, bis er die Bewegung wieder erkennt.
5.3.4. Der DVR kann bis zu 4 Stunden laufen, wenn überhaupt keine Bewegung erkannt wird.
5.4. ANSCHLIESSEN VON DVR ZUM MONITOR
5.4.1. Vergewissern Sie sich, dass der DVR eingeschaltet ist und das Kameraobjektiv
richtig in den DVR eingesteckt ist.
5.4.2. Drücken Sie einmal die Menütaste, suchen Sie "TV Standard" und wählen Sie dann
"PAL" oder "NTSC".
5.4.3. Stecken Sie ein Ende des AV-Kabels in den AV-Port, dann die anderen 3 AV-Anschlüsse
in den Monitor.
5.4.4. Es dauert ein paar Sekunden, bis das Live-Video auf dem Monitor erscheint.
VI. Aufzutragen
6.1. Schalten Sie den DVR aus und stecken Sie den DC5V Ladegerät zuerst in den DVR
ein und stecken Sie das Ladegerät in eine Steckdose.
6.2. Es dauert 10 Stunden, um eine volle Ladung zu erhalten.
6.3. Die blaue LED-Ladung bleibt während des Ladevorgangs solide.
6.4 Wenn der DVR vollständig aufgeladen ist, schaltet sich die blaue LED-Ladung automatisch
aus.
Datum Stempel Ein- und Ausschaltdatum und Zeitstempel auf dem
Videomaterial oder den Bildern.
Speicher Info
Version
Detaillierte Informationen zum Speicherkartenraum.
Benutzernummer Benutzernummer bearbeiten oder Benutzernummer ausschalten.
DVR Version

I. Produktübersicht
1. USB-Anschluss
2. Kopfhöreranschluss /Videoausgang
3. Verriegelungsschaltfläche
4. Modusschalter
5. DC5V In Jack
6. SD-Kartensteckplatz
7. Videoaufnahme / Abbrechen-Taste
8. Kamerataste
9. Auf Knopf
10. Play /Pause/Enter-Taste
11. Abwärtstaste
12. Kamera im Port
II. Was ist in der Box
1. DVR Beutel
2. Kameraobjektiv
3. USB-Kabel u. DC5V Aufladeeinheit
4. Handheld DVR
5. DIY Knöpfe
6. AV-Kabel
7. IR-Fernbedienung
8. SD-Karten-Adapter mit einer 16GB Micro SD-Karte ausgestattet
9. Kopfhörer
III. Akku installieren und Entfernen
3.1.Entfernen Sie das Klebeband auf den Elektroden. Andernfalls funktioniert die Batterie
nicht mit dem DVR.
3.2. Um die Batterie zu entfernen, entriegeln Sie sie vorsichtig, indem Sie den LOCK-Schalter
auf die rechte Seite schalten und die Batterie in die rote Pfeilspitze drücken.
3.3. Um den Akku zu installieren, befestigen Sie den Akku am DVR und schieben Sie den
Akku vorsichtig in die rote Pfeilspitze. Schließlich vergessen Sie nicht, den LOCK-Schalter
nach links zu schieben, um sicherzustellen, dass er ordnungsgemäß verriegelt ist.
IV. Kameraobjektiv an DVR anschließen
4.1. Schalten Sie den DVR aus, indem Sie den Netzschalter 2 Sekunden lang drücken.
4.2. Um die Kamera anzuschließen, stecken Sie das Mikro-USB-Ende der Kamera in die
Kamera im Port des DVR.
4.3 Der DVR funktioniert nicht, wenn er nicht mit einer gültigen Speicherkarte ausgestattet ist
und an das Kameraobjektiv angeschlossen ist.
V. Betrieb
>> Um die Speicherkarte erkennbar zu machen, bitte unbedingt die Speicherkarte formatieren,
bevor sie zum ersten Mal benutzt wird. Bitte beachten Sie, dass die Formatierung auf Ihrem
PC-Computer nicht empfohlen wird, da dies zum Ausfall des Computers führen kann, um die
Speicherkarte zu erkennen.
>> Stellen Sie sicher, dass der DVR vollständig aufgeladen ist. Wenn Sie den DVR
benötigen, um 24/7 zu arbeiten, verwenden Sie das mitgelieferte DC5V Ladegerät, um
den DVR in eine Steckdose Netzspannung zu stecken.
>> Vergewissern Sie sich, dass der DVR mit einer Speicherkarte ausgestattet und korrekt
am Kameraobjektiv angeschlossen ist.
5.1. VERWENDUNG VON FERNBEDIENUNGS-UND BEARBEITUNGSINSTELLUNGEN
5.1.1. Schalten Sie den DVR ein, indem Sie den Netzschalter 2 Sekunden lang drücken, bevor
Sie die Fernbedienung benutzen.
5.1.2. Drücken Sie die DVR-Pairing-Taste einmal, um den DVR mit der IR-Fernbedienung zu
koppeln.
5.1.3. Richten Sie die Fernbedienung auf den DVR, um den DVR fernzusteuern.
5.1.4. Sobald die Kopplung erfolgt ist, können Sie den DVR mit der Fernbedienung bedienen.
5.1.5. In der folgenden Tabelle finden Sie eine Erläuterung der Systemeinstellungen.
5.2. KONTINUIERLICHE VIDEOAUFNAHME
5.2.1. Nachdem der DVR eingeschaltet ist, drücken Sie einmal die Menütaste, suchen Sie
"Pre-capture" und wählen Sie dann "Manual".
5.2.2. Drücken Sie die Taste Abbrechen, um die Systemeinstellungen zu beenden, und
drücken Sie die Taste Video Recording einmal, um die Aufnahme von Video kontinuierlich
zu starten. Drücken Sie noch einmal, um die Aufnahme von Videos zu beenden.
5.2.3. Ein Videoclip wird alle 10 Minuten automatisch generiert und gespeichert.
5.2.4. Der DVR ist in der Lage, Video kontinuierlich für 3 Stunden direkt auf eine volle
Ladung aufzunehmen.
5.2.5. Eine 16GB SD-Karte kann bis zu 3 Stunden Videomaterial speichern.
[Anmerkung]: Videoformat: AVI
5.3. MOTION DETECTION VIDEO AUFNAHME
5.3.1. Nachdem der DVR eingeschaltet ist, drücken Sie einmal die Menütaste, suchen Sie
"Pre-capture" und wählen Sie dann "Motion detect".
5.3.2. Der DVR befindet sich nun im Bewegungserkennungsmodus. Der DVR startet die
Aufnahme eines einminütigen Videos, wenn eine Bewegung erkannt wird.
5.3.3. Wenn keine Bewegung erkannt wird, kehrt der DVR automatisch in den
Bewegungsmelde-Standby-Modus zurück, bis er die Bewegung wieder erkennt.
5.3.4. Der DVR kann bis zu 4 Stunden laufen, wenn überhaupt keine Bewegung erkannt wird.
5.4. ANSCHLIESSEN VON DVR ZUM MONITOR
5.4.1. Vergewissern Sie sich, dass der DVR eingeschaltet ist und das Kameraobjektiv
richtig in den DVR eingesteckt ist.
5.4.2. Drücken Sie einmal die Menütaste, suchen Sie "TV Standard" und wählen Sie dann
"PAL" oder "NTSC".
5.4.3. Stecken Sie ein Ende des AV-Kabels in den AV-Port, dann die anderen 3 AV-Anschlüsse
in den Monitor.
5.4.4. Es dauert ein paar Sekunden, bis das Live-Video auf dem Monitor erscheint.
VI. Aufzutragen
6.1. Schalten Sie den DVR aus und stecken Sie den DC5V Ladegerät zuerst in den DVR
ein und stecken Sie das Ladegerät in eine Steckdose.
6.2. Es dauert 10 Stunden, um eine volle Ladung zu erhalten.
6.3. Die blaue LED-Ladung bleibt während des Ladevorgangs solide.
6.4 Wenn der DVR vollständig aufgeladen ist, schaltet sich die blaue LED-Ladung automatisch
aus.

DVR-0022C
Mode d'emploi
I. Aperçu du produit
1. Port USB
2. Prise casque / sortie vidéo
3. Touche d'écran de verrouillage
4. Commutateur de Mode
5. DC5V In Jack
6. Emplacement pour carte SD
7. Bouton Enregistrement Vidéo / Annuler
8. Bouton de la Caméra
9. Bouton Haut
10. Bouton Lecture / Pause / Entrée
11. Bouton Bas
12. Caméra dans le port
II. Qu'y a-t-il dans la boite
1. Poche de DVR
2. Lentille de Caméra
3. Câble USB et Chargeur DC5V
4. DVR de poche
5. Boutons de Bricolage
6. Câble AV
7. Contrôleur IR à distance
8. Adaptateur de carte SD équipé d'une carte Micro SD de 16 GB
9. Écouteurs
III. Installation et retrait de la batterie
3.1. Retirer le ruban adhésif sur les électrodes; Sinon, la batterie ne fonctionnera pas
avec le DVR.
3.2. Pour retirer la batterie, débloquer doucement en commutant le Bouton LOCK sur le côté
droit et appuyer sur la touche en direction de la flèche rouge.
3.3. Pour installer la batterie, fixez la batterie au DVR et appuyez doucement sur la batterie
en direction de la flèche rouge. Enfin, n'oubliez pas de glisser le Bouton LOCK vers la gauche
pour vous assurer qu'il soit correctement verrouillé.
IV. Connexion de l'objectif de la caméra au DVR
4.1. Éteignez le DVR en appuyant sur le Bouton d’Alimentation pendant 2 secondes.
4.2. Pour connecter la caméra, branchez la Micro USB de la caméra dans la caméra dans
le port du DVR.
4.3. Le DVR ne fonctionnera pas à moins qu'il ne soit équipé d'une carte mémoire valide
et connecté à l'objectif de la caméra.
V. Opération
>> Pour rendre la carte mémoire reconnaissable, assurez-vous de formater la carte mémoire
avant d'utiliser pour la première fois. Veuillez noter que le formatage sur l'ordinateur de votre
PC n'est pas recommandé, car il pourrait entraîner l'échec pour l'ordinateur de reconnaître la
carte mémoire.
>> Assurez-vous que le DVR est complètement chargé. Si vous souhaitez que le DVR
fonctionne 24 heures sur 24, utilisez le chargeur DC5V fourni pour brancher le DVR dans une
alimentation secteur.
>> Assurez-vous que le DVR est équipé d'une carte mémoire et connecté correctement à
l'objectif de la caméra.
5.1. UTILISATION DU RÉGLAGE DE LA TÉLÉCOMMANDE ET DE L'ÉDITION
5.1.1. Allumez le DVR en appuyant sur le Bouton d’Alimentation pendant 2 secondes avant
d'utiliser la télécommande.
5.1.2. Appuyez une fois sur le Bouton DVR Pairing pour coupler le DVR avec la télécommande
IR.
5.1.3. Viser la télécommande au DVR pour contrôler le DVR à distance.
5.1.4. Une fois l'appariement terminé, vous êtes libre d'utiliser le DVR à l'aide de la
télécommande.
5.1.5. Voir le tableau ci-dessous pour une explication des paramètres du système.
5.2. ENREGISTREMENT VIDÉO CONTINU
5.2.1. Une fois que le DVR est sous tension, appuyez une fois sur le Bouton Menu, localisez
"Pré-capture" puis choisissez "Manuel".
5.2.2. Appuyez sur le Bouton Annuler pour quitter les réglages du système et appuyez
une fois sur le Bouton Enregistrement Vidéo pour commencer l'enregistrement vidéo en
permanence. Appuyez une fois de plus pour arrêter l'enregistrement vidéo.
5.2.3. Un clip vidéo sera généré et sauvegardé toutes les 10 minutes automatiquement.
5.2.4. Le DVR est capable d'enregistrer une vidéo en continu pendant 3 heures directement
sur une charge complète.
5.2.5. Une carte SD de 16 GB peut stocker jusqu'à 3 heures de vidéos.
[Note]: Format vidéo: AVI
5.3. ENREGISTREMENT VIDEO DE DETECTION DE MOUVEMENT
5.3.1. Une fois que le DVR est sous tension, appuyez une fois sur le Bouton Menu, localisez
"Pré-capture", puis choisissez "Détection de mouvement".
5.3.2. Le DVR est maintenant en mode d'enregistrement de détection de mouvement. Le
DVR commencera à enregistrer une vidéo d'une minute lorsque le mouvement est détecté.
5.3.3. Si aucun mouvement n'est détecté, le DVR sera de nouveau en mode de veille de
détection de mouvement automatiquement jusqu'à ce qu'il détecte de nouveau le mouvement.
5.3.4. Le DVR peut fonctionner jusqu'à 4 heures lorsque aucun mouvement n'est détecté
tout le temps.
5.4. CONNEXION DU DVR AU MONITEUR
5.4.1. Assurez-vous que le DVR est sous tension et que l'objectif de la caméra est bien
inséré dans le DVR.
5.4.2. Appuyez une fois sur le Bouton Menu, localisez «TV Standard» puis sélectionnez
«PAL» ou «NTSC».
5.4.3. Branchez une extrémité du câble AV dans le port AV, puis les 3 autres connecteurs
AV dans votre moniteur.
5.4.4 Il faudra quelques secondes pour que la vidéo en direct apparaisse sur le moniteur.
VI. CHARGEMENT
6.1. Éteignez le DVR, puis branchez le chargeur DC5V dans le DVR d'abord, puis branchez
le chargeur dans une alimentation CA de sortie.
6.2. Il faudra 10 heures pour obtenir une charge complète.
6.3. Le Bleu LED-Charge reste solide pendant le processus de charge.
6.4. Lorsque le DVR est complètement chargé, le Blue LED-Charge s'éteint automatiquement.
13. LED Rouge-Alimentation
14. Blue LED-Charge
15. Bouton d’Alimentation / Menu / Annuler
16. État de la Caméra LED rouge
17. Enregistrement LED Bleu
18. Batterie de Secours
19. Bouton d'Appariement DVR
20. Bouton d'Enregistrement Vidéo
21. Bouton Lecture / Pause / Entrée
22. Bouton Bas
23. Bouton de la Caméra
24. Bouton de Menu
25. Bouton Haut

I. Aperçu du produit
1. Port USB
2. Prise casque / sortie vidéo
3. Touche d'écran de verrouillage
4. Commutateur de Mode
5. DC5V In Jack
6. Emplacement pour carte SD
7. Bouton Enregistrement Vidéo / Annuler
8. Bouton de la Caméra
9. Bouton Haut
10. Bouton Lecture / Pause / Entrée
11. Bouton Bas
12. Caméra dans le port
II. Qu'y a-t-il dans la boite
1. Poche de DVR
2. Lentille de Caméra
3. Câble USB et Chargeur DC5V
4. DVR de poche
5. Boutons de Bricolage
6. Câble AV
7. Contrôleur IR à distance
8. Adaptateur de carte SD équipé d'une carte Micro SD de 16 GB
9. Écouteurs
III. Installation et retrait de la batterie
3.1. Retirer le ruban adhésif sur les électrodes; Sinon, la batterie ne fonctionnera pas
avec le DVR.
3.2. Pour retirer la batterie, débloquer doucement en commutant le Bouton LOCK sur le côté
droit et appuyer sur la touche en direction de la flèche rouge.
3.3. Pour installer la batterie, fixez la batterie au DVR et appuyez doucement sur la batterie
en direction de la flèche rouge. Enfin, n'oubliez pas de glisser le Bouton LOCK vers la gauche
pour vous assurer qu'il soit correctement verrouillé.
IV. Connexion de l'objectif de la caméra au DVR
4.1. Éteignez le DVR en appuyant sur le Bouton d’Alimentation pendant 2 secondes.
4.2. Pour connecter la caméra, branchez la Micro USB de la caméra dans la caméra dans
le port du DVR.
4.3. Le DVR ne fonctionnera pas à moins qu'il ne soit équipé d'une carte mémoire valide
et connecté à l'objectif de la caméra.
V. Opération
>> Pour rendre la carte mémoire reconnaissable, assurez-vous de formater la carte mémoire
avant d'utiliser pour la première fois. Veuillez noter que le formatage sur l'ordinateur de votre
PC n'est pas recommandé, car il pourrait entraîner l'échec pour l'ordinateur de reconnaître la
carte mémoire.
>> Assurez-vous que le DVR est complètement chargé. Si vous souhaitez que le DVR
fonctionne 24 heures sur 24, utilisez le chargeur DC5V fourni pour brancher le DVR dans une
alimentation secteur.
>> Assurez-vous que le DVR est équipé d'une carte mémoire et connecté correctement à
l'objectif de la caméra.
5.1. UTILISATION DU RÉGLAGE DE LA TÉLÉCOMMANDE ET DE L'ÉDITION
5.1.1. Allumez le DVR en appuyant sur le Bouton d’Alimentation pendant 2 secondes avant
d'utiliser la télécommande.
5.1.2. Appuyez une fois sur le Bouton DVR Pairing pour coupler le DVR avec la télécommande
IR.
5.1.3. Viser la télécommande au DVR pour contrôler le DVR à distance.
5.1.4. Une fois l'appariement terminé, vous êtes libre d'utiliser le DVR à l'aide de la
télécommande.
5.1.5. Voir le tableau ci-dessous pour une explication des paramètres du système.
5.2. ENREGISTREMENT VIDÉO CONTINU
5.2.1. Une fois que le DVR est sous tension, appuyez une fois sur le Bouton Menu, localisez
"Pré-capture" puis choisissez "Manuel".
5.2.2. Appuyez sur le Bouton Annuler pour quitter les réglages du système et appuyez
une fois sur le Bouton Enregistrement Vidéo pour commencer l'enregistrement vidéo en
permanence. Appuyez une fois de plus pour arrêter l'enregistrement vidéo.
5.2.3. Un clip vidéo sera généré et sauvegardé toutes les 10 minutes automatiquement.
5.2.4. Le DVR est capable d'enregistrer une vidéo en continu pendant 3 heures directement
sur une charge complète.
5.2.5. Une carte SD de 16 GB peut stocker jusqu'à 3 heures de vidéos.
[Note]: Format vidéo: AVI
5.3. ENREGISTREMENT VIDEO DE DETECTION DE MOUVEMENT
5.3.1. Une fois que le DVR est sous tension, appuyez une fois sur le Bouton Menu, localisez
"Pré-capture", puis choisissez "Détection de mouvement".
5.3.2. Le DVR est maintenant en mode d'enregistrement de détection de mouvement. Le
DVR commencera à enregistrer une vidéo d'une minute lorsque le mouvement est détecté.
5.3.3. Si aucun mouvement n'est détecté, le DVR sera de nouveau en mode de veille de
détection de mouvement automatiquement jusqu'à ce qu'il détecte de nouveau le mouvement.
5.3.4. Le DVR peut fonctionner jusqu'à 4 heures lorsque aucun mouvement n'est détecté
tout le temps.
5.4. CONNEXION DU DVR AU MONITEUR
5.4.1. Assurez-vous que le DVR est sous tension et que l'objectif de la caméra est bien
inséré dans le DVR.
5.4.2. Appuyez une fois sur le Bouton Menu, localisez «TV Standard» puis sélectionnez
«PAL» ou «NTSC».
5.4.3. Branchez une extrémité du câble AV dans le port AV, puis les 3 autres connecteurs
AV dans votre moniteur.
5.4.4 Il faudra quelques secondes pour que la vidéo en direct apparaisse sur le moniteur.
VI. CHARGEMENT
6.1. Éteignez le DVR, puis branchez le chargeur DC5V dans le DVR d'abord, puis branchez
le chargeur dans une alimentation CA de sortie.
6.2. Il faudra 10 heures pour obtenir une charge complète.
6.3. Le Bleu LED-Charge reste solide pendant le processus de charge.
6.4. Lorsque le DVR est complètement chargé, le Blue LED-Charge s'éteint automatiquement.
Fonction
Résolution de la Photo
Résolution Vidéo
Continuer la prise de vue
Pré-capture
Sur-écriture
Moteur de Vibration
Langue
Auto LCD Off
Veille automatique
Mise hors Tension
Automatique
Fréquence
Standard TV
2.4G Remérite
Par défaut
Choisissez la taille de chaque fichier image.
1080P 30 fps, 720P 60fps, 720P 30fps, 480P 30 fps sélectionnable
Activer ou désactiver le tir continu.
Options d'enregistrement : enregistrement de détection de mouvement
et enregistrement manuel
l'enregistrement en boucle permet au DVR de supprimer
automatiquement ses premiers fichiers vidéo pour enregistrer le
dernier lorsque la carte mémoire est pleine.
Autoriser le DVR à faire vibrer une fois chaque fois que vous
appuyez sur un Bouton.
Langues : OSD anglais, chinois simplifié, chinois traditionnel,
japonais, coréen et russe
Choisissez une durée pour éteindre l'écran LCD automatiquement.
Active ou désactive la fonction de sommeil automatique
Choisissez une durée pour éteindre automatiquement le DVR
lorsque le DVR est en mode veille sans aucune opération.
50/60Hz
NTSC / PAL
Pour coupler la télécommande IR avec le DVR
Réinitialiser tous les paramètres par défaut
Description

I. Aperçu du produit
1. Port USB
2. Prise casque / sortie vidéo
3. Touche d'écran de verrouillage
4. Commutateur de Mode
5. DC5V In Jack
6. Emplacement pour carte SD
7. Bouton Enregistrement Vidéo / Annuler
8. Bouton de la Caméra
9. Bouton Haut
10. Bouton Lecture / Pause / Entrée
11. Bouton Bas
12. Caméra dans le port
II. Qu'y a-t-il dans la boite
1. Poche de DVR
2. Lentille de Caméra
3. Câble USB et Chargeur DC5V
4. DVR de poche
5. Boutons de Bricolage
6. Câble AV
7. Contrôleur IR à distance
8. Adaptateur de carte SD équipé d'une carte Micro SD de 16 GB
9. Écouteurs
III. Installation et retrait de la batterie
3.1. Retirer le ruban adhésif sur les électrodes; Sinon, la batterie ne fonctionnera pas
avec le DVR.
3.2. Pour retirer la batterie, débloquer doucement en commutant le Bouton LOCK sur le côté
droit et appuyer sur la touche en direction de la flèche rouge.
3.3. Pour installer la batterie, fixez la batterie au DVR et appuyez doucement sur la batterie
en direction de la flèche rouge. Enfin, n'oubliez pas de glisser le Bouton LOCK vers la gauche
pour vous assurer qu'il soit correctement verrouillé.
IV. Connexion de l'objectif de la caméra au DVR
4.1. Éteignez le DVR en appuyant sur le Bouton d’Alimentation pendant 2 secondes.
4.2. Pour connecter la caméra, branchez la Micro USB de la caméra dans la caméra dans
le port du DVR.
4.3. Le DVR ne fonctionnera pas à moins qu'il ne soit équipé d'une carte mémoire valide
et connecté à l'objectif de la caméra.
V. Opération
>> Pour rendre la carte mémoire reconnaissable, assurez-vous de formater la carte mémoire
avant d'utiliser pour la première fois. Veuillez noter que le formatage sur l'ordinateur de votre
PC n'est pas recommandé, car il pourrait entraîner l'échec pour l'ordinateur de reconnaître la
carte mémoire.
>> Assurez-vous que le DVR est complètement chargé. Si vous souhaitez que le DVR
fonctionne 24 heures sur 24, utilisez le chargeur DC5V fourni pour brancher le DVR dans une
alimentation secteur.
>> Assurez-vous que le DVR est équipé d'une carte mémoire et connecté correctement à
l'objectif de la caméra.
5.1. UTILISATION DU RÉGLAGE DE LA TÉLÉCOMMANDE ET DE L'ÉDITION
5.1.1. Allumez le DVR en appuyant sur le Bouton d’Alimentation pendant 2 secondes avant
d'utiliser la télécommande.
5.1.2. Appuyez une fois sur le Bouton DVR Pairing pour coupler le DVR avec la télécommande
IR.
5.1.3. Viser la télécommande au DVR pour contrôler le DVR à distance.
5.1.4. Une fois l'appariement terminé, vous êtes libre d'utiliser le DVR à l'aide de la
télécommande.
5.1.5. Voir le tableau ci-dessous pour une explication des paramètres du système.
5.2. ENREGISTREMENT VIDÉO CONTINU
5.2.1. Une fois que le DVR est sous tension, appuyez une fois sur le Bouton Menu, localisez
"Pré-capture" puis choisissez "Manuel".
5.2.2. Appuyez sur le Bouton Annuler pour quitter les réglages du système et appuyez
une fois sur le Bouton Enregistrement Vidéo pour commencer l'enregistrement vidéo en
permanence. Appuyez une fois de plus pour arrêter l'enregistrement vidéo.
5.2.3. Un clip vidéo sera généré et sauvegardé toutes les 10 minutes automatiquement.
5.2.4. Le DVR est capable d'enregistrer une vidéo en continu pendant 3 heures directement
sur une charge complète.
5.2.5. Une carte SD de 16 GB peut stocker jusqu'à 3 heures de vidéos.
[Note]: Format vidéo: AVI
5.3. ENREGISTREMENT VIDEO DE DETECTION DE MOUVEMENT
5.3.1. Une fois que le DVR est sous tension, appuyez une fois sur le Bouton Menu, localisez
"Pré-capture", puis choisissez "Détection de mouvement".
5.3.2. Le DVR est maintenant en mode d'enregistrement de détection de mouvement. Le
DVR commencera à enregistrer une vidéo d'une minute lorsque le mouvement est détecté.
5.3.3. Si aucun mouvement n'est détecté, le DVR sera de nouveau en mode de veille de
détection de mouvement automatiquement jusqu'à ce qu'il détecte de nouveau le mouvement.
5.3.4. Le DVR peut fonctionner jusqu'à 4 heures lorsque aucun mouvement n'est détecté
tout le temps.
5.4. CONNEXION DU DVR AU MONITEUR
5.4.1. Assurez-vous que le DVR est sous tension et que l'objectif de la caméra est bien
inséré dans le DVR.
5.4.2. Appuyez une fois sur le Bouton Menu, localisez «TV Standard» puis sélectionnez
«PAL» ou «NTSC».
5.4.3. Branchez une extrémité du câble AV dans le port AV, puis les 3 autres connecteurs
AV dans votre moniteur.
5.4.4 Il faudra quelques secondes pour que la vidéo en direct apparaisse sur le moniteur.
VI. CHARGEMENT
6.1. Éteignez le DVR, puis branchez le chargeur DC5V dans le DVR d'abord, puis branchez
le chargeur dans une alimentation CA de sortie.
6.2. Il faudra 10 heures pour obtenir une charge complète.
6.3. Le Bleu LED-Charge reste solide pendant le processus de charge.
6.4. Lorsque le DVR est complètement chargé, le Blue LED-Charge s'éteint automatiquement.
Format
Date / Heure
Timbre de date
Numéro d'utilisateur
Formatez la carte mémoire que vous insérez dans le DVR
Définissez la date et l'heure.
Activez / désactivez la date et l'horodatage sur les images
vidéo ou les images.
Modifiez le numéro d'utilisateur ou éteignez le numéro d'utilisateur.
Version Version DVR
Informations sur la mémoire Informations détaillées sur l'espace de la carte mémoire.

I. Aperçu du produit
1. Port USB
2. Prise casque / sortie vidéo
3. Touche d'écran de verrouillage
4. Commutateur de Mode
5. DC5V In Jack
6. Emplacement pour carte SD
7. Bouton Enregistrement Vidéo / Annuler
8. Bouton de la Caméra
9. Bouton Haut
10. Bouton Lecture / Pause / Entrée
11. Bouton Bas
12. Caméra dans le port
II. Qu'y a-t-il dans la boite
1. Poche de DVR
2. Lentille de Caméra
3. Câble USB et Chargeur DC5V
4. DVR de poche
5. Boutons de Bricolage
6. Câble AV
7. Contrôleur IR à distance
8. Adaptateur de carte SD équipé d'une carte Micro SD de 16 GB
9. Écouteurs
III. Installation et retrait de la batterie
3.1. Retirer le ruban adhésif sur les électrodes; Sinon, la batterie ne fonctionnera pas
avec le DVR.
3.2. Pour retirer la batterie, débloquer doucement en commutant le Bouton LOCK sur le côté
droit et appuyer sur la touche en direction de la flèche rouge.
3.3. Pour installer la batterie, fixez la batterie au DVR et appuyez doucement sur la batterie
en direction de la flèche rouge. Enfin, n'oubliez pas de glisser le Bouton LOCK vers la gauche
pour vous assurer qu'il soit correctement verrouillé.
IV. Connexion de l'objectif de la caméra au DVR
4.1. Éteignez le DVR en appuyant sur le Bouton d’Alimentation pendant 2 secondes.
4.2. Pour connecter la caméra, branchez la Micro USB de la caméra dans la caméra dans
le port du DVR.
4.3. Le DVR ne fonctionnera pas à moins qu'il ne soit équipé d'une carte mémoire valide
et connecté à l'objectif de la caméra.
V. Opération
>> Pour rendre la carte mémoire reconnaissable, assurez-vous de formater la carte mémoire
avant d'utiliser pour la première fois. Veuillez noter que le formatage sur l'ordinateur de votre
PC n'est pas recommandé, car il pourrait entraîner l'échec pour l'ordinateur de reconnaître la
carte mémoire.
>> Assurez-vous que le DVR est complètement chargé. Si vous souhaitez que le DVR
fonctionne 24 heures sur 24, utilisez le chargeur DC5V fourni pour brancher le DVR dans une
alimentation secteur.
>> Assurez-vous que le DVR est équipé d'une carte mémoire et connecté correctement à
l'objectif de la caméra.
5.1. UTILISATION DU RÉGLAGE DE LA TÉLÉCOMMANDE ET DE L'ÉDITION
5.1.1. Allumez le DVR en appuyant sur le Bouton d’Alimentation pendant 2 secondes avant
d'utiliser la télécommande.
5.1.2. Appuyez une fois sur le Bouton DVR Pairing pour coupler le DVR avec la télécommande
IR.
5.1.3. Viser la télécommande au DVR pour contrôler le DVR à distance.
5.1.4. Une fois l'appariement terminé, vous êtes libre d'utiliser le DVR à l'aide de la
télécommande.
5.1.5. Voir le tableau ci-dessous pour une explication des paramètres du système.
5.2. ENREGISTREMENT VIDÉO CONTINU
5.2.1. Une fois que le DVR est sous tension, appuyez une fois sur le Bouton Menu, localisez
"Pré-capture" puis choisissez "Manuel".
5.2.2. Appuyez sur le Bouton Annuler pour quitter les réglages du système et appuyez
une fois sur le Bouton Enregistrement Vidéo pour commencer l'enregistrement vidéo en
permanence. Appuyez une fois de plus pour arrêter l'enregistrement vidéo.
5.2.3. Un clip vidéo sera généré et sauvegardé toutes les 10 minutes automatiquement.
5.2.4. Le DVR est capable d'enregistrer une vidéo en continu pendant 3 heures directement
sur une charge complète.
5.2.5. Une carte SD de 16 GB peut stocker jusqu'à 3 heures de vidéos.
[Note]: Format vidéo: AVI
5.3. ENREGISTREMENT VIDEO DE DETECTION DE MOUVEMENT
5.3.1. Une fois que le DVR est sous tension, appuyez une fois sur le Bouton Menu, localisez
"Pré-capture", puis choisissez "Détection de mouvement".
5.3.2. Le DVR est maintenant en mode d'enregistrement de détection de mouvement. Le
DVR commencera à enregistrer une vidéo d'une minute lorsque le mouvement est détecté.
5.3.3. Si aucun mouvement n'est détecté, le DVR sera de nouveau en mode de veille de
détection de mouvement automatiquement jusqu'à ce qu'il détecte de nouveau le mouvement.
5.3.4. Le DVR peut fonctionner jusqu'à 4 heures lorsque aucun mouvement n'est détecté
tout le temps.
5.4. CONNEXION DU DVR AU MONITEUR
5.4.1. Assurez-vous que le DVR est sous tension et que l'objectif de la caméra est bien
inséré dans le DVR.
5.4.2. Appuyez une fois sur le Bouton Menu, localisez «TV Standard» puis sélectionnez
«PAL» ou «NTSC».
5.4.3. Branchez une extrémité du câble AV dans le port AV, puis les 3 autres connecteurs
AV dans votre moniteur.
5.4.4 Il faudra quelques secondes pour que la vidéo en direct apparaisse sur le moniteur.
VI. CHARGEMENT
6.1. Éteignez le DVR, puis branchez le chargeur DC5V dans le DVR d'abord, puis branchez
le chargeur dans une alimentation CA de sortie.
6.2. Il faudra 10 heures pour obtenir une charge complète.
6.3. Le Bleu LED-Charge reste solide pendant le processus de charge.
6.4. Lorsque le DVR est complètement chargé, le Blue LED-Charge s'éteint automatiquement.

DVR-0022C
Guida Utente
I. Panoramica del Prodotto
1. Porta USB
2. Porta Jack/Uscita per Cuffie
3. Pulsante dello Schermo di Blocco
4. Interruttore di Modalità
5. DC5V In Jack
6. Slot per Scheda SD
7. Pulsante di Registrazione/Annullamento Video
8. Pulsante della Fotocamera
9. Pulsante in Su
10. Pulsante Play/Pausa/Invio
11. Pulsante Giù
12. Fotocamera in Porta
II. Cosa c'è nella scatola
1. Sacchetto del DVR
2. Obiettivo della Fotocamera
3. Cavo USB e Caricatore DC5V
4. DVR Portatile
5. Tasti fai da Te
6. Cavo AV
7. Telecomando IR
8. Adattatore di scheda SD Dotato di una Scheda Micro SD da 16 GB
9. Auricolari
III. Installazione e Rimozione Della Batteria
3.1. Rimuovere il nastro adesivo sugli elettrodi; Altrimenti la batteria non funziona con il DVR.
3.2. Per rimuovere la batteria, sbloccare delicatamente commutando l'interruttore LOCK
sul lato destro e spingere la batteria in direzione punta freccia rossa.
3.3. Per installare la batteria, collegare la batteria al DVR e spingere delicatamente la
batteria nella direzione rossa della freccia rossa. Infine, non dimenticare di scorrere
l'interruttore LOCK verso sinistra per assicurarsi che sia bloccato correttamente.
IV. Collegamento dell'OBIETTIVO della Fotocamera al DVR
4.1. Spegnere il DVR premendo il pulsante di alimentazione per 2 secondi.
4.2. Per collegare la fotocamera, collegare l'estremità Micro USB della fotocamera in
Fotocamera nella porta del DVR.
4.3. Il DVR non funziona se non è dotato di una scheda di memoria valida e collegata
all'obiettivo della fotocamera.
V. Funzionamento
>> Per rendere la scheda di memoria riconoscibile, assicuratevi di formattare la scheda
di memoria prima di utilizzare per la prima volta. Si prega di notare che la formattazione
sul computer PC non è raccomandata, in quanto potrebbe causare il guasto del computer
per la riconoscimento della scheda di memoria.
>> Assicurarsi che il DVR sia completamente caricato. Se hai bisogno del DVR di
lavorare 24 ore su 24, utilizza il caricabatterie DC5V incluso per collegare il DVR ad una
presa di corrente alternata.
>> Assicurarsi che il DVR sia dotato di una scheda di memoria e collegata correttamente
alla lente della fotocamera.
5.1. UTILIZZANDO REMOTO CONTROLLER E MODIFICA IMPOSTAZIONI
5.1.1. Accendere il DVR premendo il pulsante di alimentazione per 2 secondi prima di
utilizzare il telecomando.
5.1.2. Premere una volta il pulsante di accoppiamento DVR per accoppiare il DVR con il
telecomando IR.
5.1.3. Puntare il telecomando sul DVR per controllare in remoto il DVR.
5.1.4. Una volta che l'accoppiamento è fatto, è possibile utilizzare il DVR utilizzando il
telecomando.
5.1.5. Vedere la tabella seguente per una spiegazione delle impostazioni di sistema.
5.2. REGISTRAZIONE VIDEO CONTINUA
5.2.1. Dopo che il DVR è acceso, premere una volta il pulsante Menu, individuare "Pre-capture"
e quindi scegliere "Manual".
5.2.2. Premere il pulsante Annulla per uscire dalle impostazioni di sistema e premere una
volta il pulsante di registrazione video per avviare continuamente la registrazione. Premere
ancora una volta per interrompere la registrazione di video.
5.2.3. Viene generato e salvato un video clip ogni 10 minuti automaticamente.
5.2.4. Il DVR è in grado di registrare video continuamente per 3 ore direttamente su una
carica completa.
5.2.5. Una scheda SD da 16 GB è in grado di memorizzare fino a 3 ore di riprese video.
[Nota]: Formato video: AVI
5.3. REGISTRAZIONE VIDEO DI RILEVAMENTO MOVIMENTO
5.3.1. Dopo l'accensione del DVR, premere una volta il pulsante Menu, individuare
"Pre-capture" e quindi scegliere "Motion detect".
5.3.2. Il DVR è ora in modalità di registrazione di rilevazione del movimento. Il DVR inizia
a registrare un video di un minuto quando viene rilevato il movimento.
5.3.3. Se non viene rilevato alcun movimento, il DVR torna automaticamente in modalità
di attesa di rilevazione del movimento fino a quando non rileva il movimento.
5.3.4. Il DVR può funzionare fino a 4 ore quando non viene rilevato alcun movimento per
tutto il tempo.
5.4. COLLEGARE IL DVR AL MONITOR
5.4.1. Assicurarsi che il DVR sia acceso e che l'obiettivo della fotocamera sia inserito
correttamente nel DVR.
5.4.2. Premere una volta il pulsante Menu, individuare "TV Standard" e selezionare "PAL" o
"NTSC".
5.4.3. Collegare un'estremità del cavo AV nella porta AV, quindi gli altri 3 connettori AV nel
monitor.
5.4.4. Ci vorranno alcuni secondi per far apparire il video dal vivo sul monitor.
VI. CARICAMENTO
6.1. Spegnere il DVR e poi collegare direttamente il caricabatterie DC5V al DVR, quindi
collegare il caricabatterie ad un alimentatore CA di uscita.
6.2. Ci vorranno 10 ore per ottenere una carica completa.
6.3. La carica LED blu rimarrà solida durante il processo di ricarica.
6.4. Quando il DVR è completamente caricato, la carica LED blu si spegne automaticamente.
13. LED Rosso-Potere
14. Carica a LED Blu
15. Pulsante Power/Menu/Cancel
16. Stato Rosso della Fotocamera LED
17. LED Blu-Record
18. Batteria di Backup
19. Pulsante di Accoppiamento DVR
20. Pulsante di Registrazione Video
21. Pulsante Play/Pausa/Invio
22. Pulsante Giù
23. Pulsante Della Fotocamera
24. Tasto Menu
25. Pulsante Up

I. Panoramica del Prodotto
1. Porta USB
2. Porta Jack/Uscita per Cuffie
3. Pulsante dello Schermo di Blocco
4. Interruttore di Modalità
5. DC5V In Jack
6. Slot per Scheda SD
7. Pulsante di Registrazione/Annullamento Video
8. Pulsante della Fotocamera
9. Pulsante in Su
10. Pulsante Play/Pausa/Invio
11. Pulsante Giù
12. Fotocamera in Porta
II. Cosa c'è nella scatola
1. Sacchetto del DVR
2. Obiettivo della Fotocamera
3. Cavo USB e Caricatore DC5V
4. DVR Portatile
5. Tasti fai da Te
6. Cavo AV
7. Telecomando IR
8. Adattatore di scheda SD Dotato di una Scheda Micro SD da 16 GB
9. Auricolari
III. Installazione e Rimozione Della Batteria
3.1. Rimuovere il nastro adesivo sugli elettrodi; Altrimenti la batteria non funziona con il DVR.
3.2. Per rimuovere la batteria, sbloccare delicatamente commutando l'interruttore LOCK
sul lato destro e spingere la batteria in direzione punta freccia rossa.
3.3. Per installare la batteria, collegare la batteria al DVR e spingere delicatamente la
batteria nella direzione rossa della freccia rossa. Infine, non dimenticare di scorrere
l'interruttore LOCK verso sinistra per assicurarsi che sia bloccato correttamente.
IV. Collegamento dell'OBIETTIVO della Fotocamera al DVR
4.1. Spegnere il DVR premendo il pulsante di alimentazione per 2 secondi.
4.2. Per collegare la fotocamera, collegare l'estremità Micro USB della fotocamera in
Fotocamera nella porta del DVR.
4.3. Il DVR non funziona se non è dotato di una scheda di memoria valida e collegata
all'obiettivo della fotocamera.
V. Funzionamento
>> Per rendere la scheda di memoria riconoscibile, assicuratevi di formattare la scheda
di memoria prima di utilizzare per la prima volta. Si prega di notare che la formattazione
sul computer PC non è raccomandata, in quanto potrebbe causare il guasto del computer
per la riconoscimento della scheda di memoria.
>> Assicurarsi che il DVR sia completamente caricato. Se hai bisogno del DVR di
lavorare 24 ore su 24, utilizza il caricabatterie DC5V incluso per collegare il DVR ad una
presa di corrente alternata.
>> Assicurarsi che il DVR sia dotato di una scheda di memoria e collegata correttamente
alla lente della fotocamera.
5.1. UTILIZZANDO REMOTO CONTROLLER E MODIFICA IMPOSTAZIONI
5.1.1. Accendere il DVR premendo il pulsante di alimentazione per 2 secondi prima di
utilizzare il telecomando.
5.1.2. Premere una volta il pulsante di accoppiamento DVR per accoppiare il DVR con il
telecomando IR.
5.1.3. Puntare il telecomando sul DVR per controllare in remoto il DVR.
5.1.4. Una volta che l'accoppiamento è fatto, è possibile utilizzare il DVR utilizzando il
telecomando.
5.1.5. Vedere la tabella seguente per una spiegazione delle impostazioni di sistema.
5.2. REGISTRAZIONE VIDEO CONTINUA
5.2.1. Dopo che il DVR è acceso, premere una volta il pulsante Menu, individuare "Pre-capture"
e quindi scegliere "Manual".
5.2.2. Premere il pulsante Annulla per uscire dalle impostazioni di sistema e premere una
volta il pulsante di registrazione video per avviare continuamente la registrazione. Premere
ancora una volta per interrompere la registrazione di video.
5.2.3. Viene generato e salvato un video clip ogni 10 minuti automaticamente.
5.2.4. Il DVR è in grado di registrare video continuamente per 3 ore direttamente su una
carica completa.
5.2.5. Una scheda SD da 16 GB è in grado di memorizzare fino a 3 ore di riprese video.
[Nota]: Formato video: AVI
5.3. REGISTRAZIONE VIDEO DI RILEVAMENTO MOVIMENTO
5.3.1. Dopo l'accensione del DVR, premere una volta il pulsante Menu, individuare
"Pre-capture" e quindi scegliere "Motion detect".
5.3.2. Il DVR è ora in modalità di registrazione di rilevazione del movimento. Il DVR inizia
a registrare un video di un minuto quando viene rilevato il movimento.
5.3.3. Se non viene rilevato alcun movimento, il DVR torna automaticamente in modalità
di attesa di rilevazione del movimento fino a quando non rileva il movimento.
5.3.4. Il DVR può funzionare fino a 4 ore quando non viene rilevato alcun movimento per
tutto il tempo.
5.4. COLLEGARE IL DVR AL MONITOR
5.4.1. Assicurarsi che il DVR sia acceso e che l'obiettivo della fotocamera sia inserito
correttamente nel DVR.
5.4.2. Premere una volta il pulsante Menu, individuare "TV Standard" e selezionare "PAL" o
"NTSC".
5.4.3. Collegare un'estremità del cavo AV nella porta AV, quindi gli altri 3 connettori AV nel
monitor.
5.4.4. Ci vorranno alcuni secondi per far apparire il video dal vivo sul monitor.
VI. CARICAMENTO
6.1. Spegnere il DVR e poi collegare direttamente il caricabatterie DC5V al DVR, quindi
collegare il caricabatterie ad un alimentatore CA di uscita.
6.2. Ci vorranno 10 ore per ottenere una carica completa.
6.3. La carica LED blu rimarrà solida durante il processo di ricarica.
6.4. Quando il DVR è completamente caricato, la carica LED blu si spegne automaticamente.
Table of contents
Languages:
Other Wiseup Digital Camera manuals

Wiseup
Wiseup WIFI22 User manual

Wiseup
Wiseup DVR-0015C-WISEUP User manual

Wiseup
Wiseup GL4000 User manual

Wiseup
Wiseup CUP 100 User manual

Wiseup
Wiseup U14 User manual

Wiseup
Wiseup WIFI04 User manual

Wiseup
Wiseup T182 User manual

Wiseup
Wiseup WBD500 User manual

Wiseup
Wiseup BC185YM-720P User manual

Wiseup
Wiseup W8600 User manual
Popular Digital Camera manuals by other brands

Kogan
Kogan KAS8C4W1TBB user guide

Panasonic
Panasonic DMC-FX37A - Lumix Digital Camera Instrucciones básicas de funcionamiento

Panasonic
Panasonic Lumix DMC-FZ300 Beginner's guide

Trakm8
Trakm8 RoadHawk DVR4000 Setup guide

Olympus
Olympus FE 340 - Digital Camera - Compact Basic Manual

CST
CST Lunavision Operation manual