12 13
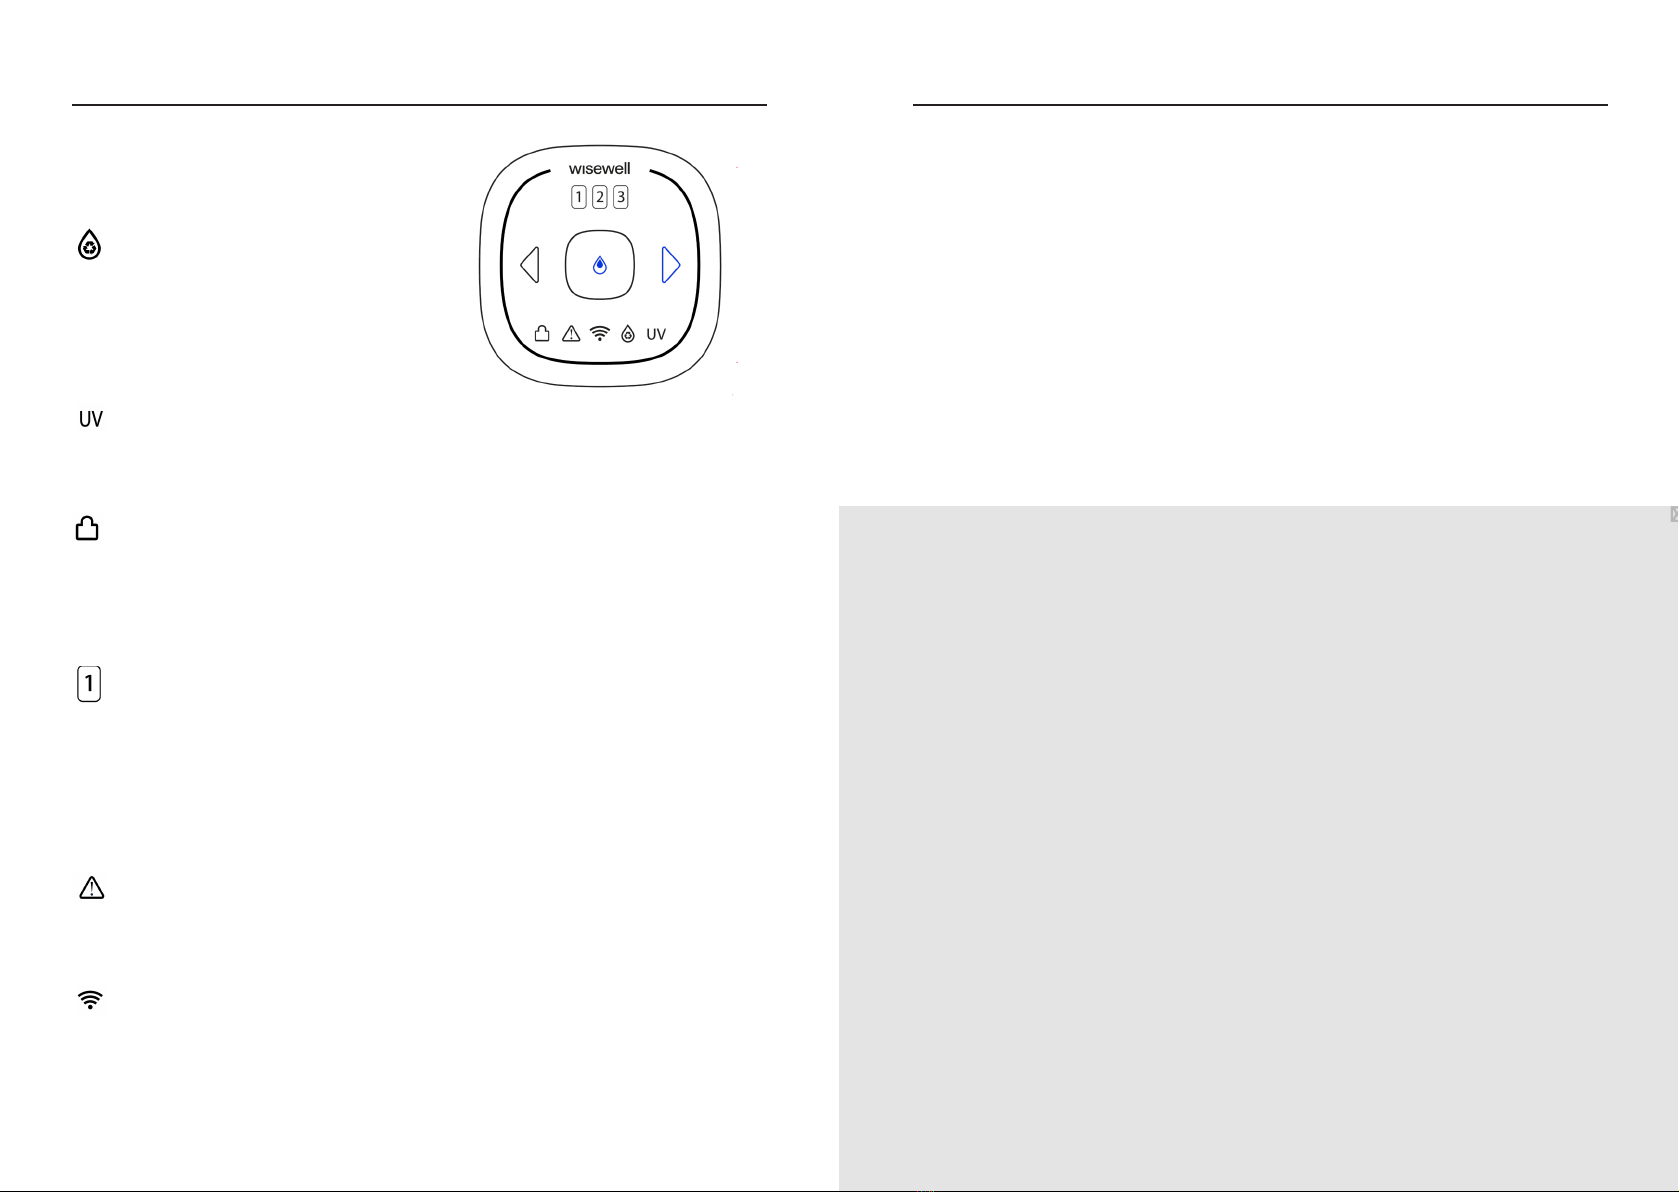
When the ‘UV’ icon appears on the touch control panel, it means that the UV lamp is
activated to kill living organisms (like viruses, bacteria, and parasites). The UV lamp is
activated for 5 minutes every 60 minutes.
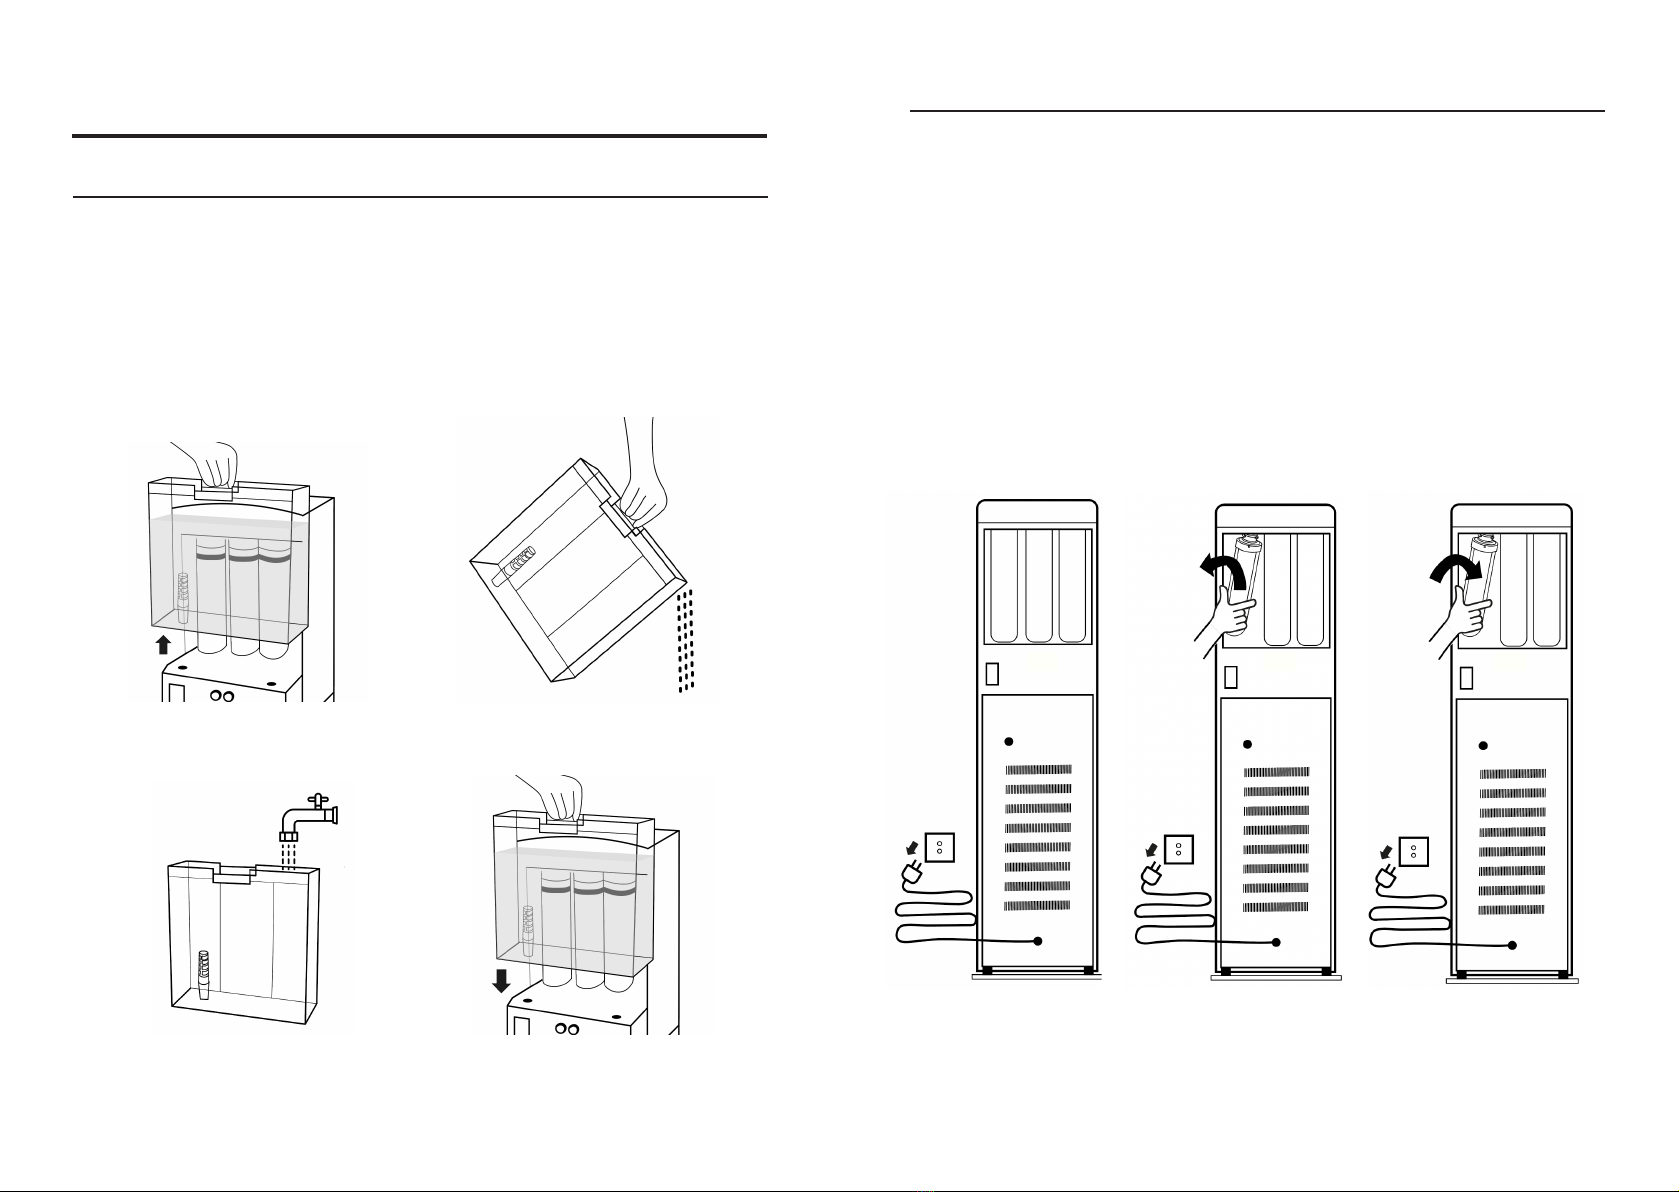
Your Wisewell will automatically inform you when a filter needs to be replaced by
displaying the corresponding filter number on the touch control panel. Please refer to
the Maintenance section in this manual to understand how to change the filters on your
Wisewell.
Replacement filters will be shipped to you automatically with your subscription using
the Wisewell app.
When the ‘Warning’ icon is on, please review the Troubleshooting section in this
manual.
The ‘WiFi’ icon is lit when your Wisewell is connected to your WiFi network. Put your
Wisewell into Connection Mode by pressing and holding the le arrow and ‘Dispense’
button on your Wisewell touch control panel for 3 seconds until the WiFi icon blinks.
When the ‘Lock’ icon is red on the touch control panel, it means that the child lock is
ON for the hot water. To unlock it, press and hold the ‘Dispense’ button for 3 seconds:
Hot water can now be dispensed by pressing the ‘Dispense’ button. The child lock will
automatically be reactivated aer 10 seconds.
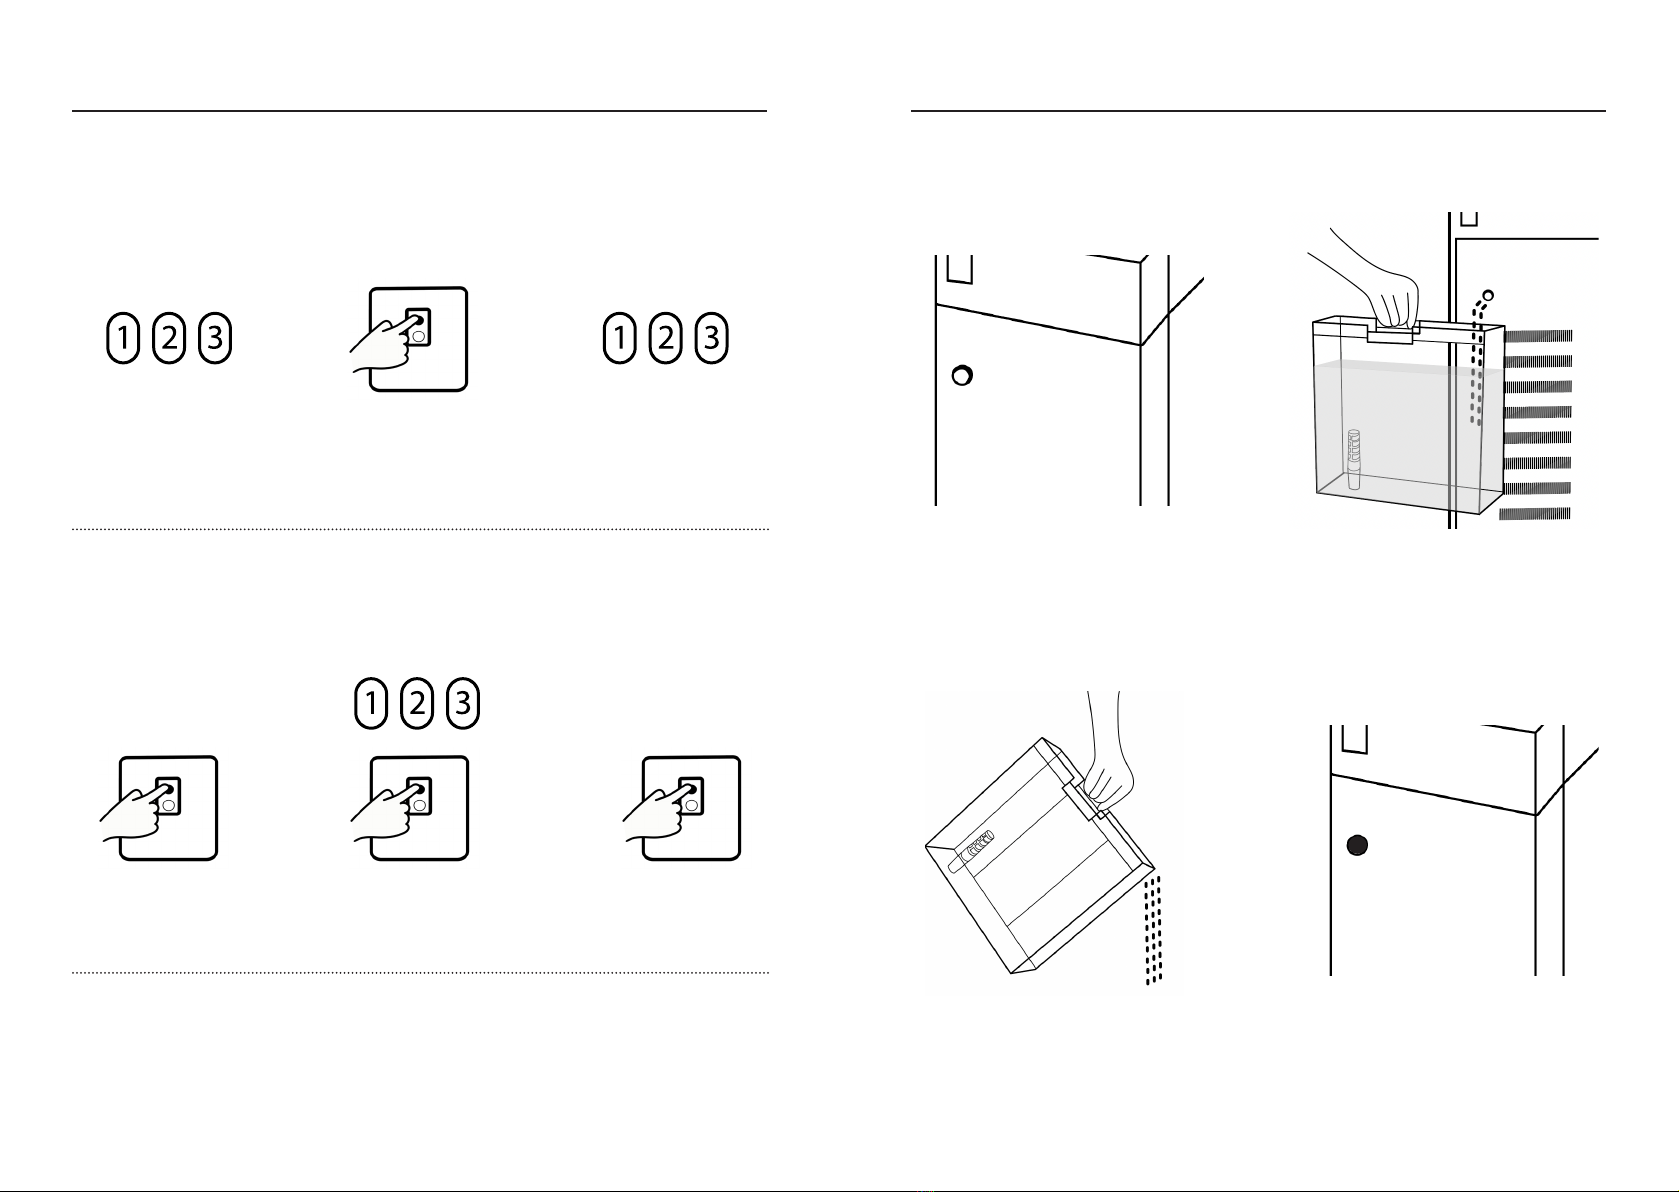
LED Array ON/OFF: The LED array is ON by default when the power is on. To turn o the LED
panel array, press and hold the le and right arrows for 3 seconds.
When the Wisewell’s LED display starts pulsing, it means that the ‘Change Water’ icon has lit
up. Dispose of the residual water and refill the water tank.
When the Wisewell’s LED display starts blinking, it means that it is due for a cleaning. This
should happen approximately every six months, if not sooner. Refer to page 18 for instructions
on how to activate the cleaning cycle.
Drain function: Simultaneously press and hold the ‘Dispense’ button and the right arrow. All
of the water will drain from the spout. Be sure to have the tank (or other receptacle) positioned
under the spout.
Hot water ON/OFF: The hot water is ON by default when the power is on. Press and hold the
le arrow for 3 seconds to turn the hot water o/on.
NOTE: If Wisewell is used at an elevation above 4921 feet/1500 meters, the hot water function
should be turned o to avoid any damage.
Cold Water ON/OFF: The cold water is ON by default when the power is on. Press and hold the
right arrow for 3 seconds to turn the cold water o/on.
To change the amount of water that your Wisewell dispenses with each button tap, head to
the app. On the home screen, tap the “cup size” icon to adjust the cup size slider.
NOTE: If you are unable to dispense cold/hot water aer completing these instructions, you
may have accidentally turned o the cold/hot water. If this occurs, simply press and hold the
right arrow button for three seconds to turn the cooler back on, and le button to turn the
heater back on.
When the ‘Change Water’ icon appears on
the touch control panel (or when the front
LEDs start to pulse), it means it is time
to dispose of the residual water (usually
around 1L) and refill the water tank.