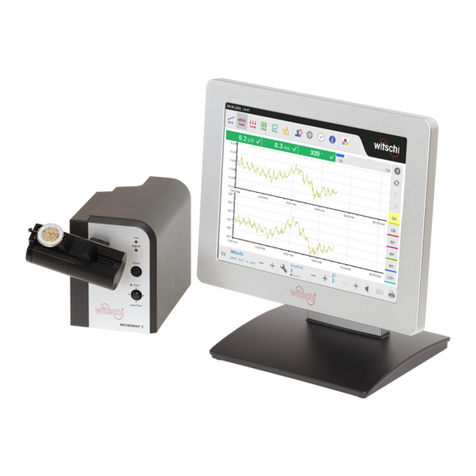
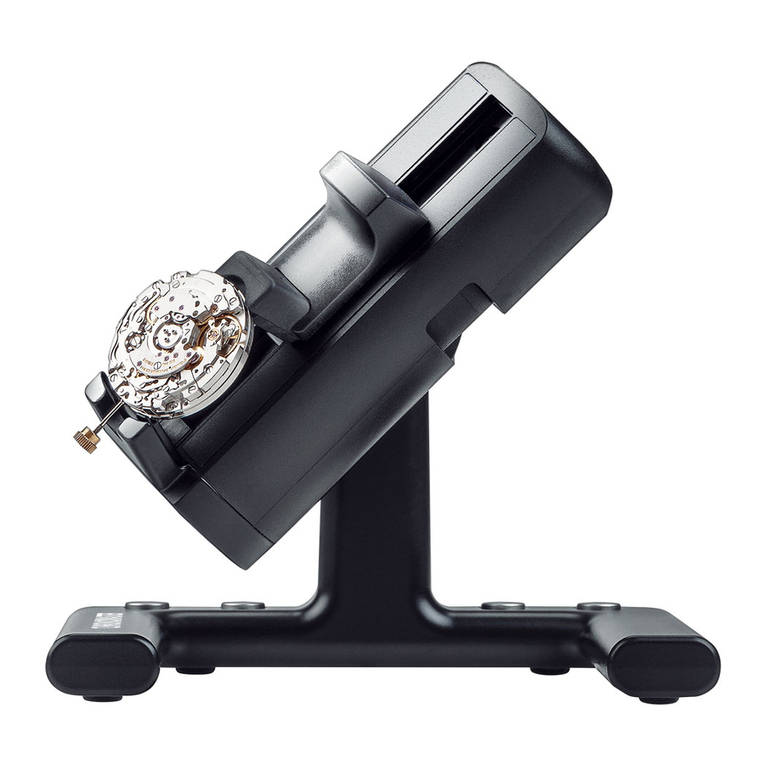
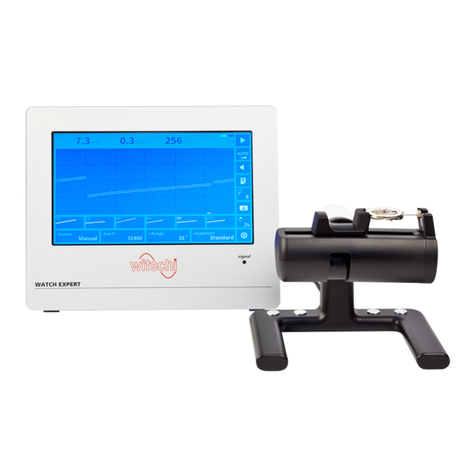
Witschi ChronoMaster User manual

Precision measuring device
ChronoMaster
Operating instructions
Read the instructions prior to performing any task!

Wits-39771-CH, 1, en_GB
Translation of the original operating instructions
© 2017 Witschi Electronic AG
Witschi Electronic Ltd.
Bahnhofstrasse 26
3294 Büren a.A.
Switzerland
Telephone: +41 32 352 05 00
Fax: +41 32 351 32 92
Email: [email protected]
Internet: www.witschi.com
12.04.2018Precision measuring device ChronoMaster2

This manual enables the safe and efficient handling of the Chrono-
Master precision measuring device (hereafter referred to as the
“device” or “ChronoMaster”). The manual is part of the device and
must be kept near the device where it can be accessed by per-
sonnel at all times.
Personnel must have carefully read through and understood this
manual before starting work. The basic prerequisite for safe work is
compliance with all the safety, warning and procedural instructions
specified in this manual.
In addition, the local health and safety regulations and general
safety rules for the area in which the ChronoMaster is used apply.
Illustrations in this manual are for a basic understanding and may
deviate from the actual design.
The content of this manual is protected by copyright. It may be
used within the context of using the ChronoMaster. No other use is
permitted without the written approval of Witschi Electronic AG.
Your point of sale can provide you with technical information.
You can find your nearest point of sale on our website at
http://www.witschi.com/de/firma/vertretungen
We are also always interested in hearing from you about your
experiences in using the device and any information that could
help us improve our products.
Address Witschi Electronic Ltd.
Bahnhofstrasse 26
3294 Büren a.A.
Switzerland
Phone +41 32 352 05 00
Fax +41 32 351 32 92
e-mail [email protected]
Internet www.witschi.com
About this manual
Copyright
Customer Service
Customer Service information
Supplemental directives
12.04.2018 Precision measuring device ChronoMaster 3

Table of contents
1 Product description............................................................ 5
1.1 Overview....................................................................... 5
1.2 Scope of delivery.......................................................... 7
1.3 Software........................................................................ 7
1.4 Modes........................................................................... 8
1.5 Technical data............................................................... 9
2 Safety................................................................................. 11
2.1 Symbols in this manual............................................... 11
2.2 Risk of material damage............................................. 12
2.3 Intended use............................................................... 12
2.4 Owner’s responsibilities.............................................. 13
2.5 Personnel qualifications.............................................. 13
3 Commissioning the ChronoMaster................................. 15
3.1 Unpacking the ChronoMaster..................................... 15
3.2 Requirements for the location..................................... 16
3.3 Installing the software................................................. 17
3.4 Connecting the ChronoMaster.................................... 19
4 Performing a measurement............................................. 20
4.1 Configuring measurement settings............................. 20
4.2 Positioning the watch and starting a measurement
automatically............................................................... 20
4.3 Controlling the measurement using control keys........ 24
4.4 Monitoring and configuring the measurement............ 25
5 Transportation and storage of the ChronoMaster......... 26
5.1 Shutting down the ChronoMaster............................... 26
5.2 Transportation and storage of the ChronoMaster....... 26
6 Maintenance and cleaning of the ChronoMaster........... 28
6.1 Safety during maintenance......................................... 28
6.2 Maintenance schedule................................................ 28
7 Troubleshooting................................................................ 29
7.1 Error messages in the display software...................... 29
7.2 Damage to the ChronoMaster.................................... 29
7.3 Troubleshooting.......................................................... 29
8 ChronoMaster disposal.................................................... 30
9 Index................................................................................... 31
Appendix............................................................................ 34
A Declaration of conformity ............................................... 35
Table of contents
12.04.2018Precision measuring device ChronoMaster4

1 Product description
1.1 Overview
Fig. 1: ChronoMaster
No. Description
1 Pivoting microphone for measuring the watch noise
2 Signal sensor for recording and transmitting the watch noise
n
Ä
Chapter 4.2 “Positioning the watch and starting a measurement automatically” on page 20
3 Clamping jaw made of neoprene for clamping the watch or the clockwork
n
Ä
Chapter 4.2 “Positioning the watch and starting a measurement automatically” on page 20
4 USB cable for connecting the ChronoMaster to the PC or tablet computer
n
Ä
Chapter 3.4 “Connecting the ChronoMaster” on page 19
5 Switching screw for setting the ChronoMaster for right-handers or left-handers
6 Control keys for frequently used functions: selecting the previous program or the next program,
restart and start/stop
n
Ä
Chapter 4.3 “Controlling the measurement using control keys” on page 24
7 LED for visual indication of the watch signal
n
Ä
Chapter 4.2 “Positioning the watch and starting a measurement automatically” on page 20
Product description
Overview
12.04.2018 Precision measuring device ChronoMaster 5

The ChronoMaster is a precision measuring device for measuring
the rate deviation, the amplitude and the beat error of mechanical
watches. The compact microphone has integrated measurement
electronics.
All common beat numbers can be determined automatically. The
manual adjustment for any beat numbers in a range between 3’600
and 72’000 A/H is possible as an alternative.
Watches can be tested in the 6 main testing positions, in 4 vertical
intermediate positions and in 2 special positions. The position is
identified automatically.
Using different measuring modes, watches can be tested with the
following escapements:
nSwiss anchor escapement
nCylinder escapement
nDuplex escapement
nChronometer escapement
nCo-Axial escapement
nAP escapement
Information on the measuring options
Further information on the measuring options is to
be found under
Ä
“Measuring modes” on page 8
and in the corresponding software manual.
Two ChronoMaster software versions are available:
nChronoMaster
nChronoMaster PRO
The “Witschi Token Installer” software can be used to install a
token on the device to extend the device to the PRO version.
Ordering the token
The token is created exactly for the device to be
extended. The token contains the item number and
the serial number of the device.
For further information, see the software manual.
Using what is called a demo token, you can test the PRO version
for a certain time. The demo token has a timestamp and can only
be installed once on the device. If new functions are provided by
the manufacturer, a new demo token can be created, which can be
installed again once.
Measuring options
Versions
Product description
Overview
12.04.2018Precision measuring device ChronoMaster6

A USB cable is used to connect the ChronoMaster to the PC or
tablet computer. The measurements are controlled using the corre-
sponding “Chronoscope Service” display software.
In the “Chronoscope Service” display software, you can choose
between the “Diagram” and “Vario” display modes for both ver-
sions. In addition, the “Trace” , “Sequence” , “Polar” , “Scope 1”
and “Scope 2” display modes are included for the ChronoMaster
PRO version.
Information on controlling the measurements
Further information on controlling the measure-
ments is to be found under
Ä
“Display modes”
on page 9, in
Ä
Chapter 4 “Performing a meas-
urement” on page 20 and in the corresponding
software manual.
1.2 Scope of delivery
The scope of delivery consists of the ChronoMaster and a USB
flash drive with the following contents:
n“Chronoscope Service” display software
nSoftware manual in German, French, English, Spanish and
Italian as PDF file
Information on the display software
Further information on the display software is to be
found in
Ä
Chapter 1.3 “Software” on page 7
and
Ä
Chapter 3.3 “Installing the software”
on page 17 and in the corresponding software
manual.
The scope of delivery also includes:
nThis manual
nCalibration certificate
nWarranty information
nDust cover
1.3 Software
The measurements are controlled using the “Chronoscope
Service” display software. It is provided on the supplied USB flash
drive.
Controlling the measurements
Product description
Software
12.04.2018 Precision measuring device ChronoMaster 7

Information on the display software
Information on installation and operation of the dis-
play software is to be found in
Ä
Chapter 3.3
“Installing the software” on page 17 and in the
corresponding software manual.
1.4 Modes
The ChronoMaster provides various measuring modes that can be
set in accordance with the escapement type of the watch to be
tested.
Measuring
mode
Information
Standard Standard measuring mode for watches with
Swiss anchor escapement.
Rate Measuring mode for the rate measurement only
of watches with cylinder, duplex or chronometer
escapement, in addition to watches with unusual
beat noise.
Special 1 Measuring mode for watches with Co-Axial
escapement.
Special 2 Measuring mode for watches with AP escape-
ment.
Special 3, 5, 7,
8 and 9
not active (reserved)
Determining the escapement type
You can find out the escapement type of the watch
that is to be tested by consulting the watch manu-
facturer.
Information in the software manual
Further information on the measuring modes is to
be found in the corresponding software manual.
Measuring modes
Product description
Modes
12.04.2018Precision measuring device ChronoMaster8

The “Chronoscope Service” display software provides two different
display modes for the ChronoMaster and ChronoMaster PRO ver-
sions:
nContinuous diagram recording
nVario
The following display modes are also available for the Chrono-
Master PRO version:
nTrace
nSequence
nPolar
nScope 1, Scope 2
Information in the software manual
Further information on the display modes is to be
found in the corresponding software manual.
1.5 Technical data
Device Type no.
ChronoMaster 13.3210
nTCXO quartz, high-frequency quartz time base
Stability ± 0.08 s/d
Ageing, 1st year ± 0.03 s/d
Function Measuring range Resolution Precision Notes
Rate deviation ± 999 s/d 1.0 s/d, 0.1 s/d or
0.01 s/d can be
selected
± 0.1 s/d Numerical display in s/d
Amplitude 70° to 360° 1° or 0.1° can be
selected
± 0.4° Numerical display in
degrees
Lift angle adjustable from
10° to 90°, resolution
0.1°
Beat error 9.9 ms 0.1 ms ± 0.1 ms Numerical display in milli-
seconds
Display modes
Configuration
Time base
Measuring capacity
Product description
Technical data
12.04.2018 Precision measuring device ChronoMaster 9

Designation Purpose
USB Connect device for the following functions to PC or tablet computer:
nPower supply
nData transmission
nControlling measurements
Data Value Unit
Width 130 mm
Height 110 mm
Depth 110 mm
Weight 180 g
Processor Quadcore processor i5 or i7
Operating system Windows 7, Windows 8.1 or
Windows 10
Working memory (RAM) at least 4 GB
USB interface 2.0, type A
Display Minimum resolution: 1366 x
768 pixels
Data Value Unit
Temperature range 10 - 50 °C
Relative humidity, maximum 10 - 80 %, non-
con-
densing
Communication interfaces
Dimensions and weight
Recommended requirements for
the PC or tablet computer
Operating conditions
Product description
Technical data
12.04.2018Precision measuring device ChronoMaster10

2 Safety
This section provides an overview of all the important safety
aspects that ensure personal protection and safe and trouble-free
operation of the ChronoMaster. There are additional, task-specific
warnings in the sections on the individual life cycle phases.
2.1 Symbols in this manual
Safety information and warnings are identified by symbols in this
manual. The safety information and warnings are introduced by
signal words that indicate the extent of the hazard.
NOTICE!
This combination of symbol and signal word indi-
cates a potentially hazardous situation that can
entail material damage if not avoided.
ENVIRONMENT!
This combination of symbol and signal word indi-
cates possible hazards to the environment.
This symbol draws your attention to useful tips and
recommendations and to information that helps
ensure efficient and trouble-free operation.
The following labels are used in this manual to draw attention to
instructions, results, lists, references and other elements:
Label Explanation
1., 2., 3. ...
Step-by-step instructions
ðResults of actions
References to sections of this manual and
other applicable documents
Lists without a fixed order
Safety indications and warnings
Tips and recommendations
Additional labels
Safety
Symbols in this manual
12.04.2018 Precision measuring device ChronoMaster 11

2.2 Risk of material damage
NOTICE!
Damage to the USB cable or to the electronics
Damage to the USB cable or to the electronics of
the ChronoMaster could damage the Chrono-
Master itself.
– Only allow Customer Service to perform work
on the ChronoMaster’s electronics (
Ä
“Cus-
tomer Service” on page 3).
– In the event of damage to the USB cable or the
plug, pull the USB plug and arrange for a repair
by Customer Service (
Ä
“Customer Service”
on page 3).
– Keep moisture away from live parts. That can
result in a short-circuit.
– Do not kink or jam USB cables, damage them
on sharp edges or bring them into contact with
heat sources.
– Check the USB cable and plug for damage
every time before using the device.
NOTICE!
Material damage due to opening the housing!
Opening the housing poses a risk of damaging
components inside the ChronoMaster or of dam-
aging the housing itself.
– Never open the housing yourself.
– In the event of malfunctions or problems that
cannot be solved using the operation manual,
contact Customer Service (
Ä
“Customer
Service” on page 3).
2.3 Intended use
The ChronoMaster precision measuring device is intended solely
for measuring mechanical watches to determine the rate deviation,
amplitude and beat errors (repère).
With the aid of the clamping jaws, the ChronoMaster is capable of
testing mechanical wrist watches of all sizes.
Its intended use includes compliance with all the information in this
manual.
Damage to the USB cable or to the
electronics
Material damage due to opening
the housing
Safety
Intended use
12.04.2018Precision measuring device ChronoMaster12

Any use beyond or other than the intended use shall be considered
misuse.
NOTICE!
Material damage due to misuse!
Misuse of the ChronoMaster can result in material
damage.
– Never immerse the device in water or other liq-
uids. Always keep the device away from rain
and wet conditions.
– Never clamp any objects other than watches
on the device.
2.4 Owner’s responsibilities
The device is intended for commercial use. The owner of the
device is subject to the statutory obligations of occupational health
and safety.
In addition to the safety indications and warnings in this manual,
you must comply with the safety, occupational health and safety
and environmental protection requirements that apply to the devi-
ce’s area of application.
The following applies in particular:
nThroughout the entire period that the device is in operation, the
owner shall check that the operating instructions compiled by
the owner comply with the current versions of regulations and
must adapt the instructions as necessary.
nThe owner shall ensure that all persons who handle the device
have read and understood this manual. In addition, the owner
shall train personnel at regular intervals.
nThe owner shall ensure that the service intervals described in
this manual are complied with.
nThe owner shall ensure that the service intervals for the com-
ponents are complied with.
2.5 Personnel qualifications
This manual stipulates the following qualifications for the operator:
Customer Service
Certain work may only be performed by Customer Service. Cus-
tomer Service personnel have been trained extensively for all work
performed on measuring devices.
Work that is the specified task of Customer Service personnel may
not be performed by unauthorised personnel. Contact Customer
Service when this work is due.
Misuse
Owner’s obligations
Safety
Personnel qualifications
12.04.2018 Precision measuring device ChronoMaster 13

Operator
The operator of the device has all the necessary knowledge and
training to handle watches. In addition, the operator has been
instructed by the owner about the tasks entrusted to him or her and
about possible hazards in the event of improper behaviour. The
operator may only perform tasks that go beyond normal operation
where this is provided for in the manual and the owner has specifi-
cally entrusted the operator with such tasks.
Safety
Personnel qualifications
12.04.2018Precision measuring device ChronoMaster14

3 Commissioning the ChronoMaster
3.1 Unpacking the ChronoMaster
The ChronoMaster is delivered by a local logistics company. All the
components included in the scope of delivery are delivered
together in a single package.
Upon receipt of the delivery, check it immediately to ensure that it
is complete and undamaged.
If there is any visible external transport damage, proceed as fol-
lows:
1. Do not accept the delivery.
2. Make a note of the scope of damage on the carrier’s delivery
note.
3. Lodge a complaint.
Claims for damages can only be made within
the applicable claim periods.
Lodge a complaint for any damage as soon as it is
identified. Claims for damages can only be made
within the applicable claim periods.
1. Take the ChronoMaster out of its packaging.
2. Store the original packaging for any later transport or storage
(
Ä
Chapter 5 “Transportation and storage of the Chrono-
Master” on page 26).
Delivery
Transport inspection
Unpacking the ChronoMaster
Commissioning the ChronoMaster
Unpacking the ChronoMaster
12.04.2018 Precision measuring device ChronoMaster 15

3.2 Requirements for the location
NOTICE!
Distortion of measurement results due to
unsuitable location!
There is a risk of the distortion of measurement
results if the following requirements for the location
are not complied with.
– Do not position the device and the test object
in the vicinity of heaters or open windows.
– Do not expose the device and the test object to
direct sunlight.
– Operate the device on a level, horizontal sur-
face.
– Set up the device in a low-noise environment.
– Do no set up the device in the direct proximity
of electromagnetic radiation (e.g. as caused by
mobile telephones).
NOTICE!
Risk of material damage due to unsuitable loca-
tion!
There is a risk of a short-circuit or of damage to the
device electronics if the following requirements for
the location are not complied with.
– Install the USB cable so that it cannot be dam-
aged by external influences.
– Never operate the device in an environment
with a high level of humidity.
Distortion of measurement results
Short-circuit or damage to the elec-
tronics
Commissioning the ChronoMaster
Requirements for the location
12.04.2018Precision measuring device ChronoMaster16

3.3 Installing the software
The “Chronoscope Service” display software is to be found on the
USB flash drive provided (
Ä
Chapter 1.2 “Scope of delivery”
on page 7).
Notes on installation
–The “Chronoscope Service” display software
must be installed on the PC or tablet computer
before the ChronoMaster is connected.
–To install the “Chronoscope Service” display
software, administrator rights are required for
the PC or tablet computer.
–Further information on the software is to be
found in the corresponding software manual.
Personnel: nOperator
1. Connect the USB flash drive to the USB port of the PC or
tablet computer.
2. Open the directory of the USB flash drive on the PC or tablet
computer.
3. Run the cs_setup.exe installation file.
4. Select the installation directory for the software on the PC or
tablet computer (Fig. 3).
Fig. 2: Connecting the USB flash drive
Fig. 3: Selecting the storage location
Commissioning the ChronoMaster
Installing the software
12.04.2018 Precision measuring device ChronoMaster 17

3.4 Connecting the ChronoMaster
Personnel: nOperator
Requirement:
nThe “Chronoscope Service” display software is installed on the
PC or tablet computer.
1. Start the “Chronoscope Service” display software on the PC
or tablet computer.
2. Plug the USB plug of the USB cable (Fig. 6/1) into the USB
port of the PC or tablet computer (Fig. 6/2).
Fig. 6: Connecting the ChronoMaster
ðnThe ChronoMaster is connected to the PC or tablet
computer.
nThe ChronoMaster is identified by the display soft-
ware and executed there (Fig. 7).
Fig. 7: ChronoMaster identified by the display software
Fig. 5: Starting “Chronoscope
Service”
Commissioning the ChronoMaster
Connecting the ChronoMaster
12.04.2018 Precision measuring device ChronoMaster 19

4 Performing a measurement
4.1 Configuring measurement settings
The measurement settings are configured using the “Chronoscope
Service” display software.
The measurement settings are:
nBeat number
nLift angle
nMeasuring mode
nIntegration time
nDisplay mode
Information in the software manual
Information on the measurement settings is to be
found in the corresponding software manual.
Various programs are available with pre-defined measurement set-
tings.
It is also possible for you to create your own programs with fre-
quently used measurement settings.
Information in the software manual
Information on selecting and setting the programs
is to be found in the corresponding software
manual.
4.2 Positioning the watch and starting a measurement automatically
NOTICE!
Distortion of measurement results!
There is a risk of the distortion of measurement
results if the watch or the clockwork is not clamped
correctly.
– Make sure that the watch or the clockwork is
clamped correctly.
Overview
Programs
Distortion of measurement results
Performing a measurement
Positioning the watch and starting a measurement automatically
12.04.2018Precision measuring device ChronoMaster20
Other manuals for ChronoMaster
2
This manual suits for next models
1
Table of contents
Other Witschi Measuring Instrument manuals
Popular Measuring Instrument manuals by other brands

Pitney Bowes
Pitney Bowes DM475 series Operator's guide

Texas Instruments
Texas Instruments MSP-EXPCC430RFx user guide

Emerson
Emerson Daniel 3410 Series Instructions for use, maintenance and installation

Ludlum Measurements
Ludlum Measurements 9-4 user manual

PCB Piezotronics
PCB Piezotronics IMI SENSORS ICP HT602D11 Installation and operating manual

Endress+Hauser
Endress+Hauser RIA16 operating instructions