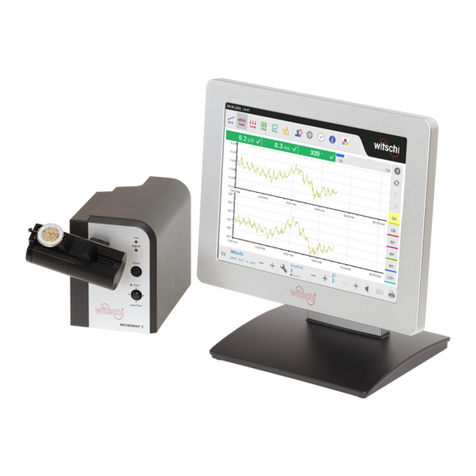
Witschi Watch Expert User manual

Precision measuring device
Watch Expert
Operating instructions
Read the instructions prior to performing any task!

Wits-35286-CH, 3, en_GB
Translation of the original operating instructions
© 2016 Witschi Electronic AG
Witschi Electronic AG
Bahnhofstrasse 26
3294 Büren a.A.
Switzerland
Telephone: +41 32 352 05 00
Fax: +41 32 351 32 92
Email: [email protected]
Internet: www.witschi.com
27.02.2018Precision measuring device Watch ...
2

This manual enables safe and efficient handling of the precision
measuring device (hereafter referred to as the “device” or “Watch
Expert”). The manual is part of the device and must be kept near
the device where it can be accessed by personnel at all times.
Personnel must have carefully read through and understood this
manual before starting work. The basic prerequisite for safe work is
compliance with all the safety, warning and procedural instructions
specified in this manual.
In addition, the local health and safety regulations and general
safety rules for the area in which the Watch Expert is used apply.
Illustrations in this manual are intended to aid basic understanding
and may deviate from the actual design.
The content of this manual is protected by copyright. It may be
used within the context of using the Watch Expert. No other use is
permitted without written approval from Witschi Electronic AG.
Your point of sale can provide you with technical information.
You can find your nearest point of sale on our website at “http://
www.witschi.com/de/firma/vertretungen”
We are also always interested in hearing from you about your
experiences of using the device and any information that could
help us improve our products.
Address Witschi Electronic AG
Bahnhofstrasse 26
3294 Büren a.A.
Switzerland
Phone +41 32 352 05 00
Fax +41 32 351 32 92
e-mail [email protected]
Internet www.witschi.com
About this manual
Copyright
Customer service
Customer service information
27.02.2018 Precision measuring device Watch ... 3

Table of contents
1Product description............................................................ 6
1.1 Watch Expert................................................................ 6
1.2 Microphone................................................................... 9
1.3 User interface............................................................. 10
1.4 Modes......................................................................... 12
1.5 Scope of delivery and accessories............................. 14
1.5.1 Scope of delivery..................................................... 14
1.5.2 Optional accessories............................................... 17
1.6 Technical data............................................................. 18
2 Safety................................................................................. 23
2.1 Symbols in this manual............................................... 23
2.2 Intended use............................................................... 24
2.3 Labels on the device................................................... 25
2.3.1 Labels on the power supply unit.............................. 25
2.3.2 Risk of material damage.......................................... 26
2.4 Owner’s responsibilities.............................................. 27
2.5 Personnel qualifications.............................................. 27
3 Storing the Watch Expert................................................. 29
3.1 Delivery and storage................................................... 29
3.2 Delivery....................................................................... 29
3.3 Transport inspection................................................... 29
3.4 Storage....................................................................... 30
4 Commissioning the Watch Expert................................... 31
4.1 Setting the inclination of the device............................ 31
4.2 Requirements for location........................................... 31
4.3 Connecting the power supply unit............................... 32
4.4 Connecting the microphone........................................ 33
4.5 Connecting the printer................................................ 33
4.6 Switching the Watch Expert on/off.............................. 34
5 Setting measuring parameters........................................ 36
5.1 Setting the beat number............................................. 36
5.2 Setting the lift angle.................................................... 39
5.3 Setting test mode........................................................ 42
5.4 Setting the integration time......................................... 43
5.5 Zooming in and out of the diagram............................. 44
5.6 Changing the display mode........................................ 44
6 Performing a measurement............................................. 45
6.1 Positioning the watch and starting a measurement
automatically............................................................... 45
6.2 Monitoring the measured results................................ 47
6.3 Setting the signal strength.......................................... 49
6.4 Switching the speaker on/off....................................... 50
Table of contents
27.02.2018Precision measuring device Watch ...4

6.5 Pausing and resuming the measuring procedure....... 50
6.6 Printing measured results........................................... 51
6.7 Generating screenshots.............................................. 52
6.8 Restarting a measuring procedure............................. 52
7 Configuring the user interface......................................... 53
7.1 Configuring touch buttons........................................... 55
7.2 Configuring the main display...................................... 56
7.3 Configuring microphone buttons................................. 58
7.4 Configuring a printer................................................... 61
7.5 Configuring system settings........................................ 62
7.6 Displaying device information..................................... 64
8 Servicing the Watch Expert............................................. 65
8.1 Safety during maintenance......................................... 65
8.2 Maintenance schedule................................................ 65
9 Performing firmware update............................................ 66
9.1 Registering Watch Expert........................................... 66
9.2 Updating firmware....................................................... 66
10 Troubleshooting................................................................ 68
10.1 Error messages on the touchscreen......................... 68
10.2 Troubleshooting........................................................ 68
11 Shutting down and disposing of the Watch Expert....... 69
12 Index................................................................................... 71
Appendix............................................................................ 74
A Declaration of conformity ............................................... 75
Table of contents
27.02.2018 Precision measuring device Watch ... 5

1 Product description
1.1 Watch Expert
Fig. 1: Watch Expert
No. Designation Function
1 Touchscreen nDisplays for the numerical test results
nDisplays for the graphical test results
nDisplays for test progress
nNavigating through the menus
nChanging parameters
2[Signal] LED display nLED flashes to the rhythm of the escapement noises.
3 Stand Adjustable stand for the Watch Expert (can be set to 6 incli-
nation angles)
Overview
Product description
Watch Expert
27.02.2018Precision measuring device Watch ...6

The Watch Expert is a precision measuring device for determining
the accuracy of mechanical watches.
The choice of parameters can be adjusted to suit the given require-
ments.
The Watch Expert automatically calculates measured values for
rate deviation, amplitude and beat errors, and displays them
numerically.
With the aid of 4 different test modes, mechanical watches with the
following escapement types can be measured:
nAnchor escapement
nDuplex escapement
nCylinder escapement
nChronometer escapement
nCo-axial escapement
nAP escapement
in addition to watches with unusual beat noise.
The typical beat numbers of all common watches are recognised
automatically by the Watch Expert. Alternatively, the beat number
can be entered manually.
In addition to the “Diagram display mode” , which shows the meas-
urement in the form of a diagram, the Watch Expert also features
the “VARIO display mode” , which shows rate accuracy and ampli-
tude measurements and displays the smallest, largest and
resulting mean values, in each case.
With the aid of the pivoting microphone, a watch can be measured
in 12 different test position.
The switching screw on the rear side of the microphone ensures a
stable handling position for left and right-handed users.
Bluetooth functionality allows the device to be connected to a suit-
able printer so the measured results can be printed out. Bluetooth
functionality is possible using an optional dongle. Otherwise the
connection is via the serial interface.
Description
Product description
Watch Expert
27.02.2018 Precision measuring device Watch ... 7

Fig. 2: Rear
No
.
Designation Function
1 Rating plate Identifying the device
Ä
page 20
2 Microphone socket Connection socket for the microphone
3 Printer port
(RS232)/connec-
tion for calibration
nConnection for the thermal printer
4 Ethernet interface Connection for future applications
5 2x USB connec-
tions
Connections for USB sticks
6 Power supply Connection socket for the power supply
unit
7[I/O] switch Switches the Watch Expert on/off
8 Openings for the
stand
Openings for inserting the stand, in 6
different positions
Connections and interfaces
Product description
Watch Expert
27.02.2018Precision measuring device Watch ...8

1.2 Microphone
Fig. 3: Microphone
1 Pivoting microphone
2 Clamping jaws
3 Switching screw for left/right-handed user
adjustment
4 Programmable keys
The pivoting microphone (Fig. 3/1) provides 12 different test posi-
tions for measuring mechanical watches. The neoprene clamping
jaw (Fig. 3/2) can be adjusted in accordance with the size of the
watch. To ensure a stable hand resting position, the microphone
can be adjusted for left/right-hand users with the aid of the
switching screw (Fig. 3/3). The freely programmable keys (Fig. 3/4)
are used to navigate through the menu. Alternatively, the keys can
be assigned an individual function.
Microphone
Product description
Microphone
27.02.2018 Precision measuring device Watch ... 9

1.3 User interface
The symbols and touch buttons on the software user interface
have the following functions:
Symbol Function
Starting/pausing the measuring procedure.
Deleting the current measured values and restarting the measuring procedure.
Automatic recognition/manual control of the signal strength.
Switching the integrated speaker on/off.
Generating screenshots of the current view, where a USB stick is connected.
Sending the measuring results to a connected printer and printing them out.
1x, 2x, 4x, 8x and 16x enlargement of the diagram.
Adjustment of the integration time.
Opening the settings menu.
Opening the keypad for manual parameter entry.
Quick guide to the user interface
Product description
User interface
27.02.2018Precision measuring device Watch ...10

Touch button Function
Provides 3 different options for setting the beat number:
nAutomatic: The beat number is recognised automatically.
nManual: The beat number (value between 3,600 b/h and 86,400 b/h) can
be entered manually.
nFrequency: The beat number is calculated automatically to obtain a rate
deviation of 0 s/d.
Provides the option of entering the beat time (value between 3,600 b/h and
86,400 b/h) manually.
Provides the option of manually selecting/entering the lift angle (value between
10° and 90°).
Provides 4 different option for setting the test mode:
nStandard: Mode for watches with Swiss anchor escapement. To determine
the amplitude of the watch, the lift angle must be specified.
nRate: Mode for rate measurement of watches with cylinder, duplex or chro-
nometer escapement, in addition to watches with unusual beat noise.
nSpecial 1 (co-axial):: Mode for watches with co-axial escapement.
nSpecial 2 (AP): Mode for watches with AP escapement.
Display element Function
Shows the rate deviation in s/d.
Shows the amplitude in °.
Shows the beat error (repère) in ms. If the zero-crossing is reached
during calibration (fine-tuning) the Δ symbol appears in addition to the
beat error, e.g. Δ 0.9 ms.
Shows the currently-set test position of the watch. The flashing bars indi-
cate that measured results are being received.
Product description
User interface
27.02.2018 Precision measuring device Watch ... 11

Display element Function
Position window for the 6 main test positions. Shows, in diagram display
mode, which test position is currently being measured.
The following 12 test positions (designation of the main test position as
per NIHS 95-10/ISO 3158) are possible:
Selected parameters
The selected parameters are shown in green in the
main display and in the settings menu.
1.4 Modes
The Watch Expert provides 4 test modes that can be set in accord-
ance with the escapement type of the watch to be tested.
Overview of test modes
Product description
Modes
27.02.2018Precision measuring device Watch ...12

Test mode Additional information
Standard Mode for watches with Swiss anchor escapement.
To determine the amplitude of the watch, the lift
angle must be set.
Rate Mode for rate measurement of watches with cyl-
inder, duplex or chronometer escapement, in addi-
tion to watches with unusual beat noise.
Special 1 (co-axial) Mode for watches with co-axial escapement.
Special 2 (AP) Mode for watches with AP escapement.
Determining the escapement type
You can find out the escapement type of the watch
that is to be tested by consulting the watch manu-
facturer.
The Watch Expert provides two different display modes in which
various parameters are measured and displayed.
Appearance Function
Diagram nShows the rate deviation, the beat error and the
amplitude.
nDuring the measuring procedure, the measured
values are displayed as a diagram.
nIt is possible to configure the diagram view.
nThe 6 position windows show the diagram as it
relates to the respective measuring position.
nIf the measuring procedure has stopped, the meas-
ured values and the diagram can be shown in the
large display by tapping the small position windows.
VARIO Visualises the rate stability and amplitude over a longer
period.
During the measuring procedure, the current measured
values, including the mean, are shown over the entire
measuring period, in addition to the minimum and max-
imum rate and amplitude values.
Overview of display modes
Product description
Modes
27.02.2018 Precision measuring device Watch ... 13

1.5 Scope of delivery and accessories
1.5.1 Scope of delivery
Fig. 4: Scope of delivery
No. Designation Function For details, see:
1 Watch Expert
2 Pilot microphone For signal transmission to the Watch Expert
Ä
page 9
3 Power supply unit (12 V
DC, 1.5 A)
Connection to electricity supply
Ä
page 15
4 Dust cover Protects the Watch Expert against build-up of dust
Ä
page 16
5 Stand For supporting the Watch Expert with 6 different
inclination angles.
Ä
page 17
Not shown in Fig. 4 but included in the scope of delivery:
n1x manual
n1x calibration certificate
n1x warranty information
Product description
Scope of delivery and accessories > Scope of delivery
27.02.2018Precision measuring device Watch ...14

Fig. 5: Power supply unit
The power supply unit (Fig. 5) is used to connect the Watch Expert
to the power supply.
Input values n100 – 240 V AC (inde-
pendent of the local mains
voltage)
n50 – 60 Hz
n18 VA
Output values n12 V DC
n1.5 A
Power supply unit
Product description
Scope of delivery and accessories > Scope of delivery
27.02.2018 Precision measuring device Watch ... 15

Fig. 7: Stand
Using the stand (Fig. 7), the Watch Expert can be positioned at 6
different angles.
Ordering contact
To order accessories or spare parts, contact your
point of sale (
Ä
page 3).
You can find your nearest point of sale on our web-
site at “http://www.witschi.com/de/firma/
vertretungen” .
1.5.2 Optional accessories
Item Item number
Thermal printer JB01-SLK-TE25-S
Thermal paper, roll for 740RS232 JB01-MM60-740RS
Bluetooth kit 95.1510
Bluetooth dongle JB15-BT900-US
Bluetooth module JB01-BT Module SLK-TE25
Stand
Printing
Product description
Scope of delivery and accessories > Optional accessories
27.02.2018 Precision measuring device Watch ... 17

Item Item number
Optoelectronic sensor for pendulum timepieces 13.1620
Stand for optoelectronic sensor 13.16.201
Item Item number
Witschi GPS receiver 19.91PK1 (230 V~)
19.91PK2 (120 V~)
1.6 Technical data
Device Type no. Notes
Watch Expert measuring device 11.2710
Pilot microphone signal sensor 13.1310
Portable power supply JA01-GT-41082-1812 Portable power supply, 100 – 240
V AC, 12 V DC, 18 W
Parameters Nominal
value
Range Note
Nominal voltage 230 V AC 100– 240 V
Mains frequency 50 / 60 Hz 45 – 65 Hz
Power consumption in operation 8 W
Standby with screen saver 4 W
Minimum warm-up period for measure-
ment
none
Minimum warm-up period for adjustment 10 min No warm-up period from
standby onwards
Sensor
GPS receiver
Configuration
Power supply
Measuring parameters
Product description
Technical data
27.02.2018Precision measuring device Watch ...18

Function Measuring
range
Resolution Accuracy Notes
Time base in temperature range
10 – 50 ° C
±0.08 s/d TCXO
Time base, 1st year ±0.03 s/d
Measurement of mechanical watches
Accuracy ±999 s/d 0.1 ±0.1 s/d
Beat error (repère) 9.9 ms 0.1 ms ±0.1 ms
Amplitude 70° - 360° 1° ±0.4° If the lift angle is
incorrect, the ampli-
tude value may
exceed 360°.
Designation Purpose Protocol Data rate Notes
USB Parameterisa-
tion, Print
Screen
Print via Blue-
tooth
Ethernet for future applications
Printer / cali-
bration
Calibration PPS 1 pps ±90 ns Witschi CTB /GPS receiver
Printer Sewoo printer
MARTEL
printer
MARTEL 19200/8/none/1 Item no. JB01-SLK-TE25-S
Item no. JB01-740RS232
Data Value Unit
Weight (including pilot microphone
and mains adapter)
1.7 kg
Width 197 mm
Height 164 mm
Depth 130 mm
Data Value Unit
Mains voltage 100 – 240 V AC
Mains frequency 50 – 60 Hz
Power consumption in operation 8 W
Communication interfaces
Dimensions and weight
Mains supply connection values
Product description
Technical data
27.02.2018 Precision measuring device Watch ... 19

Data Value Unit
Voltage 12 V DC
Current consumption, maximum 1.5 A
Power consumption, maximum 18 W
Data Value Unit
Temperature range 10 – 50 °C
Relative humidity, maximum 10 – 80 %, non-
con-
densing
The Watch Expert’s rating plate is located on the rear side of the
device and contains the following information:
nManufacturer
nDevice designation
nType
nSerial number
nYear of manufacture
Power supply unit output values
Operating conditions
Watch Expert rating plate
Fig. 8: Watch Expert rating plate
Product description
Technical data
27.02.2018Precision measuring device Watch ...20
Table of contents
Other Witschi Measuring Instrument manuals