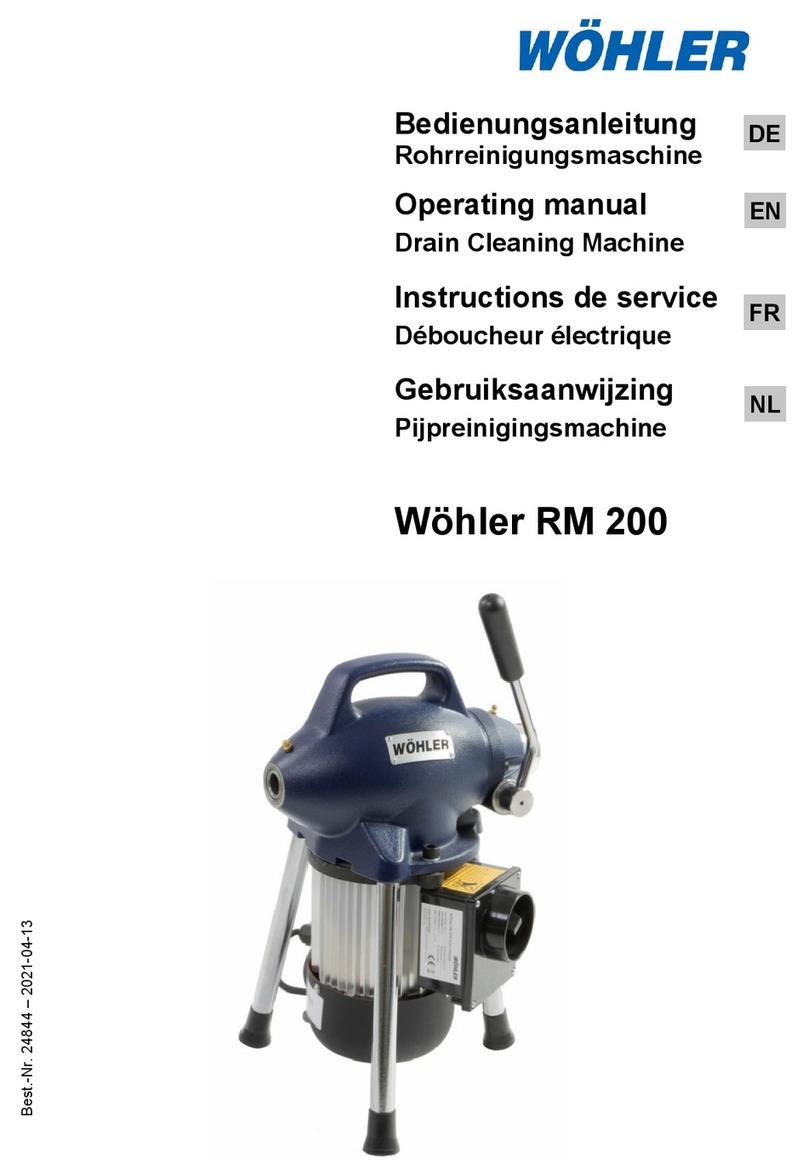
Wohler Viper 42 User manual

Technik nach Maß
Handkehrhaspel 42
mit Schnellwechselstoßkopf
06.01.2010 Art.Nr. 20261
Inhalt
1. Wichtige Hinweise...................................... 2
2. Bedienung der Handkehrhaspel................. 2
3. Stangenwechsel......................................... 3
4. Montage des Schnellwechselstoßkopfes... 3
5. Montage des Haspelfußes (optional).......... 5
6. Garantie und Service.................................. 6

Wöhler Handkehrhaspel 42
2 Hotline: +49 2953 73-211 Fax: +49 2953 73-250
1. Wichtige Hinweise
Vor der Inbetriebnahme der Wöhler Handkehrhaspel 42 ist die Bedienungsan-
leitung aufmerksam zu lesen und in allen Punkten zu befolgen.
Die Handkehrhaspel sollte grundsätzlich nur von fachkundigem Personal für
den vorgesehenen Zweck und innerhalb der spezifizierten Daten eingesetzt
werden. Eine Haftung oder Garantie für mit dem Gerät ermittelte Ergebnisse
oder für bei der Nutzung des Geräts entstandene Schäden ist in jedem Fall
ausgeschlossen.
2. Bedienung der Handkehrhaspel
Die Handkehrhaspel 42 mit der GFK-Stange 7 mm ist das Universalkehrgerät
für das Schornsteinfegerhandwerk. Sie ermöglicht es, Schornsteine von Ein-
und Zweifamilienhäusern von oben wie von unten zu kehren. Das Besondere
der Handkehrhaspel ist die gebrauchsmustergeschützte Freilaufbremse.
Freilaufbremse
Bei einer Freilaufbremse ist die Bremswirkung einseitig:
Rechtslauf leicht (ohne Bremswirkung)
Linkslauf schwer oder leicht (mit Bremswirkung je nach Einstellung)
Dadurch wird die GFK-Stange beim Auf- und Abwickeln kontrolliert und läuft
nicht selbständig aus der Haspel.
Die Freilaufbremse wird mit der Sterngriffschraube eingestellt. In der Regel
reicht eine Einstellung. Ein ständiges Verstellen der Bremse ist nicht notwen-
dig.
Wird die Einstellschraube im Uhrzeigersinn geschraubt, erhöht sich die
Bremswirkung (Stange läuft nicht aus dem Korb). Wenn die Schraube entge-
gengesetzt gedreht wird, verringert sich die Bremswirkung und die Stange
lässt sich leichter aus dem Korb ziehen.
Beim Hereinschieben der Stange sollte darauf geachtet werden, dass sie sich
gleichmäßig über die Breite des Haspelkorbes aufwickelt. Durch einseitiges
Aufwickeln kann die GFK-Stange unter Umständen aus dem Haspelkorb
springen.
Achtung:
Das kegelförmige Innenteil hat eine selbsthemmende Bremswirkung. Deshalb
1. Wichtige Hinweise

Wöhler Handkehrhaspel 42
e-Mail: mgkg@woehler.de http://mgkg.woehler.de 3
DEUTSCH
muss nach einer längeren Ruhezeit diese Bremskraft durch das Drehen des
Korbes gelöst werden.
3. Stangenwechsel
Beim Stangenwechsel wird die alte GFK-Stange komplett abgewickelt und
aus der Hülse am Haspelkorb herausgezogen.
Die Ersatzstange wird in umgekehrter Reihenfolge aufgewickelt.
Es ist darauf zu achten, dass das Stangenende sicher in der Hülse sitzt.
Bitte beachten Sie:
Die GFK-Stange kann in der Handkehrhaspel bei großer Hitze (mehr als
80 °C) brechen. Daher darf die Handkehrhaspel im Sommer nicht lange Zeit
im Auto gelassen werden. Schutz vor hohen Temperaturen bietet einfaches
Abdecken der Haspel, z.B. mit einer Decke.
4. Montage des Schnellwechselstoßkopfes
1
5
4
3
2
3. Stangenwechsel

Wöhler Handkehrhaspel 42
4 Hotline: +49 2953 73-211 Fax: +49 2953 73-250
Aufsetzen des Stoßkopfes
· Das Innengewinde M10 des Stangenendstücks (1) muss einwandfrei und
sichtbar sein.
· Stecken Sie den Kegelring (2) mit der Konusfläche nach unten auf.
· Setzen Sie auf das Stoßkopfoberteil (3) einen Stern (4) und schieben
Sie das Stoßkopfoberteil nun mit Stern auf das Stangenendstück. Das
Klemmblech im Inneren des Kopfes verriegelt den Schnellwechselstoß-
kopf.
Abziehen des Stoßkopfes
· Fassen Sie mit Daumen und Zeigefinger in die Vertiefung (5) des Stoß-
kopfoberteils und ziehen Sie das Klemmblech zurück.
· Das Oberteil kann nun abgenommen werden.
4. Montage des Stoßwechselkopfes

Wöhler Handkehrhaspel 42
e-Mail: mgkg@woehler.de http://mgkg.woehler.de 5
DEUTSCH
5. Montage des Haspelfußes (optional)
Um einen sicheren Stand der Haspel während des Kehrens zu gewährleisten,
kann zusätzlich zur Handkehrhaspel ein Haspelfuß aus Edelstahl erworben
werden (Best. Nr. 7823 J).
Zur Montage des Haspelfußes die
Auflagefläche des Haspelfußes
unter die Befestigungsfläche an
der Koppelhalterung der Wöhler
Handkehrhaspel schieben.
Zur Befestigung den schwarzen
Knebel durch eine Vierteldrehung
aufrecht stellen.
Wird die Haspel ständig mit Has-
pelfuß genutzt, empfiehlt es sich,
diesen mit drei Schrauben in den
dafür vorgesehenen Bohrungen zu
befestigen.
Mit dem Fuß lässt sich der Haspel-
fuß während der Arbeit fixieren, so
dass ein sicherer Stand der Wöhler
Handkehrhaspel garantiert ist.
Der Haspelfuß kann für einen
bequemen Transport eingeklappt
werden.
5. Montage des Haspelfußes

Wöhler Handkehrhaspel 42
6 Hotline: +49 2953 73-211 Fax: +49 2953 73-250
6. Garantie und Service
6.1 Garantie
Jede Wöhler Handkehrhaspel 42 wird in allen Funktionen geprüft und ver-
lässt unser Werk erst nach einer ausführlichen Qualitätskontrolle. Bei sach-
gemäßem Gebrauch beträgt die Garantiezeit auf die Haspel 12 Monate ab
Verkaufsdatum. Ausgenommen von dieser Garantie ist die GFK-Stange, da
es sich um ein Verschleißteil handelt. Die Kosten für den Transport und die
Verpackung des Geräts im Reparaturfall werden von dieser Garantie nicht ab-
gedeckt. Diese Garantie erlischt, wenn Reparaturen und Abänderungen von
dritter, nicht autorisierter Stelle an dem Gerät vorgenommen wurden.
6.2 Service
Der SERVICE wird bei uns nicht nur in der Garantiezeit groß geschrieben. Wir
sind selbstverständlich für Sie da:
- Sofortige Servicearbeiten erfolgen, wenn Sie mit dem Gerät zu uns nach
Bad Wünnenberg kommen, unmittelbar im Haus.
- Sie schicken uns das Gerät zu, bekommen es innerhalb von durchschnittlich
nur 5 Tagen repariert und anschließend durch unseren Paketdienst zurück.
- Sofortige Hilfe erhalten Sie durch unsere Techniker am Telefon.
- Die Anschriften aller Wöhler Verkaufs- und Servicestellen im In- und Ausland
finden Sie auf den letzten beiden Seiten dieser Bedienungsanleitung.
6. Garantie und Service

The Measure of Technology
Viper 42
with quick-change push-head adapter
1. Important information......................8
2. Operation of the viper......................8
3. Changing the rod9
4. Mounting the quick-change
push-head adapter ........................9
5. Mounting the Viper Stand (option) 11
6. Guarantee and Service.................. 12

Wöhler Viper 42
8 Hotline: +49 2953 73-211 Fax: +49 2953 73-250
1. Important information
Carefully study and observe all items of these operating instructions before
commissioning the unit.
In principle, the Wöhler Viper 42 should only be used by skilled personnel for
its intended purpose and within the specified range of data. Any liability or
warranty for results established or for defects caused when using the unit is
excluded by all means.
2. Operation of the viper
The viper 42 with 7 mm GRP rod is designed for professional chimney
sweeping. It permits to sweep chimneys of one- and two-family houses either
from above or below. The design-protected freewheeling clutch is a conveni-
ent feature of the viper.
Freewheeeling clutch
The viper is provided with a freewheeling clutch in which the braking action is
applied only on one side:
Easy running to the right (no braking action)
Hard or easy running to the left (braking action depends on the adjust-
ment)
This way, the GRP rod is controlled during winding/unwinding and cannot run
out of the viper.
The freewheeling clutch is adjusted with the star grip screw. Usually, only one
setting is sufficient, i. e. it is not necessary to change the clutch setting.
If you turn the adjusting screw clockwise, the braking action will increase (the
rod will not run out of the basket). If you turn it to the other direction, the bra-
king action will decrease and you can easily pull the rod out of the basket.
When pushing in the rod, make sure that it winds up smoothly over the entire
width of the basket. If the GRP rod winds up on one side only, it may jump
out of the basket.
Caution:
The conical interior section is designed in such a way that it brakes automati-
cally. For this reason you must release the braking force if the viper was not
used for some time. Release the force by turning the basket. .
1. Important information

Wöhler Viper 42
e-Mail: mgkg@woehler.com http://mgkg.woehler.com 9
ENGLISH
3. Changing the rod
For changing the rod, you first have to unwind the old GRP rod completely.
After that, pull it out of the basket sleeve.
Install the new rod by reversing the above steps.
Make sure that the rod end is reliably locked in place in the sleeve.
Note:
The GRP rod inside the viper may break when exposed to high temperatures
(more than 80 °C). In summer, do not leave the viper inside the car over lon-
ger periods of time. You can protect the viper against high temperatures by
simply covering it, e.g. with a blanket.
4. Mounting the quick-change push-head adapter
1
5
4
3
2
3. Changing the rod

Wöhler Viper 42
10 Hotline: +49 2953 73-211 Fax: +49 2953 73-250
Attaching the quick-change push-head adapter
· The M10 female thread of the rod-end piece (1) must be visible and in
perfect condition.
· Attach the cone ring (2) with the cone area pointing downwards.
· Place a star (4) on the top section of the push-head adapter (3). Then push
the top section, with the star being attached, onto the end piece of the
rod. The clamping plate in the adapter locks the push-head adapter into
place.
Removing the push-head adapter
· Grasp the recess (5) at the top of the push-head adapter with your thumb
and index finger and withdraw the clamping plate.
· You can now remove the top section.
4. Mounting the quick-change push-head adapter

Wöhler Viper 42
e-Mail: mgkg@woehler.com http://mgkg.woehler.com 11
ENGLISH
5. Mounting the Viper Stand (option)
For a secure stand when sweeping, a viper stand made out of stainless steel
can be acquired. (Art. n° 7823 J).
For the assembly of the Viper
Stand push the bearing surface of
the stand under the seat area of
the Wöhler Viper.
Fix the Viper Stand by turning the
black screw to an upright position.
If you constantly use the viper with
the stand, we recomend to con-
nect the viper and the stand with
three screws, using the correspon-
dant bore holes.
For a secure stand, fix the Vi-
per Stand with your foot when
sweeping.
The Viper Stand is retractable for
the transportö.
5. Mounting the Viper Stand

Wöhler Viper 42
12 Hotline: +49 2953 73-211 Fax: +49 2953 73-250
6. Guarantee and Service
6.1 Guarantee
In the case of proper usage, the guarantee period for the Wöhler Viper 42
amounts to 12 months from the date of sale. Excluded here is the rod, becau-
se this is consumable material.
The cost for the transportation and the packing of the device in the case of
repair are not covered by this guarantee.
6.2 Service
We attach great importance to SERVICE. Therefore, of course, we are readily
available to assist you after the guarantee period ends.
· Immediate help is provided by our technical staff over the telephone.
· You will find the directions of all Wöhler Service-Sites at the last two pages
of the manual.
6. Guarantee and Service

Des techniques sur mesure
Enrouleur pour tiges 42
à boulet de lestage à changement rapide
1. Consignes importantes ...................................................14
2. Utilisation de l’enrouleur pour tige de ramonage .............14
3. Changement de la tige flexible.........................................15
4. Montage du boulet de lestage à changement rapide ......15
5. Montage du support de l‘enrouleur (Option)....................17
6. Garantie et service après-vente .......................................18

Wöhler Enrouleur pour tiges 42
14 Hotline: +49 2953 73-211 Fax: +49 2953 73-250
1. Consignes importantes
Avant la mise en service, il est absolument nécessaire de lire attentivement
les instructions de service et de les suivre en tout point.
Par principe, l’enrouleur pour tige 42 ne devrait être utilisé que par un person-
nel compétent, conformément à l’usage prévu et dans les limites des carac-
téristiques spécifiées. Toute garantie ou responsabilité est exclue - dans tous
les cas - aussi bien pour les résultats déterminés à l’aide l’appareil que pour
les dommages survenus lors de l’utilisation de l’appareil.
2. Utilisation de l’enrouleur pour tige de ramonage
L’enrouleur pour tige 42, équipé d’une tige en matière plastique renforcée de
fibres de verre de 7mm de diamètre, est un outil polyvalent pour les entrepri-
ses de ramonage. Il permet de ramoner les cheminées de maisons pour une
ou deux familles, aussi bien par le haut que par le bas. Le système de frein à
roue libre protégé par un brevet est la particularité de cet enrouleur pour tige
de ramonage.
Frein à roue libre
Un frein à roue libre n’exerce une action de freinage que d’un côté:
Roulement aisé à droite (sans effet de freinage)
Roulement à gauche difficile ou aisé (avec effet de freinage, selon le
réglage)
Ainsi le contrôle de la tige flexible reste assuré pendant les opérations
d‘enroulement et de déroulement : la tige ne sort pas d’elle-même de
l’enrouleur.
Le réglage du frein à roue libre est effectué à partir de la vis à poignée étoile.
En général, un réglage suffit. Il n’est pas nécessaire de régler constamment le
frein.
Si la vis de réglage est tournée dans le sens des aiguilles d’une montre, l’effet
de freinage est accentué (la tige ne sort pas du panier). Si l’on tourne la vis
dans le sens contraire, l’effet de freinage diminue et la tige se laisse sortir du
panier plus facilement.
En rentrant la tige, on veillera à ce que celle-ci soit enroulée régulièrement
dans le panier de l’enrouleur. Si la tige flexible n’est enroulée que d’un côté,
elle risque, dans certains cas, de sauter du panier de l’enrouleur.
1. Consignes importantes

Wöhler Enrouleur pour tiges 42
e-Mail: mgkg@woehler.com http://mgkg.woehler.com 15
FRANÇAIS
Attention:
La partie intérieure de forme conique a un effet de freinage automatique.
C’est pourquoi il est nécessaire de desserrer ce freinage en tournant le panier
après un temps de repos prolongé.
3. Changement de la tige flexible
Pour remplacer la tige en matière plastique renforcée de fibres de verre, on
dévidera tout d’abord l’ancienne tige et on la retirera de la douille placée dans
le panier de l’enrouleur.
La tige de rechange sera enroulée en suivant l’ordre inverse des opérations.
On veillera à ce que le bout de la tige soit fixé correctement dans la douille.
Veuillez tenir compte de ce que :
La tige flexible peut casser dans l’enrouleur à main si elle est soumise à une
chaleur excessive (plus de 80°C). C’est pourquoi, en été, on évitera de laisser
longtemps l’enrouleur à main dans une voiture. Pour protéger l’enrouleur des
températures élevées, il suffira de le recouvrir d’une couverture, par exemple.
4 . Montage du boulet de lestage à changement rapide
1
5
4
3
2
3. Changement de la tigre flexible

Wöhler Enrouleur pour tiges 42
16 Hotline: +49 2953 73-211 Fax: +49 2953 73-250
Mise en place du boulet de lestage
· Le filet intérieur M10 de l’extrémité de la tige (1) doit être visible et en bon
état.
· Placez l’anneau conique (2) de sorte à ce que la base du cône soit orien-
tée vers le bas.
· Placez une brosse (4) sur la partie supérieure du boulet de lestage (3)
puis poussez la partie supérieure du boulet de lestage munie de la brosse
dans l’extrémité de la tige. La tôle de serrage placée à l’intérieur de la tête
verrouille le boulet de lestage à changement rapide.
Retirer le boulet de lestage
· Appuyez à l’aide du pouce et de l’index dans le creux (5) placé dans la
partie supérieure de la tête du boulet de lestage et enlevez la tôle de ser-
rage.
· Il est maintenant possible de retirer la partie supérieure.
5. Montage du boulet

Wöhler Enrouleur pour tiges 42
e-Mail: mgkg@woehler.com http://mgkg.woehler.com 17
FRANÇAIS
5. Montage du support de l‘enrouleur (Option)
Pour garantir une position sûre pendant le travail, on un support de
l‘enrouleur d‘acier fin peut être acheté comme accesoire (art. n° 7823 J).
Pour mettre en place le support
de l‘enrouleur, pousser le surface
d‘appui du support de l‘enrouleur
sous la surface de fixage de
l‘enrouleur.
Tourner l‘hélice noire jusqu‘á une
position debout.
Si vous utilisez l‘enrouleur toujours
avec le support, nous recomen-
dons de le fixer au enrouleur avec
trois hélices.
Pendant le travail, le support peut
être fixé avec la pie pour garantir
une position sûre.
Pendant le transport, le support
peut être plié.
5. Montage du support de l‘enrouleur

Wöhler Enrouleur pour tiges 42
18 Hotline: +49 2953 73-211 Fax: +49 2953 73-250
6. Garantie et service après-vente
6.1 Garantie
En cas d’utilisation correcte, la garantie couvrant l’enrouleur pour tige de
ramonage 42 est de 12 mois à compter de la date de vente. Les tigres GFK
(pièces d’usure) ne sont pas couvertes par cette garantie.
S’il faut réparer l’appareil encore sous garantie, les frais de transport et
d’emballage de l’appareil ne sont pas couverts par cette dernière.
6.2 Service après-vente
Pour nous, le SERVICE APRÈS-VENTE est une préoccupation prioritaire, rai-
son pour laquelle nous demeurons à votre service aussi au-delà de la période
de garantie.
· Vous nous envoyez l’appareil, nous le réparons et vous le renvoyons sous
forme de colis postal.
· Nos techniciens peuvent vous fournir une aide immédiate par téléphone.
· Vous trouvez les adresses des lieus après-vente a la fin de ce manuel .
6. Garantie et service après-vente

Tecnica a misura
Aspo 42
con testata di sostituzione rapida
1. Informazioni importanti....................................... 20
2. Impiego dell‘aspo............................................... 20
3. Sostituzione dell’asta ......................................... 21
4. Montaggio della testata di sostituzione rapida .. 21
5. Garanzia ed assistenza ..................................... 22

Wöhler Miniaspo 42
20 Tel: 0471 402422 Fax: 0471 406099
1. Informazioni importanti
Prima di ogni messa in esercizio leggere attentamente le istruzioni per l’uso e
osservarle in tutti i punti.
In via di principio il Wöhler Aspo 42 va usato per lo scopo previsto solo da
personale esperto e in conformità ai dati specificati. Si esclude qualsiasi re-
sponsabilità o garanzia per i risultati rilevati con l’apparecchiatura o per danni
risultanti dall’uso dell’apparecchiatura stessa.
2. Impiego dell‘aspo
L’aspo 42 con asta GFK da 7 mm è lo strumento universale di pulizia per
l’attività dello spazzacamino. Esso permette di pulire le canne fumarie di case
unifamiliari e di case bifamiliari sia dall’alto che dal basso. La caratteristica
speciale dell’aspo è il freno della ruota libera protetto come modello di utilità
Freno della ruota libera
Con il freno della ruota libera l’azione frenante è unilaterale:
Rotazione destrorsa leggera (senza azione frenante)
Rotazione sinistrorsa dura o leggera (con azione frenante a seconda
dell’impostazione)
In tal modo, durante l’avvolgimento e lo svolgimento, l’asta GFK viene cont-
rollata e non si svolge autonomamente dall’aspo.
Il freno della ruota libera viene regolato con la vite a manopola a crociera.
Normalmente è sufficiente effettuare una sola regolazione. Non è necessario
regolare sempre nuovamente il freno.
Avvitando la vite di regolazione in senso orario, l’azione frenante aumenta
(l’asta non scorre dal cestello). Girando la vite in senso antiorario, l’azione
frenante diminuisce rendendo più facile l’estrazione dell’asta dal cestello.
Nell’inserire l’asta occorre far attenzione che la stessa si avvolga in modo
equo per tutta la larghezza del cestello dell’aspo. Con l’avvolgimento effettua-
to su un solo lato, l’asta GFK rischia eventualmente di saltare fuori dal cestel-
lo dell’aspo.
Attenzione:
Il pezzo interno conico presenta un’azione autobloccante. Dopo un periodo
d’inattività relativamente lungo occorre quindi sbloccare questa forza frenante
girando il cestello.
1. Informazioni importanti
Table of contents
Languages:
Other Wohler Pipe Cleaner manuals