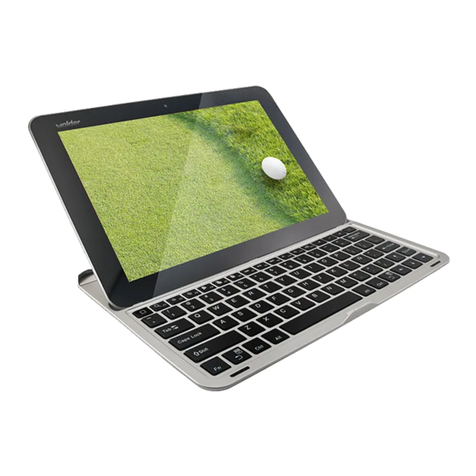
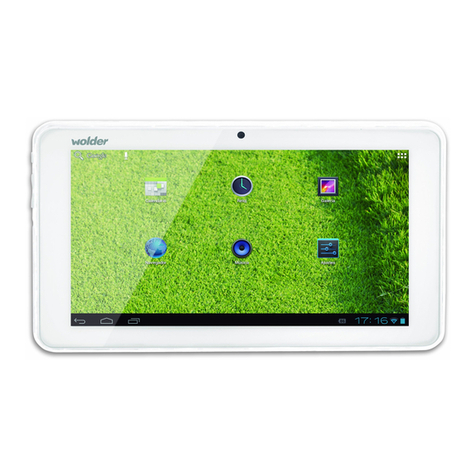
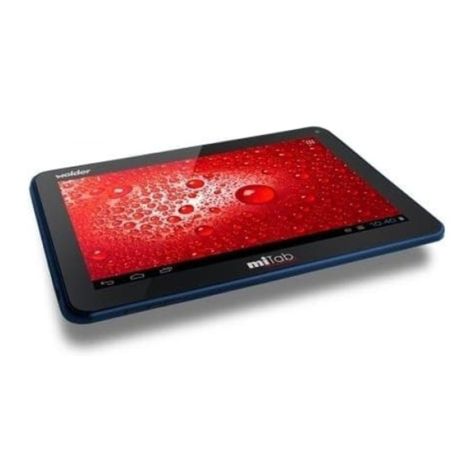
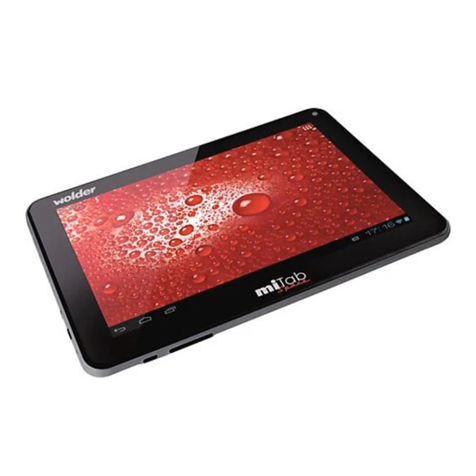
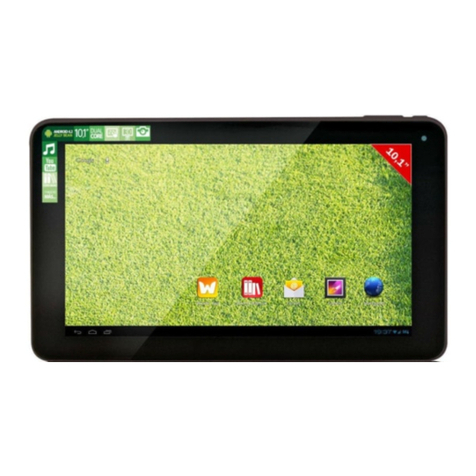
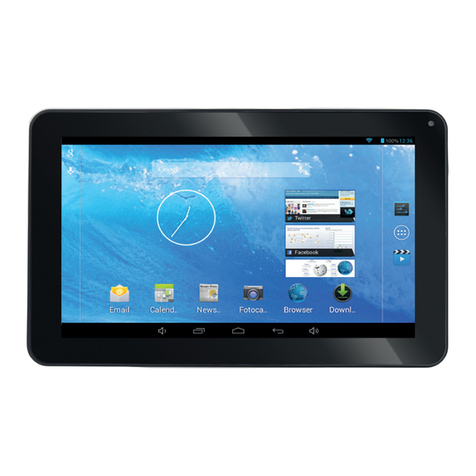
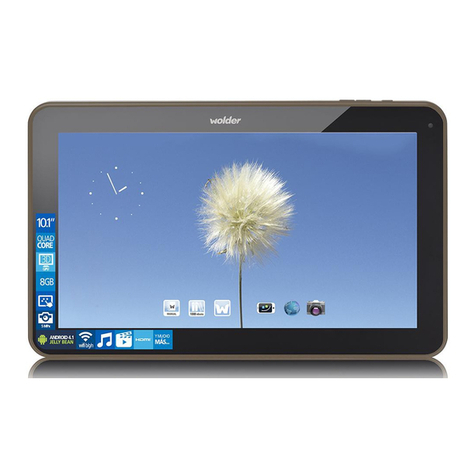
Wolder miTab DIAMOND User manual


Características
Navegapor Internet
Visita tuspáginas favoritas
Consultatucorreoelectrónico
Mantenteencontactocontusamigosy
familiares
Disfruta de los vídeos de YouTube™
Accedealacomunidadde
vídeoscompartidosmás
populardelmundo
Leetuslibrosfavoritos
Descargamilesdelibros
Descubremilesdeaplicacionespara
Android™:juegos,aplicacionesymucho
másconlatiendaAndroid(necesitarás
tenerinstaladalaaplicacióncliente)
ConéctateaInternetsincables
ConexiónWi-Fi802.11b/g/n
SalidaHDMI™paraconectarconel
televisor
Disfrútalocómodamentedesdetusalón
Disfrutadelalibreríamultimediaen
cualquierlugar
Esteequipoportátilescompatibleconlos
formatosdemúsica,vídeoyfotografía
máspopulares
LectordetarjetasdememoriamicroSD
Aumentalacapacidaddealmacenamiento
(hasta32GB)
Cámaraintegrada
Cámarafrontalycámaratraserapara
unamayorcomodidaddeuso
Detecciónautomáticadeorientación
Leecomomásteguste:lapantallase
ajustaautomáticamente
SerequiereuncableHDMIopcional(TipoAa
TipoC).
Lareproduccióndevídeoa1080pHDrequiere
queelarchivodevídeoestécodificadoa
1080p.Lacalidaddelosflujosdevídeoen
streamingseveráafectadaporlafuente,así
comoporlacalidadylascondicionesdetu
conexiónaInternet.
1

PUERTODETARJETATFPUERTOUSBHDMI
TOMADECORRIENTEDE9V
5
Esquemadelaunidad
2 1 4. USB OTG
Conecta la unidad a un dispositivo USB o a un
ordenador para transferir datos (música, vídeos,
fotos, archivos...).
5.Ranura de tarjeta TF
Inserta aquí las tarjetas de memoria externa
microSD.
3
4 6. Puerto USB
Conexión con un dispositivo USB
6
7
8 7. HDMI
9 Conexión con un televisor u otras pantallas.
1. VOL-/VOL+
Pulsaparabajarelvolumen.Pulsa
parasubirelvolumen.
2. INICIO
Volveralainterfazdeinicio.
3. Auriculares
Conexióndesalidadeaudiopara
auriculares
8. TOMA DE CORRIENTE DE 9V
Cargue la tableta con el adaptador de
alimentación que se incluye.
9. ENCENDIDO
Pulse para encender la unidad, o para encender o
apagar la pantalla.
Mantenga presionado para acceder al menú de
apagado
2

Iniciorápido
Encendido y apagado de la
t a bl e t a
P a r a e n c e n d e r l a t a b l e t a :
Mantén pulsado el botón de encendido
hasta que se ilumine la pantalla. Espera
hasta que aparezca la pantalla de inicio, tras
lo cual la tableta estará lista para su uso.
P a r a a p a g a r l a t a b l e t a :
1. Mantén presionado el botón de
encendidohastaqueaparezcael
menú de opciones del
dispositivo.
2. P u l s a O K e n l a p a n t a l l a p a r a a p a g a r l a t a b l e t a .
Encendido y apagado de la
p a nt a l l a ( m o d o d e e s p e r a)
Cuandolatabletaestáencendida,puedes
apagarlapantallaparaahorrarbatería.
Sólotienesquepulsarunavezelbotónde
encendidoparaapagarlapantalla.Pulsa
denuevoelbotóndeencendidopara
volveraencenderlapantalla.
P a r a a h o r r a r b a t e r í a , s e p u e d e c o n f i g u r a r l a
p a n t a l l a p a r a q u e s e a p a g u e a u t o m á t i c a m e n t e c u a n d o
l a t a b l e t a n o s e e s t é u s a n d o ( e n t r e 1 5 s e g u n d o s
y30minutos).
Estaopcióndeapagadodepantallase
encuentraenelmenúPantalla.
3

Iniciorápido
Desbloquearlapantalla
Cuandolapantallaseapague,tendrás
quedesbloquearlacuandolavuelvasa
encender.P a r a e l l o , a r r a s t r a e l i c o n o d e b l o q u e o
p o r l a p a n t a l l a h a c i a e l i c o n o d e d e s b l o q u e o .
Acercadelas
aplicaciones
P a r a a b r i r u n a a p l i c a c i ó n , t o c a e l i c o n o d e l a a p l i c a c i ó n
d e s d e l a p a n t a l l a d e i n i c i o o e n e l m e n ú d e a p l i c a c i o n e s ,
d o n d e p u e d e s t o c a r e l i c o n o p a r a c o l o c a r l o e n l a
p a n t a l l a d e i n i c i o y a c c e d e r a l a a p l i c a c i ó n .
Pantalladeaplicaciones:
Lapantallaquesemuestramásarriba
sóloseincluyeamodoinformativo.Nos
reservamoselderechoamodificarymejorar
lalistafinaldeaplicacionesdisponiblesdela
tableta.
4

Acercadelas
aplicaciones
Aplicacionespreinstaladas
Paratucomodidad,algunas
aplicacionesvienenyainstaladasenla
tableta.
Entreestasaplicacionesfiguran:
Navegar porInternet.
Realizasencillas
operacionesmatemáticas.
H a z f o t o s o v í d e o s c o n l a c á m a r a
f r o n t a l .
Consultatucorreoelectrónico.
Reproducemúsica.
AccedealmenúdeConfiguración
paraajustarlasopcionesdela
tableta.
Aplicaciones
preinstaladas
Instalacióndeaplicaciones
T a m b i é n p u e d e s d e s c a r g a r e i n s t a l a r a p l i c a c i o n e s
d e s d e e l d i s p o s i t i v o a t r a v é s a p p c e n t e r , d e l
n a v e g a d o r o d e o t r o t i p o d e f u e n t e s .
5

Conexiónconunaredinalámbrica
Enlabarradenotificacionesaparecen
iconosqueindicanelestadodelaconexión
inalámbricadeldispositivo.
Notificacióndedisponibilidaddeuna
redinalámbricaabierta.
Conectadoaunaredinalámbrica
(elnúmeroderayasdelaseñalindica
lapotenciadelaseñal).
[sinicono]Nohayredesinalámbricasal
alcancedeldispositivoolaconexión
inalámbricaestádesconectada.
1. Enciendeelreceptordeconexiones
inalámbricas en caso de que no esté encendido.
P a r a e n c e n d e r l a c o n e x i ó n i n a l á m b r i c a :
a.Accedealapantalladeiniciopulsandoel
botóndeinicio.b.Abreelmenúde
Configuración:arrastrahaciaarribaelicono
hastalapantalladeinicioparaaccederal
lanzador,ydespuéstocaeliconode
Configuración.
c.Abreelmenúdeconexiones
inalámbricasydered:Deslizaelicono
hastalaposiciónON.
Cuandoseenciendalaconexión
inalámbrica,latabletabuscaráymostrará
unalistadelasredesinalámbricas
disponibles.
Siencuentraunaredalaqueyatehas
conectadopreviamente,latabletase
conectaráaella.Sinovesturedenlalista,
puedesforzaralatabletaparaquebusque
redesdenuevo.P a r a b u s c a r r e d e s d i s p o n i b l e s , t o c a
e l b o t ó n d e M e n ú y d e s p u é s t o c a " B u s c a r " .
6

2. Seleccionalaredinalámbricaalaque
quieresconectarte:enelmismomenúde
configuraciónderedesinalámbricas,
seleccionaunadelasredesdelalista.
Silaredestáabierta,latabletamostraráun
mensajeparaconfirmarsideseasconectartea
esared.P u l s a " C o n e c t a r " p a r a c o n f i r m a r l a a c c i ó n .
Silaredestáprotegida(apareceindicadoconun
iconoenformadecandado),latabletatepedirá
queintroduzcasunacontraseñauotrotipode
credenciales.Seleccionaelcuadrodeintroducción
decontraseñaderedinalámbricaparaque
aparezcaeltecladovirtualeintroducela
contraseñamedianteeseteclado.P u l s a " C o n e c t a r "
p a r a c o n f i r m a r l a a c c i ó n .
Unavezestablecidalaconexiónconesared
inalámbrica,enlabarradenotificacionesque
apareceenlaparteinferiordelapantallase
mostraráuniconodeseñalderedinalámbrica.
P a r a o b t e n e r m á s i n f o r m a c i ó n s o b r e c ó m o a ñ a d i r
u n a r e d i n a l á m b r i c a c u a n d o n o s e e n c u e n t r a a l a l c a n c e o
c u a n d o e l r o u t e r e s t á c o n f i g u r a d o p a r a o c u l t a r e l n o m b r e
d e l a r e d ( S S I D ) , o s o b r e c ó m o c o n f i g u r a r l a s o p c i o n e s
a v a n z a d a s d e W i -F i , consultaelmanual.
Conexionesopcionales
Conexiónconunordenador
Conexióndelatabletaaunordenadorpara
transferirarchivos.
1.Conectalatabletaaunordenador.
ConelcableUSBincluido:Conectalaclavija
pequeñadelcableenlaranuradeUSB2.0
dealtavelocidaddelatableta.Conectala
clavijagrandedelcableenunpuertoUSB
2.0dealtavelocidaddelordenador.
2.Cuandolatabletaestáconectada,
deslizahaciaarribaeliconodeUSBque
apareceenlapantallayluegotocaelicono
deconexiónporUSB.
7

3.Activaelmododealmacenamiento.
T o c a e l b o t ó n d e " A c t i v a r e l m o d o d e a l m a c e n a m i e n t o
U S B ”p a r a a c t i v a r e l a l m a c e n a m i e n t o i n t e g r a d o d e l a
t a b l e t a . Cuandoyaestétodoactivado,
puedescopiararchivosdelordenadoren
latabletayviceversa.
C o n e x i ó n d e l a t a b l e t a a l t e l e v i s o r :
1. Conectalaclavijapequeñadelcable
HDMIalconectorminiHDMIdelatableta.
2. Conectalaclavijagrandedelcable
HDMIalpuertoHDMIdeltelevisor.
3. Enciende el televisor y selecciona la entrada
HDMIalaqueestáconectadalatableta.
Sinecesitasayudaparaconfigurarla
entradadeimagendetutelevisor,consulta
ladocumentaciónproporcionadaporel
fabricantedeltelevisor.Sinopasaelsonido
delatabletaaltelevisor,esposibleque
tengasqueconfigurarlosajustesdesonido
delaconexiónHDMI
8

Especificaciones
Procesador
ROCKCHIPS dual-core Cortex
A9a
1,5GHz
RAM
1G DDR3
Almacenamiento
Memoriaflashintegradade16Gb;
ranuradetarjetamicroSD
(máx.32Gb)
Pantalla
TFTde9,7pulgadasLCD
(1024x768), Pantallatáctilcapacitiva
Conexióninalámbrica
IEEE 802.11 b/g/n
Bluetooth
V4.0
Salidadevídeo
MiniHDMI,tipoC(compatiblecon
1080p y 720p)
Salidadeaudio
Auricularesconclavijade3,5mm
Interfazde
conexiónconPC
USB 2.0 dealtavelocidad
Características
Adicionales
Micrófonointegrado
Cámarafrontal(0,3megapíxeles),
cámaratrasera(2megapíxeles)
Altavozde2x1W
Sistema
Operativo
Android™ 4.0
Alimentación
Bateríarecargabledepolímerode
litio.Adaptador(DC 9V,2A)
9

DECLARACION DE CONFORMIDAD
GLOBALWOLDERGROUPS.L.,Polígono Industrial de Barros nº 29, 39408 Barros,
Cantabria. España, declara, que este Producto, modelo Mitab Diamond, cumple con lo
dispuesto en la Directiva 99/05/CE sobre Equipos de Terminales de Radio y
Telecomunicaciones (R&TTE), y de la Directiva 2004/108/CEE de Compatibilidad
Electromagnética cumpliendo con las normas armonizadas.
Santander, Agosto de 2012
Juanjo Colas
Dtor. General
10

Features
Browse the Web.
Visit your favorite websites
Checkyoure-mail
Keep in touch withfriends and family
Watch YouTube™videos
Browse the world’s most popular
video-sharing community
Read your favorite books
Download thousands of books .
Discover thousandsof apps for Android™
Games, applications,and more with
marketplace(need for customerinstalled)
Connect tothe Internet wirelessly
High-speedWi-Fi 802.11 b/g/n networking
HDMI™output to your TV ™
Enjoy in the comfort of your living room
Enjoy your medialibrary anywhere
Portable powerhouse playspopular music,
video,and photo formats
microSD memory card reader
Increase your storage capacity (upto 32 GB
supported)
Built-in camera
Convenient front-facing camera andrear
camera
Automatic orientation detection
Readany way you want; the display adjusts
automatically!
Requires optional HDMI cable
(Type A-to-Type C). 1080p HD video playback
requires a video file encoded at 1080p.
Streaming video quality will be affected by the
source,and the quality and condition of your
networkconnection.
11

TF C A R D USB HOST HDMI DC IN 9V
5
Unit at a Glance
2 1 4.USB OTG
Connect to a USB device or a computer to transfer
data (e.g. music, videos,photos, files).
5. TF card slot
Load external microSD memory cards here.
3
4 6.USB HOST
Connect to a USB device
6
7
8 7. HDMI
9 Connect to a TV or other displays.
1. VOL-/VOL+
Pressto decrease the volume level.
Pressto increase the volume level.
2. HOME
backtohome interface.
3. Headphone
Audio output connection for headphones
8. DC IN 9V
Charge and power the tablet with the
included power Adapter.
9. POWER
Press to turn the unit on,
or to turn the screen on and off.
Press and hold to access the Power Off menu
12

Getting Started
Turning the Tablet on or off
To turnthetablet on:
Press and hold the Power key until the LCD
screen turns on. Wait untilthe Home screen
appears;thetablet is now ready for use.
To turnthetablet off:
1.Pressand hold the Power key untilthe
Device Options menuappears.
2. Touch ok the screen to turn off the tablet.
Turning the Screen On or
off (Standby)
When thetablet is on, youcanturn off the
screen to conserve battery power. Simply
press the Power key once toturn thescreen
off. Pressthe Powerkey again toturn the
screen backon.
To conserve battery power, the screen
can be set to turn off automatically whenthe
tabletis not in use (between15 second
and 30minutes).
This Screen timeoutoption can be found in the
Display menu.
13

Getting Started
Unlocking the Screen
When thescreenturns off, you will have to
unlockthe screen,when youturn it backon.
To unlockthe screen, drag the lockicon
acrossthescreentowards the unlockicon.
About Applications
To open an application, touchtheapplication
icon onthehome screen or in the Launcher
where you can tap the icon right up on the
home screen to get in..
Launcher screen:
The screen shownabove isfor illustrative
purposesonly.Reservestherighttomodify
and improve the final list of applications
available onthetablet.
14

About Applications
Preinstalled Applications
Someapplicationshave been installed on
your tablet for your convenience.
Theseapplicationsinclude:
Browse the web.
Performsimple mathematical
operations.
Take pictures or videos with the
frontfacing camera.
Checkyoure-mail.
Play music
Access the Settings menu toadjust the
tablet’s options.
Preinstalled Applications
Installing Applications
You can also download an install additional
applications from the device’s applications
marketplace, the webbrowser, or other
sources.
15

Connect to a Wi-Fi network
The Notification bar displays icons that
indicate your tablet’s Wi-Fi status.
Notification that an open
Wi-Fi networkis inrange.
Connected to a Wi-Fi network
(wavesindicate connectionstrength).
[no icon] Thereare no Wi-Fi networksin range,
or the Wi-Fi radio is off.
1. Turn on the Wi-Fi radio if itis not already on.
To turnon Wi-Fi:
a.Go to the Homescreen: Press the Home key.
b.Open the Settingsmenu: tap the icon right
up on the home screen to get into the launcher,
then touch Settings icon.
c.Open the Wireless & networks menu: Slide
the icon to ON status.
When Wi-Fi is on, the tablet willlookfor and
display a list of available Wi-Fi networks.
If a networkthatyouhave connected to
previously isfound,thetablet will connect to it.
If youdon’t see your networkin the list, you
can force the tablet to re-scan. To scan for
networks,tap the Menukey, and then touch
Scan.
16

2. Select anavailable Wi-Fi networkto
connectto: In the same Wi-Fi settings menu
above,touch a networkin the list.
If the networkis open,thetablet will prompt
youto confirm connection to the network.
Touch Connecttoconfirm.
If the networkis secured (as indicated by a Lock
icon),thetablet will prompt youto enter a
password orother credentials.Touch the
Wireless password box toshow the on-screen
keyboardand then use it to enter the password.
Touch Connecttoconfirm.
When youhave successfully connected to a
Wi-Fi network, the Notificationsbar at the the
low ofthescreenwill show a Wi-Fi signal
indicator.
To learn about how to add a Wi-Fi network
whenit is not in range or when the router is set
to obscure the networkname(SSID); orto
configure advanced Wi-Fi options, please
refer tothemanual.
Optional Connections
Connecting to a Computer
Connect the tablet to a computer to transfer
files.
1.Connect your tablet to the computer.
With the includedUSBcable: Plug the small
end of the cable intotheUSB 2.0 high speed
connector of the tablet. Plug the large endof
the cable into anavailable USB 2.0highspeed
port on the computer.
2.When yourtablet is connected, slide up the
USB icon right down on the screen and then
touch icon USB connected.
17

3.Mount the storage.
Touch button Turn on USB storage to mount
the tablet’s built-in storage. When it is
mounted, you cancopy files toor fromyour
tablet.
To connect the tablet to the TV:
1. Plug the small end of the HDMI cable into
the mini HDMI connector on the tablet.
2. Plug the large endof the HDMI cable into
the HDMI port on the TV.
3. Turn on the TV, andset its display mode to
the HDMI port that the tablet is connected to.
If you need help setting the display mode
of the TV, please refer tothedocumentation
provided by the TV manufacturer. If thereis no
sound fromthe tablet on your TV, you may
need to set the HDMI switch soundsettings.
18

Specifications
Processor
ROCKCHIPS 1.5GHz dual-cove Cortex
A9
RAM
1G DDR3
Storage
16GBflash built-in;
microSD card slot
(max.32GB supported)
Display
9.7” TFT LCD(1024x768),
Capactive touch screen
Wi-Fi Networking
IEEE 802.11 b/g/n
Bluetooth
V4.0
Video Output
MiniHDMI,type C(1080p and
720p supported)
Audio Output
3.5mm headphone
PC Interface
USB 2.0 high speed
Additional
Features
Built-in microphone
Front facing camera(0.3MP) ,
rear camera(2MP)
2x1Wspeaker
Operating
System
Android™ 4.0
Power
Rechargeable Li-poly battery
power
Adapter(DC 9V,2A)
19
Table of contents
Languages:
Other Wolder Tablet manuals

Wolder
Wolder miBuk ilusion User manual

Wolder
Wolder miTab Epsilon User manual

Wolder
Wolder miTab Broadway User manual

Wolder
Wolder miTab line User manual

Wolder
Wolder miTab BROOKLYN User manual

Wolder
Wolder miTabMINT User manual

Wolder
Wolder miTab Evolution W1 User manual

Wolder
Wolder miTabGoCar User manual

Wolder
Wolder miTab SKY User manual

Wolder
Wolder miTab Space User manual