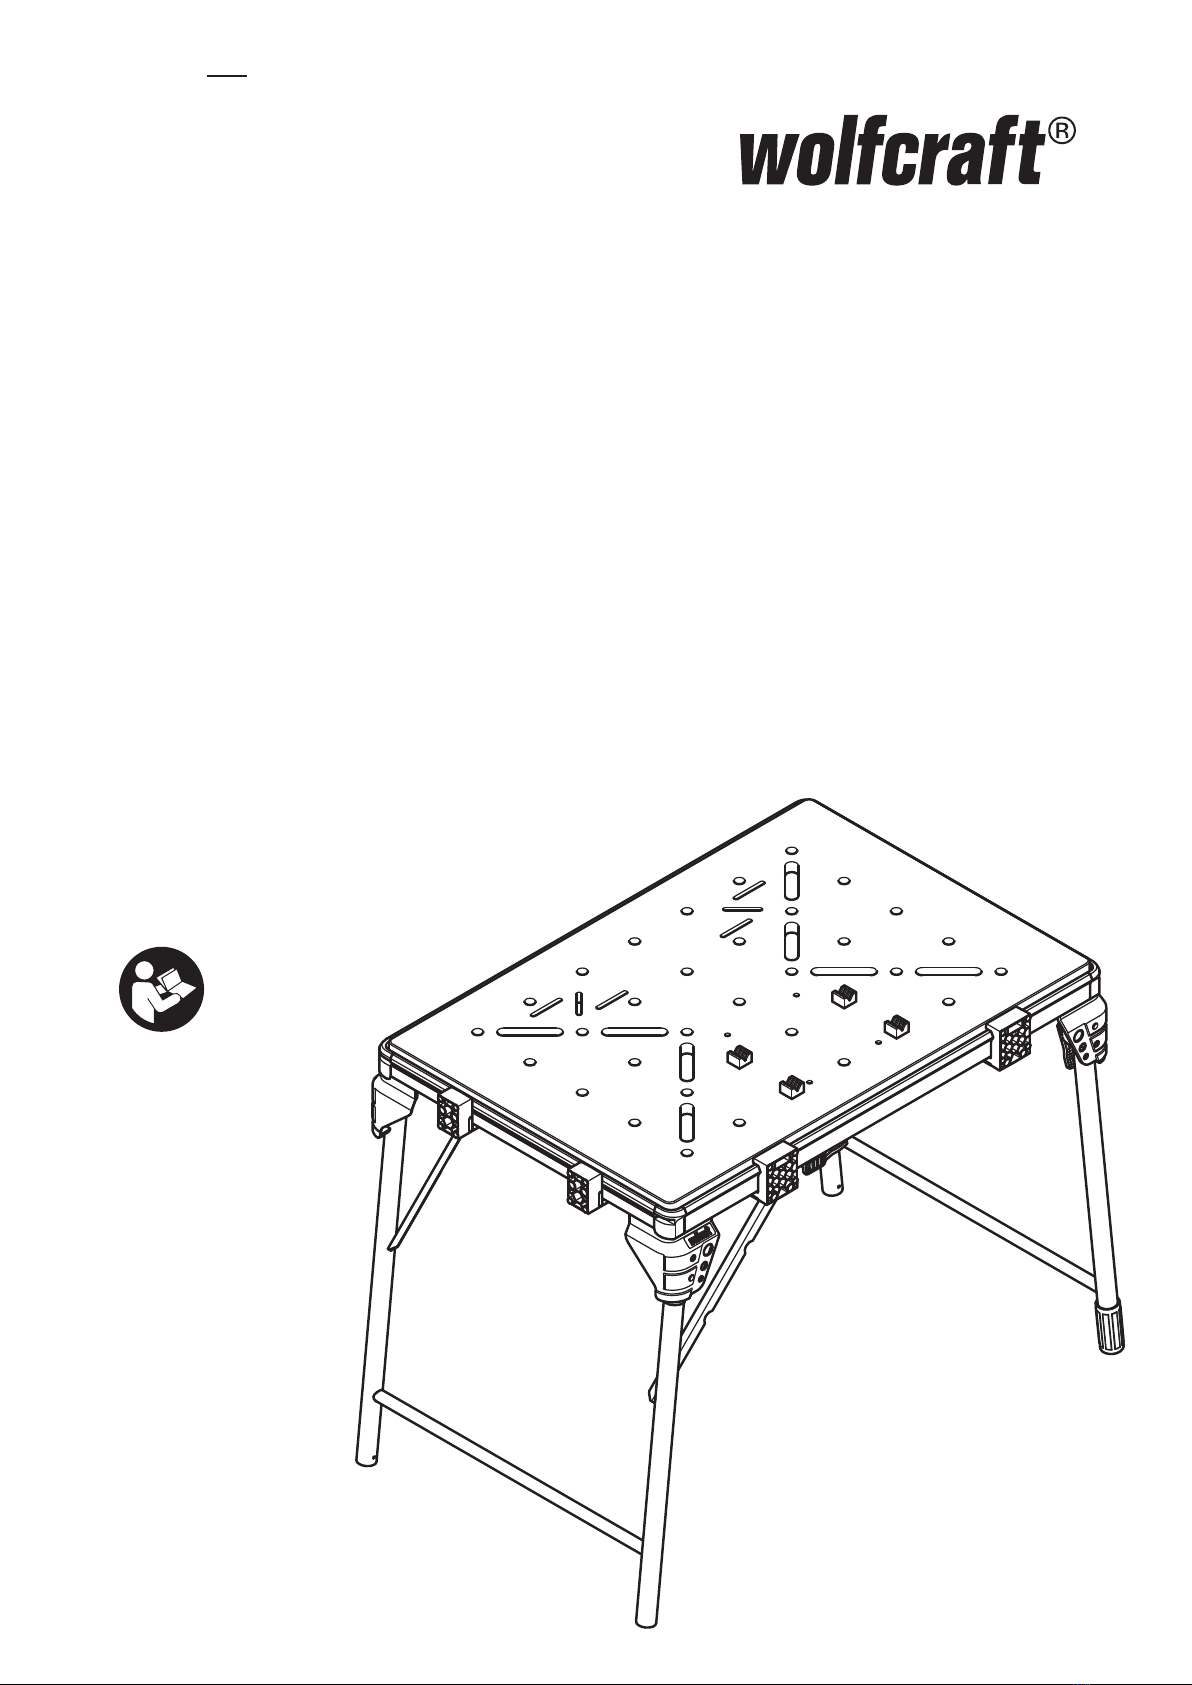
Wolfcraft MASTER work 1600 Quick guide

MASTER work 1600
wolfcraft GmbH
Wolffstraße 1
56746 Kempenich
Germany
www.wolfcraft.com
lOriginal-Bedienungsanleitung (11)
tTranslation of the original operating instructions (15)
pTraduction de la notice d'utilisation originale (19)
nTraducción del manual de instrucciones original (23)
LVertaling van de oorspronkelijke handleiding (27)
yTraduzione del manuale d’uso originale (31)
MTradução do manual original (35)
mOversættelse af den originale betjeningsvejledning (39)
SÖversättning av original bruksanvisningen (43)
qAlkuperäisen käyttöohjeen käännös (47)
KOversettelse av original bruksanvisning (51)
NTłumaczenie oryginalnej instrukcji obsługi (55)
vΜετάφραση του πρωτότυπου οδηγιών χρήσης (59)
WOrijinal işletim kılavuzunun çevirisi (63)
kPřeklad originálního Návodu na obsluhu (67)
wAz eredeti használati útmutató fordítása (71)
PTraducerea instrucţiunilor de operare originale (75)
eПревод на оригиналното упътване за употреба (79)
xPrevod originalnog uputstva za upotrebu (83)
rПеревод оригинала инструкции
по эксплуатации (87)
6909 000
BDAL 6909.000_143006909 04.02.20 11:28 Seite 1

2
1
4 x
M 6 x 80
DIN 933
4 x
6,4
DIN 9021
4 x
6,4
DIN 125
4 x
M 6
DIN 934
119936902
1 x
SW 5
2 x
2 x
4 x
BDAL 6909.000_143006909 04.02.20 11:28 Seite 2

3
2
2.1
2.2
A
A
A
BDAL 6909.000_143006909 04.02.20 11:28 Seite 3

4
2
C
D
2.4
B
B
D
C
C
2.3
B
BDAL 6909.000_143006909 04.02.20 11:28 Seite 4

5
3
3.1 3.2
3.3
3.4
3.5 3.6
1 x
1 x
1 x
2 x
1 x
SW 5
BDAL 6909.000_143006909 04.02.20 11:28 Seite 5

4.1
6
4
2 x
4.2
4.3
4.4
1 x
1 x
BDAL 6909.000_143006909 04.02.20 11:28 Seite 6

7
5
6
1 x
1 x
BDAL 6909.000_143006909 04.02.20 11:28 Seite 7

2 x
6,4
DIN 9021
2 x
6,4
DIN 125
2 x
M 6
DIN 934
1 x
1 x
8
8
1 x
1 x
1 x
1 x
4 x
M 6 x 80
DIN 933
4 x
6,4
DIN 9021
4 x
6,4
DIN 125
4 x
M 6
DIN 934
7SW 10
SW 10
119936902
2 x
M 6 x 80
DIN 933
119936902
BDAL 6909.000_143006909 04.02.20 11:28 Seite 8

l Zubehör separat erhältlich
t Accessories not included
pAccessories vendus séparément
n Accesorios no incluidos
L Accessories separaat verkrijgbaar
y Accessori non compresi
M Accéssoirios vendidos separamente
m Tilbehør som fåer separat
S Tillbehör ingår ej
P Accesoriile se pot aciziţiona
și separat
e Аксесоарите се поръчват
отделно
x Pribor dobavljiv odvojeno
rПринадлежности продаются
отдельно
q Varusteet eivät sisälly
K Tillbehør følgerikke med
N Akcesoria opcjonalne
do oddzielnego nabycia
v Εξαρτματα μπορον
να αγοραστον ξεχωριστ
W Aksesuvar ayrıca satın alınabilir
k Příslušenství dodáváno samostatně
w Tartozékok külön kaphatók
9
3036000
5027 000
6913 000 6897 000
2 x
2 x
3456 - 3457 000
3031 - 3034 000
6176000
BDAL 6909.000_143006909 04.02.20 11:28 Seite 9

l Ersatzteilliste
t Spare parts list
pListe de pièces de rechange
n Lista de recambios
L Lijst met reserveonderdelen
y Elenco pezzi di ricambio
M Lista de peças sobresselentes
m Liste over reservedele
S Reservdelslista
q Varaosaluettelo
K Reservdelsliste
N Lista części zamiennych
v Κατλογος ανταλλακτικν
W Yedek parça listesi
k Seznam náhradních dílů
w Pótalkatrész lista
P Componente de schimb
e Лист с резервни части
x Popis nadomjesnih dijelova
rСписок запчастей
10
115980824
115980765
115980720
115981047
115981048
4 x
M 6 x 80
DIN 933
4 x
6,4
DIN 9021
4 x
6,4
DIN 125
4 x
M 6
DIN 934
119936902
115980718
115980719
115980718
115980719
BDAL 6909.000_143006909 04.02.20 11:28 Seite 10

l
11
EINLEITUNG
• ACHTUNG! Lesen Sie alle Sicherheitshinweise und Anweisungen, die mit dem MASTER work 1600 und den verwendeten
Elektrowerkzeugen mitgeliefert wurden. Versäumnisse bei der Einhaltung der Sicherheitshinweise und Anweisungen können
elektrischen Schlag, Brand und/oder schwere Verletzungen verursachen.
• Bewahren Sie die Bedienungsanleitung für die Zukunft sicher auf.
TECHNISCHE DATEN
Abmessungen aufgebaut: 1110 x 765 x 863 mm
Abmessungen geklappt: 1110 x 765 x 200 mm
Arbeitsfläche: 1035 x 695 mm
Bohrungsdurchmesser der Spannlöcher: 20 mm
Bohrungsraster der Spannlöcher: 128 / 128 mm (horizontal / vertikal)
Bohrungsdurchmesser der Langlöcher: 91 x 23 mm
Belastbarkeit: 120 kg
Gewicht: 21 kg
SYMBOLE UND BEDEUTUNG
Nicht einseitig belasten!
Belastung maximal: 120 kg
Nicht als Sitz, Leiter oder Gerüst verwenden!
Nicht auf den Arbeitstisch stellen!
Stationäre Geräte mit Schrauben auf dem Tisch befestigen!
Nicht tiefer als 5 mm in den Tisch sägen!
Warnung vor allgemeiner Gefahr
Anleitung/Hinweise lesen!
Tragen Sie eine Schutzbrille.
Tragen Sie Gehörschutz.
Stecker ziehen
Zur allgemeinen Information
Tragen Sie eine Staubschutzmaske.
MONTAGEWERKZEUG
1 Innensechskantschlüssel: SW 5
(im Lieferumfang enthalten)
BESTIMMUNGSGEMÄSSER GEBRAUCH
• Der Arbeitstisch MASTER work 1600 ist vorgesehen zum Einsatz als Arbeitsstation für das Bearbeiten von Werkstücken
(z.B. Schleifen, Hobeln, Bohren, Sägen etc.).
• Mit den im wolfcraft-Sortiment angebotenen Zwingen können auf der Arbeitsplatte Werkstücke sicher festgespannt werden.
• Beim Einsatz von Kapp-/Gehrungssägen und dem separat erhältlichen wolfcraft Bohrständer (Art.Nr. 5027000) auf dem Tisch
müssen die mitgelieferten Befestigungsmittel verwendet werden.
• ACHTUNG! Es dürfen nur Maschinen verwendet werden bei denen das Werkstück vertikal von oben nach unten bearbeitet wird.
• ACHTUNG! Maschinen bei denen seitlicher Druck auf den Arbeitstisch ausgeübt wird, dürfen nicht montiert werden!
• Es müssen die Herstellerangaben und die Sicherheitshinweise der verwendeten Maschinen sowie die Sicherheitshinweise
des Arbeitstisches eingehalten werden.
• Bitte beachten Sie im Falle der Entsorgung des MASTER work 1600 Ihre örtlichen Entsorgungsvorschriften.
Für Schäden und Unfälle bei nicht bestimmungsgemäßem Gebrauch haftet der Benutzer.
1 Schraubenschlüssel: SW 10
(nicht im Lieferumfang enthalten)
BDAL 6909.000_143006909 04.02.20 11:28 Seite 11

l
12
SICHERHEITSHINWEISE
• Montieren Sie den Arbeitstisch korrekt und überprüfen Sie vor jedem Arbeiten, dass alle Schrauben und Exzenterhebel fest angezogen
sind.
• Verwenden Sie Ihren Arbeitstisch nie unsachgemäß oder zweckentfremdet!
• Alle Gegenstände, die nicht benötigt werden, vom Arbeitstisch entfernen.
• Arbeiten Sie nie mit einem defektem Arbeitstisch!
• Spannen Sie das zu bearbeitende Werkstück fest ein!
• Achten Sie darauf, dass beim Transport sämtliche Schrauben und Exzenterhebel fest angezogen sind.
• Stellen Sie den Arbeitstisch auf eine feste, ebene und waagerechte Fläche. Wenn der Arbeitstisch verrutschen oder wackeln kann,
kann das Werkstück oder das Elektrowerkzeug nicht gleichmäßig und sicher geführt werden.
• Bauen Sie den Arbeitstisch richtig auf, bevor Sie das Elektrowerkzeug montieren.
• Befestigen Sie das Elektrowerkzeug sicher auf dem Arbeitstisch, bevor Sie es benutzen. Ein Verrutschen des Elektrowerkzeugs
auf dem Arbeitstisch kann zum Verlust der Kontrolle führen.
• Achten Sie darauf, dass das Elektrowerkzeug zentriert auf dem Arbeitstisch montiert ist.
• Stellen Sie sicher, dass lange Werkstücke den Arbeitstisch nicht aus dem Gleichgewicht bringen. Lange Werkstücke müssen
am freien Ende unterlegt oder abgestützt werden.
• Tragen Sie geeignete persönliche Schutzausrüstungen: Gehörschutz, Schutzbrille, Staubmaske bei stauberzeugenden Arbeiten,
Schutzhandschuhe beim Bearbeiten rauer Materialien und beim Werkzeugwechsel.
• Lagern Sie den Arbeitstisch nicht im Freien oder in feuchter Umgebung. Es besteht Gefahr der Korrosion und Aufquellen
der Arbeitsplatte.
• Halten Sie Ihren Arbeitsbereich sauber und gut beleuchtet. Unordnung oder unbeleuchtete Arbeitsbereiche können
zu Unfällen führen.
• Halten Sie Kinder und andere Personen während der Benutzung des Arbeitstisches fern. Bei Ablenkung können Sie die Kontrolle
über das Gerät verlieren.
• Entfernen Sie Einstellwerkzeuge oder Schraubenschlüssel, bevor Sie das Elektrowerkzeug einschalten. Ein Werkzeug oder Schlüssel,
der sich in einem drehenden Geräteteil befindet, kann zu Verletzungen führen.
• Tragen Sie geeignete Kleidung. Tragen Sie keine weite Kleidung oder Schmuck. Halten Sie Haare, Kleidung und Handschuhe fern
von sich bewegenden Teilen. Lockere Kleidung, Schmuck oder lange Haare können von sich bewegenden Teilen erfasst werden.
• Prüfen Sie vor Arbeitsbeginn die Funktionsfähigkeit der Geräte und Werkzeuge. Arbeiten Sie nie mit beschädigtem oder stumpfem
Werkzeug.
• Ziehen Sie den Stecker aus der Steckdose und/oder den Akkupack aus dem Elektrowerkzeug, bevor Sie Geräteeinstellungen
vornehmen oder Zubehörteile wechseln. Unbeabsichtigtes Starten des Elektrowerkzeugs ist ein Grund für Unfälle.
• Überlasten Sie den Arbeitstisch nicht und verwenden Sie ihn nicht als Sitz, Leiter oder Gerüst. Überlastung oder Stehen auf dem
Arbeitstisch kann dazu führen, dass sich der Schwerpunkt des Tisches verlagert und der Tisch umkippt.
• Lose Splitter, Späne oder ähnliche Werkstoffteile dürfen aus der Nähe des laufenden Sägeblattes nicht von Hand entfernt werden!
• Achten Sie darauf, dass vor Beginn jedes Sägevorganges keine Gegenstände auf der Arbeitsplatte liegen.
• Sägeblätter dürfen nach dem Ausschalten des Antriebs nicht durch seitliches Gegendrücken gebremst werden!
• Benutzen Sie Werkzeuge nur für ihren eigentlichen Bestimmungszweck.
• Nur einwandfreie Sägeblätter verwenden.
• Verwenden Sie nur Original wolfcraft Ersatzteile.
• ACHTUNG! Bei überstehenden Werkstücken besteht Kippgefahr. Stellen Sie sicher, dass der Tisch durch seitliches Spannen
und durch die Bearbeitung seitlich gespannter Werkstücke nicht aus dem Gleichgewicht gerät.
• Achten Sie darauf, dass Sie zerbrechliche Materialien nicht mit zu hoher Spannkraft befestigen. Splittergefahr!
• Legen Sie schwere Gegenstände behutsam auf den Tisch ab und belasten Sie die Tischplatte gleichmäßig.
• Sägen Sie nicht mehr als 5 mm in den Tisch, da sonst das Aluminiumprofil beschädigt wird.
• Achten Sie darauf, dass Ihre Hände beim Spannen dünner Werkstücke mit Einhandzwingen nicht gequetscht werden.
• Achten Sie darauf, dass Ihre Hände beim Auf- und Zuklappen des Tisches nicht gequetscht werden.
SICHERHEITSHINWEISE FÜR wolfcraft BOHRSTÄNDER Art. Nr. 5027000
• Der Arbeitstisch ist mit Bohrungen für den separat erhältlichen wolfcraft Bohrständer Art. Nr. 5027000 ausgestattet.
• Montieren Sie den separat erhältlichen Bohrständer mit dem mitgelieferten Befestigungsmaterial gemäß den Anleitungen
in dieser Bedienungsanleitung.
• Der Bohrständer ist zur Aufnahme von netzbetriebenen Bohrmaschinen mit einem Spannhals-Durchmesser von 43 mm bestimmt.
Andere Geräte dürfen nicht verwendet werden.
• Beachten Sie neben den Sicherheitshinweisen in der Bedienungsanleitung des Bohrständers unbedingt die Sicherheitshinweise
der verwendeten Bohrmaschine.
• Stützen Sie lange Werkstücke auf der Abnahmeseite ab, um gefährliche Situationen durch unkontrolliertes Abkippen zu verhindern.
SICHERHEITSHINWEISE FÜR KAPP- UND GEHRUNGSSÄGEN
• Beachten Sie neben diesen maschinenspezifischen Sicherheitshinweisen unbedingt die Sicherheitshinweise der verwendeten
Kapp- und Gehrungssäge. Die verwendeten Maschinen müssen der DIN EN 62841-5 entsprechen.
• Montieren Sie die Kapp- und Gehrungssäge mit dem mitgelieferten Befestigungsmaterial gemäß den Anleitungen in dieser
Bedienungsanleitung.
• Sollte die Montagebohrung Ihrer Kapp- und Gehrungssäge nicht auf das Bohrungsraster der vorgesehenen Langlöcher passen,
darf das Gerät nicht auf dem Tisch verwendet werden.
• Arbeiten Sie nicht mit einer beschädigten Kapp- und Gehrungssäge und verwenden Sie keine stumpfen oder beschädigten
Sägeblätter.
• Stützen Sie lange Werkstücke auf der Abnahmeseite ab, um gefährliche Situationen durch unkontrolliertes Abkippen
zu verhindern.
BDAL 6909.000_143006909 04.02.20 11:28 Seite 12

l
13
LIEFERUMFANG UND MONTAGE
• Packen Sie den MASTER work 1600 aus dem Karton aus und überprüfen Sie den Inhalt auf Vollständigkeit aller abgebildeten Teile
(Bild 1).
• Legen Sie den Tisch auf einen ebenen, sauberen Untergrund (Bild 2.1). Beide Exzenterhebel lösen und das rechte Beinpaar bis zum
Anschlag aufklappen. Anschließend beide Exzenterhebel wieder schließen (Bild 2.2). Die vier Exzenterhebel lösen und das linke
Beinpaar bis zum Anschlag aufklappen. Anschließend alle vier Exzenterhebel wieder schließen (Bild 2.3). Den Tisch auf die Beine
stellen und bei Bedarf den Tisch durch Drehen des Höhenausgleichsfußes justieren (Bild 2.4).
• Montieren Sie die beiden kleinen Spannblöcke an der Querseite des Tisches (Bild 3.1 - 3.5) und die beiden großen Spannblöcke
an der Längsseite des Tisches (Bild 4.1 - 4.3). Sie können hierfür den mitgelieferten Innensechskantschlüssel verwenden, der nach
der Montage griffbereit in einem der kleinen Spannblöcke verstaut werden kann (Bild 3.6).
• Die vier mitgelieferten Spannpratzen können für Transport und Lagerung seitlich in die Halterungen an den großen Spannblöcken
gesteckt werden (Bild 4.4).
• Für Transport und Lagerung kann der Arbeitstisch auf die Spannblöcke gestellt werden. Dadurch wird das Aluminiumprofil
geschont und der Arbeitstisch ist auch in geklapptem Zustand freistehend (Bild 5).
WERKSTÜCKE FESTSPANNEN MIT DEM ARBEITSTISCH MASTER work 1600
• Der MASTER work 1600 bietet verschiedene Spannmöglichkeiten für die Bearbeitung Ihres Werkstückes.
• Spannen auf den Spannblöcken: Fixieren Sie Ihr Werkstück mithilfe von Zwingen an der Außenkante des Arbeitstisches (Bild 6).
Sie können die Spannblöcke mit dem mitgelieferten Innensechskantschlüssel lösen und an die gewünschte Position für
das Spannen bringen.
• Spannen mithilfe der 20 mm-Bohrungen: Sie können mit nahezu jedem Spannelement, das eine 20 mm-Aufnahme besitzt, auf dem
Tisch spannen. Hierzu eignen sich z.B. die separat erhältlichen wolfcraft Werktischspanner Art. Nr. 3036000 (siehe Seite 9).
• Spannen mithilfe der Langlöcher: In den 23 mm-Langlöchern können Sie mit allen Zwingen durchtauchen, die schmaler sind
als 23 mm. Darüber hinaus können Sie den Kopf der separat erhältlichen wolfcraft Einhandzwingen (verschiedene Ausführungen,
siehe Seite 9) abnehmen und von oben bzw. von unten spannen.
• Auf Seite 9 finden Sie eine Übersicht zum aktuell erhältlichen Zubehör und auf Seite 10 zu den Ersatzteilen
für den MASTER work 1600.
MONTAGE DES SEPARAT ERHÄLTLICHEN wolfcraft BOHRSTÄNDERS Art. Nr. 5027000
• ACHTUNG! Der Bohrständer muss unbedingt auf dem Arbeitstisch verschraubt werden, bevor er für Arbeiten verwendet wird.
• GEFAHR! Ziehen Sie den Stecker aus der Steckdose bzw. den Akku aus dem Elektrowerkzeug, bevor Sie Geräteeinstellungen vor-
nehmen oder Zubehörteile wechseln. Unbeabsichtigtes Starten des Elektrowerkzeugs ist ein Grund für Unfälle.
• Mit den im Lieferumfang enthaltenen Befestigungsschrauben aus Zubehörbeutel 119936902 können Sie den wolfcraft Bohrständer
Art. Nr. 5027000 auf den Tisch montieren. Setzen Sie den Bohrständer mit den Montagebohrungen über die vier kleinen Rundlöcher
in der Tischplatte.
• Befestigen Sie den Bohrständer, indem Sie die Schrauben und die Unterlegscheiben von oben durch die Montagebohrungen
und durch die Tischplatte stecken. Mit den Muttern von unten fest verschrauben (Bild 7).
MONTAGE EINER KAPP- UND GEHRUNGSSÄGE
• ACHTUNG! Die Kapp- und Gehrungssäge muss mit mindestens zwei Befestigungsschrauben, vier Scheiben und zwei Muttern auf
dem Tisch befestigt werden. Sollten die Montagebohrungen Ihrer Säge nicht mit den Langlöchern in der Tischplatte übereinstimmen,
darf die Kapp- und Gehrungssäge nicht verwendet werden.
• GEFAHR! Ziehen Sie den Stecker aus der Steckdose bzw. den Akku aus dem Elektrowerkzeug, bevor Sie Geräteeinstellungen
vornehmen oder Zubehörteile wechseln. Unbeabsichtigtes Starten des Elektrowerkzeugs ist ein Grund für Unfälle.
• Mit den im Lieferumfang enthaltenen Befestigungsschrauben aus Zubehörbeutel 119936902 können Sie eine Kapp- und Gehrungs-
säge auf den Tisch montieren. Setzen Sie die Kapp- und Gehrungssäge mit den Montagebohrungen über die schmalen Langlöcher in
der Tischplatte.
• Befestigen Sie jetzt die Kapp- und Gehrungssage. Hierzu die Schrauben und die kleinen Unterlegscheiben von oben durch die
Montagebohrungen und durch die Tischplatte stecken. Mit den großen Unterlegscheiben und Muttern von unten fest verschrauben
(Bild 8).
BDAL 6909.000_143006909 04.02.20 11:28 Seite 13

l
14
Garantieerklärung
Liebe Heimwerkerin und lieber Heimwerker,
Sie haben ein hochwertiges wolfcraft-Produkt erworben, das Ihnen viel Freude beim Heimwerken bringen wird.
wolfcraft Produkte entsprechen hohem technischem Standard und durchlaufen, bevor sie in den Handel gelangen, intensive Entwick-
lungs- und Testphasen. Während der Serienfertigung sichern ständige Kontrollen und regelmäßige Tests den hohen Qualitätsstandard.
Solide technische Entwicklungen und zuverlässige Qualitätskontrollen geben Ihnen die Sicherheit einer richtigen Kaufentscheidung.
Auf das erworbene wolfcraft-Produkt gewähren wir Ihnen bei ausschließlicher Nutzung der Geräte im Heimwerkerbereich
10 Jahre Garantie ab Kaufdatum.
Von der Garantie umfasst sind nur Schäden am Kaufgegenstand selbst, und nur solche, die auf Material- und Fabrikationsfehler
zurückzuführen sind. Nicht von dieser Garantie umfasst sind Mängel und Schäden, die auf unsachgemäße Bedienung oder fehlende
Wartung zurückzuführen sind. Ebenso nicht von der Garantie umfasst sind übliche Abnutzungserscheinungen und gebrauchsüblicher
Verschleiß sowie Mängel und Schäden, die dem Kunden bei Vertragsschluss bekannt waren. Garantieansprüche können nur unter
Vorlage der Rechnung/des Kaufbeleges geltend gemacht werden. Die von wolfcraft gewährte Garantie schränkt Ihre gesetzlichen
Rechte als Verbraucher (Nacherfüllung, Rücktritt oder Minderung, Schadens- oder Aufwendungsersatz) nicht ein.
Garantieansprüche sind zu richten an:
wolfcraft GmbH
Wolffstraße 1
56746 Kempenich
Germany
BDAL 6909.000_143006909 04.02.20 11:28 Seite 14

t
15
INTRODUCTION
• CAUTION! Do read all safety & other instructions that have come with the MASTER work 1600 and with the power tools
you use for work. Failing to observe the safety & other instructions may cause electric shocks, fire and/or severe injuries.
• Do keep the operating instructions for future reference in a safe place.
TECHNICAL DATA
dimensions (put up for use): 1110 x 765 x 863 mm
dimensions (folded up): 1110 x 765 x 200 mm
worktop: 1035 x 695 mm
diameter of the clamping holes: 20 mm
pattern of the clamping holes: 128 / 128 mm (horizontal / vertical)
bore diameter of the slotted holes: 91 x 23 mm
load-bearing capacity: 120 kg
weight: 21 kg
SYMBOLS AND THEIR MEANING
Do not apply weight unevenly.
Maximum load: 120 kg
Do not use as a seat, ladder or support.
Do not stand on the working table.
Fasten stationary devices to the table using bolts!
Do not saw more than 5 mm into the table!
Warning against a general danger
Read the instructions!
Goggles must be worn.
Hearing protection must be worn.
Pull the plug.
General information
Dust mask must be worn.
ASSEMBLY TOOLS
1 Allen key: A/F 2.5
(included in scope of delivery)
INTENDED USE
• The MASTER work 1600 working table is intended for use as a workstation for machining workpieces (e.g. sanding, planing, drilling,
sawing, etc.).
• Workpieces can be clamped securely to the worktop using the clamps available in the wolfcraft range.
• When using mitre saws and the separately available wolfcraft drill stand (art. no. 5027000) on the table, the fasteners supplied must
be used.
• CAUTION! It is only possible to use machines on which the workpiece is processed vertically from top to bottom.
• CAUTION! Machines that apply lateral pressure to the working table should not be mounted.
• Observe the manufacturer’s safety instructions for the machines used, as well as the safety instructions for the working table.
• When disposing of the MASTER work 1600, please observe local disposal regulations.
The user is liable for any damage or accidents resulting from improper use.
1 spanner: A/F 10
(not included in scope of delivery)
BDAL 6909.000_143006909 04.02.20 11:28 Seite 15

t
16
SAFETY INFORMATION
• Assemble the working table correctly and check that all the bolts and eccentric levers are tightened before beginning work.
• Never use your working table improperly or for an unintended purpose!
• Remove all items that are surplus to requirements from the working table.
• Never work with a defective working table!
• Clamp the workpiece to be processed firmly!
• Make sure that all bolts and eccentric levers are tightened during transport.
• Place the working table on a firm, level and horizontal surface. If the working table can slip or wobble, the workpiece or power tool
cannot be controlled evenly and safely.
• Assemble the working table correctly before mounting the power tool.
• Fasten the power tool securely on the working table before using it. If the power tool slips on the working table, this can lead
to loss of control.
• Make sure that the power tool is mounted centrally on the working table. If the power tool is not centred on the working table,
this can mean the centre of gravity of the power tool does not align with the centre of gravity of the working table, so that the table
can tip over.
• Make sure that long workpieces do not bring the working table out of balance. Long workpieces must be supported at the free end.
• Wear suitable personal protective equipment: ear protection, safety goggles, dust mask (if the work generates dust), protective gloves
when working with rough materials and when changing tools.
• Do not store the working table outdoors or in a damp environment. There is a risk of corrosion and the work top may warp.
• Keep your work area clean and well lit. Untidy or dark work areas can lead to accidents.
• Keep children and other persons at a safe distance when using the working table. If you are distracted, you may lose control
of the device.
• Remove the adjusting tools or spanners before switching on the power tool. A tool or spanner left behind in a rotating part
of the device can cause injury.
• Wear suitable clothing. Never wear loose clothing or jewellery. Keep hair, clothing and gloves away from moving parts.
Loose clothing, jewellery or long hair can get caught in moving parts.
• Before starting work, check that the devices and tools are operational. Never work with damaged or blunt tools.
• Disconnect the plug from the electric socket and/or remove the battery pack from the power tool before adjusting the tool
or changing the accessories. Accidents may occur if the power tool is started unintentionally.
• Avoid overloading the working table and never use it as a seat, ladder or support. Placing excess weight on the machine table
or even standing on it can cause the centre of gravity of the table to shift, so that it tips over.
• Loose fragments, chips or similar materials should not be removed by hand from the area around the moving saw blade.
• Make sure that there are no objects on the worktop each time you start sawing.
• Saw blades must not be stopped by applying lateral pressure after switching off the drive mechanism!
• Only use tools for their actual intended purpose.
• Only use saw blades that are in perfect condition.
• Only use genuine wolfcraft spare parts.
• CAUTION! There is a risk of tipping in the case of protruding workpieces. Make sure that lateral clamping and machining
of laterally clamped workpieces does not result in the table becoming unbalanced.
• Make sure that you do not apply excessive clamping pressure when fastening fragile materials. Risk of splinters!
• Place heavy objects on the table with care and ensure an even load on the tabletop.
• Do not saw more than 5 mm into the table as this will damage the aluminium profile.
• Take care not to pinch your hands when clamping thin workpieces using one-hand clamps.
• Take care not to pinch your hands when folding and unfolding the table.
SAFETY INFORMATION FOR wolfcraft DRILL STAND (Art. No. 5027000)
• The working table is equipped with bores for the separately available wolfcraft drill stand (art. no. 5027000).
• Assemble the separately available drill stand using the fastening materials supplied in accordance with the instructions in this manual.
• The drill stand is designed to hold electric drills with a collar diameter of 43 mm. No other devices may be used.
• In addition to the safety information in the drill stand manual, make sure you observe the safety information for the drill used.
• Support long workpieces on the receiving side to prevent dangerous situations caused by accidental tipping over.
SAFETY INFORMATION FOR MITRE SAWS
• In addition to this tool-specific safety information, make sure you observe the safety information for the mitre saw used.
The machines used must comply with DIN EN 62841-5.
• Mount the mitre saw using the fastening materials supplied in accordance with the instructions in this manual.
• If your mitre saw's mounting hole does not fit on the bore grid of the slotted holes provided, the device must not be used
on the table.
• Do not work with a damaged mitre saw and do not use blunt or damaged saw blades.
• Support long workpieces on the receiving side to prevent dangerous situations caused by accidental tipping over.
BDAL 6909.000_143006909 04.02.20 11:28 Seite 16

t
17
SCOPE OF DELIVERY AND ASSEMBLY
• Take the MASTER work 1600 out of the cardboard box and check that the contents are complete and all illustrated parts are included
(Fig. 1).
• Place the table on a flat, clean surface (Fig. 2.1). Release the two eccentric levers and fold out the right pair of legs as far as they
will go. Then close the two eccentric levers again (Fig. 2.2). Release the four eccentric levers and fold out the left pair of legs as far
as they will go. Then close all four eccentric levers again (Fig. 2.3). Place the table on its legs (Fig. 2.4) and if necessary adjust the table
by turning the height adjustment (Fig. 2.4).
• Assemble the two small clamping blocks on the short side of the table (Fig. 3.1 - 3.5) and the two large clamping blocks on
the long side of the table (Fig. 4.1 - 4.3). You can use the Allen key supplied for this, and store it within easy reach in one
of the small clamping blocks following assembly (Fig. 3.6).
• The four clamping claws supplied can be inserted into the holders on the sides of the large clamping blocks for transport
and storage (Fig. 4.4).
• The working table can be placed on the clamping blocks for transport and storage. This protects the aluminium profile
and means that the working table can be self-supporting even when folded (Fig. 5).
CLAMPING WORKPIECES USING THE MASTER work 1600 WORKING TABLE
• The MASTER work 1600 provides various clamping options for machining your workpiece.
• Clamping on the clamping blocks: fasten your workpiece to the outer edge of the working table using clamps (Fig. 6). You can loosen
the clamping blocks using the Allen key supplied and move them to the required position for clamping.
• Clamping using the 20 mm bores: you can clamp objects to the table using almost any clamping element with a 20 mm interface.
The separately available wolfcraft work table clamps (art. no. 3036000) are suitable for this (see page 9).
• Clamping using the slotted holes: the 23 mm slotted holes are compatible with all clamps with a width of less than 23 mm.
In addition, you can remove the head of the separately available wolfcraft one-hand clamp (various designs, see page 9)
and clamp from above or from below.
• See page 9 for an overview of the accessories currently available and page 10 for an overview of the spare parts for the
MASTER work 1600.
ASSEMBLY OF THE SEPARATELY AVAILABLE wolfcraft DRILL STAND (Art. No. 5027000)
• CAUTION! The drill stand must be bolted to the working table before use.
• DANGER! Disconnect the plug from the electric socket or remove the battery from the power tool before adjusting the tool
or changing accessories. Accidents may occur if the power tool is started unintentionally.
• You can mount the wolfcraft drill stand (art. no. 5027000) on the table using the fastening bolts from accessories bag 119936902
supplied in the scope of delivery. Position the drill stand so that the mounting holes are above the four small round holes in the
tabletop.
• Mount the drill stand by inserting the bolts and the washers through the mounting holes and the tabletop from above.
Fasten it from below using the nuts (Fig. 7).
MOUNTING A MITRE SAW
• CAUTION! The mitre saw must be secured to the table using at least two fastening bolts, four washers and two nuts.
The mitre saw must not be used if the mounting holes in your saw do not align with the slots in the table plate.
• DANGER! Disconnect the plug from the electric socket or remove the battery from the power tool before adjusting the tool
or changing accessories. Accidents may occur if the power tool is started unintentionally.
• You can mount a mitre saw on the table using the fastening bolts from accessories bag 119936902 supplied in the scope of delivery.
Position the mitre saw so that the mounting holes are over the narrow slotted holes in the tabletop.
• Next secure the mitre saw. To do this, insert the bolts and the small washers through the mounting holes and table plates from above.
Fasten it from below using the large washers and nuts (Fig. 8).
BDAL 6909.000_143006909 04.02.20 11:28 Seite 17

t
18
Warranty statement
Dear DIY enthusiast,
You have purchased a high-quality wolfcraft appliance which we know you will enjoy using.
wolfcraft appliances are built to high technical standards and undergo intensive development
and testing before leaving the factory. Constant checks and regular tests during their production ensure a high standard of quality.
Sound technical developments and reliable quality assurance give you the certainty that you have made the right purchase decision.
For this wolfcraft product we grant you a 10 year guarantee from the date of purchase, provided the appliance is used exclusively
for DIY purposes.
This warranty only covers damage to the object of purchase itself and only such damage that is attributable to material
or manufacturing defects. This guarantee does not cover defects or damage attributable to improper operation or inadequate
maintenance of the appliance. Moreover, the guarantee does not include the effects of normal wear, or defects or damage known
to the customer upon conclusion of the purchase contract. Guarantee claims can only be asserted upon submission of the invoice/proof
of purchase. The guarantee granted by wolfcraft does not restrict your legal rights as a consumer (supplementary performance,
rescission or reduction, compensation for damages or expenses).
Warranty claims should be addressed to:
wolfcraft GmbH
Wolffstraße 1
56746 Kempenich
Germany
BDAL 6909.000_143006909 04.02.20 11:28 Seite 18

p
19
INTRODUCTION
• ATTENTION ! Veuillez lire toutes les consignes de sécurité et instructions relatives au MASTER work 1600 et aux outils
électroportatifs utilisés. Si les consignes de sécurité et les instructions ne sont pas correctement respectées, vous encourez
des risques d’électrocution, d’incendie et/ou de blessures graves.
• Conservez la notice d'utilisation soigneusement.
CARACTÉRISTIQUES TECHNIQUES
Dimensions monté : 1110 x 765 x 863 mm
Dimensions replié : 1110 x 765 x 200 mm
Surface de travail : 1035 x 695 mm
Diamètre des trous de serrage : 20 mm
Espacement des trous de serrage : 128 / 128 mm (horizontalement / verticalement)
Diamètre d'alésage des trous oblongs : 91 x 23 mm
Charge admissible : 120 kg
Poids : 21 kg
SYMBOLES ET LEUR SIGNIFICATION
Pas de charge unilatérale !
Charge maximale : 120 kg
Ne pas monter dessus, ni s’en servir d’échelle ni d’échafaudage !
Ne pas monter sur l'établi !
Fixer les appareils stationnaires avec des vis sur l'établi !
Ne pas scier à plus de 5 mm de profondeur dans l'établi !
Avertissement : danger de nature
générale
Veuillez lire la notice /
les consignes !
Portez des lunettes de protection
Utilisez une protection antibruit
Débranchez l’appareil
Vers les informations générales
Portez un masque de protection
contre la poussière.
OUTILS DE MONTAGE
1 clé Allen : 5 mm
(fournie)
UTILISATION CONFORME AUX SPÉCIFICATIONS
• L'établi MASTER work 1600 est destiné à une utilisation en tant que station de travail pour l'usinage de pièces (par ex. ponçage,
rabotage, perçage, coupe etc.).
• Avec les serre-joints proposés dans la gamme wolfcraft, les pièces peuvent être fixées sur le plateau en toute sécurité.
• Lors de l'utilisation d'une scie oscillatoire/à onglet et du support de forage wolfcraft disponible séparément (n° d'art. 5027000)
sur l'établi, il faut utiliser les dispositifs de fixation fournis.
• ATTENTION : il n'est possible d'utiliser que des machines avec lesquelles les pièces sont travaillées à la verticale, de haut en bas.
• ATTENTION : n'installez pas de machines exerçant une pression latérale sur l'établi !
• Veuillez respecter les indications du fabricant et les consignes de sécurité concernant les machines utilisées et les établis.
• Lors de la mise au rebut du MASTER work 1600, veuillez respecter les dispositions locales relatives à l'élimination des déchets.
La responsabilité de l'utilisateur est engagée en cas de dommage ou d'accident suite à une utilisation non conforme.
1 clé à fourche : 10 mm
(non fournie)
BDAL 6909.000_143006909 04.02.20 11:28 Seite 19

p
20
CONSIGNES DE SÉCURITÉ
• Montez l'établi correctement et vérifiez avant de travailler que toutes les vis et le levier excentrique sont bien serrés.
• N'utilisez jamais votre établi de manière inadéquate ou autrement que pour l'usage prévu !
• Retirez de l'établi tous les objets dont vous n'avez pas besoin.
• Ne travaillez pas avec un établi défectueux !
• Serrez bien la pièce à travailler !
• Veillez à ce que les différentes vis et le levier excentrique soient bien serrés pendant le transport.
• Placez l'établi sur une surface plane, ferme et horizontale. Si l'établi peut glisser ou est instable, il est impossible de guider la pièce
ou l'outil électrique de manière régulière et sure.
• Assemblez correctement l'établi avant d'y monter l'outil électrique.
• Fixez l'outil électrique fermement sur l'établi avant de l'utiliser. Un dérapage de l'outil électrique sur l'établi peut provoquer une perte
de contrôle.
• Veillez à bien centrer l'outil électrique sur l'établi. Si l'outil électrique est mal centré sur l'établi, son centre de gravité peut ne pas
se trouver au milieu du centre de gravité de l'établi et faire basculer l'établi de serrage.
• Assurez-vous que les longues pièces à travailler ne pourront pas déséquilibrer l'établi.
• Mettez un équipement de protection individuel adapté : Protection auditive, paire de lunettes de protection, masque antipoussière
pour les travaux générant de la poussière, gants de protection pour travailler les matériaux bruts et lors des changements d'outils.
• Ne stockez pas l'établi à l’extérieur ou dans un lieu humide. Risque de corrosion et de gonflement du plateau.
• Gardez les enfants et les autres personnes à l’écart lors de l'utilisation de l'établi. En cas de distraction, vous pourriez perdre
le contrôle de l’appareil.
• Retirez les outils de réglage ou les clés de vissage avant de mettre l'outil électrique sous tension. Un outil ou une clé se trouvant
dans une partie rotative d'un appareil peut provoquer des blessures.
• Portez les vêtements adéquats. Ne portez pas de vêtements larges ou de bijoux. Gardez vos cheveux, vêtements et gants à l'écart
des pièces mobiles. Des vêtements, bijoux ou cheveux longs lâches peuvent se prendre dans les pièces mobiles.
• Avant d‘utiliser des appareils et des outils, vérifiez leur bon état de marche. Ne travaillez jamais avec un outil endommagé
ou émoussé.
• Débranchez la prise et/ou l'accumulateur de l'outil électrique avant de procéder aux réglages de l'appareil ou de changer
d'accessoires. Un démarrage inopiné de l'outil électrique est une cause d'accident.
• Ne surchargez pas l'établi et ne l'utilisez pas comme siège, comme escabeau ou comme échafaudage. Si vous surchargez
ou montez sur le plateau, le centre de gravité de l'établi peut se déplacer et faire basculer le plateau.
• Ne retirez pas à la main des éclats, des copeaux ou des matériaux similaires à proximité de la lame de scie en rotation !
• Veillez à ce qu'aucun objet de se trouve sur le plateau de travail avant de commencer à scier.
• Après la coupure du moteur, ne freinez pas la lame de scie par une pression latérale !
• Utilisez uniquement les outils aux fins prévues.
• N'utilisez que des lames de scie en parfait état.
• N'utilisez que des pièces de rechange d’origine wolfcraft.
• ATTENTION ! Les pièces en saillie risquent de basculer. Assurez-vous que l'établi ne soit pas en déséquilibre en raison
de la fixation latérale et de l'usinage de pièces fixées sur le côté.
• Veillez à ce que les matériaux cassants ne soient pas fixés avec une force de serrage trop élevée. Risque d'éclats !
• Posez les objets lourds doucement sur l'établi et chargez le plateau de l'établi uniformément.
• Ne sciez pas plus de 5 mm dans l'établi car sinon le profilé en aluminium risque d'être endommagé.
• Veillez à ce que vos doigts ne se retrouvent pas coincés lors de la fixation de pièces plus fines avec des serre-joints à une main.
• Faites attention à ne pas vous coincer les doigts lorsque vous dépliez ou repliez l'établi.
CONSIGNES DE SÉCURITÉ POUR LE SUPPORT DE FORAGE wolfcraft n° d'art. 5027000
• L'établi est équipé d'alésages pour le support de forage n° d'art 5027000 disponible séparément.
• Montez le support de forage disponible séparément avec le matériel de fixation fourni selon les instructions du mode d'emploi.
• Le support de forage est destiné à la réception des perceuses électriques avec un diamètre de collier de serrage de 43 mm.
Les autres appareils ne doivent pas être utilisés.
• Respectez les consignes de sécurité du mode d'emploi du support de forage ainsi que les consignes de sécurité de la perceuse utilisée.
• Étayez les pièces longues du côté sortie pour éviter des situations dangereuses ou un basculement incontrôlé.
CONSIGNES DE SÉCURITÉ POUR SCIES OSCILLATOIRES ET À ONGLET
• Outre les présentes consignes de sécurité spécifiques aux machines, respectez impérativement les consignes de sécurité de la scie
oscillatoire ou à onglet utilisée. Les machines utilisées doivent répondre à la norme DIN EN 62841-5.
• Montez la scie oscillatoire ou à onglet avec le matériel de fixation fourni selon les instructions du mode d'emploi.
• Si l'alésage de montage de votre scie oscillatoire ou à onglet ne s'adapte pas à la grille de perçage des trous oblongs disponibles,
l'appareil ne doit pas être utilisé sur l'établi.
• Ne travaillez pas avec une scie oscillatoire ou à onglet endommagée et n'utilisez pas de lames de scie émoussées ou endommagées.
• Étayez les pièces longues du côté sortie pour éviter des situations dangereuses ou un basculement incontrôlé.
BDAL 6909.000_143006909 04.02.20 11:28 Seite 20
Table of contents
Languages:
Other Wolfcraft Indoor Furnishing manuals
Popular Indoor Furnishing manuals by other brands

URBAN OUTFITTERS
URBAN OUTFITTERS SANNA Assembly instructions

Oxybul éveil & jeux
Oxybul éveil & jeux IZIBUL 338567 manual

Bon Pergola
Bon Pergola Villa Pergola User instructions

Hay
Hay ARBOUR instruction manual

hygena
hygena Amparo 633/3290 Assembly instructions

Sunnydaze Decor
Sunnydaze Decor DTA-324 manual