manuals.online logo
Brands
  1. Home
  2. •
  3. Brands
  4. •
  5. Woodbridge
  6. •
  7. Bathtub
  8. •
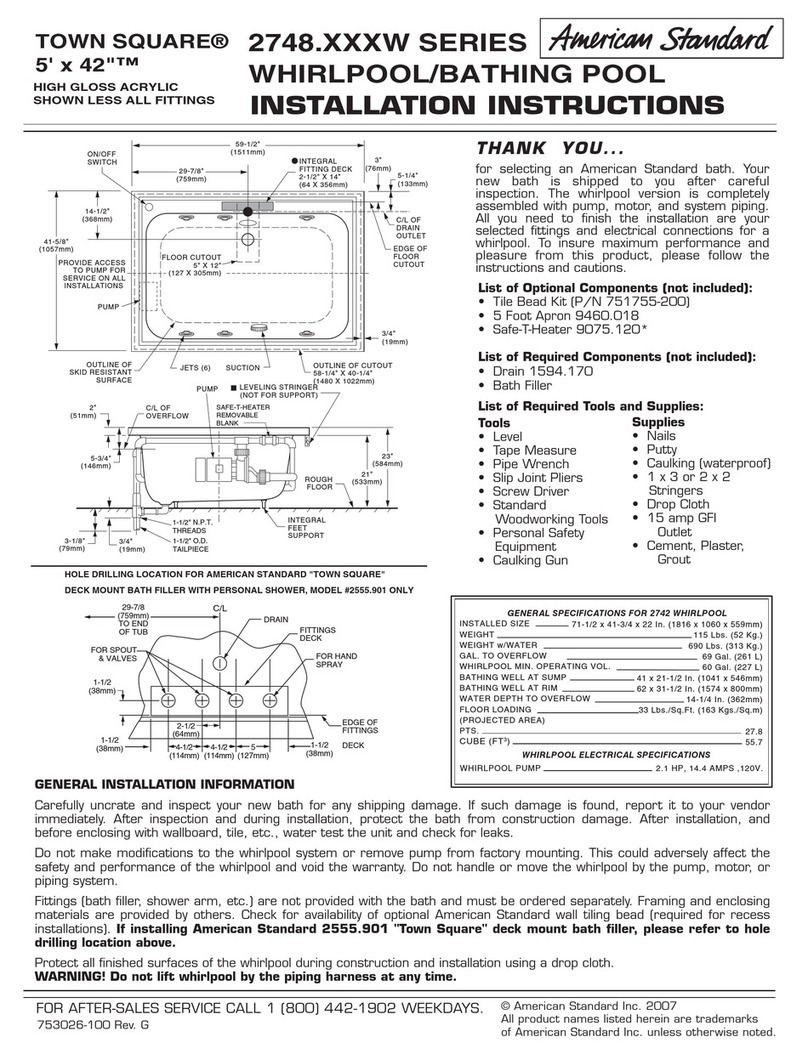
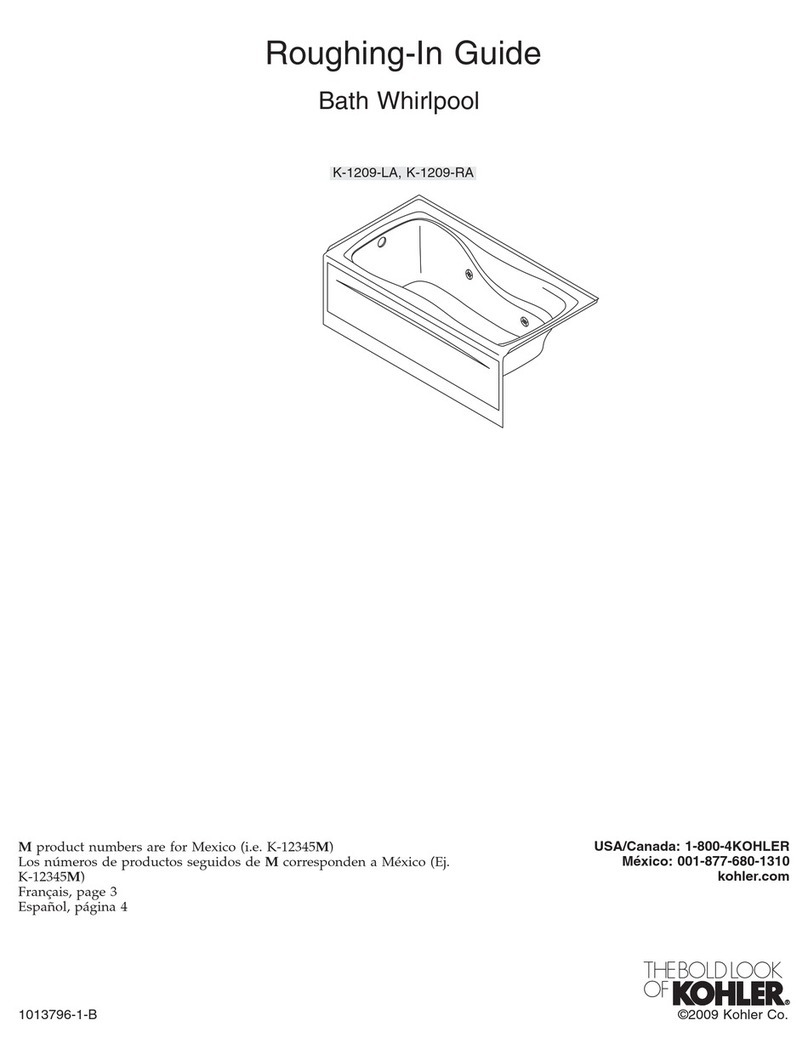
  9. Woodbridge BTS1606-B0030 User manual

Woodbridge BTS1606-B0030 User manual

BTS1606-B0030
1
INSTALLATION INSTRUCTIONS
BEFORE YOU BEGIN
Please read these instructions carefully to familiarize yourself with the required
tools, materials, and installation sequences. Follow the sections that pertain to your
particular installation. This will help you avoid costly mistakes. In addition to proper
installation, read all operating and safety instructions.
All information is based on the latest product information available at the time of
publication. Woodbridge® reserves the right to make changes in product
characteristics, packaging, or availability at any time without notice.
please leave these instructions for the consumer.
PRODUCT REQUIREMENTS
A. Summary Of Key Requirements
Observe all local plumbing codes.
Install the unit to a level subfloor.
Provide properly-dimensioned framing.
Baths are designed for a variety of installations,depending upon the model chosen.
B. Product Inspection
Uncrate and inspect bath for damage. Leave all materials in the crate during construction to
prevent damage.
Ɣ
Ɣ
Ɣ
Ɣ
Ɣ
Ɣ
Ɣ
READ ALL INSTRUCTIONS BEFORE UNPACKING THE PRODUCT
2 PEOPLE ARE REQUIRED TO LIFT AND DURING
ENTIRE INSTALLATION OF THIS PRODUCT
INSTALLATION OF THIS PRODUCTS BY AN
INEXPERIENCED INSTALLER MAY RESULT
PERSONAL INJURY OR DEATH!
INSTRUCTIONS THAT, IF IGNORED COULD RESULT IN DEATH OR SERIOUS INJURY CAUSED BY INCORRECT HANDLING
OR INSTALLATION OF THE PRODUCT. THESE INSTRUCTIONS MUST BE OBSERVED FOR SAFE INSTALLATION.
We reserves the right to change, update, modify, alter, redesign this manual/product or its policies without prior notice!
We
shall not be liable for any injuries or property damages in connection with this product during installation or use of this product!
This products must be installed by a fully insured and licensed plumber only. Installation of any our product by anyone other
than fully insured and licensed plumber shall void limited warranty. We recommends that such licensed plumber have experience
in the installation of products.
Limited warranty is void on any commercial installation
We are not responsible for local code compliance for this product. Building and plumbing codes may vary from state-to-state in
accordance to your location. We are not responsible for providing any compliance certifications.
Under no circumstances we are shall not be liable for any and all incidental damages sustained in connection with this product
Neither manufacture, nor distributor, nor retailer is responsible for water damage or flood caused due to use of this product.
Under no circumstances We shall not be liable for any and all fees, cost of installation/reinstallation/removal, subsequent
damage or transportation in case of the product defect
R
WOODBRIDGE
2
ROUGHING-IN
Roughing-in:
INSTALLATION REQUIREMENTS
A. Tools Required
ƔAdjustable pipe
Ɣwrench
ƔRule
ƔLevel
ƔSafety shoes
ƔSafety glasses
ƔSquare
ƔScrewdriver
ƔPliers
ƔUtility knife
B. Materials Required:
ƔPlumbers putty
ƔWall coverings, as necessary
ƔSilicone sealant
ƔGypsum cement (optional)
ƔConstruction adhesive
Ɣ(optional)
ƔProtective covering for
Ɣbathtub
ƔNails
1) Set the bathtub on two 4x4 pieces of lumber .so you can access from the bottom
of the bathtub.
2) Fill bathtub with cold water above the jets and trial run pump for 10-15 minutes.
Check all the fittings for leaks and test the control functions. Switch off the pump
and leave the unit filled with water (pump is not running) for at least another two
minutes. Check the pump and pipes union connections for leaks. Hand tighten
union connections if required.
3) Pls check the drain and overflow are properly sealed and tightened , if a leakage
occurs , pls disassemble the drain line or overflow assemblies and apply a
plumbing Teflon tape /silicone calk to the fix the leakage.
4) This products must be installed by a fully insured and licensed plumber only.
IMPORTANT BEFORE INSTALLATION:
22 7/8"
16 7/8"
66 1/2"
41 3/4"
31 7/8"
20 1/2"
3
C. Clearance Requirements:
Check the rough-in and room dimensions to provideadequate space for the bath unit.
SITE REQUIREMENTS
A. Plumbing Preparation
Position the plumbing according to rough-in dimensions.
Cap the supplies and check for leaks.
BEFORE INSTALLING UNIT
CAUTION: Ensure a watertight seal on the bath drain connections.
A. Install the faucet valving and shower head tee.Whendrilling bathtub for faucet,
ensure sufficientclearance. Open the hot and cold water valves and check the
supply connections for leaks.
B. Run water into the bath and check the drainconnections for leaks.
C. Fill the bathtub up to the overflow level and checkoverflow unit for leaks.
INSTALL BATHTUB
1) Your new bathtub beenmanufactured to the highest possible
standards, it has been factory tested and approved.
2) When removing bathtub from protective carton. DO NOT LIFT BATHTUB BY PIPE WORK.
Inspect for any possible damage that may have occurred in transit.
IMPORTANT: Bathtub must be installed level on all top edges.
3) Connect Power Supply:
Connect power supply to control unit. The electrical connections must comply with local
authority regulations and must be done by an authorized electrician.
DUAL SYSTEM 15 AMPS Supply
4) Fill bathtub with water to approximately 40 mm above the jets and trial run pump for 10-15
minutes. Check all the fittings for leaks and test the control functions. Switch off the spa
pump and leave the unit filled with water (pump is not running) for at least another two
minutes. Check the pump and pipes union connections for leaks. Hand tighten union
connections if required.
IMPORTANT: Your bathtub has been factory tested and approved. It is the responsibility of
the installer to test run the bathtub, check all the fittings for leaks and test the control functions.
NON OBSERVANCE WILL INVALIDATE FACTORY WARRANTY.
5) Bathtub Rim Support. Drop-In Models:
CAUTION: Risk of product damage. Do not support the weight of the bath by the rim.
4
CLEAN-UP AFTER INSTALLATION
When cleaning up after installation, do not use abrasive cleansers as they may scratch
and dull the surface. Use warm water and liquid, non-abrasive detergent to clean the
surface.
Stubborn stains, paint, or tar can be removed with mineral spirits. Do not use cleaners
containing solvent. Plaster can be removed by scraping with wood edge. Do not use
metal scrapers, wire brushes, or other metal tools. One of the powder type detergents
may be used on a damp cloth to provide mild abrasive action to the residual plaster.
IMPORTANT CONSUMER INFORMATION
A. Consumer Responsibilities
Cleaning Acrylic Surfaces: Do not use abrasive cleansers on any acrylic surfaces, as they
will scratch and dull the surface. Wipe out the bath after each use to prevent a build-up of
soap and scum.
If the acrylic surface becomes dull, an automotive type rubbing compound may be used on
the unit, followed by an application of paste wax.
*We recommended:
Rubbing compound Mequiars® mirror glaze 28 metal polish (import product) or "green oil".
Please contact us if you have any questions.
Customer Service Phone: 562-774-2284.
Or email : [email protected]

Other Woodbridge Bathtub manuals

Woodbridge WB1028 Assembly instructions

Woodbridge

Woodbridge WB1028 Assembly instructions

Woodbridge BM400 Assembly instructions

Woodbridge

Woodbridge BM400 Assembly instructions

Woodbridge FREESTANDING BATHTUB Assembly instructions

Woodbridge

Woodbridge FREESTANDING BATHTUB Assembly instructions

Woodbridge B0034 Assembly instructions

Woodbridge

Woodbridge B0034 Assembly instructions

Woodbridge BJ500 Assembly instructions

Woodbridge

Woodbridge BJ500 Assembly instructions

Woodbridge WIC54-01 User manual

Woodbridge

Woodbridge WIC54-01 User manual

Woodbridge BS5430R Assembly instructions
Woodbridge

Woodbridge BS5430R Assembly instructions

Woodbridge BS0260 Assembly instructions

Woodbridge

Woodbridge BS0260 Assembly instructions

Woodbridge BJ100 Assembly instructions

Woodbridge

Woodbridge BJ100 Assembly instructions

Woodbridge Megabrand User manual

Woodbridge

Woodbridge Megabrand User manual

Woodbridge B0030 Assembly instructions

Woodbridge

Woodbridge B0030 Assembly instructions

Woodbridge B0170 Assembly instructions

Woodbridge

Woodbridge B0170 Assembly instructions

Woodbridge B0090 Assembly instructions

Woodbridge

Woodbridge B0090 Assembly instructions

Woodbridge BJ200 Assembly instructions

Woodbridge

Woodbridge BJ200 Assembly instructions

Woodbridge B0030/BTS1606 Assembly instructions

Woodbridge

Woodbridge B0030/BTS1606 Assembly instructions

Woodbridge BM500 Assembly instructions

Woodbridge

Woodbridge BM500 Assembly instructions

Woodbridge BA5430R Assembly instructions

Woodbridge

Woodbridge BA5430R Assembly instructions

Woodbridge BTA1531R Assembly instructions

Woodbridge

Woodbridge BTA1531R Assembly instructions

Woodbridge BJ600 Assembly instructions

Woodbridge

Woodbridge BJ600 Assembly instructions

Popular Bathtub manuals by other brands

JASON Hydrotherapy Alexia SL Installation, operation and maintenance

JASON Hydrotherapy

JASON Hydrotherapy Alexia SL Installation, operation and maintenance

Oasis BA-5429 Installation

Oasis

Oasis BA-5429 Installation

Mirolin Madison 3 Series Installation instructions and owner's manual

Mirolin

Mirolin Madison 3 Series Installation instructions and owner's manual

AZZURRA Andrina Installation instructions and owner's manual

AZZURRA

AZZURRA Andrina Installation instructions and owner's manual

Kohler K-1418 Roughing-In Guide

Kohler

Kohler K-1418 Roughing-In Guide

Wellis Flavia WK00135 instruction manual

Wellis

Wellis Flavia WK00135 instruction manual

Kohler K-1209P-LA Guide

Kohler

Kohler K-1209P-LA Guide

Laufen MEDA 2.2011.5 manual

Laufen

Laufen MEDA 2.2011.5 manual

bebe-jou Sense manual

bebe-jou

bebe-jou Sense manual

Delta B23608-6030L-WH manual

Delta

Delta B23608-6030L-WH manual

ARJO HUNTLEIGH Classic Line Instructions for use

ARJO HUNTLEIGH

ARJO HUNTLEIGH Classic Line Instructions for use

Mastercare Integrity MB-80R installation manual

Mastercare

Mastercare Integrity MB-80R installation manual

Noro Single manual

Noro

Noro Single manual

Kingkraft Multibath SE Instructions for use

Kingkraft

Kingkraft Multibath SE Instructions for use

Sanotechnik G9020 Mounting instruction

Sanotechnik

Sanotechnik G9020 Mounting instruction

DURAVIT Blue Moon 760402 Mounting instructions

DURAVIT

DURAVIT Blue Moon 760402 Mounting instructions

glass 1989 eden 170/75 quick start guide

glass 1989

glass 1989 eden 170/75 quick start guide

HOESCH ERGO+ Assembly, installation and operation instructions

HOESCH

HOESCH ERGO+ Assembly, installation and operation instructions

manuals.online logo
manuals.online logoBrands
  • About & Mission
  • Contact us
  • Privacy Policy
  • Terms and Conditions

Copyright 2025 Manuals.Online. All Rights Reserved.