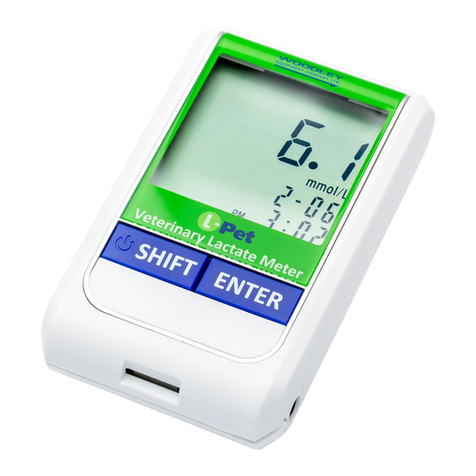
Woodley g-Pet User manual

User Guide
Veterinary Monitoring System
M asy!
Veterinary Monitoring System
M
For dog and cat use only
Glucose Meter
Gpet instruction Manual 31/5/09 18:06 Page 1

Gpet instruction Manual 31/5/09 18:06 Page 2

3
TABLE OF CONTENTS
Your g-Pet system contains 4
g-Pet meter details 5
g-Pet test strip details 6
g-Pet test strip vial 7
Glucode chip details 8
Installing/replacing the battery9
Setting up the g-Pet meter 10
Coding your g-Pet meter 14
Blood Glucose Testing 15
Preparing the test strip 16
Obtaining a blood sample 17
Applying a blood sample 18
Control solution 20
Memory features 21
Careand storage 23
Displaymessages 24
Specifications 31
Limitations of the procedure 32
Service and warranty 33
Gpet instruction Manual 31/5/09 18:06 Page 3

g-Pet glucose meter kit.
Your g-Pet system contains:
•g-Pet meter
• One vial of g-Pet test strips
•Twoglucode chips: one for cats,one for dogs
• One lancing device
•Ten lancets
•One carrying case
•User’s guide
• Quick reference guide
•Control solution
4
Gpet instruction Manual 31/5/09 18:06 Page 4

1. Display -Your test results are displayed here.
The large, easy to read screen guides you
through the test by using numbers and
symbols.
2. M Button - On/Off.
3. S Button -Select button.
4. Test Port -This is where you insert the
g-Pet Test Strip into the g-Pet Meter.
5. Battery Cover
6. Reset Button -Press this
button to re-set the system.
7. Glucode Chip Port -Insert
the Glucode Chip for coding.
g-Pet Meter details.
1
2
4
3
Front Back
6
7
5
5
Gpet instruction Manual 31/5/09 18:06 Page 5

The g-pet Test Strip is used to perform the
blood glucose test in conjunction with the g-pet Meter.
Each strip can be used only once.
The g-pet Test Strip consists of the following parts:
1. Contact Bar—This end of the g-pet Test Strip is
inserted into the Test Port to activate the g-pet Meter
(white side face up, arrow points into test port).
2. Target Area—This is where blood is drawn
intothe g-pet Test Strip.
3. Confirmation Window—This is where you
confirm that enough blood has been applied to
the target area.
g-Pet Test Strip details.
6
Gpet instruction Manual 31/5/09 18:06 Page 6

g-Pet Test Strip Vial.
Test Strip Vial
Code Numbers
g-Pet Control Solution Range Lot Number
Expiration Date
7
Gpet instruction Manual 31/5/09 18:06 Page 7

Glucode Chip details.
Your new g-Pet Meter is supplied with two Glucode
chips. There is one for cats, and one for dogs.
The Glucode chip is used toensure that your g-Pet Meter
provides you with the most accurate results. Before
performing the blood glucose test, or when starting a
new test strip vial, please check your g-Pet Meter with
the corresponding Glucode chip for your pet type to
ensureproper performance. The g-Pet Meter uses
removable Glucode chips so you are always getting the
most up-to-date information.
(Further instructions for use of the Glucode chips are
provided on page 10).
Note: Always use the correct pet type glucode chip
for cat or dog to ensure your g-Pet meter
gives you the most accurate results.
CODE Number
front back
8
Gpet instruction Manual 31/5/09 18:06 Page 8

When to replace the battery
When the battery is low, the g-Pet
Meter will show a warning signal that
appears when it is time to replace the
battery (see page 28).
Once the low battery warning signal is
shown, the g-Pet Meter will provide
accurate results for approximately 50
more measurements.
How to Replace the battery
1. From the back of the g-Pet Meter, gently slide
and remove the battery cover.
2. Inserta3-Volt lithium battery (CR-2032) with
the“+”side facing up.
3. Slide battery cover back into place.
The g-Pet Meter uses one 3-Volt lithium
battery(CR-2032)
Installing/Replacing the battery.
9
Gpet instruction Manual 31/5/09 18:06 Page 9

10
To turn the g-Pet Meter on, first pull the plastic tab
out from the battery chamber, then press the reset
button located at the back of the Meter and
proceed with the following instructions:
Setting up the g-Pet Meter.
Setting Up the Date and Time
1. Press the M button for 3 seconds to enter setting
mode. Press and release S button to choose“24Hr”or
“12Hr” display.With your favorite clock mode, press M
button and the Year setting will appear. Press and
release the S button until the correct year appears.
2. Toenter the year and move on to choose the month,
press the M button. To change the month, press the S
button.
3. To enter the month and move on to choose the day,
pressthe M button. To change the day, press the S
button.
Gpet instruction Manual 31/5/09 18:06 Page 10

11
Setting Up the Date and Time
4. To enter the day and move on to choose the hour setting,
press the M button.
5. To change the hour, press the S button. To enter the hour
and move on to change the minutes, press the M button.
6. Tochange the minutes, press the S button. To enter the
minutes and move on to choose the alarm setting, press
the M button.
Setting Up the Alarm
7. Toset the first alarm, press the M button (y). If you press
Sbutton (n), it will move to health management alarm
setting (step 11). To change the hour, press S button. To
enter the hour and move on to change the minutes,
press M button. To change the minutes, press S button.
Toenter the minutes and move on to the second alarm
setting,press the M button. (Fig.1)
Setting up the g-Pet Meter.
(Fig.1)
Gpet instruction Manual 31/5/09 18:06 Page 11

12
Setting up the g-Pet Meter.
8. To set the second alarm, press the M button (y). If you press S button (n), it
will move to health management alarm setting (step 11). To change the
hour, press S button. To enter the hour and move on to change the minutes,
press M button. To change the minutes, press S button. To enter the minutes
and move on to the third alarm setting, press the M button. (Fig.2)
9. To set the third alarm, press the M button (y). If you press S button (n), it
will movetohealth managementalarm setting (step 11). To change the
hour, press S button. To enter the hour and move on to change the minutes,
press M button. To change the minutes, press S button. To enter the minutes
and move on to the fourth alarm setting, press the M button. (Fig.3)
10. To set the fourth alarm, press the M button (y). If you press S button (n), it
will movetohealth managementalarm setting (step 11). To change the
hour, press S button. To enter the hour and move on to change the minutes,
press M button. To change the minutes, press S button. To enter the
minutes and move on to health management“HI alarm setting”press the
Mbutton. (Fig.4)
(Fig.2)
(Fig.3)
Gpet instruction Manual 31/5/09 18:06 Page 12

13
Setting up the g-Pet Meter.
10. To set the fourth alarm, press the M button (y). If you press S button
(n), it will move to health management alarm setting (step 11). To
change the hour, press S button. To enter the hour and move on to
change the minutes, press M button. To change the minutes, press S
button. To enter the minutes and move on to health management“HI
alarm setting”press the M button. (Fig.4)
Setting Up the HI and LO Alarm
Note: When the alarm is ringing,press S or M button to turn off or
meter will turn off alarm automatically after 30 sec.
11. To change the “HI alarm setting”press the S button. To enter the
‘HI alarm setting”and moveon to“LOalarm setting”press M
button. (Fig.5)
12. To change the “LO alarm setting”press the S button. To enter the
“LO alarm setting”and move on to PC link setting, press M
button. To finish the setting, press S button (no) to turn off the meter.
13. Press S button when PC option is displayed.
(Fig.4)
(Fig.5)
Gpet instruction Manual 31/5/09 18:06 Page 13

14
Coding your g-Pet Meter.
Each batch of g-Pet Test Strips
comes with two Glucode Chips,
one for cats and one for dogs. The
Glucode chips are encoded with
the algorithms for the blood
glucose testing for a specific species
type. In order to ensure an
accurate result, the code number
on the display must also match the
code number found on the g-Pet
Test Strip vial for your animal type.
1. The meter must be switched
off before inserting the g-Pet
glucode chip.
Insert the g-Pet Glucode Chip,
conductive bar’s end first, into
the slot. The g-Pet Meter will
automatically be engaged.
Note: Code the g-Pet Meter
whenever you start a new
Test Strip Vial.
2. All segments of the LCD display
will appear indicating that the
g-Pet Meter is functioning
properly. Then a beep will sound,
followed by the code number.
1a 1b
2&3
3. Match the code number on the
g-Pet Meter display with the code
number on the g-Pet Test Strip Vial
for cat or dog. If the code matches,
you may begin to test.
Gpet instruction Manual 31/5/09 18:06 Page 14

15
Before testing blood glucose, you need the
following items:
1. g-Pet Meter.
2. g-Pet Test Strip in Vial.
3. Adjustable automatic lancing device or insulin
needle.
4. Sterile lancet.
5. Glucode Chip for the animal type.
Caution: to reduce the chances of infection:
•Never share a lancing device and lancet with another
animal.
•Always use a new and sterile lancet. Lancets are for
single use only.
•Always use a new g-Pet Test Strip. Test Strips are for
single use only.
•Do not get lotion, oil, dirt or debris in or on the lancet
and lancing device.
Blood glucose testing.
Gpet instruction Manual 31/5/09 18:06 Page 15

16
Preparing the test strip.
1. Wash hands using soap and warm water. Rinse and
dry thoroughly.
2. Insert the g-Pet Test Strip, white side face up, arrow
intothe Test Port.
3. A beep will sound and the code number will
appear followed by a flashing “ “ symbol.
Now you are ready to obtain a blood sample.
*Check the g-Pet Meter and g-Pet Test Strip regularly
using the g-Pet Control Solution.
Reminder: Make sure that the code number on the display matches the code number located on the g-Pet Test Strip Vial for
your animal type (cat or dog). If the code number on the display does not match the code number on the Test Strip Vial,
code the Meter by using the appropriate Glucode Chip. (See page 8)
12
34
Gpet instruction Manual 31/5/09 18:06 Page 16

17
Obtaining a blood sample.
Sample may be obtained from cat
or dog. Using an insulin needle or
the lancing device supplied:
1. Unscrew the Lancing Device cap.
2. Place the lancet into the lancet
holder.
3. Twist and remove the protective
lancet cover to expose the sterile
needle tip.
4. Screw on the Lancing Device cap.
Select the skin penetration depth
from 1 to 5 (shallow to deepest).
5. Pull the barrel back until you
hear a“click”sound.
6. Place the Lancing Device softly
against cat or dog skin. Press the
trigger toobtain blood droplet.
PERFORM THE TEST WITH METER
(see p. 19)
TO UNLOAD LANCET DEVICE:
1. After sampling, remove the
endcap containing the used
lancet carefully.
2. Remove the lancet from the
lancing device and discard in a
clinical waste sharps container.
*For safety do NOT leave lancet in lancet device.
123
456
Gpet instruction Manual 31/5/09 18:06 Page 17

18
Applying a blood sample.
1. Place either edge of the g-Pet
Test Strip against the drop of blood.
2. Blood is automatically drawn
into the g-Pet Test Strip.
3. As soon as enough blood has
filled the Confirmation Window of the
Test Strip, the g-Pet Meter will beep and
begin counting down from 8 to 1.
4. The blood glucose result will
appear on the LCD panel and will be
stored into the Meter memory
automatically.
Note: To ensure accurate results,
make sure the Confirmation window
of the Test Strip is completely filled
with the blood sample.
12
34
Gpet instruction Manual 31/5/09 18:06 Page 18

19
Applying a blood sample.
5. The g-Pet Meter results range
between 1.1 to 33.3 mmol/l. If a
“HI”message appears on your
display, your g-Pet Meter has
detected that your patients blood
glucose level is higher than 33.3
mmol/l. It is suggested that you
review your testing procedure
and test again with a new g-Pet
Test Strip to confirm the result.
6. If a“Lo”message appears on your
display, your g-Pet Meter has
detected that your patients blood
glucose level is lower than 1.1
mmol/l. It is suggest that you
review your testing
procedure and test again with a
new g-Pet Test Strip to confirm
the result.
7. If no further tests are performed,
the g-Pet Meter will
automatically shut off after 4
minutes.
8. Wash hands thoroughly.
9. Recordglucose test reading in
Log Book.
After finishing the test, we
recommend using a tissue to
remove the g-Pet Test Strip from
the g-Pet Meter for proper disposal.
56
78
Gpet instruction Manual 31/5/09 18:06 Page 19

20
The g-Pet Control Solution is used to
check the performance of the g-Pet
Meter, g-Pet Test Strips, and your testing
technique. The g-Pet System is
performing successfully when the g-Pet
Control Solution test result falls within
the specific control solution ranges listed
on your g-Pet Test Strip vial.
To do a control solution test, code meter
with glucode chip,insert g-Pet Test Strip.
When ready screen shows, hold the S
button for 3 seconds until“ ”shows
onscreen. Conduct test. Control tests do
not store in memory.
Acontrol solution test should be
performed:
1. When you first get the g-Pet
Meter, before doing a blood test.
2. When you begin using a new
vial of g-Pet Test Strips.
3. If you have forgotten to close
the g-Pet Test Strip vial.
4. When you suspect the g-Pet Meter or
g-Pet Test Strips are not working
properly.
5. When the blood glucose test results
are not consistent with how the
animal is acting, or when you think
the results are not accurate.
6. If you drop the meter.
If the test result is NOT within the range
printed on the g-Pet Test Strip vial:
1. Repeat test and double check
your procedure.
2. Code set in meter may not match
g-Pet Test Strip code.
3. g-Pet Test Strips and/or g-Pet
Control Solution were exposed
to extreme temperatures or have
expired. Repeat test with a new
batch.
4. g-Pet Control Solution test
performed outside of 15º - 40ºC
(59º - 104ºF).
If you have ruled out all possibilities and
the suspect results persist, call
Woodley Equipment Company Limited
Customer Services at
Tel: +44 (0)1204 669033.
Fax: +44 (0)1204 669034.
or E-mail us at:
sales@woodleyequipment.com
Do not use the blood glucose monitoring
system to test the animal’s blood
glucose.
Control Solution.
Gpet instruction Manual 31/5/09 18:06 Page 20
Other manuals for g-Pet
1
Table of contents
Other Woodley Pet Care Product manuals